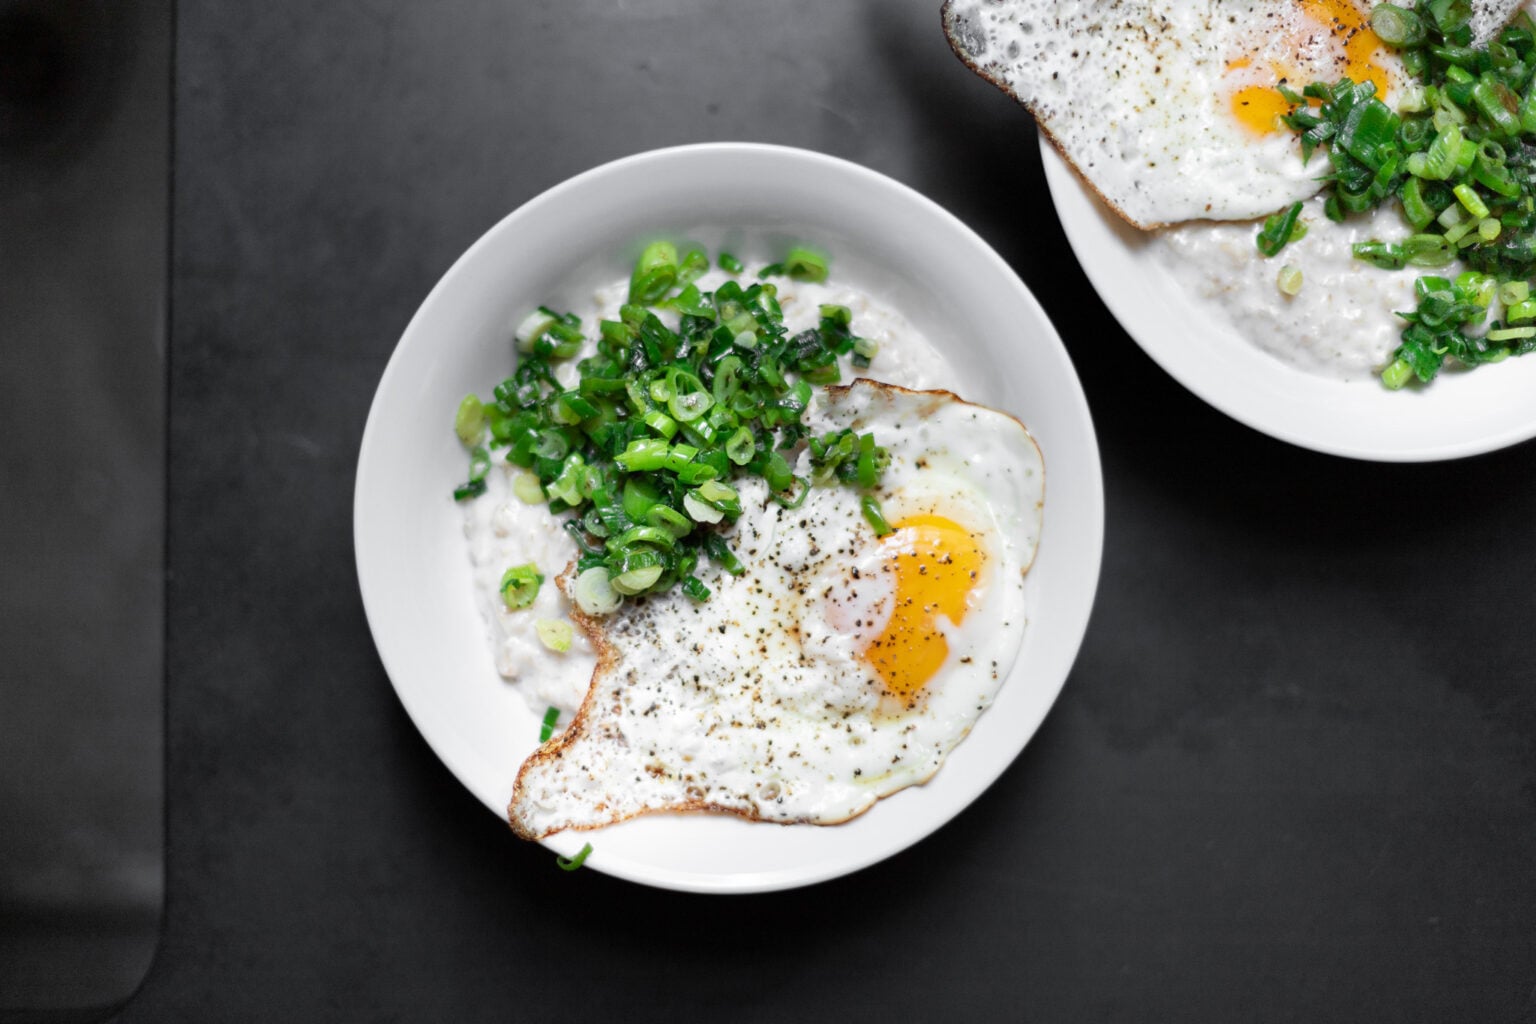
Think of this savory oatmeal sort of like a creamy bowl of grits. Anything you can put on grits you can also put on oats. Cheese with butter and chives? Yes. Shrimp with bacon bits and butter? Absolutely yes! Or if you don’t feel like going grocery shopping, my standby is 1 fried egg + salty scallions sautéed in oil. That’s what’s in this post’s recipe, but the sky’s the limit.
This analogy doesn’t stop at toppings. Since no one wants a stodgy blob under a heap of toppings, we also have to make our oats with a grits-ey technique.
Jump to the recipe to hit the ground running, or read on to learn how and to get more savory oatmeal topping ideas.

How to give your oatmeal a grits-like texture
With grits, you would never just add equal parts water, milk, and grain, heat, and serve. That would set up into something more like fried polenta. That’s great as an antipasto, but not so great if you’re looking for a creamy bowl of grits. That 1:1:1 ratio is pretty standard for oatmeal, but it’s not ideal for achieving a grits-like texture.
I’m personally a creamy-oatmeal nut, but for savory oatmeal, I split the difference between creamy and chewy. The texture in this recipe wins everyone over, whatever texture oatmeal they love.
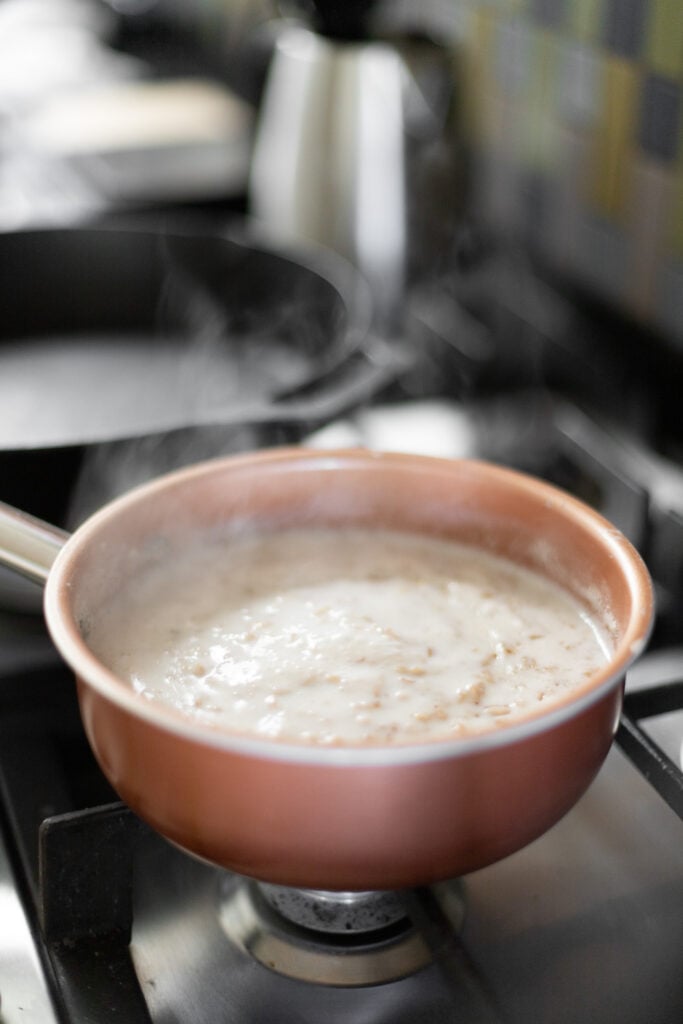
Instead of 1:1:1, the key is to use 1 cup oats : 1.5 cups water : 1.5 cups milk. Then we want to simmer it long enough (stirring occasionally) for the starches to swell and thicken the whole thing. It will look like it’s never going to happen and you’ve made a horrible mistake, and then eventually it will cross over into perfectly-cooked.


Savory oatmeal toppings
The formula I use for coming up with a great bowl of savory oats: Think of another savory dish you love and replace the carbs with oats. A few suggestions:
- Butter corn ramen: Butter, sweet corn, soft boiled egg, black pepper, and salt
- Diner breakfast: Scrambled eggs, breakfast sausage, and maybe some garlicky spinach
- Shrimp and grits: Cajun shrimp, scallions, bacon, cheddar, and hot sauce
Savory Oatmeal


- Prep Time: 5 minutes
- Cook Time: 15 minutes
- Total Time: 20 minutes
- Yield: 2 large servings
Ingredients
For the oats:
- 1 cup old fashioned oats [100g]
- 1½ cups water [350g]
- 1½ cups your milk of choice* [360g]
- ¼ teaspoon salt
For the topping:
- Neutral oil (e.g., avocado or canola)
- 2 eggs**
- Salt
- 1 bunch scallions (or ½ of an onion), thinly sliced
Instructions
- Preheat a skillet over low to medium-low heat so it is ready when the oats are almost done.
- For the oats: Bring the oats, water, milk, and salt to a simmer in a small saucepan** over medium heat, stirring every minute or so. Once it comes to a simmer, reduce the heat to medium-low and continue to simmer for about 15 minutes, stirring occasionally, until the liquid thickens and the oatmeal softens. It will start out watery, and at a certain point it will noticeably thicken (e.g., the bubbles will get bigger), while still remaining pourable and creamy. Leave it uncovered the whole time, and be careful not to let it bubble over.
- For the topping: Drizzle some oil into the preheated skillet, use tongs to swipe a paper towel around. It should not smoke—if it smokes, the skillet is too hot. Drizzle a little more oil into the skillet, raise the heat to medium, crack in the eggs, and season with salt and pepper to taste. Cook for your desired amount of time (about 4 minutes for the whites to cook through). Remove the eggs to a plate, and immediately add the onions to the still-hot skillet. Season with salt and paper to taste and stir around for about 2 minutes. Remove from heat once they’ve wilted.
- Once the oatmeal is done, remove to 2 bowls. Top with the fried eggs, scallions, and a little more salt and pepper to taste.
Notes
* I recommend using whole milk or unsweetened soy milk, and I recommend against using oat milk or rice milk here. Almond milk sort of depends—creamier ones work better than waterier ones here.
** To veganize this, instead use half a brick of tofu, fried or roasted. This is my favorite recipe, which works perfectly here.
*** If you’re using a wide pan instead of a small saucepan, you may need to add a bit more water as it cooks (more water will evaporate from a wide pan).
Video note: If you don’t see the video for this post after scrolling up, please disable ad block and try reloading the page.
Note: From April 2018 through July 2026, this post was slightly different. It had a slightly thicker oatmeal base + the following 2 topping suggestions (one which is very similar to the recipe in this post). I’ve since streamlined the post, but I just wanted to include them here for anyone who used to make the old version:
Breakfast at Nana’s
Basic oatmeal (above)
Bacon (optional)
Cooking oil
Eggs
Salt
Green onions, chopped
Garlic, crushed through a garlic press
Za’atar
Crushed red pepper
- While the oatmeal is cooking, microwave some bacon until it’s crispy, and then cut it into small pieces.
- Once the oatmeal has cooked, turn off the heat, and leave it on the warm burner so it doesn’t get cold.
- Heat a small skillet over high heat for at least 3 minutes, until it’s very hot.
- Add about 1 or 2 tablespoons of oil to the pan, swirl it around, and immediately crack an egg wherever the oil is pooling. Be very careful—it will splatter violently.
- While the egg is cooking, season it with some salt and (carefully!) baste it by spooning hot oil onto the whites to help them cook faster. The egg is done once the whites are set and brown on the bottom and around the edges (just about 2 minutes). Remove to a plate and repeat if you’re making multiple servings (replace some of the oil as you go).
- Once you’re done with the eggs, carefully dump out the remaining oil and replace with about 1 teaspoon of fresh oil. Add some green onions and garlic to the still-hot pan and stir for about 2 minutes. Season to taste.
- Serve the oatmeal and top with the bacon, crispy egg, and onions and garlic. Sprinkle with za’atar and crushed red pepper.
Buttered corn oatmeal
Butter
Salt
Corn (fresh or frozen)
Scallions, chopped
Freshly ground black pepper
- While the oatmeal is cooking, melt a generous portion of butter in a skillet over medium-low heat. Once it’s melted, add some corn, salt to taste, and cook, stirring occasionally, until the corn warms through (about 3 minutes for fresh).
- Add some scallions to the corn and season it with a little black pepper. Stir and cook for about 1 minute.
- Spoon the corn and scallions over the oatmeal, and drizzle to taste with the remaining butter. Feel free to add a fresh pat of butter if there’s not enough melted in the pan.