This summer, I got to spend some time on the east coast catching up with my friends from grad school and even a couple fellow bloggers. It was so much fun seeing everyone again, and (of course!) there was a lot of good food. My friend Anita cooked the most beautiful dinner, including a whole roasted cauliflower with a green herby tahini dipping sauce.
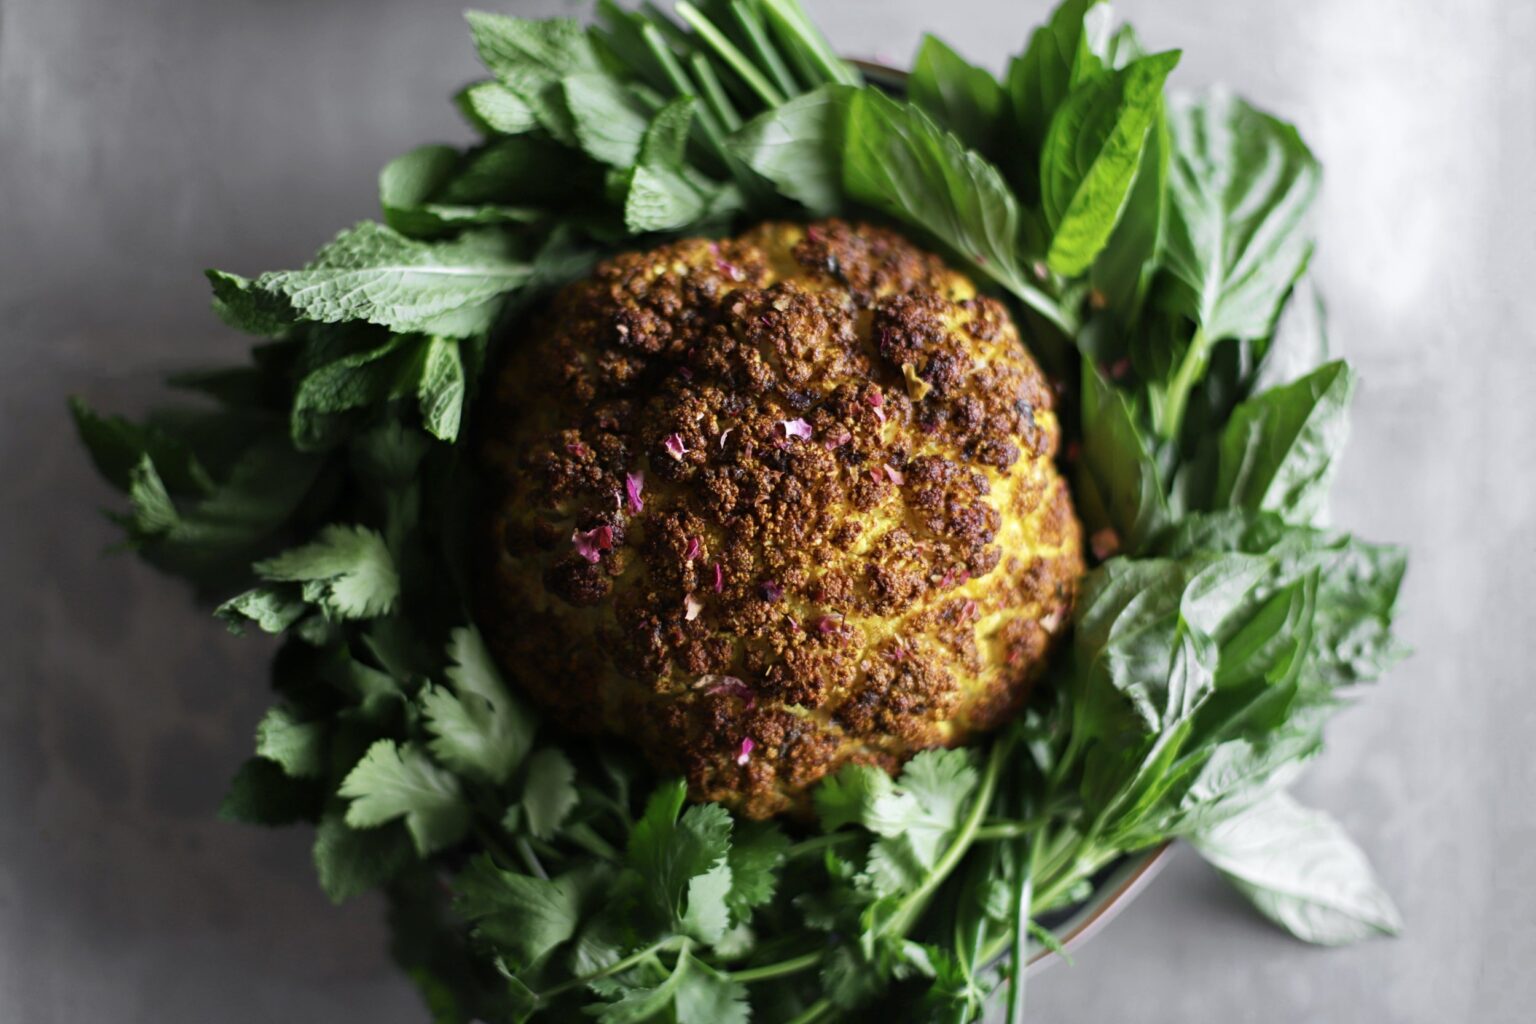
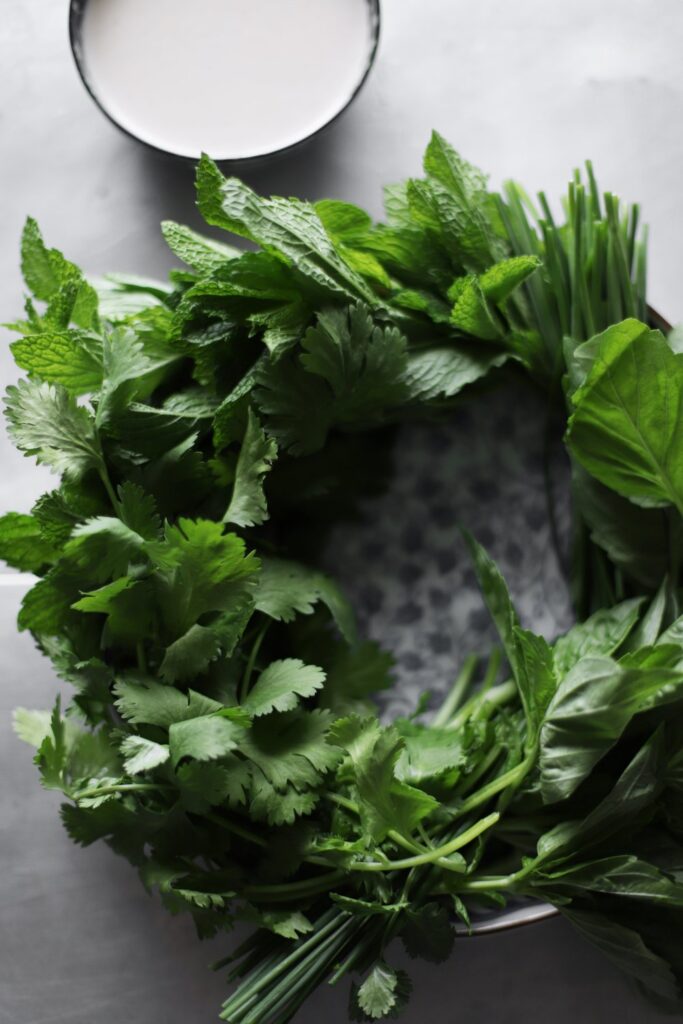
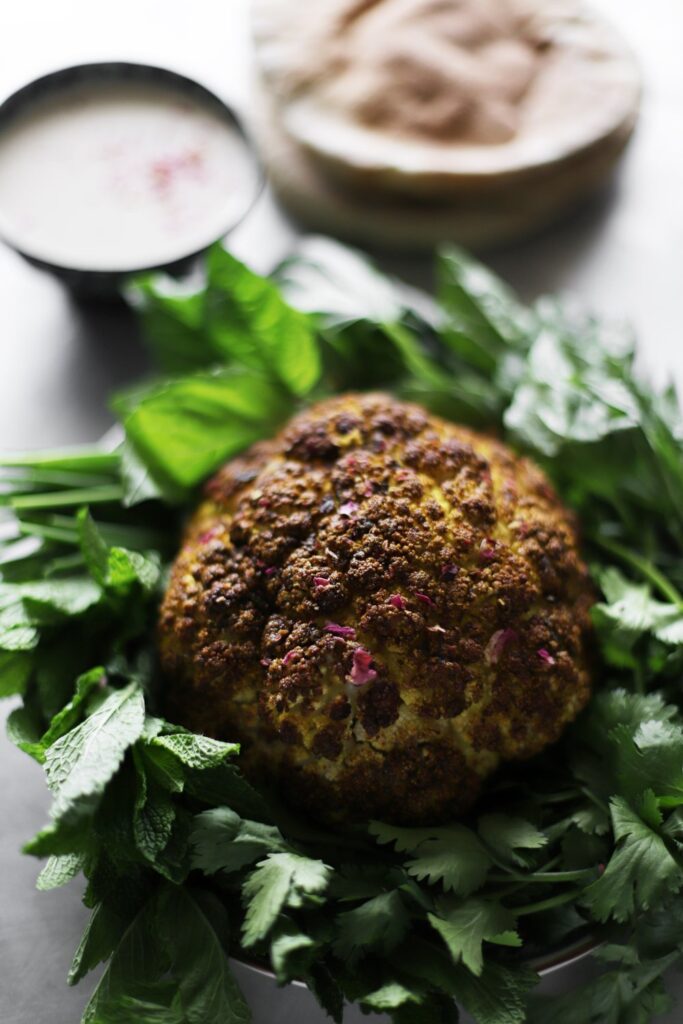
When we got home, I put my own spin on it with a wreath of herbs and a tahini sauce. The herb wreath is inspired by Persian sabzi khordan, and the cauliflower sort of takes the place of the big hunk of feta that it’s normally served with. Feel free to use whatever fresh, leafy herbs you’ve got on hand. I used basil, cilantro, chives, and mint, but you could also use parsley or watercress. Just stay away from more perfumey herbs like rosemary and thyme. Their flavors would work wonderfully here, but you wouldn’t want to use them in such vast quantities. Unlike rosemary, an entire wreath of basil will easily disappear in one sitting.
The spices I chose for this whole roasted cauliflower were inspired by Persian Mama Blog’s advieh berenj, a seasoning for rice. It adds a lovely warmth and depth to just about anything.
whole roasted cauliflower with sabzi khordan


- Prep Time: 15 minutes
- Total Time: 2 hours
- Yield: 6 to 8 servings as an appetizer, 4 to 6 as a side
Ingredients
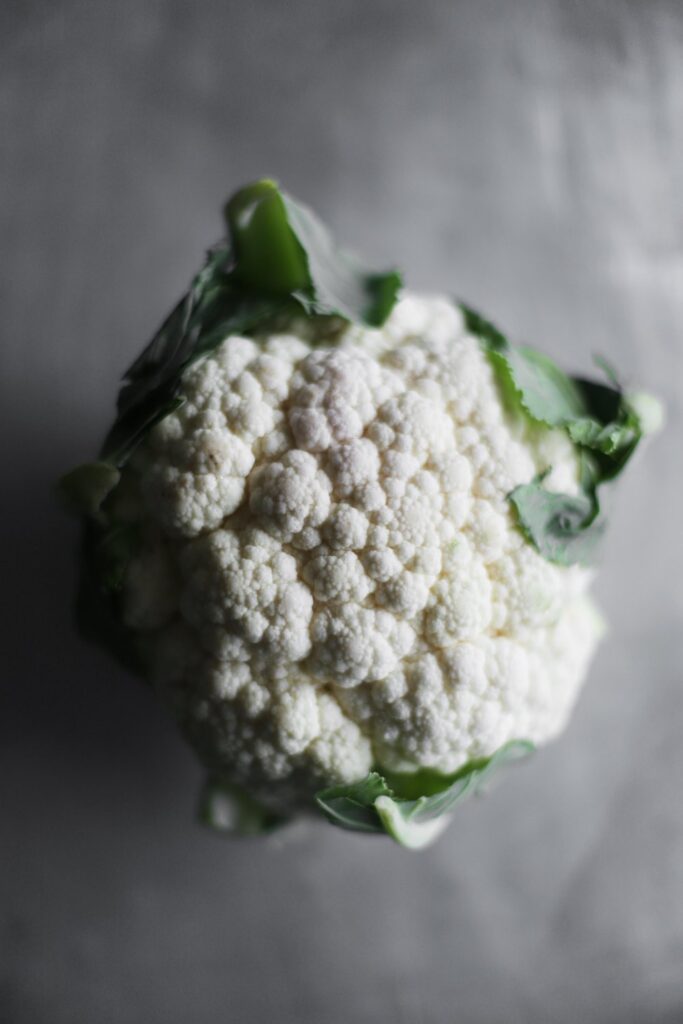
- 1 medium/small head cauliflower (700g)
- 1 tablespoon olive oil
- 1/2 teaspoon cinnamon
- 1/2 teaspoon ground cumin
- 1/4 teaspoon turmeric
- 1/8 teaspoon ground cardamom
- 1/8 teaspoon rosewater (optional)
- Salt to taste
- 1/4 cup tahini (60g)
- 3 tablespoons lemon juice (45g)
- 3 tablespoons water (45g), optional
- 1/4 teaspoon crumbled rose petals (optional)
- 1 bunch basil
- 1 bunch cilantro
- 1 small bunch chives
- 1 small bunch mint
- Bread for serving
Instructions
- Preheat the oven to 375°F.
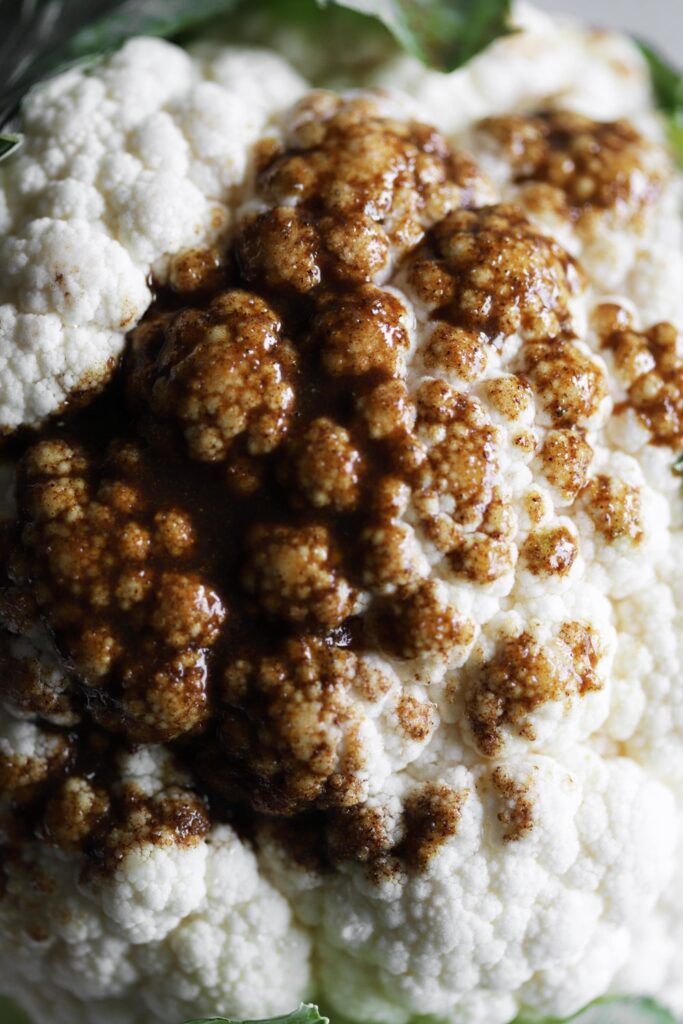
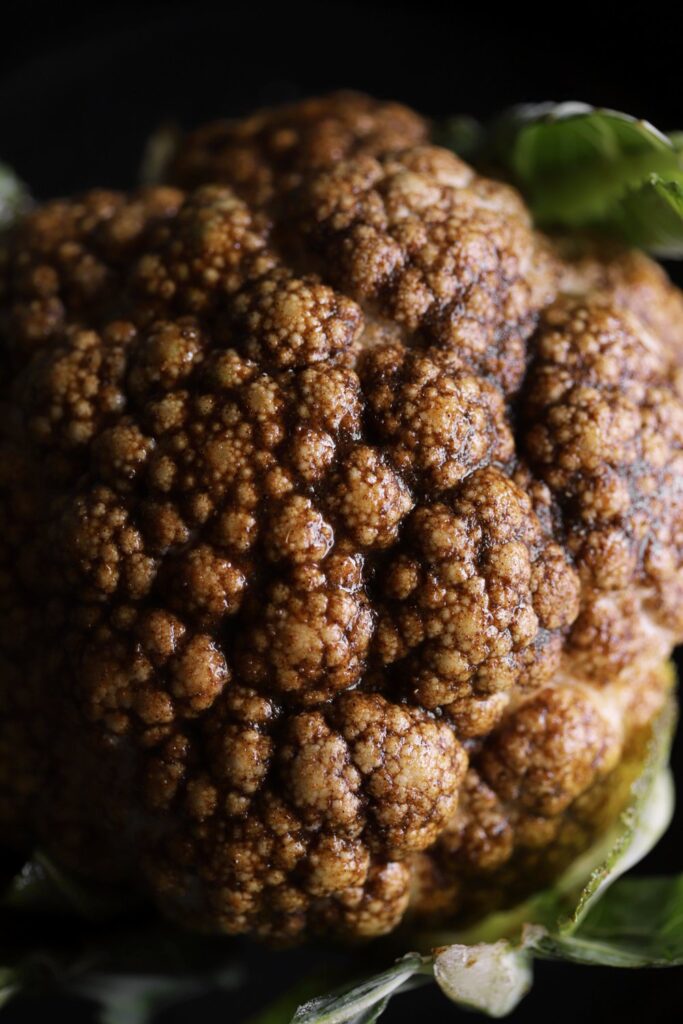
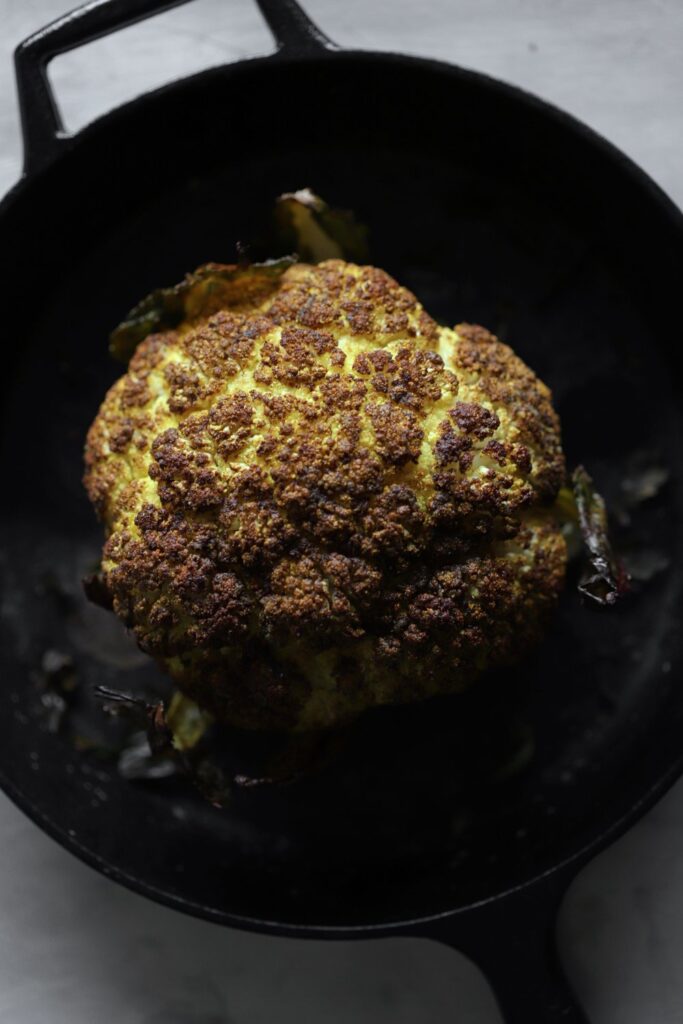
- Cut the stem so the cauliflower sits level, and (optionally) discard the leaves. Combine the olive oil, cinnamon, cumin, turmeric, cardamom, rosewater (do not add extra—it should be very subtle), and salt to taste (about 1/2 teaspoon) and brush all over the cauliflower, getting under the leaves. Place in a cast iron skillet or another baking dish with room around it, and place in the oven. Bake for about 1 hour 15 minutes for al dente, or longer for more tender cauliflower (up to 2 hours). Decrease the temperature to 350°F and tent with foil if it starts to brown too much for your liking, and check on it often after the first hour.
- While it’s in the oven, make the tahini dipping sauce. Combine the tahini, lemon juice, water, and salt to taste (about 1/4 teaspoon), and whisk together until it thickens. Set aside.
- Remove the cauliflower to a plate. Top the cauliflower with the rose petals. Arrange the basil, cilantro, chives, and mint around it. Serve with the dipping sauce on the side, and encourage guests to grab a big handful of their favoirte herbs with every bite of cauliflower/bread/tahini.
Notes
To make ahead: The cauliflower can be roasted ahead of time, stored in the refrigerator, and then reheated in the oven before serving (it will soften more as it reheats, so cook it for about 15 minutes less than you’d like earlier on, and let it finish cooking through as it reheats). The tahini sauce can be mixed up ahead of time, and then stored in the refrigerator for a couple days. The herbs can be washed, dried, wrapped up in slightly damp kitchen towels, and stored in a resealable container for several days