A couple months ago, my aunt Masy taught me and my grandmother how to make one of my favorite cookies from my childhood. But before we got to baking, Masy told me all about her version of chipteh (CHIP-tee) stew, which her three-year-old great grandson can’t get enough of, and which has become a family favorite.
Here’s how the conversation went:
Masy: Let me tell you how to make my chipteh.
Kathryn: Oh yum! I love kipteh*
Oh no, this is not kipteh, this is chipteh.
Oh like kifteh?
No, chipteh.
Oh yum! Where did you learn how to make it?
This one’s my own recipe.
Oh cool! Is it related to kibbeh? Are kipteh and chipteh the same?
They’re related, but not exactly the same. This is my recipe for chipteh.
Fair enough! Masy then dictated her recipe, which is sort of a cross between kipteh and kibbeh. I took careful notes, but didn’t get around to trying it until a few months later, and I was totally blown away by how wonderful it is. I love it because it’s delicious (and definitely our favorite stew of winter 2018/19), but also because it’s such a beautiful expression of Masy’s creativity.
* an Assyrian stew, similar to kift’it gu shirwah
By the way, this is my first post that I photographed in our new kitchen in our tiny apartment in the Sheung Wan neighborhood of Hong Kong. Over the next couple months, I’ll be posting a mix of things I photographed before we moved (I’m a planner, and I like to work on posts a couple months ahead of time), and things I’ve photographed more recently. I’ve been having so much fun getting to know the new kitchen, and learning how to work with the new lighting situation.
It’s the most ridiculously tiny space I’ve ever cooked in, and it only has two little cupboards, but I’m getting creative with storage, and finding solutions to the problem of having nowhere to put my camera and notebook while I’m working. My camera’s new home is strapped across my chest, resting on my back, and my notebook’s new home is on a bench I drag into the kitchen and plop in front of the freezer. But I’m the kind of person who would rather have slightly too little space than too much, and the challenge has been mostly fun so far (with the exception of learning the hard way that command hooks won’t stay stuck to the side of the refrigerator, and definitely won’t support the weight of all our silverware). I made Masy’s chipteh for the first time right after we moved in, and it was the perfect way to feel at home.
Masy’s chipteh


- Prep Time: 20 minutes
- Total Time: 45 minutes
- Yield: 6 servings
Ingredients
for the kibbeh:
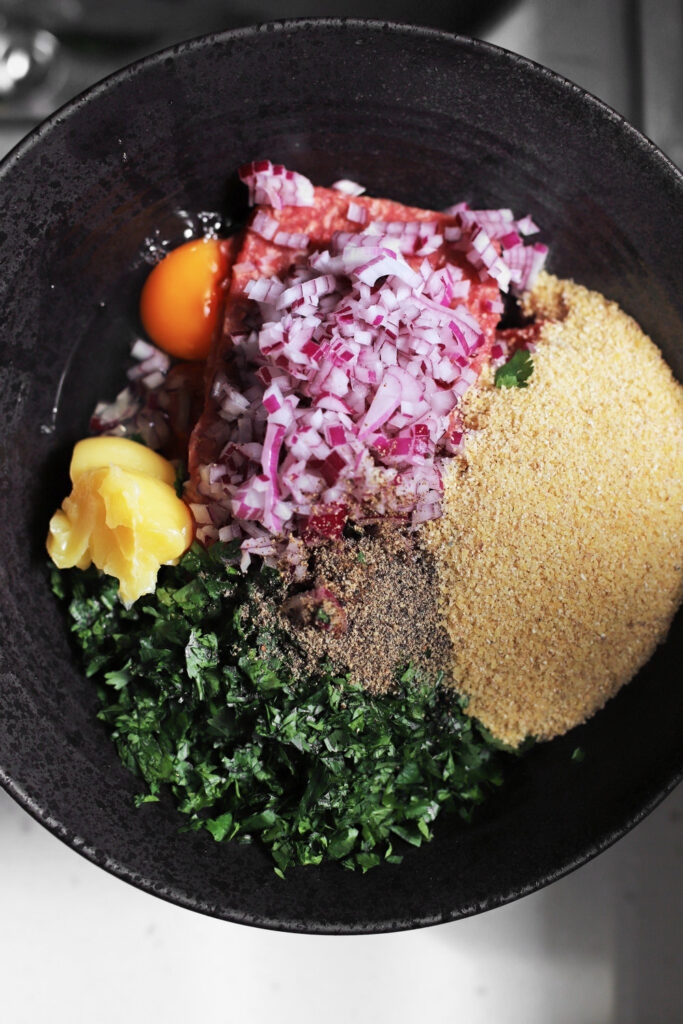
- 1 lb 5 oz lean ground beef (600 grams)
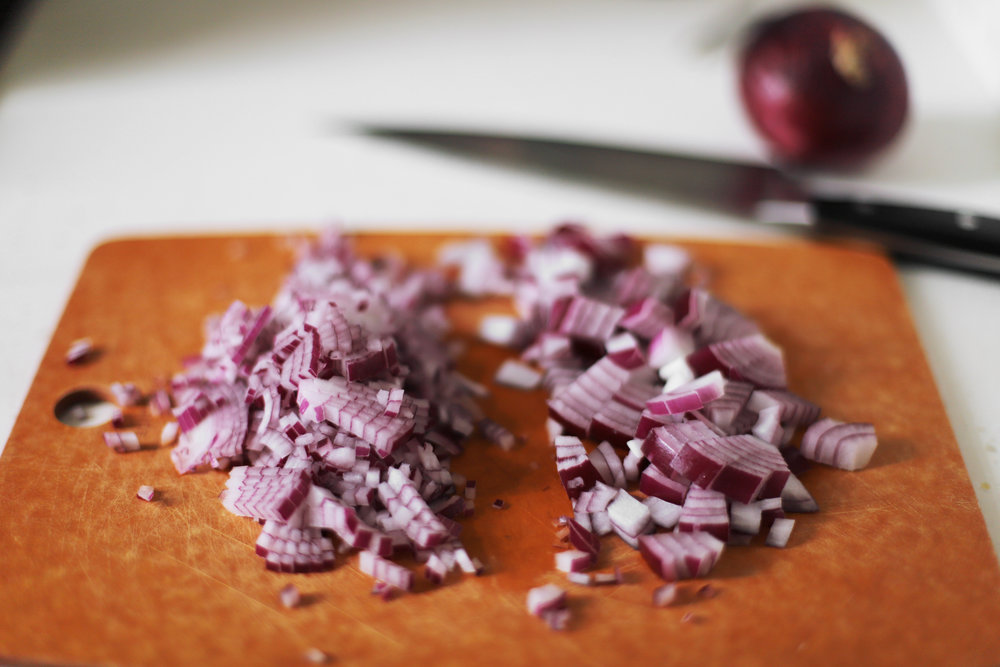
- 1/2 of a small red onion, minced very finely (85 grams)
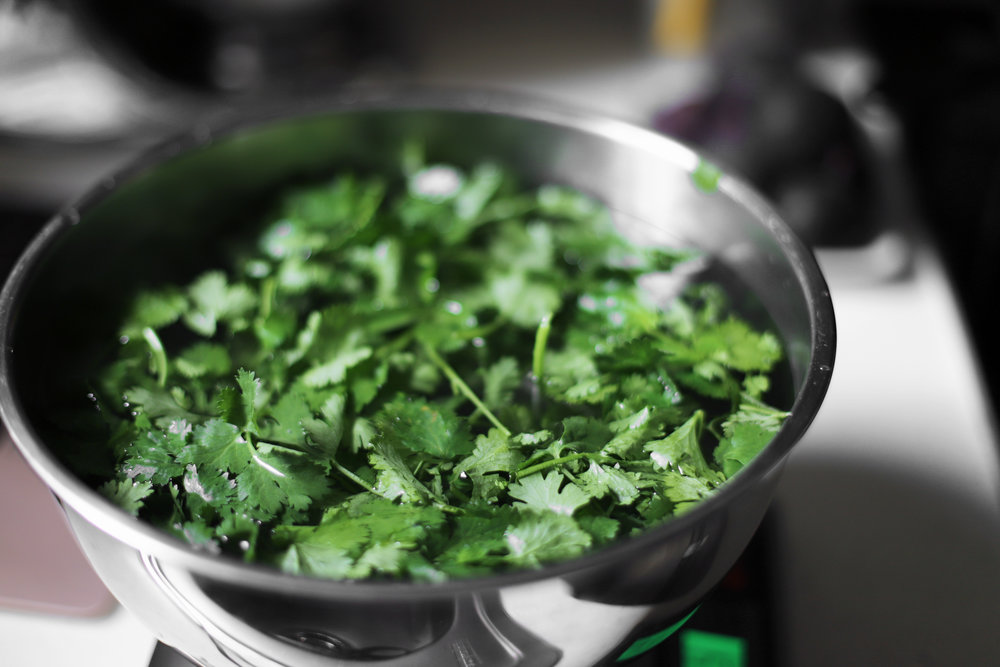
- 1 small bunch chopped cilantro (40 grams)
- 1 1/2 teaspoons salt (about 9 grams, or to taste)
- 1 teaspoon ground black pepper (2 grams)
- 3/4 cup bulgur #1 extra fine (150 grams) – do not soak it or cook it
- 1 large egg (55 grams)
- 2 tablespoons softened clarified butter or olive oil (26 grams)
for the stew:
- 2 tablespoons clarified butter or olive oil (26 g)
- 1/2 of a small red onion, chopped (85 grams)
- 6 oz can tomato paste (170 gram can)
- 28 ounce can of diced tomatoes (800 gram can)
- 3 cups water or stock (680 grams)
- Salt to taste (about 1 teaspoon)
- 1 1/2 cups of your favorite veggies, large-diced (Masy likes celery and carrots, I like green pepper, but you could also do kale or another green)
- Juice from 1/2 a lemon or 1 whole lemon, to taste
Instructions
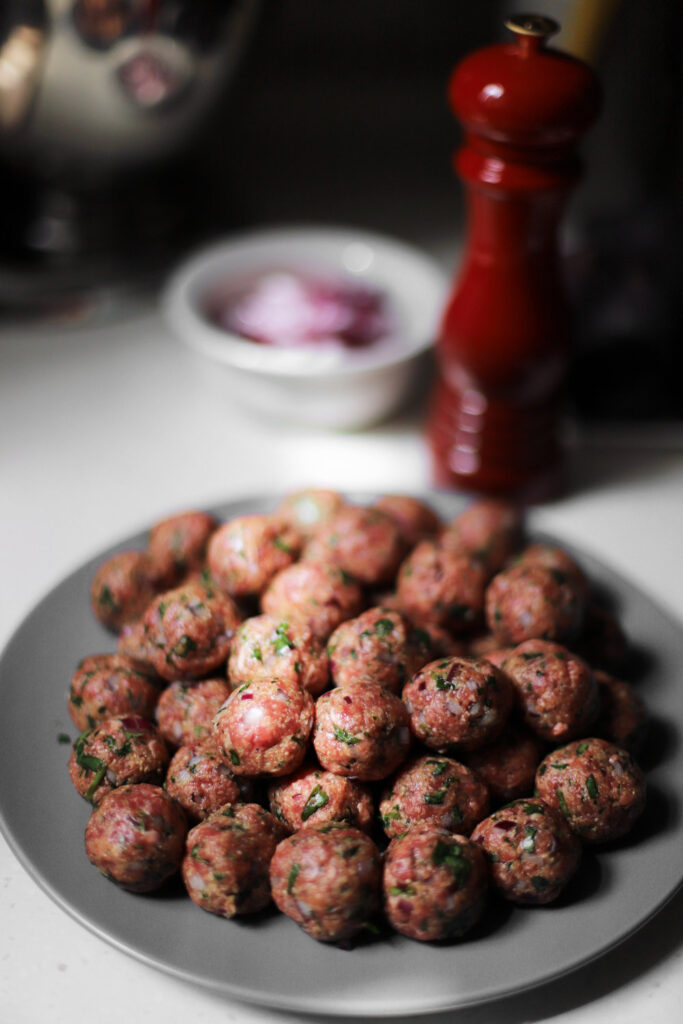
- Mix the kibbeh ingredients together: Combine the ground beef, minced red onion, chopped cilantro, salt, black pepper, bulgur, egg, and clarified butter/oil. Set aside.
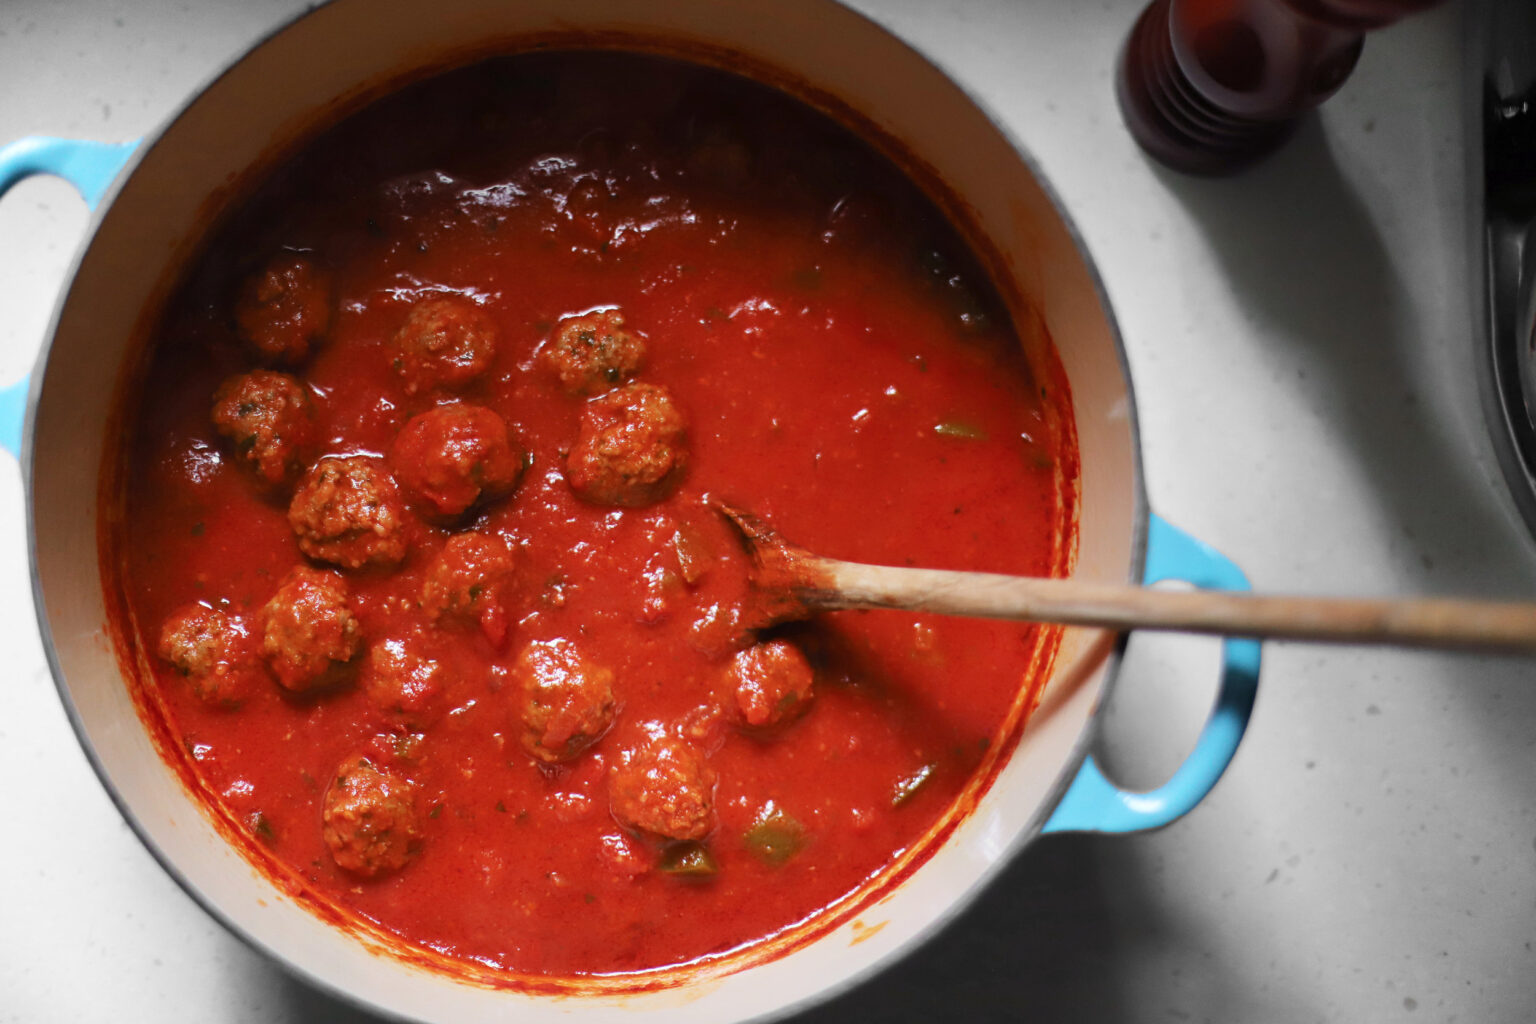
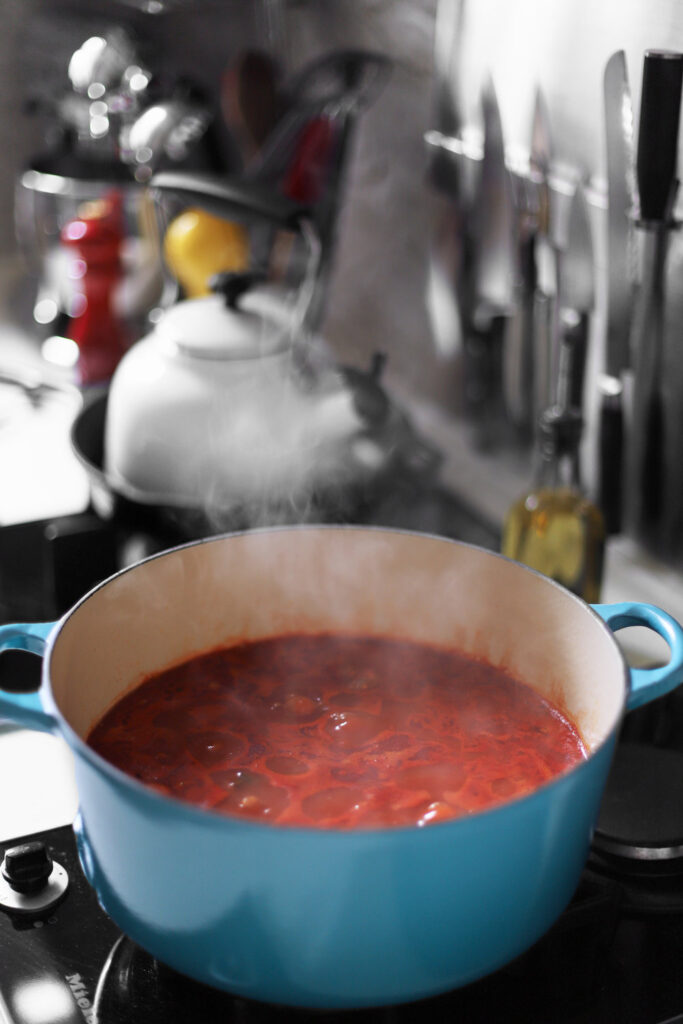
- Make the stew: Place a dutch oven or stockpot over medium heat. Add the butter/olive oil and wait a minute or two, until it melts. Add the chopped onions and cook, stirring occasionally, for about 5 or 6 minutes, until they soften. Reduce heat to low, add the tomato paste, and stir constantly for 1 minute. Add the diced tomatoes, water/stock, and season to taste (I use 1 teaspoon, but check how salty your tomatoes and/or stock are). Increase the heat to medium-high, and bring to a gentle boil.
- While you wait for it to boil, shape the meat/bulgur mixture into small meatballs, about the size of an in-shell walnut (about 20- to 25-gram balls).
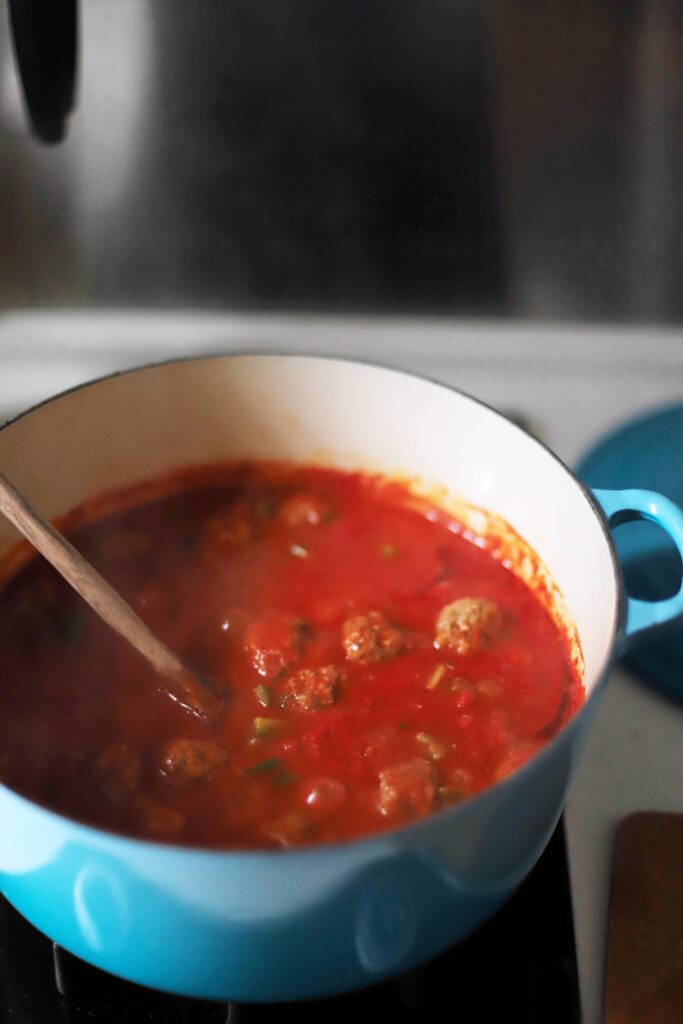
- Once the liquid comes to a gentle boil, carefully add the meatballs, making sure they’re submerged (at least mostly, but it’s ok if they’re poking out a little). Let it come back up to a gentle boil, cover, and reduce the heat to medium-low. Cook for 15 minutes covered, then cook for another 15 minutes uncovered. During the last few minutes of cooking, add your favorite veggies (e.g., add green peppers 3 minutes before the meatballs are done, carrots get 8 minutes, kale gets 3 or 4, celery gets 4 or 5, etc. Feel free to cook them to your preferred doneness).
- Once the stew is done, add the lemon juice, stir together, and serve. Leftovers will keep well in the refrigerator or freezer.