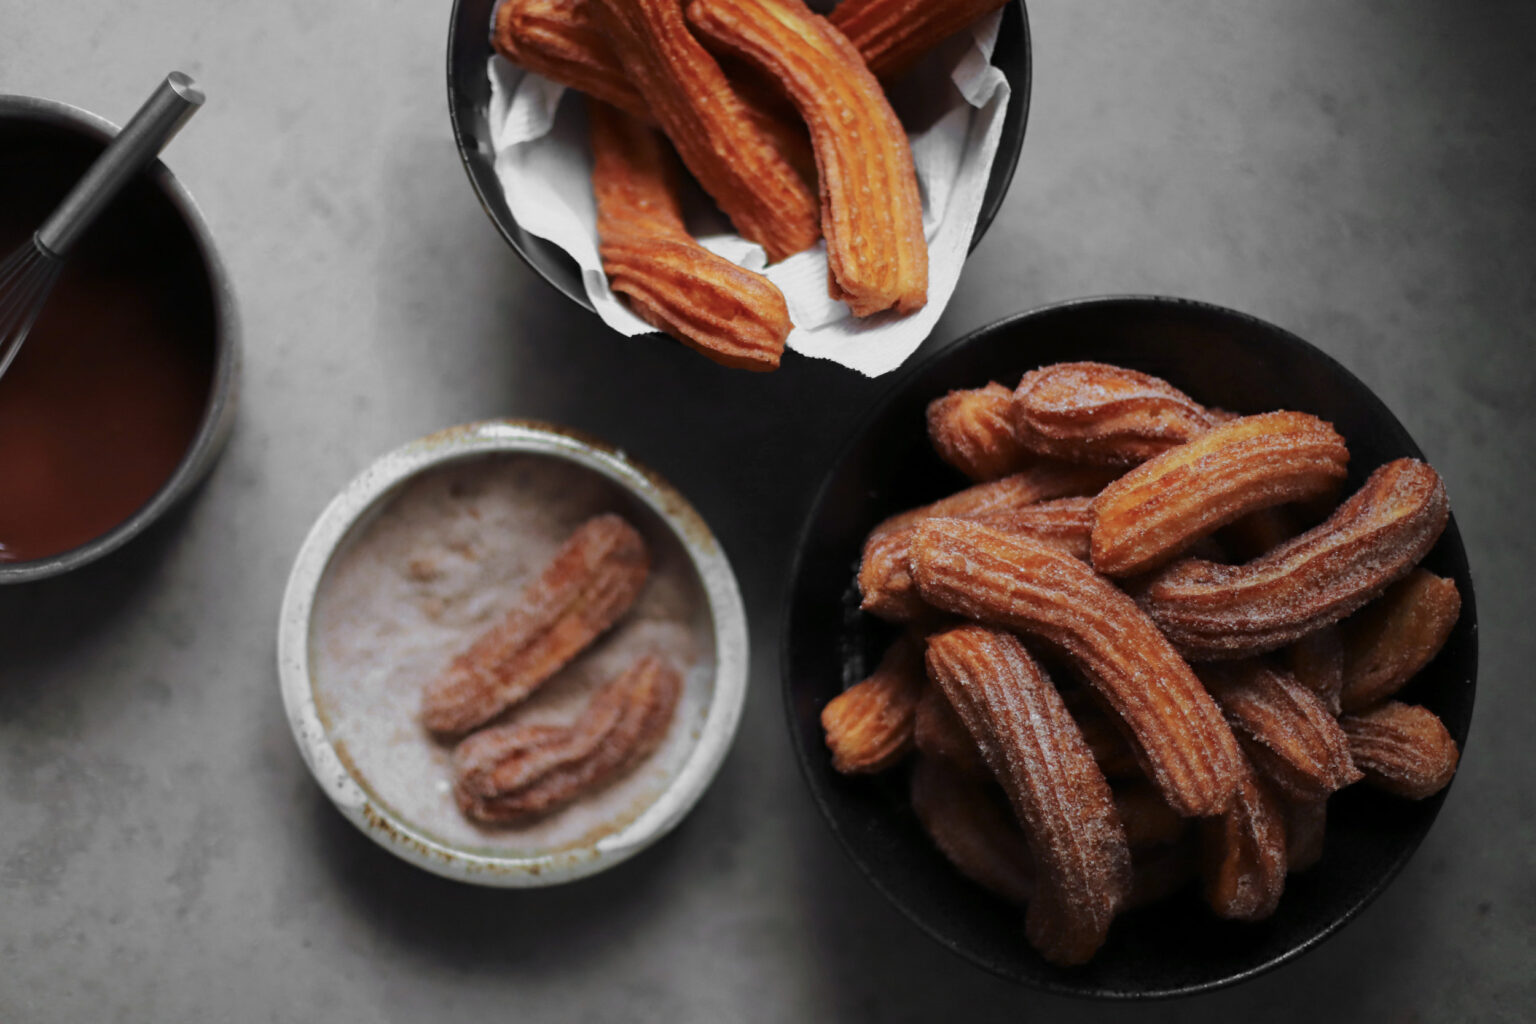
The next six blog posts I have lined up are all desserts. I don’t know if that makes me the worst or best planner ever, but I guess you’re welcome/I’m sorry? So here’s one for everyone who’s just as excited as I am for holiday sweets: cardamom cinnamon churros! Plus a chocolate sauce with orange blossom water (substitutions available, no worries).
I’ll always love classic cinnamon churros with hot chocolate. But cardamom and orange blossom water lend a flavor profile that reminds me of really good floral baklawa.
The orange blossom chocolate sauce is sure to please both orange-chocolate fans and skeptics, with its subtly floral, less punchy flavor. In fact, I sometimes think orange blossom tastes more like ripe banana than orange peel. But either way, it goes great with chocolate and cardamom. But if you don’t have any on hand, a little orange zest will work nicely in its place.


notes for making cardamom cinnamon churros
two kinds of choux pastry:
I did a lot of churro research and tried several recipes before coming up with this one. And I found that there are many different ways to make this wonderful Latin American and Spanish pastry. While all churros are made with some variety of choux pastry, I found that most fall into two categories:
- Pastry with more eggs, which needs to be piped directly into hot oil
- Pastry with fewer eggs and more butter, which can be piped onto a parchment-lined sheet pan and refrigerated until firm
I personally prefer the first kind, because they get that eggy/very slightly custardy hollow center, and crisp edges. And they have a curvy, wild aesthetic, which I prefer over the perfectly straight lines that you get from chilling. I think people usually assume that the directly-piped kind are more challenging than forming them on a sheet pan first. But I found the opposite to be true, at least for me.
why I prefer piping directly into the oil:
Since you’ve got to have stiffer choux pastry to pre-pipe it, the dough will sometimes begin to set in the piping bag as it cools. That makes it really hard to pipe out if you don’t work quickly enough. But a piping bag full of eggier pastry (like this recipe) will pretty much never solidify. So you can even keep it in the refrigerator overnight without worrying about it setting.
When it comes to making churros ahead of time, I’d rather have a pastry bag in my fridge than a big sheet pan taking up an entire shelf.
frying safety
It takes a little coordination to pipe churros directly into hot oil. But as long as you’re safe and careful, it’s a lot easier than it seems. Make sure to use a heavy dutch oven, which should have plenty of room above the oil so it doesn’t bubble over, and be sure to place it on the back burner. Also make sure there are no little kids or pets around when you fry. As long as you get a really good grip on the pastry bag (twist and tightly pinch the empty part of the bag in the U between your thumb and index finger, and cradle the big part of the bag in the palm of your hand), and pipe them from right above the surface of the oil, everything should go great.


a quick roundup
Before I get to my recipe, I wanted to include a roundup of a few related recipes I love. Some are varieties of churros, and some are classic Latin American dishes with Middle Eastern influences.
Esteban Castillo’s Vegan Churros
Abeer Najjar’s Rose Cardamom Tres Leches
my Jerusalem salad pico de gallo
my mujadara-style tacos

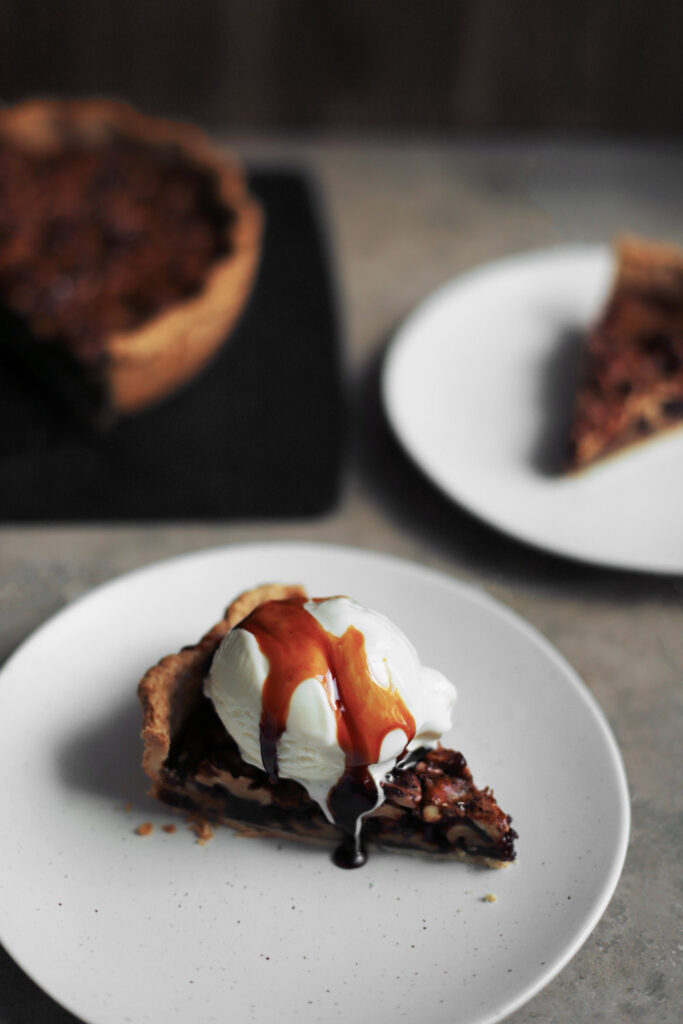
cardamom cinnamon churros with orange blossom chocolate

make ahead: the pastry can be made ahead and refrigerated in the unopened pastry bag overnight
- Prep Time: 45 minutes
- Total Time: 1 hour
- Yield: about 30 to 35 churros
Ingredients
for the orange blossom chocolate sauce:
- 3/4 cup whole milk (174 grams)
- 1 tablespoon + 1 teaspoon orange blossom water* (19 grams)
- 1/2 teaspoon salt (or less to taste) (3.5 grams)
- 250 grams / 8 ounces dark chocolate
for the spiced sugar:
- 3/4 cup sugar (180 grams)
- 1 big pinch salt (or to taste)
- 2 teaspoons cinnamon (4.5 grams)
- 1/2 teaspoon cardamom (1.5 grams)
for the churro pastry and deep frying:
- 1 cup whole milk (232 grams)
- 1 cup water (227 grams)
- 4 tablespoons butter (57 grams)
- 1 1/2 tablespoons sugar (21 grams)
- 3/4 teaspoon salt (5 grams)
- 1 teaspoon vanilla extract (5 grams)
- 2 cups all purpose flour (exactly 319 grams)
- 8 eggs (395 grams)
- 2 quarts/2 liters of oil for frying (I used canola, but you can use anything with a high smoke point)
- special equipment: a piping bag, a large closed-star tip, a deep-fry/candy thermometer (or an instant-read thermometer will work in a pinch), scissors
Instructions
Make the chocolate sauce:
- Bring the milk to a simmer over medium-high heat. As soon as it starts to simmer, remove from heat, add the orange blossom water, salt, and chocolate, and immediately cover it. Let it sit for about 2 minutes, then whisk everything together until it forms a smooth chocolate sauce.
- Pour it into a serving bowl, and then right before serving, microwave it just until it warms up and thins out (it won’t take long to reheat—just 15 to 45 seconds).
Make the spiced sugar:
- Mix everything together and set aside.
Make the churro pastry:
- Combine the milk, water, butter, sugar, salt, and vanilla in a medium sauce pot. Set over high heat and bring to a simmer. Once it’s simmering, turn off the heat, add the flour, and stir until it comes together into a dough. Keep stirring vigorously until the ball becomes smooth and pulls away from the sides of the pot.
- Move the dough to the bowl of a stand mixer fitted with the paddle attachment (or use a wooden spoon, then hand mixer). Mix on low speed for about 1 minute, until the dough ball smooths out. Add 1 egg to the bowl and turn the speed to low. Once the dough doesn’t have loose pieces flying around, increase the speed to medium and mix until everything is totally combined. Continue in this way, adding 1 egg at a time, until all eggs are incorporated and the mixture is totally smooth. The final dough should slowly fall off the beaters in a V shape.
- Set up a safe fry station on the stove or in a dedicated deep fryer. Turn the heat to medium so that the oil slowly rises to 350° F (180° C) and keep an eye on it while you work. To keep your fry station safe, find a heavy dutch oven, make sure you have several inches of space above the oil line so that it doesn’t bubble over, and keep the pot toward the back of the stove.
- While you’re waiting on the oil to heat, fit a piping bag with a large star tip (but do not yet snip the end of the bag), and fold the top of the bag outward so that you can easily fill the part closest to the tip. Fill the bag with a few spoon-fulls of the pastry (try not to leave any gaps). Slightly uncuff the sides of the bag to leave a few more inches of space, and then fill it with a few more spoon-fulls. Continue in this way until the bag is full, leaving about 3 inches of empty space at the top. Uncuff the bag, twist the end shut several times, until there’s a good amount of pressure. To set it down, keep it twisted shut, and place the top under the weight of the full bag. The bag can be stored like this in the refrigerator overnight, before snipping. It does not need to come to room temperature to pipe.
Fry the churros:
- Get your spiced sugar ready (above), and line a medium bowl with a few layers of paper towels.
- Once the oil is 350° F (180° C), push the star tip back a tiny bit, and snip the end of the piping bag so the tip can pop out. Twist and tightly pinch the empty part of the bag in the U between your thumb and index finger, and cradle the big part of the bag in the palm of your hand (like this). Hold it in one hand and make sure you have a really good grip on it (do not let it fall into the oil!), and hold scissors in your other hand.**
- With the tip of the bag at a 45 degree angle about a half inch above the oil, pipe about 4 to 7 inches of pastry directly into the oil, and snip it off with the scissors, and then pipe one more, snipping it again. Twist the bag once or twice to create more pressure and immediately pipe out two more churros into the oil. Twist the bag, and pipe one or two more, depending on how much space there is. Do not let them plop into the oil from far above—just inject them into the surface of the oil.
- Let them cook for about 2 minutes on the first side, and then carefully flip them once they’re golden brown. Cook the other side for about 2 more minutes, and remove them with tongs once they’re done (about 4 to 5 minutes total).*** To make sure they don’t get greasy, lay them almost vertically against the sides of the paper-towel-lined bowl, so their oil runs down their sides instead of pooling in the grooves.
- Let the first batch of churros drain while you pipe the next batch. As soon as the next batch is frying, toss the drained batch in the cinnamon sugar to coat, and set them on a plate or sheet pan in a single layer. Don’t let them drain and cool longer than a couple minutes, or the sugar will have trouble sticking to the churros. Repeat with the remaining pastry, until all the churros are fried and coated. Serve immediately.
Notes
* Feel free to substitute a little orange zest, to taste. It won’t taste the same, but it will taste delicious!
** If you don’t think you are coordinated enough to do this (safety first!!), try this recipe from Cook’s Country, which uses fewer eggs for a thicker choux pastry, which means you can pipe the pastry onto a sheet pan while it is still warm and maleable, and then chill it until it’s firm. The choux pastry in this recipe (like most) will not firm up enough to handle it if you refrigerate it. But the up-side is that you can refrigerate the pastry in this recipe overnight in a piping bag, and pipe directly from the refrigerator.
*** Monitor the heat to make sure it stays around 350° F (never going below 340 or above 370). If you need to pause to refill the bag, make sure you turn off the heat on the oil so it doesn’t overheat (it’ll still be hot by the time you’re ready).