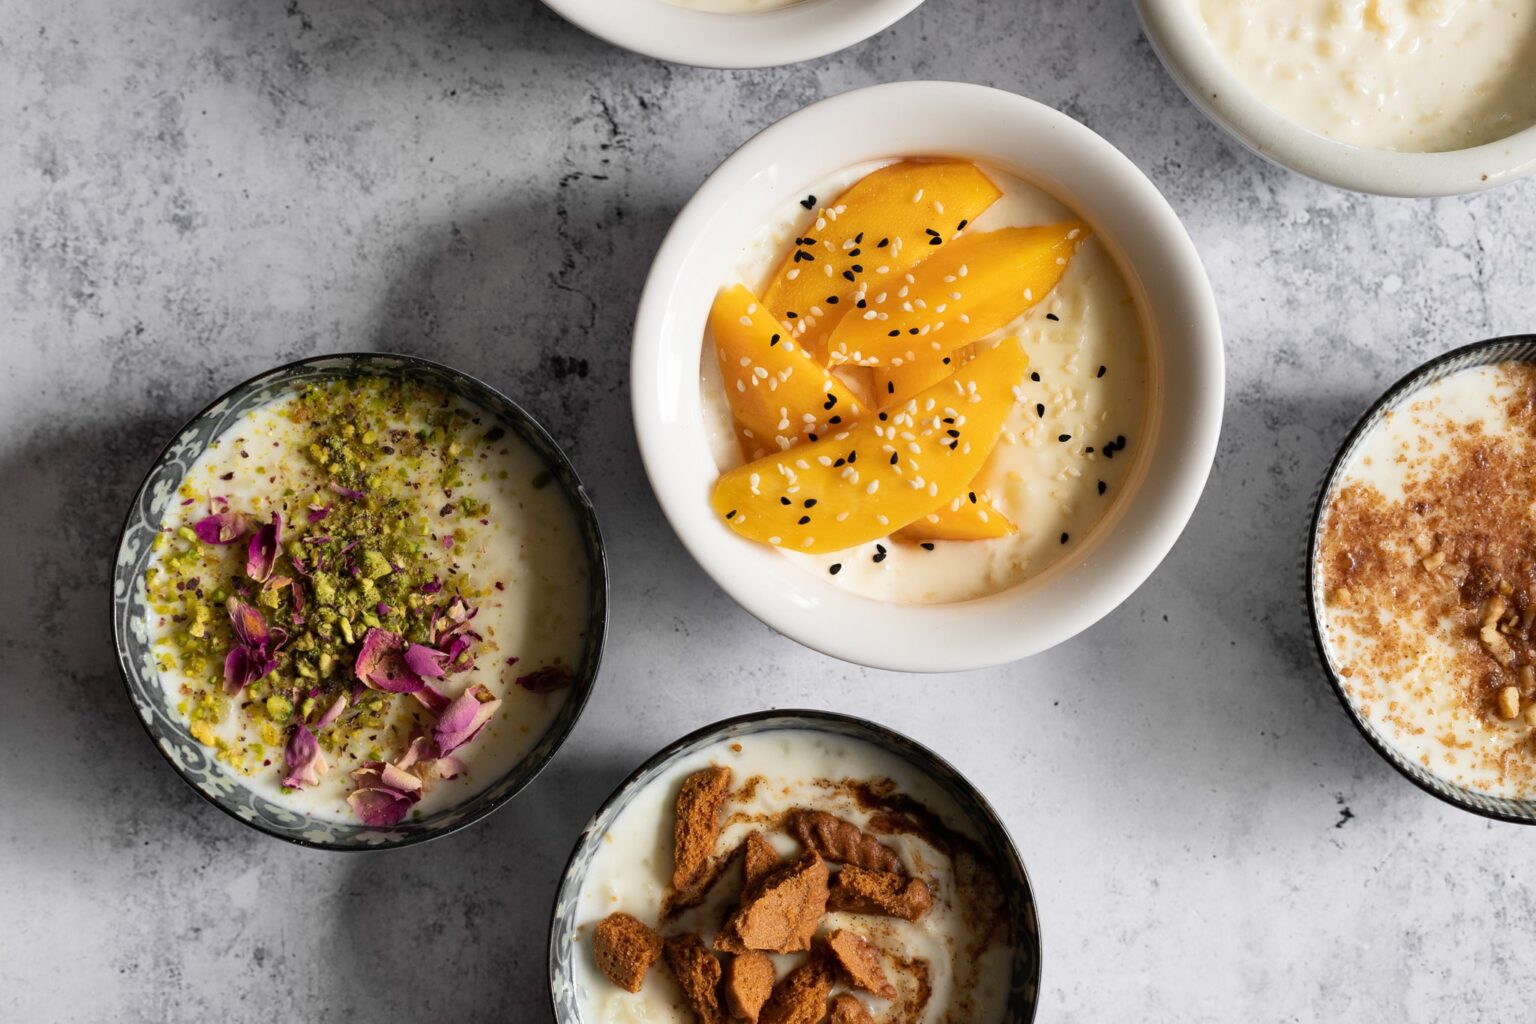
I grew up in the Chicagoland area, so I consider myself a deep dish pizza expert. And as far as I’m concerned, Chicago deep dish pizza is all about the crust. Giordano’s has a super flaky biscuity crust. Pequod’s has extra-caramelized bits of frico around the edges. And Lou Malnati’s (my favorite!) has a buttery, deeply flavorful cornmeal crust.
Until recently, I was only an expert in eating deep dish pizza, but I tried recreating that iconic Lou Malnati crust, and I finally cracked the code. It took me a long time to get there, but last week I had a major revelation that I probably could’ve gleaned from a cheesy corporate motivational poster: Many paths lead to the same destination.
(Oh! And: adding beer makes most things taste even better.)

How I cracked the code:
What I tried first:
I watched every video of cooks making pizza at Lou’s. I read every interview with their owner. I read every article speculating about how they make their iconic cornmeal crust. Over the years, I tried one or two copy-cat recipes. I tried tinkering with my own recipe, closely following what I had learned. But nothing tasted like the Lou’s I knew.
Then I decided to go a completely different route:
I took everything I knew about the final product, and backwards engineered it, paying less attention to the way it’s supposed to be made.
My ingredients and method weren’t in line with the real deal, but the results were weirdly even more Lou-ish than recipes that stick closely to the original.
So, no—this is not exactly how Lou Malnati’s actually makes their pizza. But here are the main things you can do to end up with a crust (and pizza!) that’s uncannily similar:


How to make very good deep dish pizza:
- Add beer! Lou Malnati’s does not actually add beer to their crust (as far as I can tell). But their crust has always reminded me of beer bread. Adding beer gives it that characteristic flavor that’s simultaneously a little bitter and a little tart (sort of like sourdough bread). Lou Malnati’s achieves that flavor with some combination of good quality yeast and a very long rise time. However, I have not been able to achieve the same results that way. But I have discovered that beer gets you to something very similar!
- Use olive oil. Ok, now this one’s a hot take. The Lou Malnati crust is known as Buttercrust™, so the idea of using something else is a little out there. But I’ve noticed that olive oil dough sometimes tastes even more buttery than dough made with butter, if that makes any sense. So I use a generous glug of extra virgin olive oil in mine.
- Go parmesan crazy! While a Chicago deep dish pizza without a heap of parmesan or romano on top is wonderfully bright red, it’s so much tastier with a generous amount of sharp cheese on top. Lou Malnati’s goes this route, and I do too.
- Bake it on the floor of the oven. Here, I’m following tradition. By cooking it on the floor of the oven, the bottom of the crust will cook up super crisp.
- Use some cornmeal in the dough, but make it a wet dough. Cornmeal does not absorb water as readily as flour, so your raw dough should be a little on the soft side. As it bakes, the cornmeal will absorb some of that liquid and it will firm up without becoming dry. Follow the gram measurements in the following recipe for maximum accuracy and you won’t even have to think about it, but if you’re eyeballing it with volume, keep in mind that it should not be a very firm dough, and that it will firm up as it bakes.
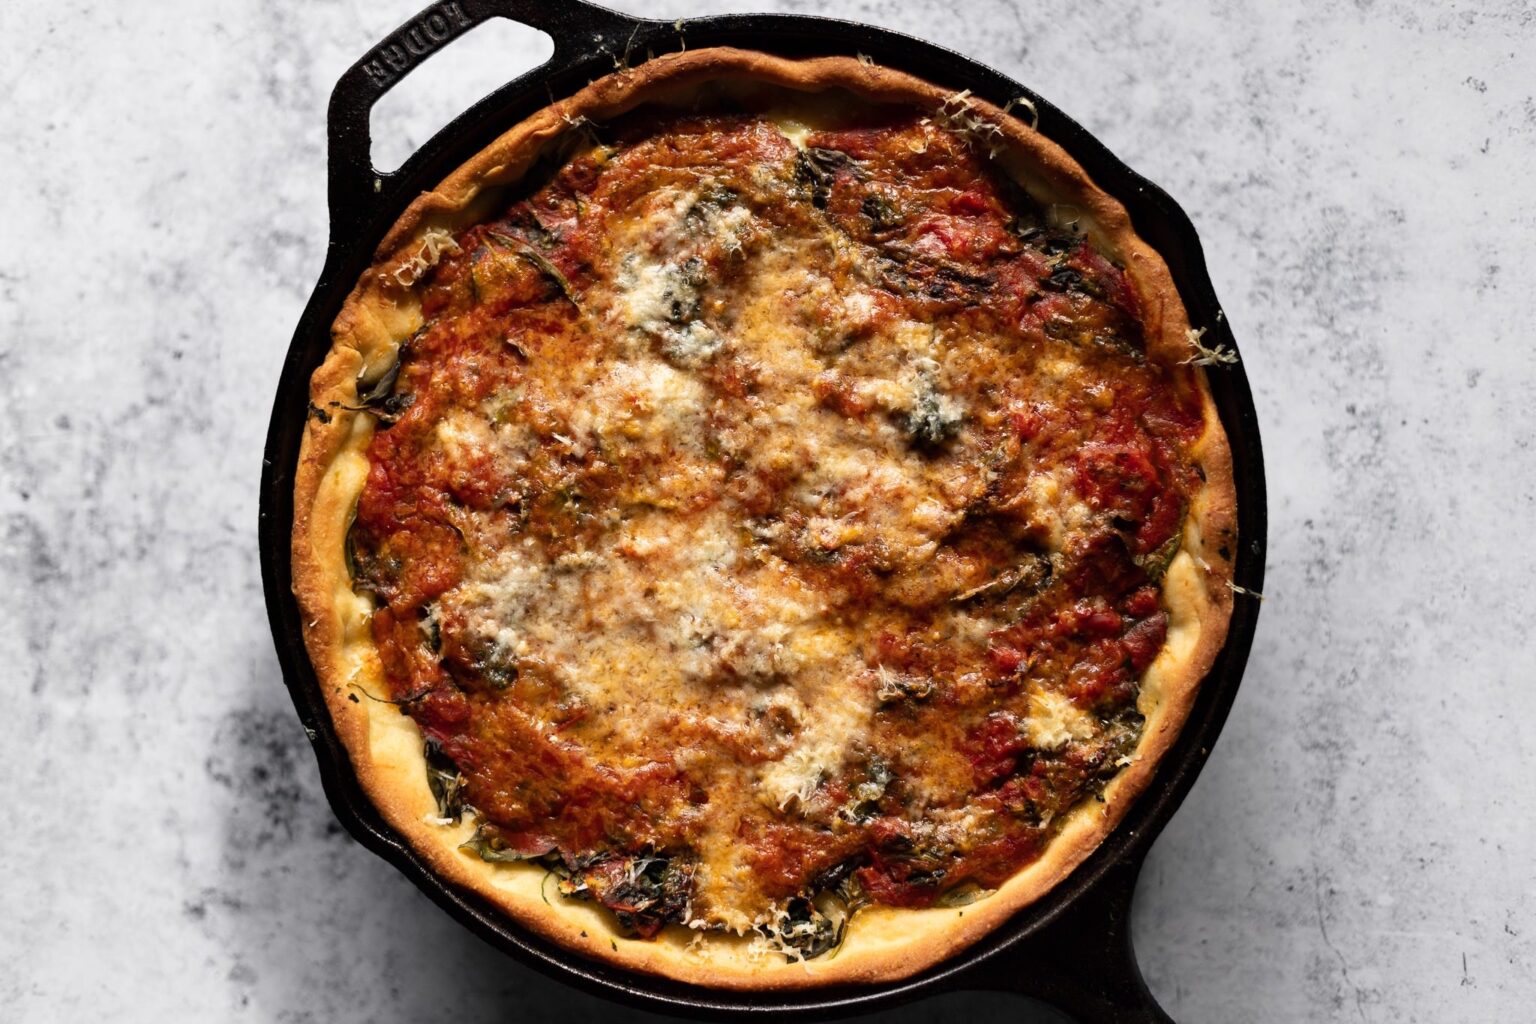
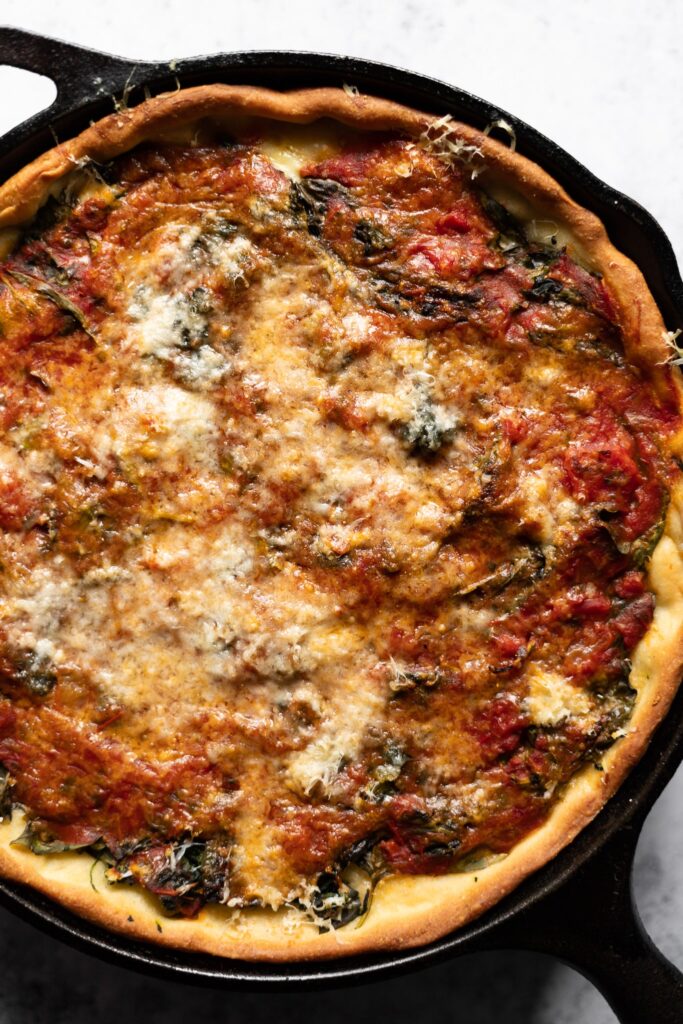
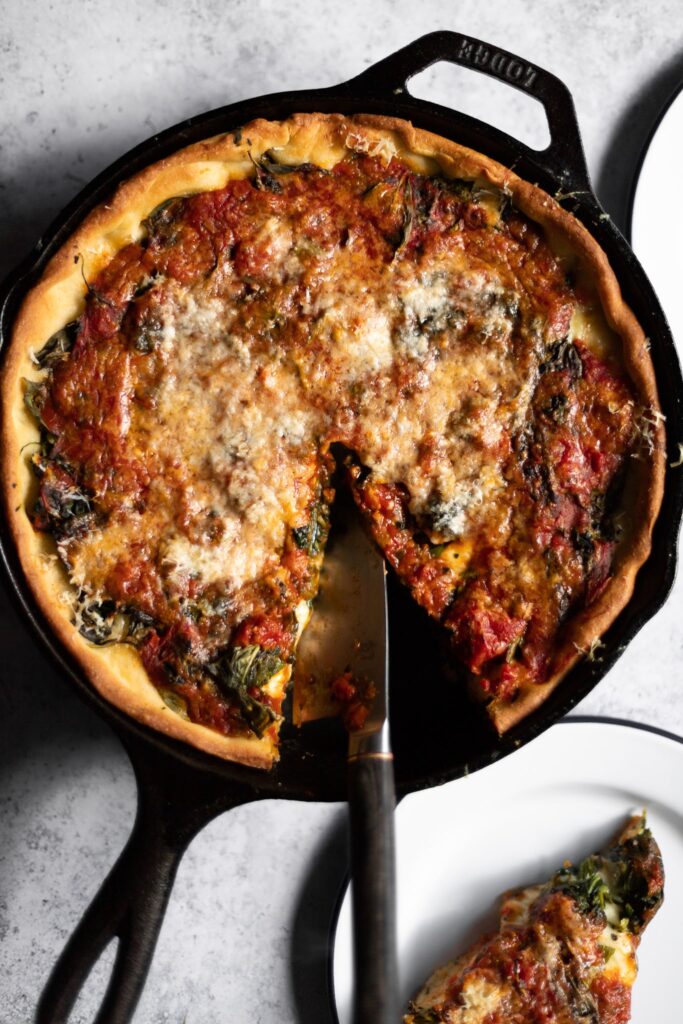
Chicago deep dish pizza with spinach (the real deal)

Ingredients
For the dough:
- 175g beer* (¾ cup, or half a bottle), at room temperature
- 5g instant yeast (1½ teaspoons)
- 5g sugar (1 teaspoon)
- 260g all purpose flour (2 cups)
- 30g polenta or cornmeal (3 tablespoons)
- 25g extra virgin olive oil (2 tablespoons), plus more for greasing the pan
- 5.5g salt (1 teaspoon)
For the pizza:
- 8 oz shredded or sliced mozzarella (225g)
- 8 oz container frozen spinach (225g)
- 3 medium cloves garlic (10g)
- 1 small bunch basil (25g leaves)**
- Salt
- 1 cup tomato sauce (240g)
- ½ cup finely grated Parmesan or pecorino (25g)
Instructions
- Make the dough: combine the beer, yeast, sugar, flour, cornmeal, olive oil, and salt in the bowl of a stand mixer (if using dry active yeast, dissolve it in the beer with the sugar first). Bring together with the dough hook at low speed, then increase speed to medium-high and knead for about 5 minutes.
- Once the dough smooths out, use a rubber spatula to scrape the dough into a greased bowl (it will be pretty sticky), oil your hands, shape it, cover loosely, and set aside for about 3 hours, until doubled in size.
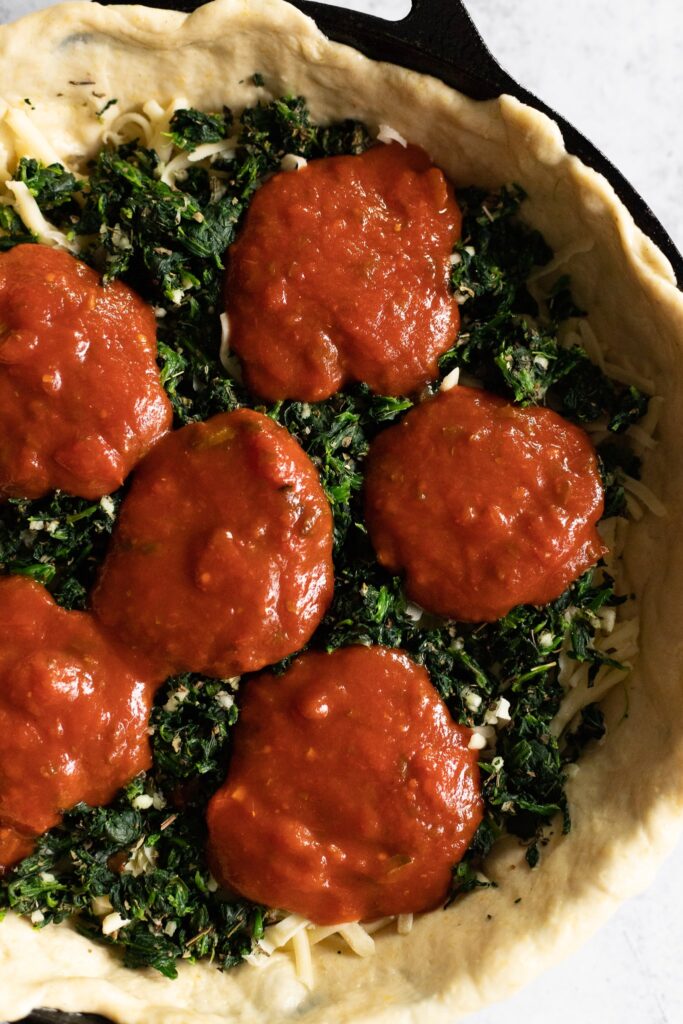
- Prep the toppings while you wait: Wring out the spinach very well and place in a small mixing bowl. Crush the garlic through a press into the bowl. Pick the basil leaves from the stems and add the leaves to the spinach. Season to taste (about ¼ teaspoon). Mix together and set aside.
- Once the dough is ready, preheat your oven to 445°F (230°C).
- Make the pizza: Generously grease a 10 inch (25cm) cast iron skillet*** with more olive oil. Scrape the dough into the skillet and use your oil-coated fingers to work it out into a thin layer. Make sure it goes all the way up the sides of the skillet.
- Fan out the cheese slices or sprinkle the cheese right on top of the dough. Sprinkle the spinach mixture over the cheese. Ladle on the tomato sauce. Sprinkle with the pecorino or parmesan.
- Bake for about 25 minutes on the floor of your oven. The crust should be brown around the edges and golden brown underneath, the cheese should be melted and stringy, and the top should be a little caramelized.
- Let it cool in the pan for about 10 minutes before serving (or it will be completely molten). Slice and serve out of the pan.
Notes
To make the dough overnight, just let it rise at room temperature for 2 hours, and then refrigerate for up to 24 hours. After dough has risen (either at room temperature or in the refrigerator), you can tightly wrap it and freeze it for a few months. Thaw in the refrigerator to use.
* In place of the beer: Measure 10g (2 tsp) apple cider vinegar. Top off with 165g water (to end up with ¾ cup liquid total).
** Can substitute 1 tablespoon (3g) dried basil.
*** If you don’t have a cast iron skillet, use another similar sized ovenproof skillet or pan. Depending on your pan, pizza might get more or less crispy on the bottom, and it might take more or less time to cook.