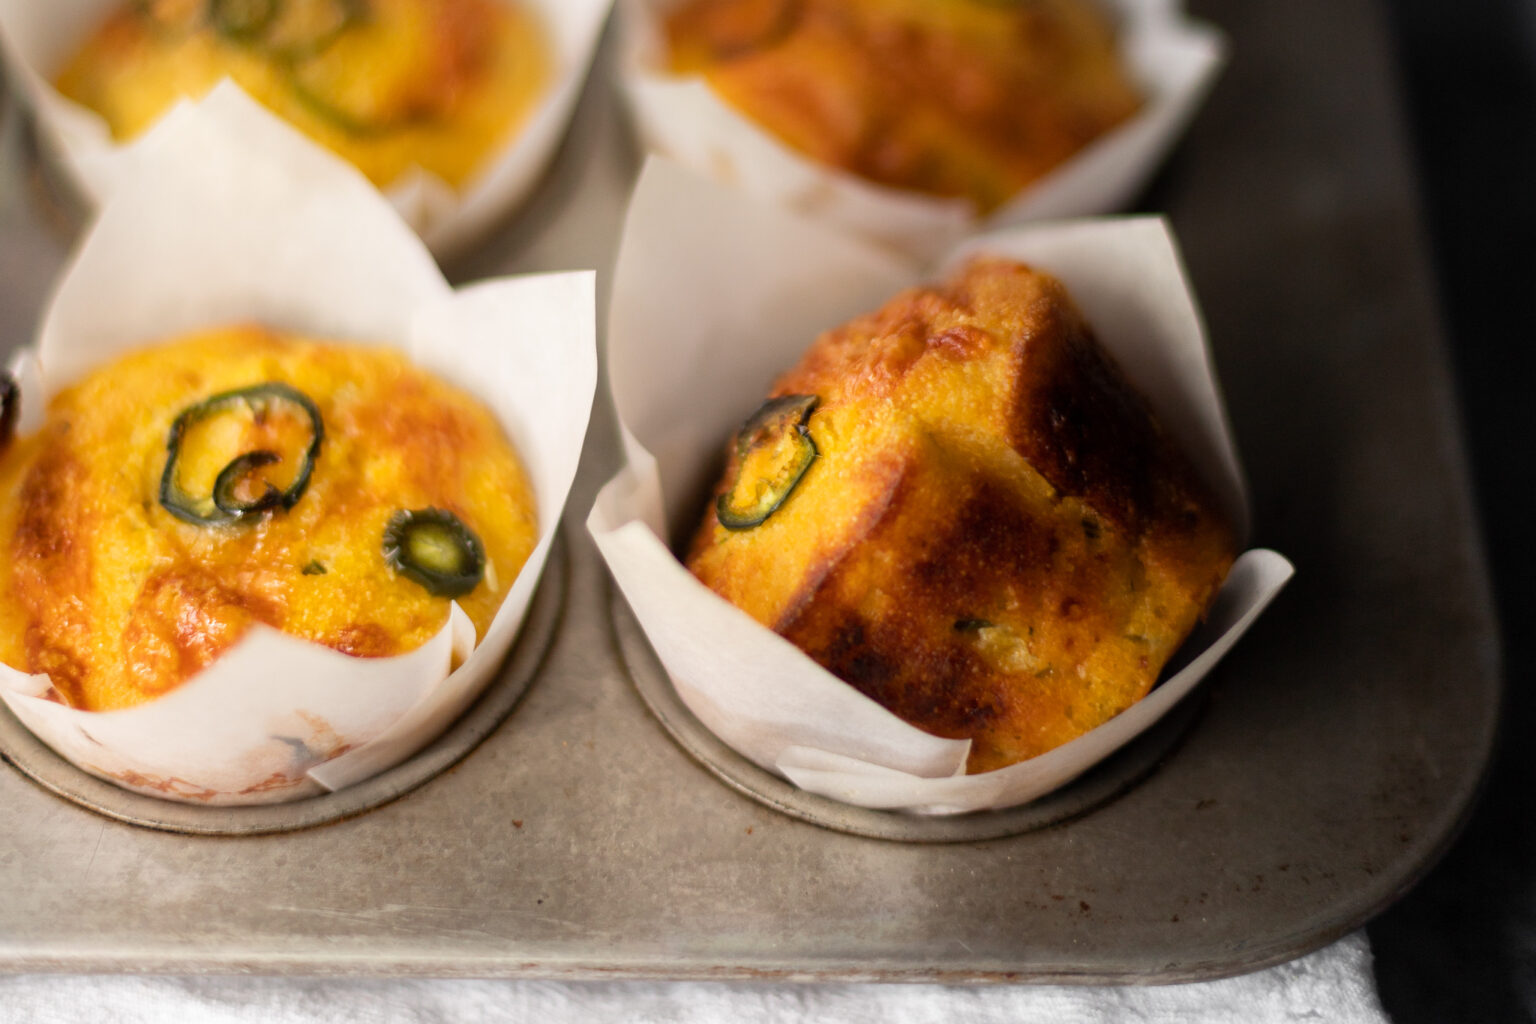
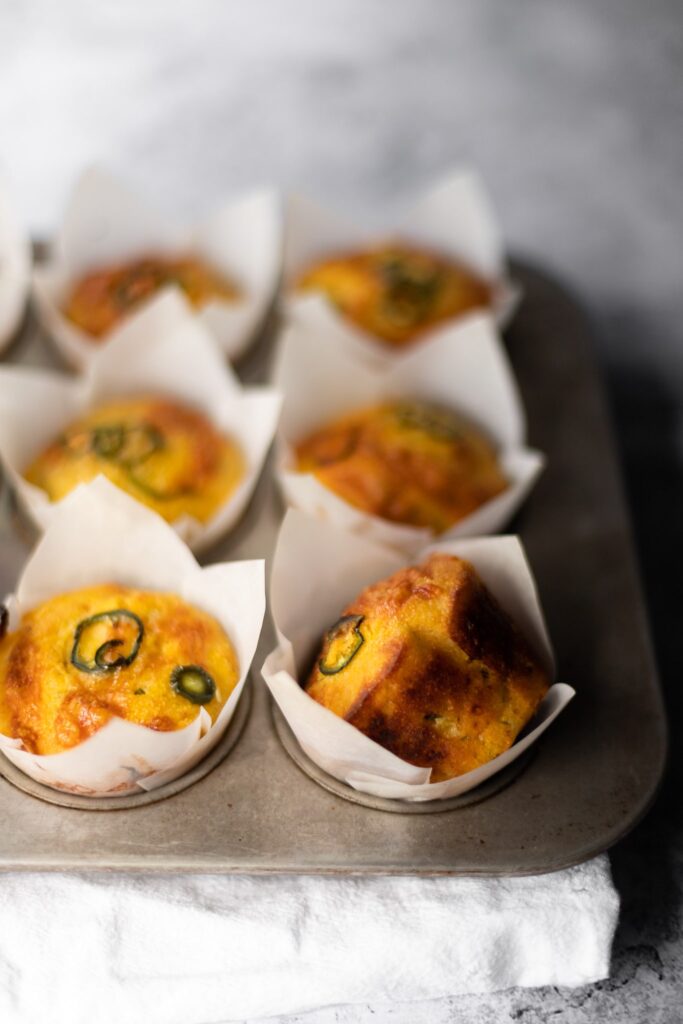
Here’s the thing about BBQ: really good smoked brisket is too good for this world; but even if smoked meats ceased to exist, I would still go to BBQ places just for the sides. And that’s why I think that if you’re ever planning a menu (ahem… Thanksgiving!), and you’re at a loss what to include, just make a bunch of BBQ sides! Even if you’re not smoking any meats, BBQ sides will make everyone happy. My favorite one? Jalapeño cornbread muffins!
Tips for jalapeño cornbread muffin success:
1. Don’t overmix!
While over-mixing is a much bigger concern for an all-flour muffin, corn muffins still benefit from some restraint in the mixing department.
Why over-mixing is bad: When you agitate wet ingredients + flour by stirring or kneading, you develop its gluten. As gluten develops, it becomes more and more rubbery. This can be a good thing when it comes to something like a baguette. But for muffins (and pancakes, and banana bread, and any other thing that should have a tender crumb), it’s important to mix with restraint.
How to avoid over-mixing: If you just dump everything together in one bowl, it’ll take a lot of mixing to get all those flour lumps totally smooth. That’s why it’s important to whisk or sift the dry ingredients, whisk together the wet ingredients separately, and then bring them all together. By whisking separately first, you break up any flour clumps and you fully combine the wet ingredients. Then it takes much less effort to stir everything together. Less stirring = less gluten development = tender muffins.
2. Decide how spicy you want them to be.
If you want spicy cornbread muffins, feel free to leave in all or some of the jalapeño pith. Contrary to popular belief, the heat does not primarily lie in the seeds, but in the white waxy stuff surrounding the seeds. So if you want super mild muffins with just some jalapeño flavor, remove all the white stuff. If you want spicy muffins, chop them up whole (seeds, pith, and green flesh).
Spiciness varies from pepper to pepper, so use your judgment, and feel free to scale things back or add a little extra. Doubling the amount of jalapeño will have a huge affect on its spiciness level, but own’t affect the structure of the recipe.
3. Don’t skip the muffin tin liners.
Whenever I make muffins, I’m tempted to just go for it without the muffin liners because I almost never have them around. But don’t skip the liner step, or your cheesy muffins will stick to the pan like crazy. If you don’t have muffin liners on hand, you can always make your own with parchment paper.
A quick note on veganizing these:
I recently tried veganizing this recipe to some success. Replace the buttermilk with soymilk combined with 1 1/2 tablespoons red wine vinegar (or another neutral-flavored vinegar). Measure by adding the vinegar to a liquid measuring cup and topping the measuring cup off with soymilk. Replace the eggs with a flax egg (ground flax seeds mixed with water to form a gloopy egg-like liquid). Omit the cheese (or use a vegan cheddar). Add a little extra salt. They might take slightly longer to bake, but use the same toothpick trick as described in the recipe below.
Printjalapeño cornbread muffins

Ingredients
- 1½ cups [240 g] cornmeal
- 1½ cups [195 g] all purpose flour
- 1 tablespoon [15 g] baking powder
- 1½ teaspoon [8 g] salt
- 2 large eggs [100 g]
- 4 tablespoons [55 g] unsalted butter, melted
- ¼ cup [55 g] extra virgin olive oil
- 2 cups [480 g] buttermilk
- ⅓ cup [65 g] granulated sugar
- 4 jalapeños (ribbed* and minced) [70 g minced]
- 1 cup [110 g] grated cheddar
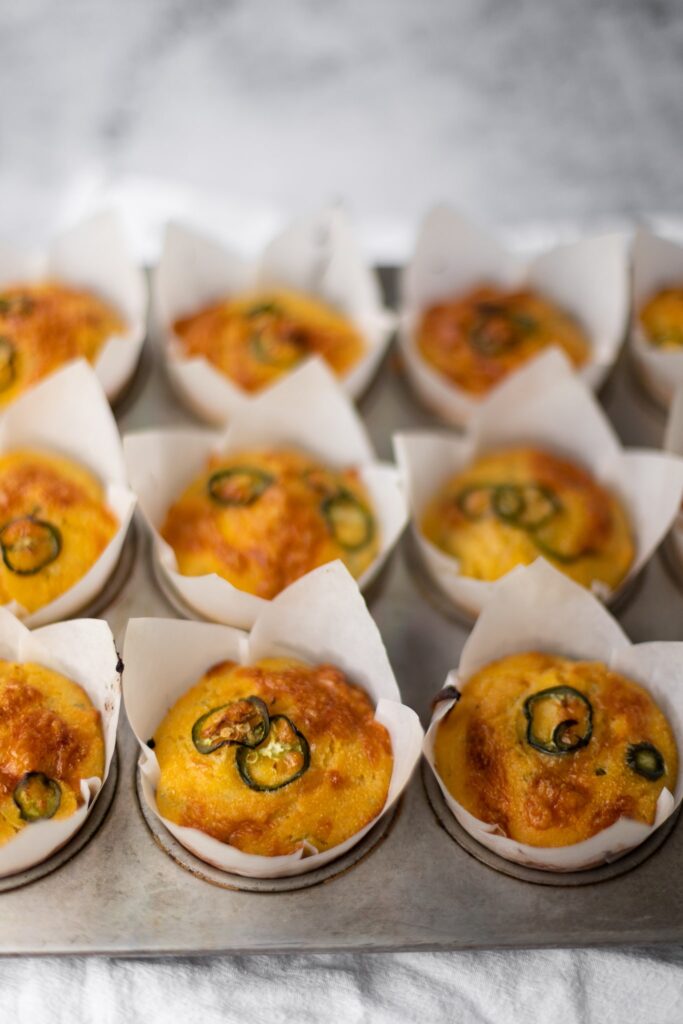
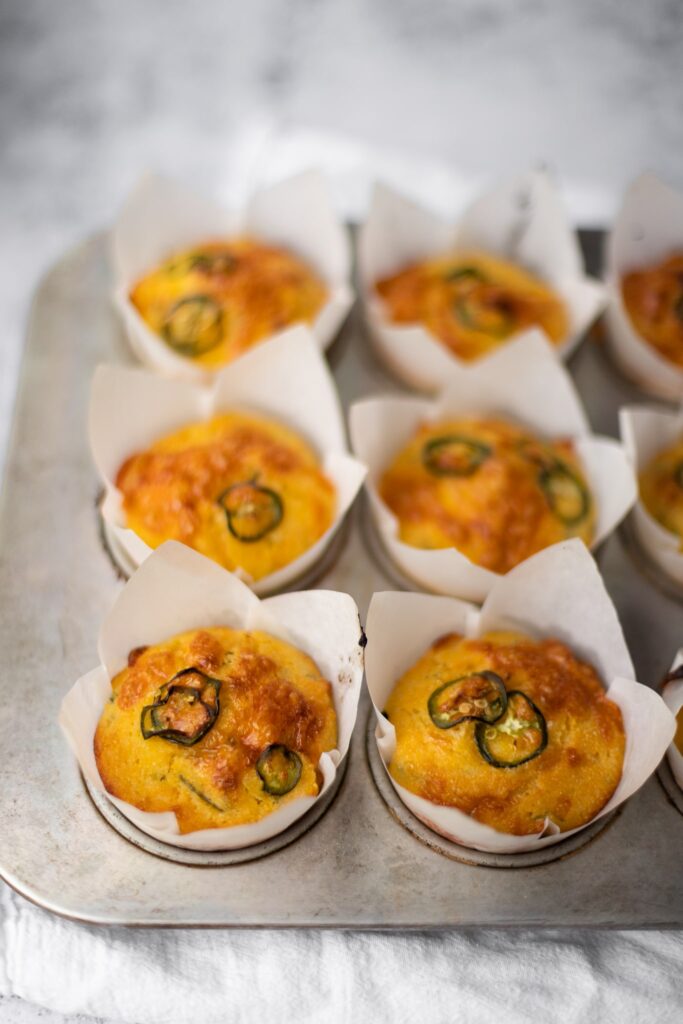
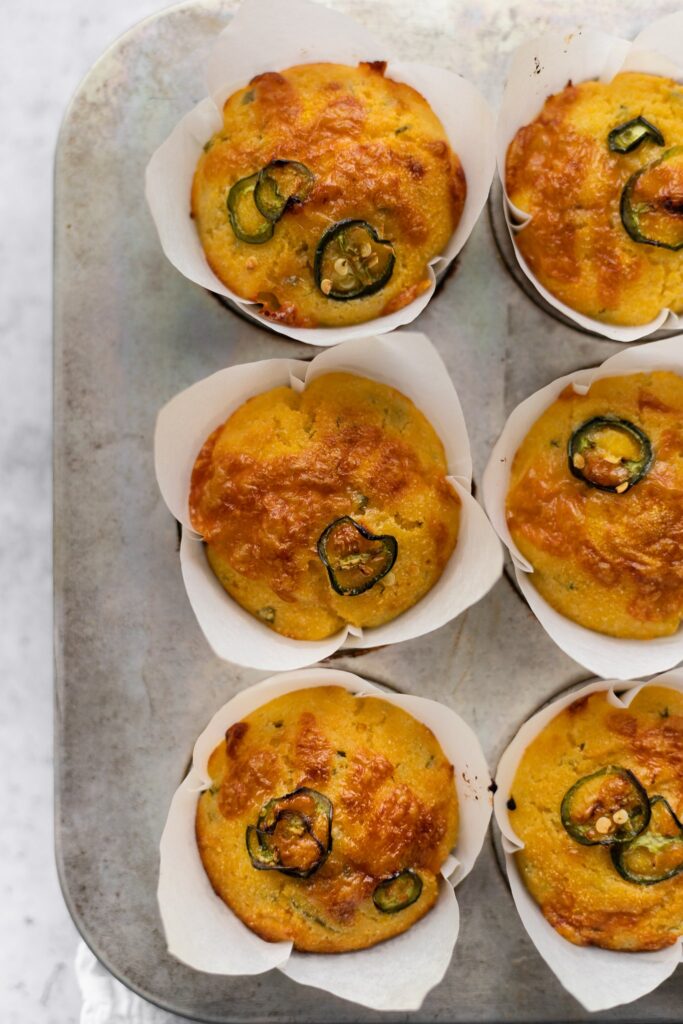
- 1 thinly sliced jalapeño and extra cornmeal, for decorating
Instructions
- Preheat your oven to 425°F [220°C]. Prep a muffin tin with 12 parchment liners.
- In a large mixing bowl, whisk together the cornmeal, flour, baking powder, and salt. In a medium mixing bowl, whisk together the eggs, butter, olive oil, buttermilk, sugar, minced jalapeños, and most of the cheddar. Pour the wet ingredients over the dry ingredients, and stir to combine (do not overmix).
- Evenly distribute the batter among the 12 lined muffin cups. Decorate the tops with jalapeño slices, cheese, and a light sprinkling of cornmeal. Bake for 20 minutes, until a toothpick inserted in the center comes out cleanly.
- Let cool on a rack or clean, dry towel. Muffins keep well at room temperature for a couple days. But they keep much better in the freezer, so freeze any ones you don’t plan to eat in the first day or two.
Notes
* If you want it to be pretty spicy, only de-rib them partially, or leave the piths intact for a ton of spice. The heat comes almost entirely from the white pith, and less so from the green flesh and seeds.
Nov 2025 update: I added a note on making a vegan version, which you can find above the recipe.