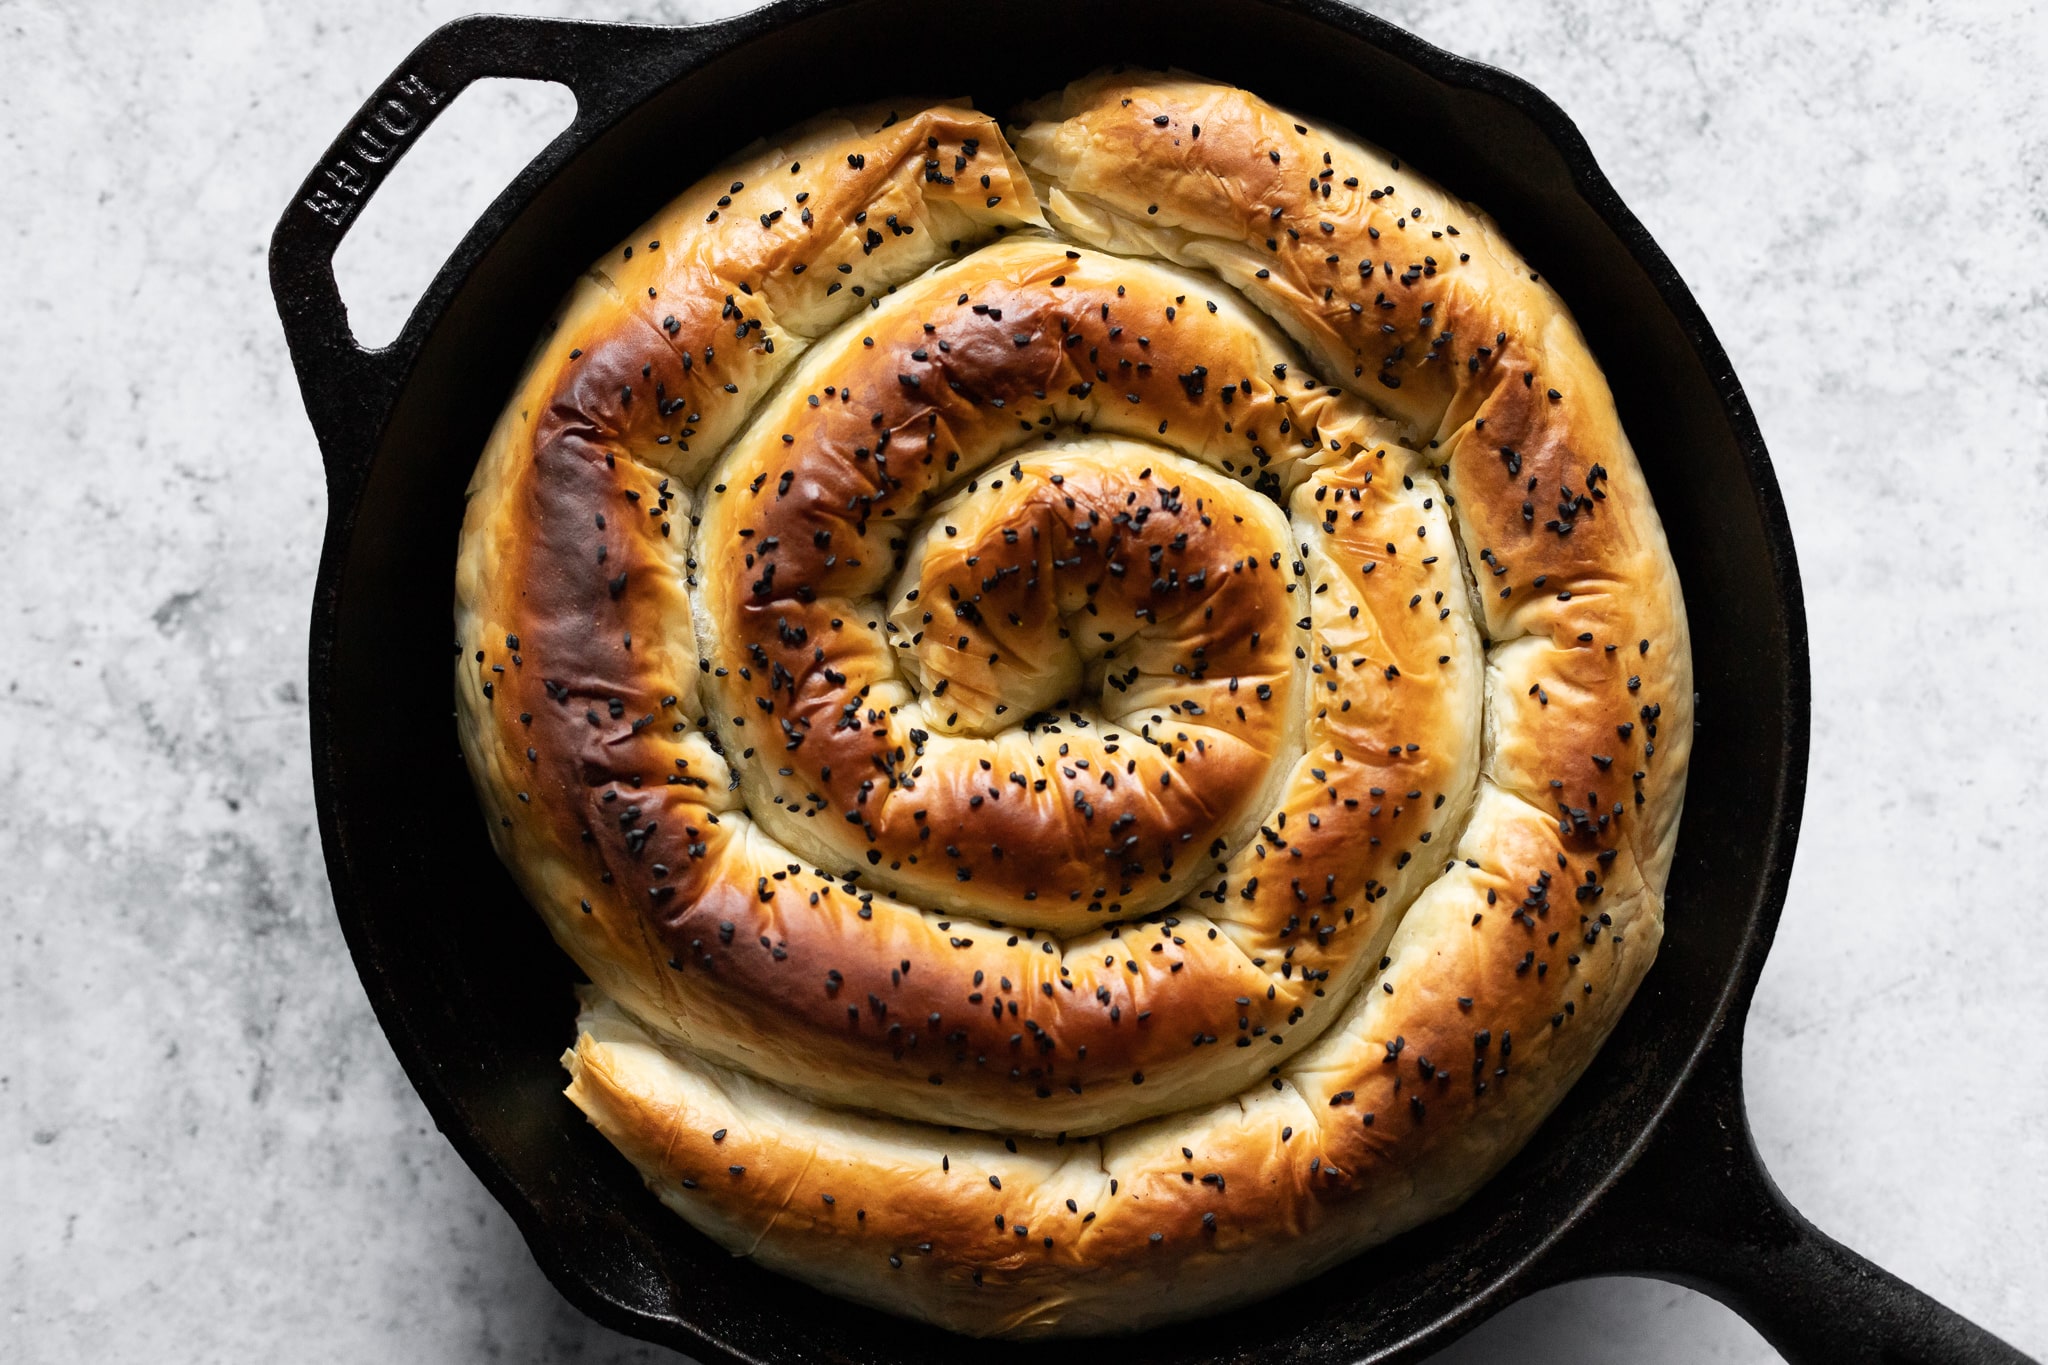
There are a few dishes I come back to again and again because they’re simple to pull off but feel just a tad more thoughtful, and spanakopita is one of them. And while the traditional tray-baked version has its charm, a spanakopita spiral is what I reach for most. It’s easy to make, easier to share, and (not to be shallow, but…) it’s also easier on the eyes, if I do say so myself.
This post has everything you need: the recipe + video, tips for success, a guide to working with filo dough, and all the small details that make a big difference. It’s easy to mess up, but also very easy to get right!
tips for spanakopita spiral success
1) Decide whether to swirl it or stack it
Deciding what shape to make your spanakopita all depends on your preferences. If you’re looking to maximize crispiness, a rectangular tray-bake version is for you. But if you’re looking for more of a mix of crisp and tender textures, go with a spanakopita spiral. Other advantages of the spiral:
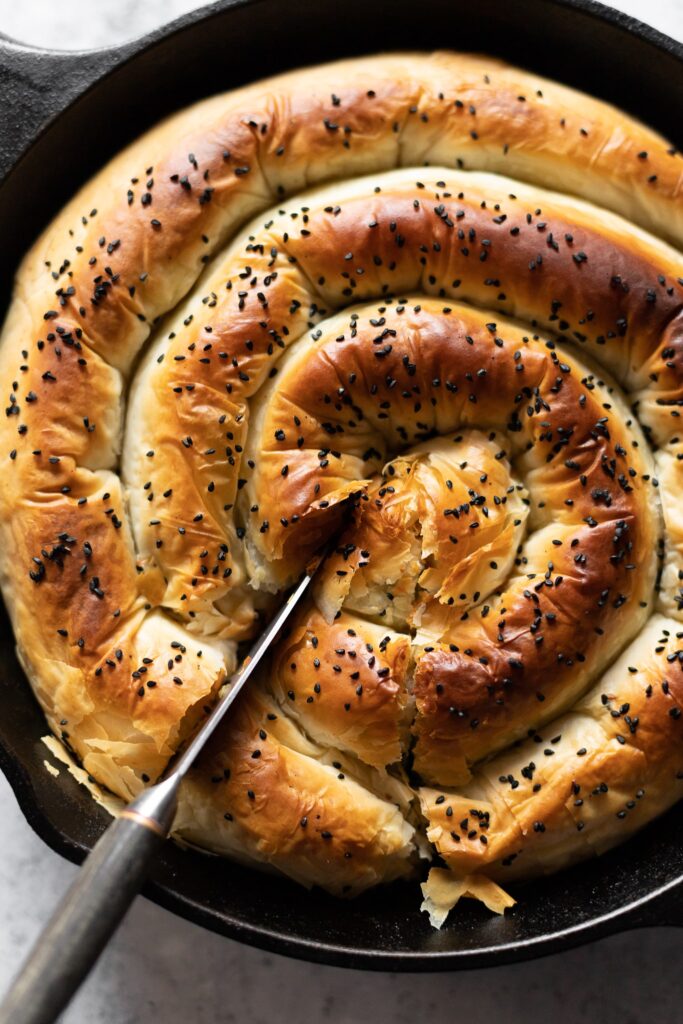
- It’s great for entertaining. Guests can tear off a piece, or you can slice it into rustic wedges.
- It will turn out gorgeous with very little effort. Unlike with a tray bake, you don’t have to fuss with scoring the top. You just fill, roll, and spiral.
- It’s very forgiving of tearing. If your sheets tear in the process of layering, it’ll still turn out gorgeous because everything gets beautifully crinkled anyway.
- I find it easier to keep the filo from drying out when making a spiral. That’s because you only have to work with 1/3 of the dough at a time, so you can keep most of it covered while you layer those sheets.
This recipe will work for either a spiral or a tray bake. If you want to turn it into a rectangle, simply layer half of your filo sheets with butter in a snugly-fitting casserole dish, fill it, and layer with the rest of the sheets and butter. If you want to be able to slice through without shattering the top of your tray bake, score the top with a knife before baking.
2) make sure the filling is not soggy
Soggy filo is your greatest enemy here. Squeeze your spinach dry (very dry) and sauté the onions until they’ve shrunk down and let off some steam, then drain any briny feta before mixing in.
3) make sure the filling is flavorful
Spanakopita should taste like herbs, not just spinach. I use parsley, dill, and a touch of dried mint, but you could also use a little fresh mint. If it’s not flavorful before baking, it won’t magically get better in the oven, so make sure you use enough herbs, green onions, and garlic.
4) use clarified butter or olive oil, and save those butter solids!
Clarified butter gives you crisp, golden layers with less risk of burning. Bonus: those leftover butter solids you get after clarifying your butter? Stir them into the filling for a little extra depth of flavor! If you’ve never clarified butter, check out my clarified butter post, which includes a video. Or follow the instructions in the notes at the end of my recipe, and you’ll be just fine.
No time to clarify your own butter? Store-bought clarified butter (ghee) or olive oil works great as a substitute. Just start with 1/2 cup (105g) of your fat of choice.
how to work with filo dough
Filo has a reputation for being finicky, and to be fair, it can be. But with a few smart habits, it’s actually very manageable. Here are some tips to make the experience less stressful:
1) a lesser-known fact: let it come to room temperature before opening
You absolutely have to let your filo come to room temperature before opening the package. If you let it thaw in the fridge overnight, and then open the package and start to try to work with it cold, it will dry out almost immediately. It will ruin your day. It will haunt your dreams for the rest of your life. Just don’t do it. Leave it on the kitchen counter for at least a couple hours (after thawing).
2) a better-known fact: don’t open it until you’re ready to use it
Don’t open the filo until you have all your components in place. While filo doesn’t dry out quite as quickly as most guides claim, it does indeed dry out after a few minutes. So don’t stress, but do have everything ready to go, and be ready to work efficiently.
3) a hot take: don’t use a damp cloth, and don’t worry about covering the whole stack
While you should keep your filo covered while you work with it, don’t use a damp cloth, and don’t stress about keeping the whole stack covered. Instead of a damp cloth, I like to use the plastic sheet it (usually) comes wrapped in. I find that using a damp cloth sometimes results in the filo sticking to itself—it can be hard to have just the right amount of dampness to prevent over-hydrating those delicate layers.
I just divide the dough in thirds, fold up the two-thirds I’m not immediately using, wrap it with the plastic sheet it came in, and set it aside while I work on the first third. You should have plenty of time to work with the first third, and the rest will be fresh as a daisy once you’re ready for it.
PrintEasy Spanakopita Spiral (+ video)


- Prep Time: 40 minutes
- Total Time: 2 1/2 hours
- Yield: about 6 to 8 servings
Ingredients
- 13.2 oz (375g) filo dough, thawed in the fridge
- 16 oz (455g) frozen chopped spinach, thawed
- Olive oil for sautéeing
- 2 cups (120g) chopped green onion
- 3 medium cloves garlic (10g), crushed through a press
- 1 cup (40g) chopped parsley
- ¼ cup (10g) dill
- 2 large eggs
- 1¼ cup (175g) crumbled feta
- 1 tsp (1g) dried mint (optional)
- ½ tsp (1.5g) black pepper
- Salt
- ½ cup (105 g) melted clarified butter* and/or extra virgin olive oil
- 1 tsp seeds (e.g., nigella or sesame)** (optional)
Instructions
- Move your filo dough from the fridge to the counter for about 2 hours. Do not remove it from the packaging until you’re ready to fill it.
- Preheat your oven to 420°F (215°C).
- Wring out the spinach: Place about ¼ of the spinach in a clean tea towel***, twist it shut, and keep twisting and squeezing to wring it out. You should end up with about 190g. Once it’s completely dry, add to the mixing bowl. Repeat with the remaining batches.
- Make the filling: Move the small saucepan back over medium heat, let it heat for a minute or two, and add 1 teaspoon olive oil and the green onions. Stir for about 4 minutes, just until they soften and cook down a bit. Remove to the mixing bowl.
- Add the garlic, parsley, dill, eggs, feta, mint, and pepper to the mixing bowl. Season with about ¾ tsp (4g) salt. Mix together very well.
- Fill and shape the spanakopita: Open the filo and prepare to work quickly. Separate out ⅓ of the sheets and keep the rest covered under the plastic sheet they came in. Place one filo sheet on a clean surface and brush with butter. Top with another sheet, brush with more butter, and repeat until you have a stack with the top brushed in butter. Place ⅓ of the filling in a line down one side of the filo’s long side. Roll it up (not tightly), starting with the filled side, ending with the unfilled side. Twist into a spiral (seam-side-down), and move to a greased sheet pan or large ovenproof skillet.
- Repeat twice more with the remaining filo and filling. Tuck the second link into the end of the first one, and coil it around the outside, then repeat with the third and final one. If you run out of butter at any point, just use more olive oil.
- Brush the top with any remaining butter or olive oil. Sprinkle with nigella seeds, if using.
- Bake for about 20 to 25 minutes, until golden brown, crispy, and completely heated through.
Notes
* Use any combination of clarified butter and extra virgin olive oil, to reach ½ cup (105 g) oil/butter combined. To clarify butter, start with 1 stick (115g) butter. Melt the butter in a small saucepan over medium heat. Once the butter has melted, reduce the heat to medium-low and continue to simmer. Keep an eye on the temperature and adjust it as necessary, so that the butter solids don’t brown. Remove the pan from heat as soon as the simmering has quieted down a bit, but before it goes silent—this should take about 4 minutes from the time the butter melts. Use a spoon to skim off any floating solids, and place them in a medium mixing bowl. Slowly pour the melted butter into a measuring cup, leaving behind any of the solids left at the bottom of the pot. If you’d like to, you can add the solids into the mixing bowl with the filling. You should have between ⅓ and ½ cup (85g) of butter after clarifying, which you will add olive oil to to reach 1/2 cup (105 g) oil/butter combined.
** Nigella seeds look a lot like black sesame seeds, but the two could not taste more different. Use whichever you love.
*** If you don’t want to risk staining your towel, you can just do this in more like 8 batches with your bare hands. Afterwards, dab with a paper towel to make sure your spinach is totally dry.
Video note: If you don’t see the video for this post after scrolling up, please disable ad block and try reloading the page.
2025 update: The measurements and method in this recipe are essentially the same as it always has been, but I edited it to streamline it. Notably, the clarified butter steps are now in the note at the bottom instead of embedded within the recipe. This is because many people choose to make this recipe with store-bought clarified butter and/or olive oil, so I thought this made for an easier-to-read process. If you’ve been making this recipe for years, it’s still exactly the same, but hopefully a bit easier to follow now.
I think I needed 4 sets of phyllo dough but it turned out great. I also used one egg and half amount of olive oil, it was quite moist. Do you have nutritional information?
Hi Laura! By 4 sets, do you mean 4 375g containers of filo or 4 sheets of filo? Sheets are all different shapes and sizes, so if you meant 4 sheets, it’s possible that your sheets were much larger than the ones I used for this recipe. Sticking to the weight amount will be more precise. But I’m also guessing you could get away with using less filo, which would also mean you’d need much, much less oil.
At the end of the day, it is a pretty flexible recipe. And while the way it’s written is the way I developed and tested it, I’m glad it turned out well with so many changes!
This is my go to!! I have made it several times and have had it complimented by my family each time.
I’m so glad you’re enjoying it!