• Skip to primary navigation
  • Skip to main content
  • Skip to primary sidebar
  • Skip to footer
Cardamom and Tea
  • Blog
  • Recipes
  • About
  • Cookbooks
    • Piecemeal
    • A Dish for All Seasons (my first cookbook)

herb salad

July 31, 2021 by Kathryn Pauline Leave a Comment

herb salad

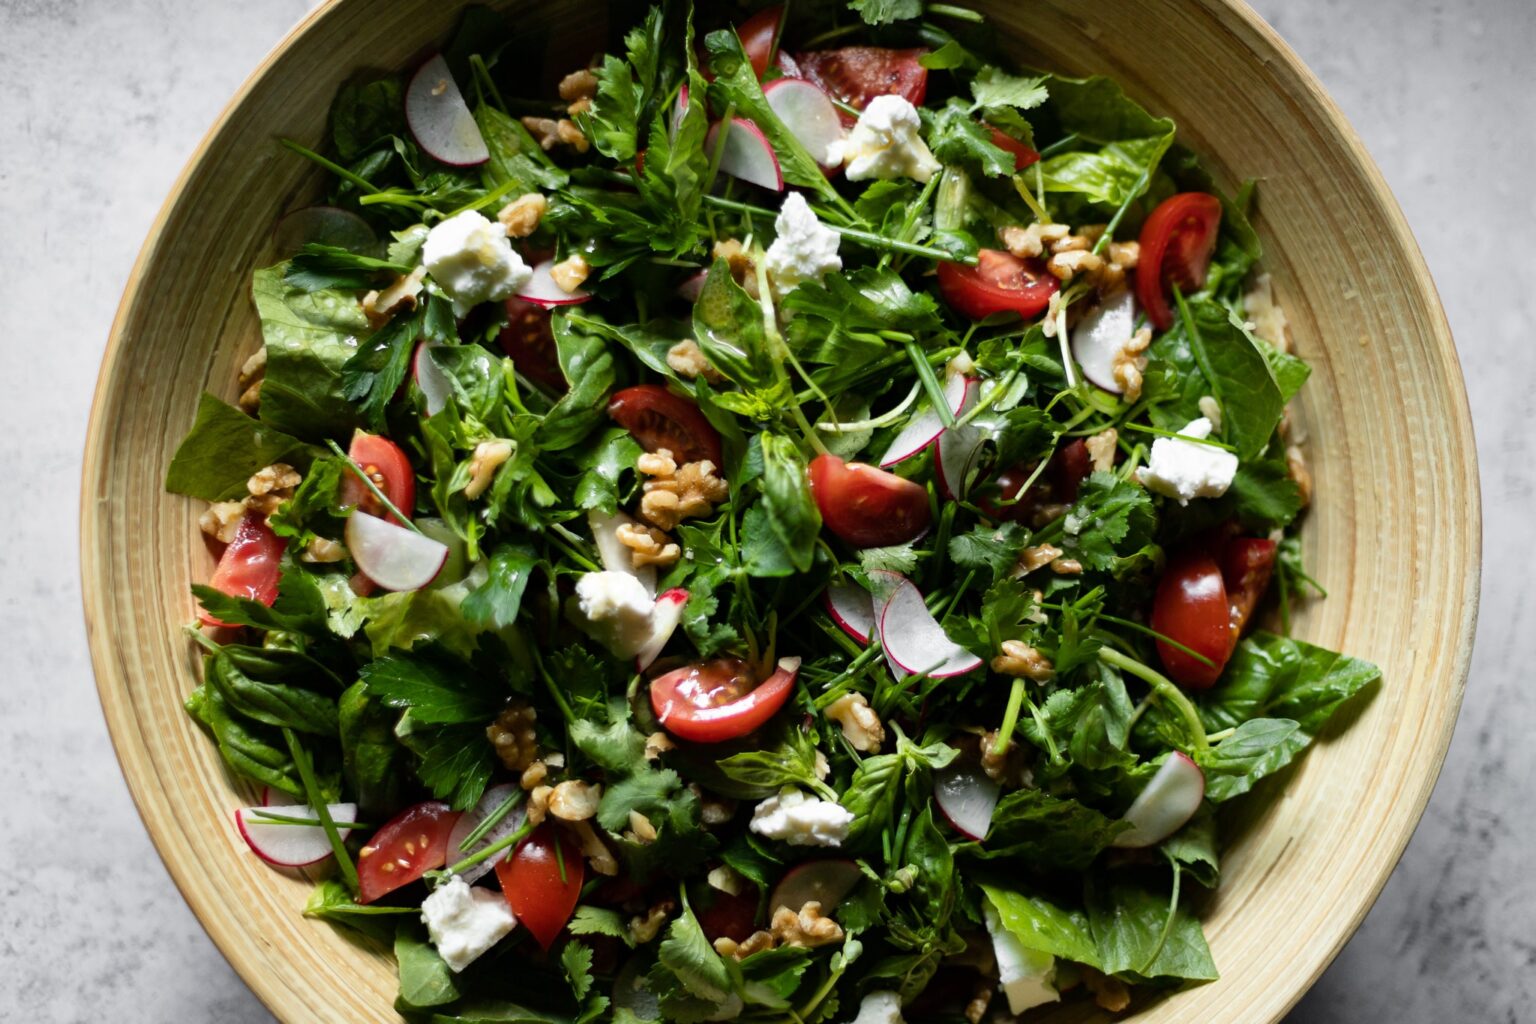
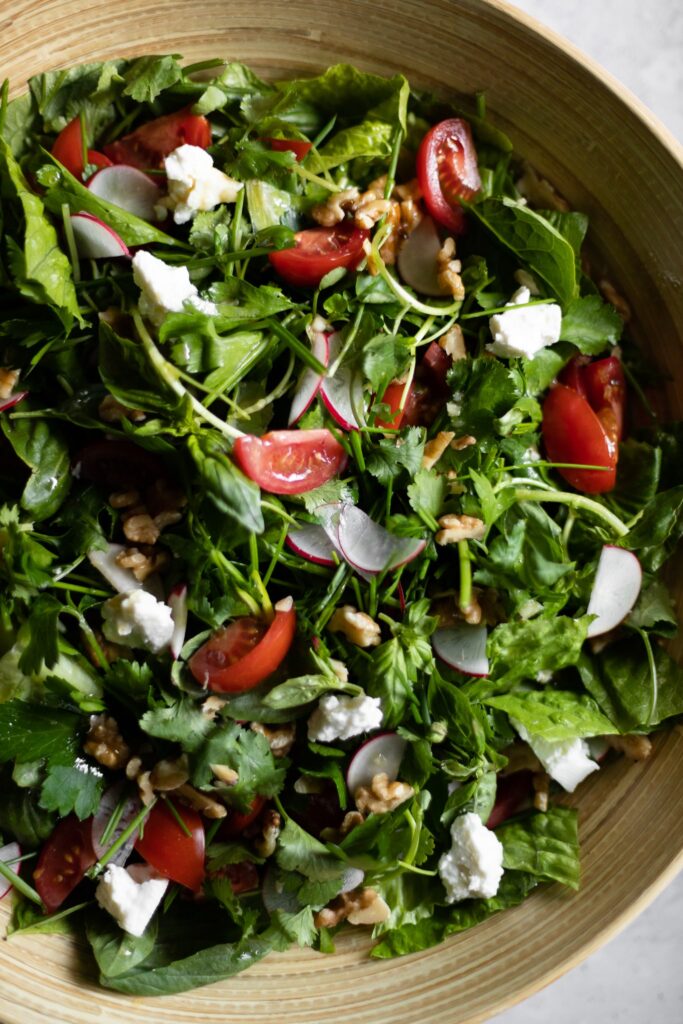
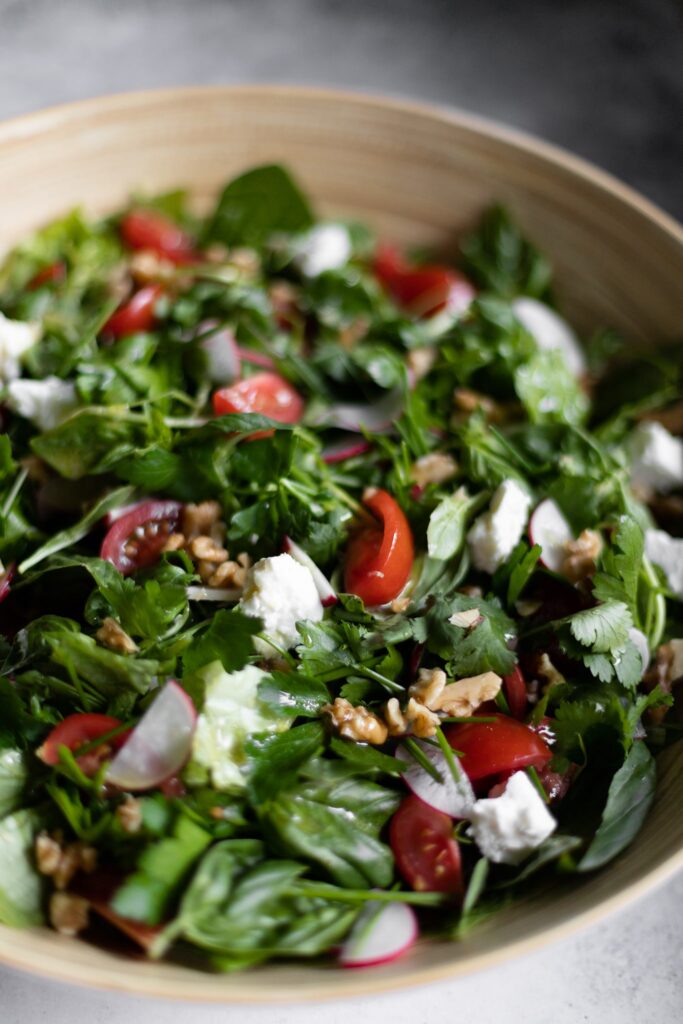
My favorite salads always pile on the herbs with reckless abandon, and this one is no exception. Indeed, this herb salad is pretty much just a big mountain of herbs masquerading as lettuce, dressed with a perfectly tangy and rich dressing.

Read on to learn how to use whatever leafy herbs you’ve got + how to store them for maximum shelf life, or jump to the recipe if you’re ready to go!

herb salad

What kinds of herbs can go in an herb salad?

Almost any!

You can absolutely feel free to include some of your other favorites in this herb salad—throw in whatever you’ve got on hand. Dill, mint, and tarragon all work wonderfully here in smaller quantities.

If you can’t stand cilantro, you can also just add more parsley and basil to compensate. It’s super adaptable, but the idea is always the same: 1/3 herbs, 2/3 lettuce, and lots of good stuff on top.

If you don’t have watercress, replace it with a 1:1 blend of lettuce and herbs. In other words, replace it with a bit more romaine and a bit more herbs.

The only herbs to stay away from in this herb salad are the woody/perfumey kinds like thyme, rosemary, oregano, and sage. While you can get away with using as much basil, cilantro, or parsley as you’d like, more intensely fragrant flavors work better in small doses.

leafy herbs

How to wash herbs for a long shelf-life

How to wash herbs:

Submerge the de-stemmed leaves in a bowl of cold water. Gently agitate to loosen dirt. Shift herbs to one side, drain away the dirty water, and repeat the process with fresh water as needed. On the final rinse, lift herbs out by hand rather than draining with a strainer—this helps leave any residual grit behind. Dry using a towel or spin dry in a salad spinner.

For towel drying: loosely roll the herbs in a clean towel, hold both ends, and shake vertically a few times. See the video below.

How to store herbs:

Begin by removing any bruised or damaged leaves to prevent spoilage. Wrap unchopped herbs in a damp (not soaked) kitchen towel and place them inside an airtight container.

Properly stored, herbs can remain fresh for several days to over a week, depending on their type. Hardy herbs like parsley tend to last longer than delicate varieties such as mint or dill. For optimal shelf life, store different types separately, especially if you expect to use them at different times.

(If video does not appear below, please disable ad block)

Print

Herb Salad

herb salad
Print Recipe

5 Stars 4 Stars 3 Stars 2 Stars 1 Star

No reviews

Note: The watercress and herbs in this salad are super flexible. See the discussion above the recipe for substituting herbs.

  • Total Time: 30 minutes
  • Yield: 6 to 8 servings

Ingredients

For the salad:

  • Outer leaves from 1 medium head romaine [225g leaves], coarsely chopped
  • 1 small bunch watercress [40g], torn
  • Leaves and tender stems from 1 small bunch cilantro [40g leaves]
  • Leaves from 1 small bunch parsley [20g leaves]
  • Leaves from 1 small bunch basil [20g leaves]
  • 1 small bunch chives [20g], coarsely chopped
  • 1 large green onion [20g], thinly sliced
  • 4 or 5 radishes, thinly sliced [60g]
  • 6 small tomatoes [175g]
  • ⅔ cup crumbled feta [90g] (omit or replace with vegan feta to make vegan)
  • ½ cup coarsely chopped walnuts [50g]

For the dressing:

  • ¼ cup [55g] extra virgin olive oil
  • 2 teaspoons [15g] honey
  • 1 tablespoon [15g] red wine vinegar
  • 1 tablespoon [15g] water
  • 1 teaspoon [5g] dijon mustard
  • 1 medium clove garlic, crushed through a press
  • ½ teaspoon [3g] salt

Instructions

  1. Place the romaine in a large mixing bowl and toss together with some of the dressing.
  2. Top with the watercress, herbs, chives, green onion, radishes, tomatoes, feta, and walnuts, drizzle with more dressing, and serve.

Notes

Tips for storage: Store your herbs properly for a long shelf life—basil and chives will last for a few days, parsley and cilantro will last for more like a week or two. You can also store greens this way, which will last for about 3 to 7 days. Whole romaine leaves will last longer—if their stems oxidize a little, just trim the brown bit away.

If you want to make this salad ahead for guests, store the lettuce and herbs in one container, the toppings in another, and the dressing in another. Dress the lettuce at herbs at the last moment, then top with the rest of the toppings, and drizzle with more dressing.

If you don’t want to eat the whole salad at once, store the lettuce/herbs in one container, toppings in another, and dressing in another, and assemble smaller portions as needed.

find us on instagram and let us know what you made!

Filed Under: appetizers, dairy free, dinner, every recipe, gluten free, lunch, meze, salads, vegan, vegetarian, weeknight Tagged With: basil, cilantro, feta, herbs, middle eastern, parsley, radish, spring, summer, tomato, walnut

donuts 6 ways (+ a recipe to create your own donut)

July 9, 2021 by Kathryn Pauline Leave a Comment

6 colorful donuts photographed from above

Donut week is coming to a close! But today I’m leaving you with a guide to creating a custom old fashioned cake donut. Get creative with your favorite flavors and mix-ins, and don’t forget to decorate them so that it’s clear what’s inside. The 6 I posted this week are a few of my favorites, but there are so many possibilities:

Try substituting raspberries in my blueberry icing, then make the recipe below with a handful of chocolate chips added to the dry ingredients, and a little bit of almond extract added to the wet ingredients. Or make my cinnamon sugar donuts, but add some lemon and orange zest to the wet ingredients and even more to the cinnamon sugar. The sky’s the limit—get creative, and have fun!

  • 6 colorful donuts photographed from above
  • 6 colorful donuts photographed from the side

Here’s a quick list of the 6 recipes I posted this week, in case you want to borrow a glaze or some inspiration for your own creation:

  1. Lemon poppy seed donuts
  2. Funfetti cake donuts
  3. Persian love cake donuts
  4. Cinnamon sugar donuts
  5. Blueberry cake donuts
  6. Old fashioned donuts (plain or with powdered sugar)
  • 6 colorful donuts photographed from above
  • 6 colorful donuts photographed from above
Print

create your own cake donut

6 colorful donuts photographed from above
Print Recipe

5 Stars 4 Stars 3 Stars 2 Stars 1 Star

No reviews

  • Yield: about 8 to 10 donuts

Ingredients

  • Neutral high smoke point oil, for deep frying (e.g., canola)
  • 250g all purpose flour (2 cups), plus more for dusting
  • Dry ingredient flavorings*, to taste (e.g., spices like cinnamon, cardamom, etc.)
  • 4g salt (¾ teaspoon)
  • 9g baking powder (2 teaspoons)
  • Dry mix-ins, to taste (optional, e.g. chocolate chips, chopped nuts, etc.)
  • 45g melted butter (3 tablespoons), cooled slightly
  • 100g sugar (½ cup)
  • 50g egg (1 large) at room temperature
  • 120g plain unstrained yogurt (½ cup) at room temperature
  • Wet ingredient flavorings*, to taste (e.g., extracts like vanilla or almond, flower waters, or citrus zest)
  • Optional: glazes and/or decorations (see the 6 examples linked to above this recipe for recipes and inspiration)

Instructions

  1. Set up a safe fry station on your stove or a dedicated deep-fryer. Make sure it cannot be knocked over. Set over medium-low heat so it can heat gradually while you prep the donuts, and set up a deep fry thermometer. Keep a close eye on it, and aim for it to reach 350°F [180°C] by the time you’re ready to fry. If it heats too quickly, reduce the heat to low or turn off for a few moments until you’re ready.
  2. In a medium mixing bowl, combine the flour, dry ingredient flavorings, salt, baking powder, and mix-ins (if using). Whisk or sift together until completely lump free.
  3. In a separate mixing bowl, combine the melted butter, sugar, egg, yogurt, and wet ingredient flavorings. Whisk together until completely smooth.
  4. Scrape the wet ingredients into the dry ingredients, then mix together just until combined (do not overmix).
  5. Dust a clean counter with more flour, then scrape the dough onto the dusted counter. Sprinkle on a little more flour, then gently pat it into an oval.** Take care to make sure it’s well dusted both underneath and on top. Roll it out to ½-inch thick, redusting above and below to keep it from sticking as you work.
  6. Stamp out as many donuts as you can using a donut stamp or set of pastry rings. Collect the scraps***, re-roll, and stamp out more donuts.
  7. Once the oil has heated, fry the donuts. They should take about 2 minutes per side at 350°F [180°C], and should be deeply brown (but not burnt) and cooked through. Remove to a paper-towel-lined plate or cooling-rack-lined sheet pan to cool.
  8. Glaze and decorate (if using).

Notes

* You don’t need to use both dry and wet ingredient flavorings, but you should at least use one or the other.

** Do not knead the dough or incorporate the flour into it, or it will turn out dry—just pat it into shape.

*** To get a really good re-roll out of the scraps, try not to let any flour touch the freshly stamped edges, and compress them together so the bare edges mush together with other bare edges. Try not to introduce a lot of new flour. Feel free to fry the donut holes, or re-roll them with the scraps (if you fry them, they will take about 30 seconds less per side).

find us on instagram and let us know what you made!

Filed Under: breakfast, every recipe, sweets Tagged With: donuts, icing, yogurt

  • « Go to Previous Page
  • Page 1
  • Interim pages omitted …
  • Page 56
  • Page 57
  • Page 58
  • Page 59
  • Page 60
  • Interim pages omitted …
  • Page 183
  • Go to Next Page »

Primary Sidebar

Kathryn Pauline smiling

Welcome! I’m Kathryn Pauline, cookbook author, recipe developer, and photographer.

Footer

read our privacy policy

© 2017 - 2026 Kathryn Pauline