• Skip to primary navigation
  • Skip to main content
  • Skip to primary sidebar
  • Skip to footer
Cardamom and Tea
  • Blog
  • Recipes
  • About
  • Cookbooks
    • Piecemeal
    • A Dish for All Seasons (my first cookbook)

homemade yogurt | mesta

February 26, 2017 by Kathryn Pauline 9 Comments

There’s something precious about the way mesta (homemade yogurt) is made. You slowly simmer milk, swaddle it in a blanket right before going to sleep, and then you wake up to the most perfect breakfast. But for all its preciousness, the process is not the least bit fussy. So if you’ve never fermented anything at home, yogurt is a nice first project. It doesn’t take very long, it doesn’t require any special equipment, it’s very hard to mess up, and the results are so much more delicious than anything you can buy in a store. All you need is milk and a little bit of leftover yogurt, which we call the khumsah.

If you have a lot of friends or relatives who make their own yogurt, you should be able to track down some real khumsah, left over from the last batch of homemade yogurt. The khumsah gets passed on from friend to friend and generation to generation, so that it eventually becomes impossible to pinpoint where or when it started. But if you don’t have a homemade yogurt fanatic friend, you can always start your first batch off with a scoop of store-bought yogurt. After you make the first batch, just be sure to set a little bit of yogurt aside to make more—you’ll be on a roll and soon your friends will start showing up at your house, asking you if they can borrow a scoop.

If you’ve never tried plain homemade yogurt, you don’t know what you’ve been missing. But there are also a lot of tasty ways to dress up this humble bowl. Try out some of these serving suggestions (crowd-sourced from my friends and family), whether you’ve got homemade or store-bought:

Sweet:
Rosewater, pistachio, and honey (pictured above)
Figs, dates, honey, and cinnamon
Slivered almonds and a dollop of jam or honey
Apple, pomegranate, and slivered almonds

Savory:
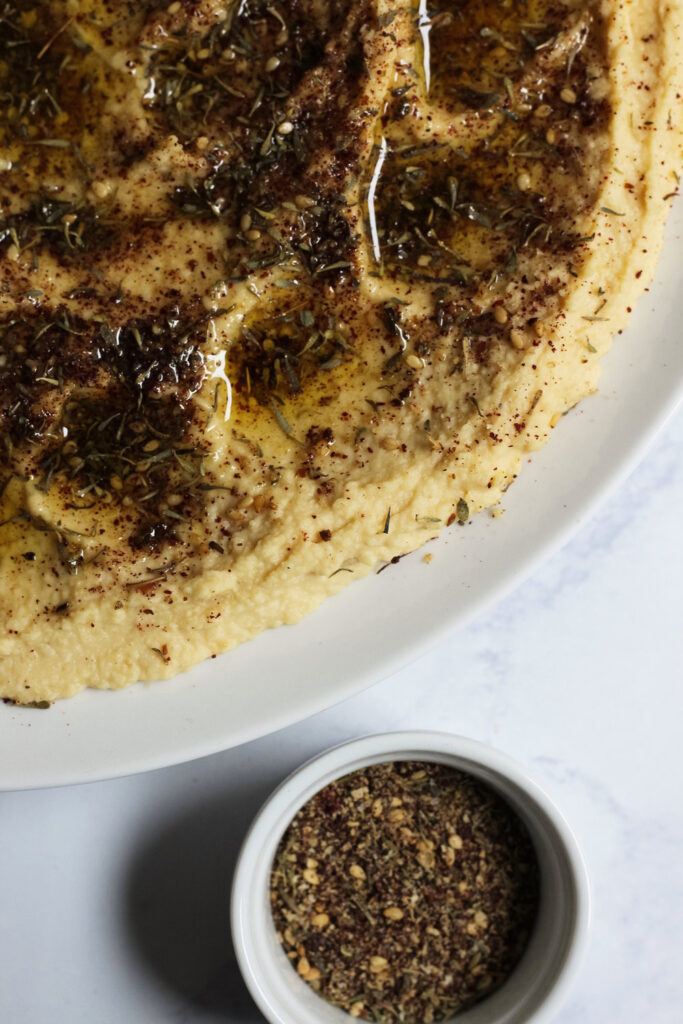
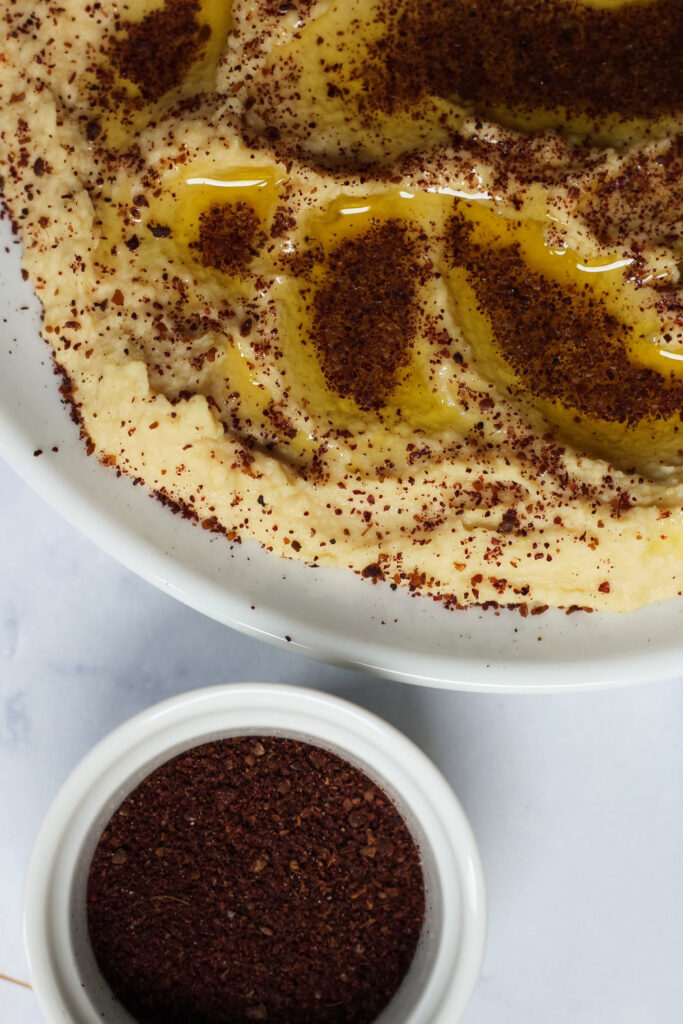
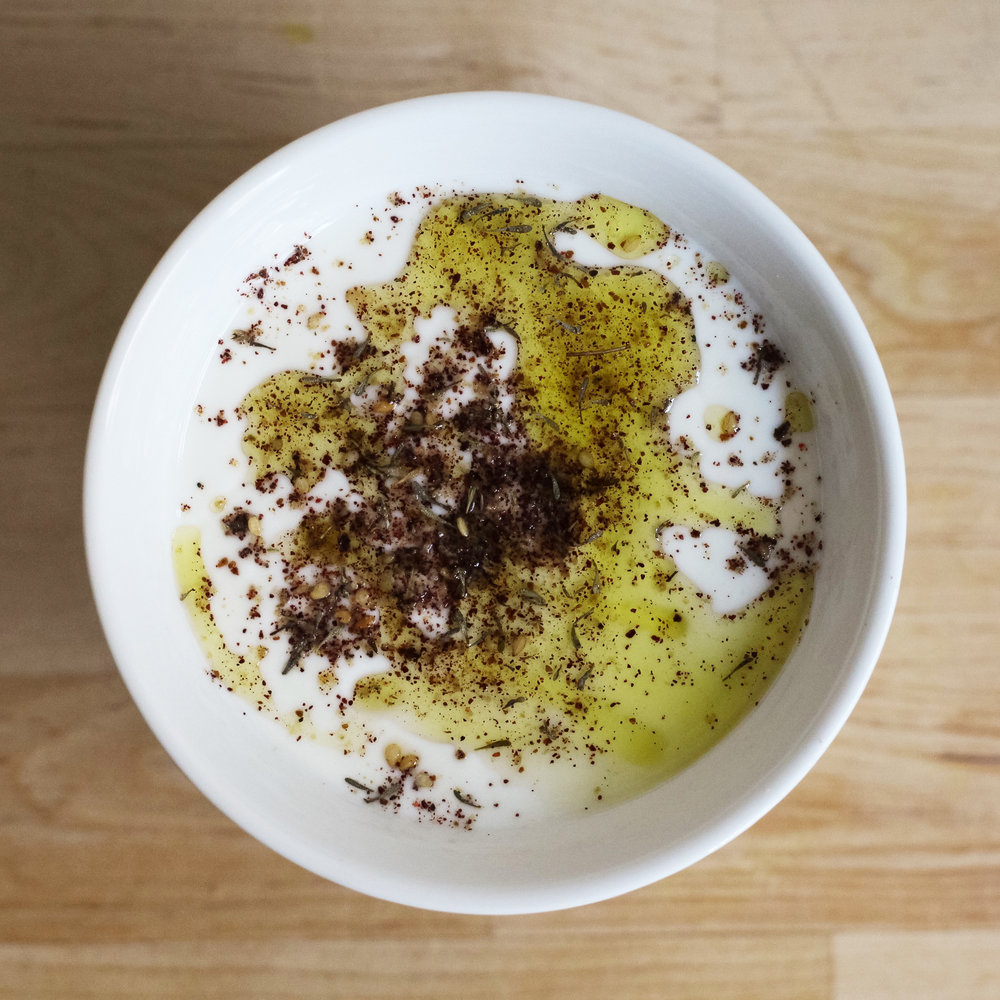
Za’atar and extra virgin olive oil (above left)
Oregano, garlic powder, and extra virgin olive oil (above right, pictured with Cuban oregano)
Mint or dill, cucumber, garlic powder (a variety of jajik)
+ Add some pita chips or prakhe (stuffed grape leaves) to any savory option

Print

homemade yogurt | mesta

Print Recipe

5 Stars 4 Stars 3 Stars 2 Stars 1 Star

No reviews

  • Prep Time: 35 minutes
  • Total Time: 8 1/2 to 24 hours
  • Yield: 4 quarts, unstrained

Ingredients

  • 1 gallon whole milk
  • 1/4 cup yogurt with live active cultures (also known as khumsah) *

Instructions

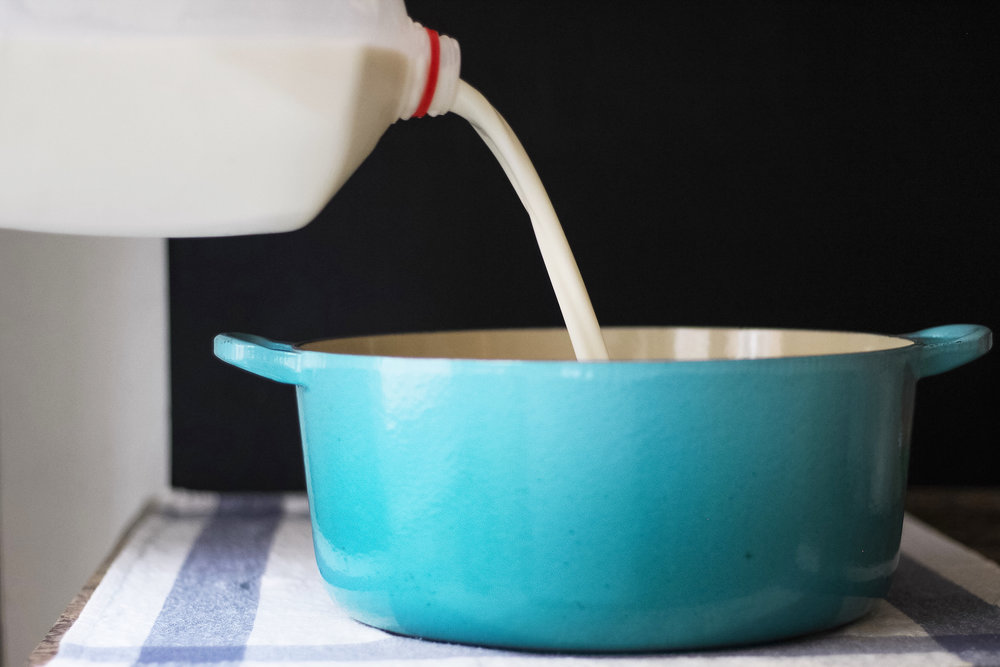
  1. Heat the milk very carefully over medium-low heat so that it doesn’t scorch or boil over. Stir it every few minutes and keep a very close eye on it.
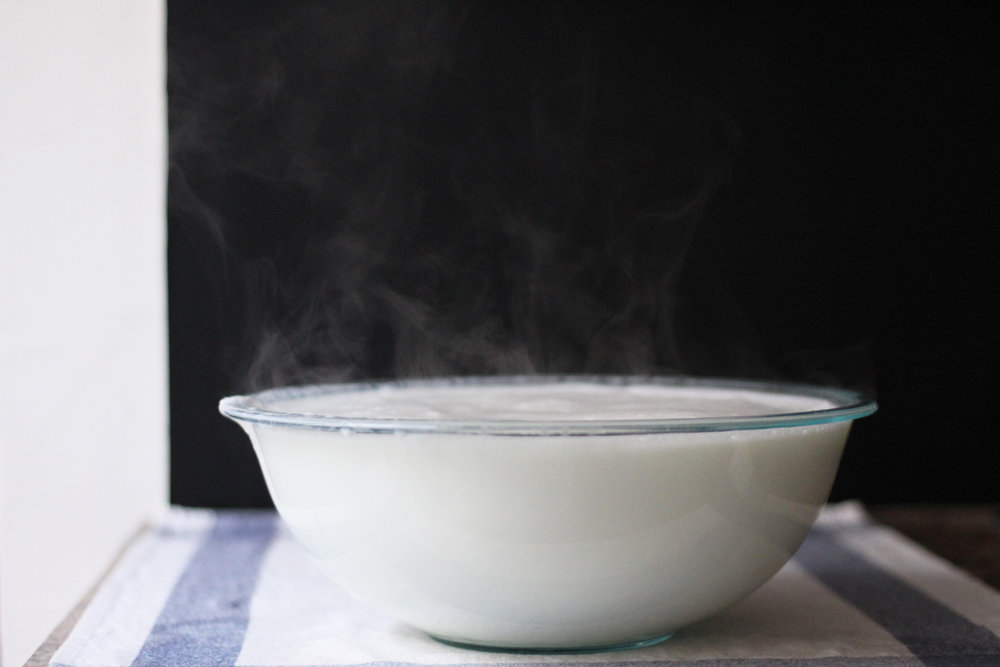
  2. As soon as it starts to simmer, take it off the heat and pour it into the container you’re going to store it in (either glass or ceramic). Or you can leave it in the same container you heated it in, as long as it’s a non-reactive metal and you have avoided scorching the bottom.
  3. Let it cool down a bit, checking periodically to make sure the milk doesn’t cool down too much. It should still feel warm, but should be cool enough that you can stick your finger in the milk without burning yourself. Once it’s at this point, add the khumsah to a small bowl and combine it with 1/4 c of the warm milk.
  4. Add this mixture back into the container, mix it together, and cover it with a loose-fitting lid or plastic wrap.
  5. Wrap the whole thing in a blanket. This will keep it insulated so that it keeps some of the residual heat from the milk.
  6. Store the blanketed container in the oven and put a note on the control board so no one turns it on while your yogurt is inside.
  7. Let it ferment anywhere between 8 to 24 hours, depending on how sour you want it to be. It will become more sour as it ages. 12 hours is usually perfect.
  8. Once you’re happy with the consistency, put it in the refrigerator to let it chill.
  9. Once it’s chilled, put a couple of layers of undyed paper towels or clean tea towels (washed without dryer sheets, fabric softener, or fragrance) on top to soak up some of the whey. Discard after they absorb as much liquid as they’ll hold.
  10. Enjoy the mesta as is, or hang it with cheesecloth to turn it into Greek yogurt (hung for about 4 hours) or labneh (hung for about 12 hours).

Notes

* The khumsah can be from a homemade batch of yogurt, or a scoop of store-bought yogurt.

find us on instagram and let us know what you made!

Filed Under: breakfast, every recipe, family recipes, gluten free, lunch, vegetarian Tagged With: labneh, middle eastern, rosewater, yogurt, za'atar

zesty lemon hummus

February 23, 2017 by Kathryn Pauline 10 Comments

Hummus is sometimes dense, cakey, clumpy, heavy, gritty, and bland—a dreadful combination. You can hold a drab bowl of hummus upside down, like a Dairy Queen blizzard, and the kneaded brick of ground-up chickpeas will stay in the bowl, slowly growing cracks across the dry surface as it hovers, completely forgotten, over the party appetizer table. My family makes hummus for just about every party we go to or host, and there’s never any left at the end of the night. There are a few easy tricks to making really good hummus.

lemons

I use a lot more lemon juice than you might think necessary. Most recipes call for just a couple tablespoons, which leads to a thick, bland, gritty paste instead of a zesty, tangy, smooth spread. Since it’s served with pita bread or lawasha, hummus has got to be super flavorful to stand out.

I also use a bit more tahini than you might think. The tahini balances the tartness of the lemons and gives the chickpeas a lot more earthiness. A good amount of tahini and lemon juice make this hummus very dynamic and balanced.

I don’t use a ton of garlic, just a medium clove, maybe two if you really love garlic. Extra garlic is not the way to make your hummus more flavorful. You don’t want it to actually taste garlicky, but to have a subtle note of garlic.

I particularly love the way my mother and grandmother taught me to present hummus, which is both beautiful and functional. Hummus is often served in a bowl with some oil drizzled over it and some spices, but that’s not the most efficient way to get a good amount of spices and olive oil with every bite. Instead, we spread it somewhat thinly over a plate or shallow bowl (about 1/2 to 1 inch thick), then dip the spoon over the surface to create indentations, which we fill with extra virgin olive oil and a dusting of spices. That way every bite is covered with the toppings. (See the above video for step-by-step instructions).

And speaking of toppings, there are so many tasty spices you can top your hummus with. There’s za’atar for herby earthiness, paprika for piquancy, and sumac for extra tartness. If you don’t have za’atar around, you can simply add a mixture of thyme, sumac, and sesame seeds. You can also sprinkle it with cayenne pepper, you can fill the center with red peppers, olives, capers, or preserved lemons—there are endless possibilities.

Print

zesty lemon hummus

Print Recipe

5 Stars 4 Stars 3 Stars 2 Stars 1 Star

5 from 2 reviews

  • Prep Time: 15 minutes
  • Total Time: 15 minutes
  • Yield: 2 large plates of hummus

Ingredients

  • 1 or 2 medium cloves of garlic (go easy on the garlic!)
  • 2 15.5 ounce cans chickpeas, rinsed and drained *
  • 1/2 cup + 2 tablespoons fresh lemon juice (about 2 to 3 lemons) **
  • 1/2 cup tahini
  • Salt to taste ***
  • Extra virgin olive oil for drizzling
  • Spices or herbs for topping (for instance, sumac, za’atar, paprika, cayenne pepper)
  • For serving: pita bread (either store-bought or homemade), or whatever else you’d like to use for dipping (carrots, cucumbers, etc.)

Instructions

  1. Chop or mash the garlic clove in a food processor or mortar and pestle.
  2. Add the chickpeas and grind them until they look like a gritty paste.
  3. Add the lemon juice and continue to process for a minute or two, until the hummus becomes smooth.
  4. Add the tahini and process until combined.
  5. Add a little salt, to taste, depending on how well the chickpeas have already been seasoned.
  6. Spread half of the hummus in a thin, even layer on a plate (about 1/2 – 3/4 inch thick). Drag the back of a spoon across the surface, dipping the spoon into the hummus to create little pockets as you go. Moving in a spiral over the surface works well (see the video above this recipe).
  7. Use the rest of the hummus for another plate, or keep it in the refrigerator or freezer for another time.
  8. Drizzle with extra virgin olive oil and dust with herbs or spices.

Notes

* If you’d prefer to use dried chickpeas, check out my other hummus recipe for instructions.

** This hummus recipe is very lemony and vibrant. If you like less lemon, feel free to replace some amount of the lemon juice with an equal amount of water. For instance, replacing 2 tablespoons of lemon juice with an equal amount of water results in a less zesty, but still very tasty, hummus. Dusting it with something less sour than za’atar or sumac, like paprika, also keeps it on the mellow side.

*** Check the sodium content of the chickpeas you’re using and taste before seasoning.

find us on instagram and let us know what you made!

Filed Under: appetizers, dairy free, dinner, every recipe, family recipes, gluten free, lunch, meze, side dishes, vegan, vegetarian Tagged With: beans, chickpeas, hummus, middle eastern, sumac, tahini, za'atar

  • « Go to Previous Page
  • Page 1
  • Interim pages omitted …
  • Page 180
  • Page 181
  • Page 182
  • Page 183
  • Go to Next Page »

Primary Sidebar

Kathryn Pauline smiling

Welcome! I’m Kathryn Pauline, cookbook author, recipe developer, and photographer.

What’s new? đŸ¥•

cauliflower frying

Fried Cauliflower

edible cookie dough

A Better Way to Make Edible Cookie Dough

steamed kale

Steamed Kale (without a steamer)

steamed cauliflower

Steamed Cauliflower

strawberry rhubarb jam in a jar with a spoon photographed from overhead

Strawberry Rhubarb Jam

rhubarb cookies

Rhubarb Cookies

Footer

read our privacy policy

© 2017 - 2026 Kathryn Pauline