• Skip to primary navigation
  • Skip to main content
  • Skip to primary sidebar
  • Skip to footer
Cardamom and Tea
  • Blog
  • Recipes
  • About
  • Subscribe
  • Cookbooks
    • Piecemeal
    • A Dish for All Seasons

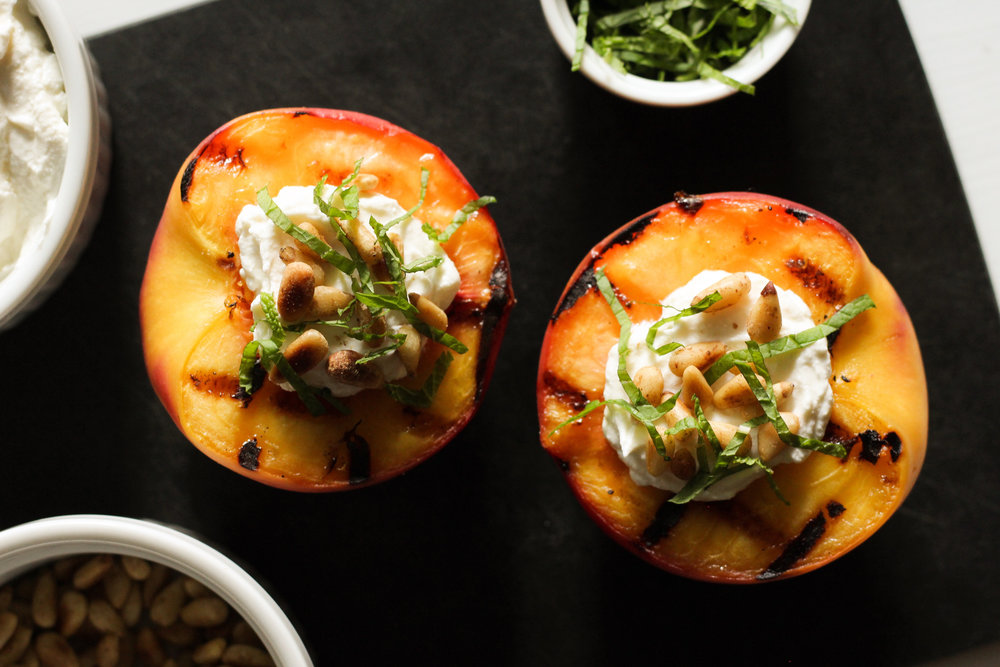
grilled peaches with labneh, mint, and pine nuts

September 13, 2017 by Kathryn Pauline 2 Comments

I find myself spending way too much time trying to decide whether something is a passing fad or a game-changing new concept with serious staying power. I mean, it’s such a fun thing to think about! Because when you’re really in it, when you absolutely love a particular new thing, it’s hard to see outside of that infatuation.There are lots of food trends that everyone—both proponents and haters alike—would agree will probably look a little dated in a couple months or years (ahem… unicorn smoothie bowls), but I’m constantly speculating about all of my favorite food sensations, holding out hope that they’ll stay chic forever, completely unwilling to give them up yet. This brings me to grilled peaches, which (at least in my kitchen) are absolutely here to stay.

I first fell in love with them in 2012, the first time Tracy Benjamin posted about them, and I’ve been eating them every summer since. In all that time, I’ve experimented a lot with flavor pairings and grilling techniques, and I’ve come up with a recipe for my favorite way to prepare them.
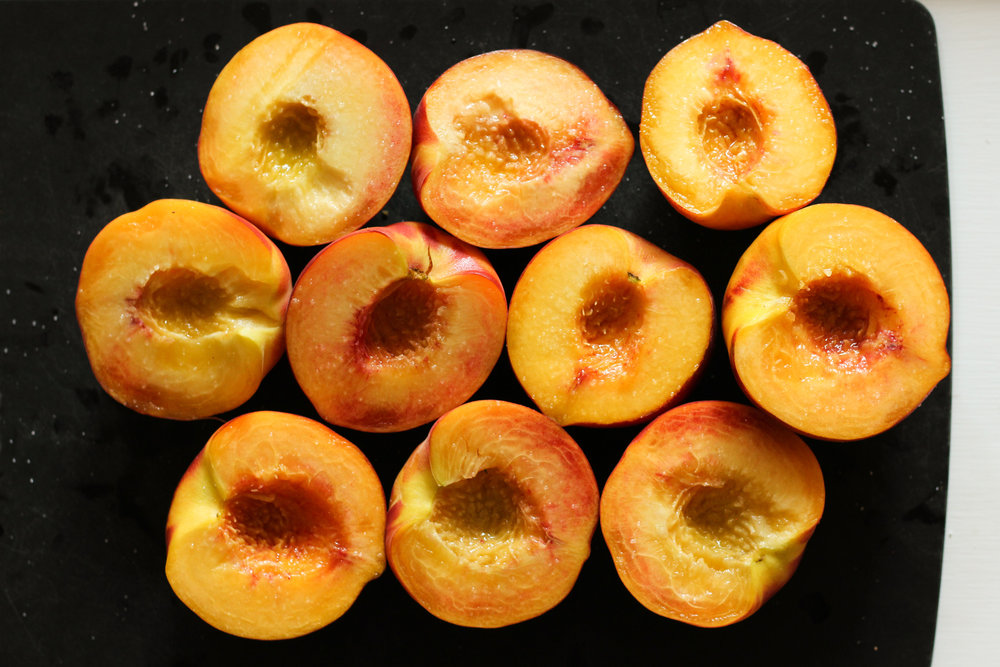
how to grill peaches perfectly

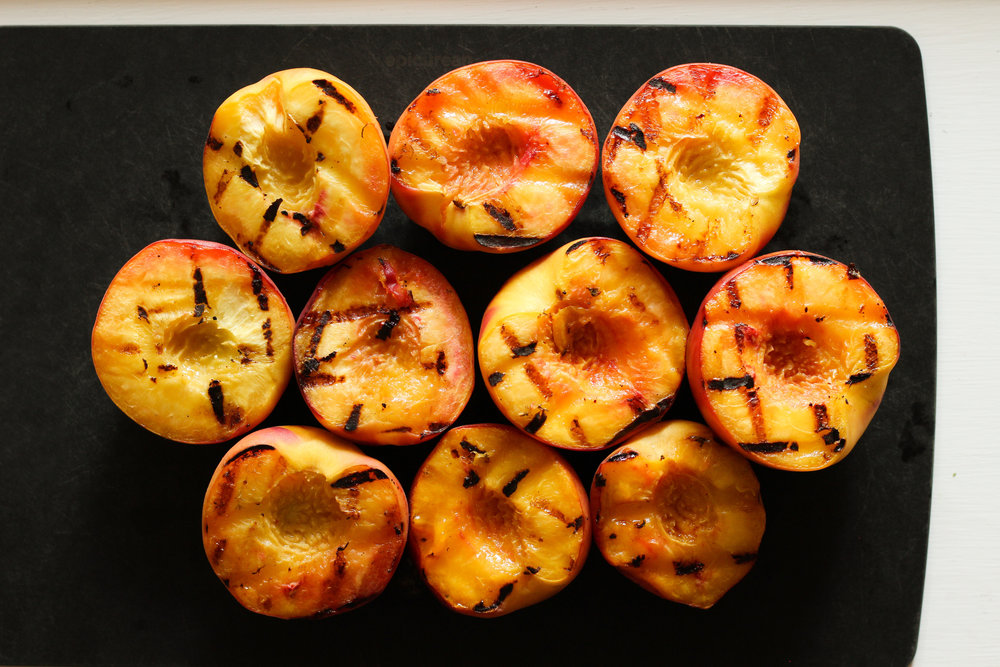
The goal of grilling peaches is to sear them enough that they caramelize, but not so much that they fall apart and turn to mush. It might sound like a challenge, but it’s super easy. And if you follow this advice, you don’t even need a recipe (although I’ve written one at the end of this post).

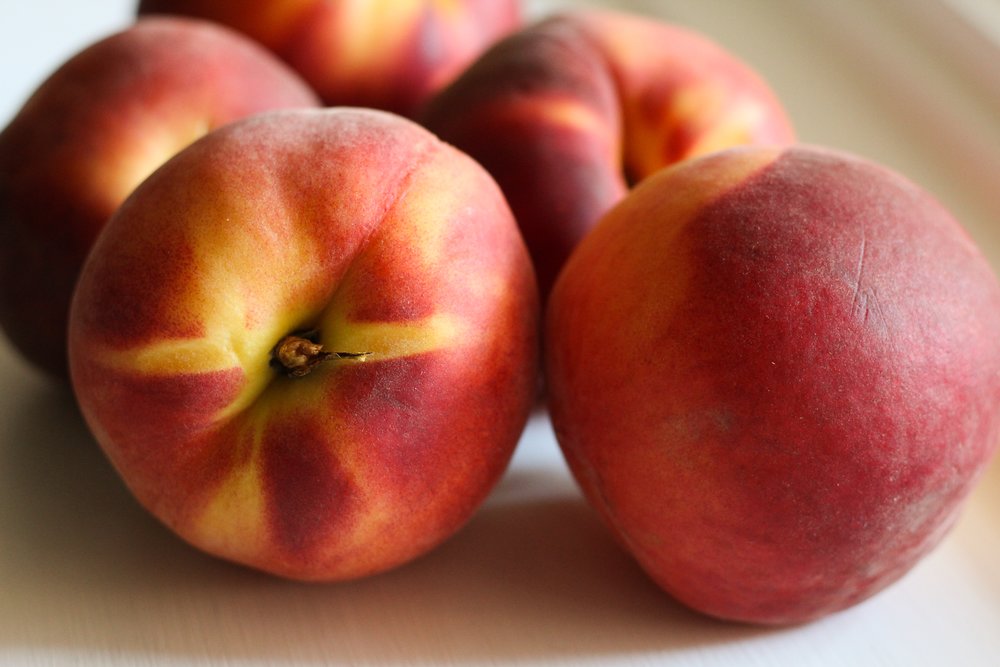
Every grilled peach recipe out there will (rightfully!) tell you to preheat the grill until it’s extremely hot, and to brush both the grates and peaches with oil. Preheating the grill ensures that you can char the outside before the inside turns to mush, and oiling adequately means that less of the beautiful caramelization will be left behind, stuck to the grates. Also make sure you choose a peach that’s ripe (about one day away from the perfect snacking ripeness), but not extremely ripe. It shouldn’t be hard as a rock, but it should be a bit on the firm side.

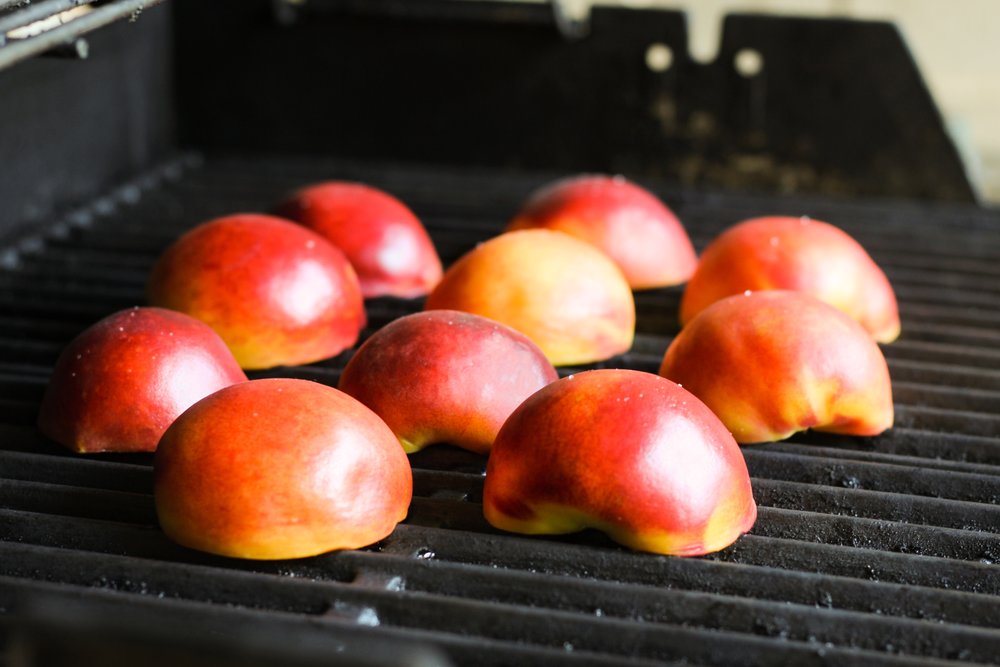
I totally agree with all of these guidelines, but I do one extra thing that I think makes a big difference: I only grill the cut-side of the peach. My reason for doing so is simple: I’ve noticed that grilling the skin-side adds just a marginal amount of grilled flavor, but it makes the peaches significantly mushier, and it usually makes the skins slough off once they make it to the plate. Plus, I love the variety of different flavors and textures you get when you just grill one side. There’s raw, caramelized, and everything in between.
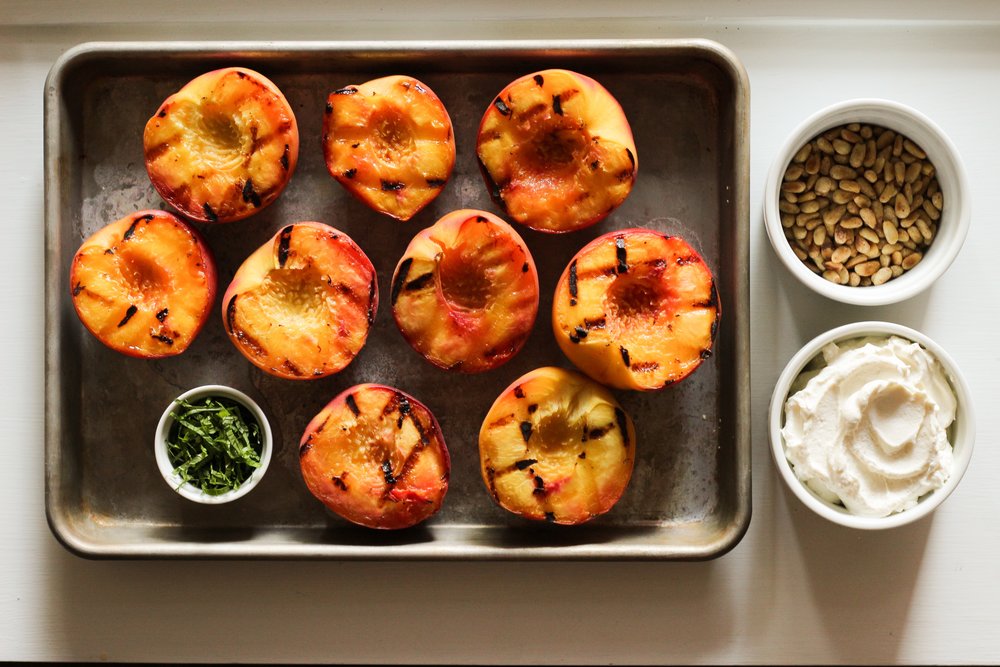
grilled peach toppings

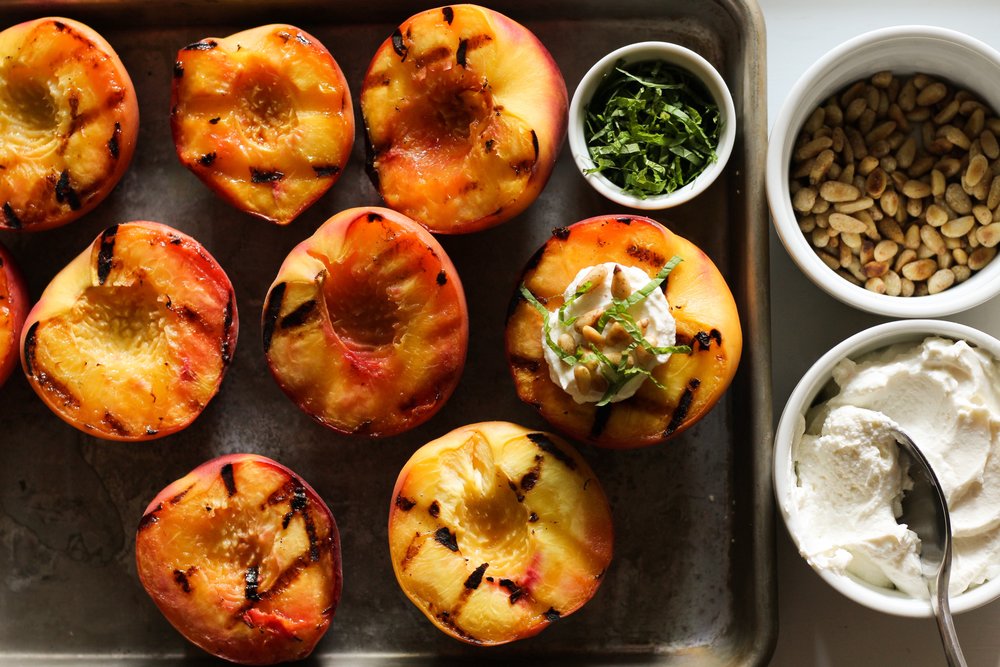
And speaking of flavors, labneh, pine nuts, and mint are my favorite grilled peach toppings because they’re an incredibly dynamic combination. Or less pretentiously, the combination is super confusing, but in a fun way! Allow me to way-over-complicate the idea of sweet and savory:

When you look at each ingredient on its own, labneh (or yogurt more generally) and mint have very neutral flavor profiles. Pine nuts and peaches, on the other hand, are at opposite ends of the savory and sweet spectrum; they can both work well with sweet or savory ingredients, but pine nuts are distinctly savory, and peaches are no doubt sweet. So obviously when you put all four ingredients together, you’ve got something that’s both savory and sweet.

But here’s the big question: what is going on with the two neutral flavors, labneh and mint? Are they pulled toward sweet or savory, or do they just stay neutral? When you look at each of the flavors together in groups of two, you’ll notice that each pair works together differently, depending on the context.

Labneh is savory when it’s with pine nuts, but sweet with peaches. Likewise, mint is savory with pine nuts, and sweet with peaches. But somehow when you put labneh and mint together, they’re definitively savory. Labneh-mint and peach-mint are perhaps the most familiar pairings, but each pulls mint in a completely different direction, and both directions are present here in this recipe, which creates a magical tension.

But why overthink it? Just enjoy the last few peaches of the season, before the pumpkins, ornamental gourds, and bags of Halloween candy take their place.
Print

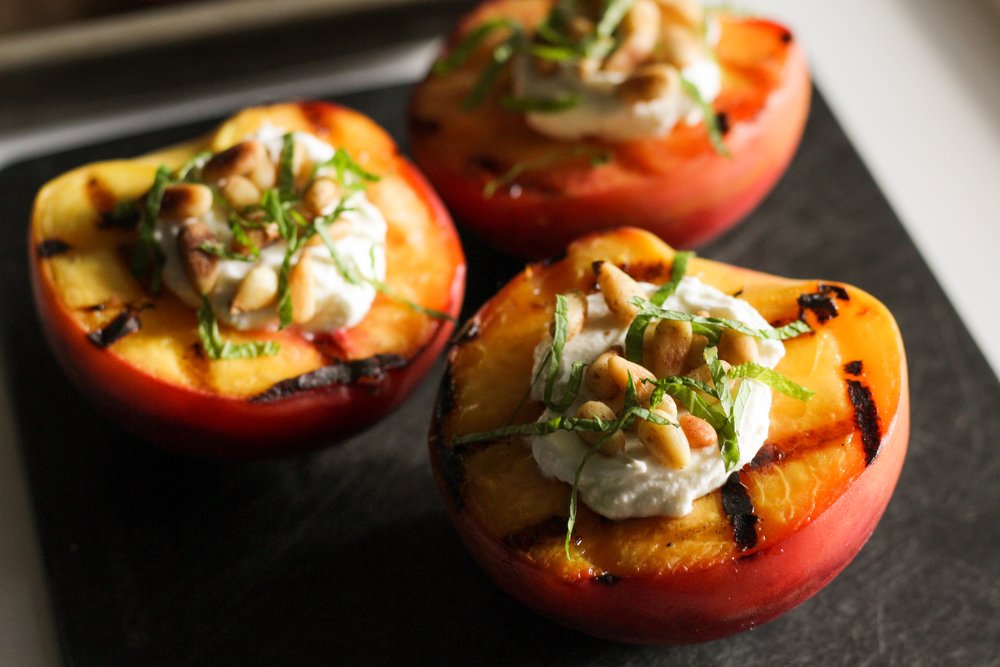
grilled peaches with labneh, mint, and pine nuts

Print Recipe

5 Stars 4 Stars 3 Stars 2 Stars 1 Star

No reviews

  • Total Time: 20 minutes
  • Yield: 10 stuffed peach halves

Ingredients

  • Olive oil to coat the peaches and the grill
  • 5 peaches *
  • Salt, to taste
  • 2/3 cup labneh **
  • 2 heaping tablespoons lightly toasted pine nuts ***
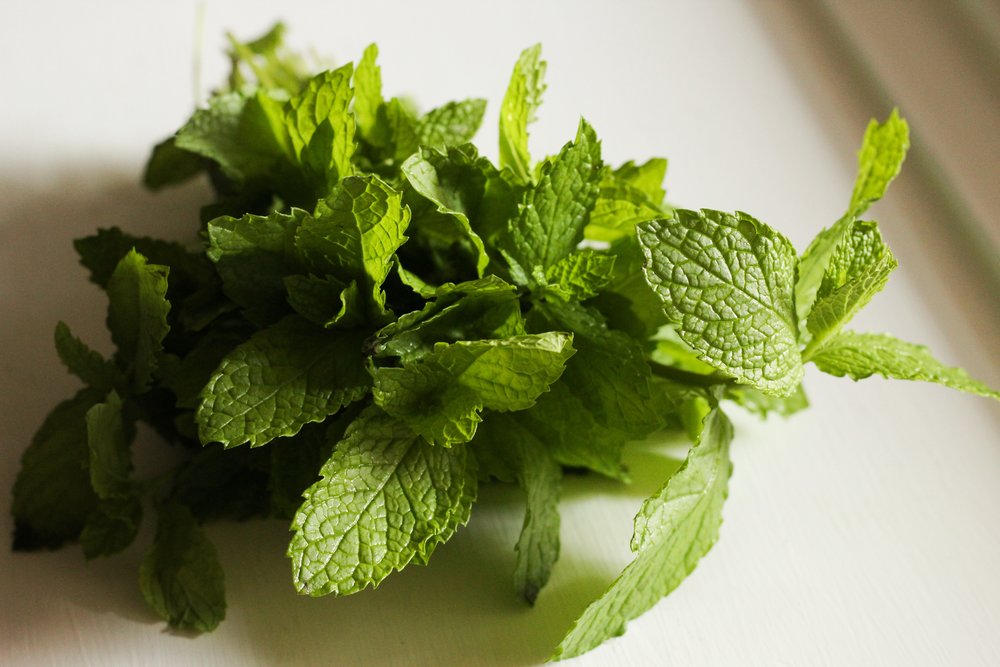
  • About 15 large mint leaves, chiffonade or chopped (from a few sprigs)

Instructions

  1. Oil the grill grates and preheat the grill over the highest possible heat. Close the grill while it preheats and wait for the grates to get very hot.
  2. Split the peaches by rolling a knife along the side and then twisting the halves to separate.
  3. Remove the pits without using a knife: if the peaches are on the ripe side, you will be able to remove the pit easily with your hands. If the pit is difficult to remove, work a thin spoon (like a measuring spoon) between the pointy part of the pit and the flesh of the peach. Once it’s under by a little bit, use the tip of the spoon as a lever to pry the pit out.
  4. Coat the cut sides of the peaches in olive oil and sprinkle with a little salt, to taste.
  5. Place the peaches cut-side-down on the hot grill. Let them sit undisturbed for about 2 to 3 minutes with the grill open. **** Inspect the peaches: if they are getting too soft, remove them right away. If not, use a spatula to turn the peaches 90 degrees to give them criss-crossed grill marks and cook for another 3 minutes. Don’t flip and cook the round side.
  6. Move the peach halves to a serving plate. Place about 1 tablespoon of labneh in the center of each peach half. Top each peach half with about 10 to 15 pine nuts, followed by a pinch of the mint chiffonade. If you’d like, finish with a little more salt.

Notes

* The peaches must be slightly ripe, but not too soft. If you have very soft, ripe peaches and still want to make this recipe, I recommend skipping the grilling part and serving everything fresh (it’s still really good). Just split the peaches, pit them, salt them, and stuff them. Avoid super crunchy, rock hard peaches altogether (or wait a few days for them to ripen before slicing them open).

** If you can’t find labneh, you can make your own, or feel free to substitute whole milk Greek yogurt, which isn’t the exact same thing, but will also be very tasty.

*** To make this more budget-friendly, feel free to use toasted almonds. The finished product will be different, but equally tasty.

**** If you have an extremely powerful grill, you should babysit them a bit more.

find us on instagram and let us know what you made!

Filed Under: appetizers, breakfast, dinner, every recipe, gluten free, lunch, meze, side dishes, sweets, vegetarian Tagged With: grilling, herbs, labneh, mint, nuts, peach, summer

kadeh | roux-stuffed brioche

September 6, 2017 by Kathryn Pauline 14 Comments

When I was a kid, we would often go to Andersonville to see my great grandfather, his sister, and my great uncle’s family. Umtie Yasmi would make a big pot of chai and thaw some kadeh. She would cut it into a beautiful trapezoidal design.

The freezer was always packed to the brim with loaves of kadeh, some with a middle layer of martookhah, or golden-brown roux, and some without. I was thinking about these memories recently, so I asked my Aunt Masy to teach me how to bake kadeh. And I’m so glad I did, because this is the kadeh of my childhood in all its buttery glory.

The most important thing in learning to bake like your elders is making sure you record the butter carefully. Because there is always more butter than you could ever imagine. Don’t let the adorable granny demeanor fool you: they will lie about this to protect you from knowing how much butter you’ve really eaten in your life. So instead of asking Masy how to make kadeh, I watched her make it and took careful notes. And I’m so glad I did, because I would have never guessed two and a quarter sticks.

But if you’re looking for a way to help two and a quarter sticks of butter become their best selves, kadeh is the answer. It is a love letter to butter. The dough is a rich brioche, with so much dairy fat that you don’t use flour to roll it out. There’s just enough flour to hold everything together and to give the yeast something to nosh.

As if a rich-brioche dough weren’t enough, the inside gets filled with a buttery roux, which might sound strange if you’ve only ever encountered roux when making béchamel or gumbo. But if you’ve ever licked the spoon early on while making mac and cheese, I’m sure you’ve thought to yourself, “wow, this would make a really good sandwich.” And I’m here to tell you that you can totally make a roux sandwich, and it’s just as delicious as you’ve secretly dreamed.

There’s not much more to say about kadeh, since it speaks for itself. It goes great with chai, as a not-too-sweet dessert. And my mom loves to split hers open and spread some grape jelly over the martookhah.

Kadeh is particularly beautiful when you cut it the traditional way. Just slice a few chunky strips horizontally, and then cut each strip in half on a bit of a diagonal to make little trapezoids.

It’s great the first day, but it stales just like any homemade bread. So you should store it in the freezer and then reheat before serving. Kadeh freezes beautifully, especially before slicing, so don’t feel like you’re losing anything by doing so.

Print

kadeh | roux-stuffed brioche

Print Recipe

5 Stars 4 Stars 3 Stars 2 Stars 1 Star

5 from 1 review

  • Prep Time: 1 hour
  • Total Time: 4 hours 15 minutes
  • Yield: 2 loaves (cut into about 18 to 20 pieces total)

Ingredients

For the dough starter (khmira)
1 1/2 teaspoons yeast
1/2 teaspoon sugar
1 1/2 teaspoons vegetable oil
1/4 cup 115° F water

For the dough (leasha)
15 ounces flour (about 3 cups unsifted, 3 3/4 cups sifted)
3/4 teaspoon salt (add an extra 1/4 teaspoon if you prefer saltier kadeh)
1/4 cup sugar
9 tablespoons unsalted butter, melted (1 stick and 1 tablespoon)
1/4 cup + 3 T milk (115° F) (plus more, if necessary)

For the roux (martookhah):
10 tablespoons (divided into 1 stick + 2 tablespoons) unsalted butter
1 tablespoon sugar
1/4 teaspoon salt
3/4 cup flour

To assemble the loaves:
Cooled martookhah (above)
2 risen dough balls (above)
1 egg beaten with 2 teaspoons water
2 teaspoons sesame seeds

Instructions

  1. Make the starter: Combine the yeast, sugar, vegetable oil, and water and mix to dissolve.
  2. Cover and let it sit for 15 to 20 minutes, until it’s very foamy.
  3. Make the dough: Sift together the flour, salt, and sugar.
  4. Make a well in the center of the flour mixture, add the butter, 1/4 cup milk, and starter/khmira, and stir together to combine. As it starts to come together, add one more tablespoon of milk at a time until it comes together into a soft, flexible dough. Knead by pulling the sides of the dough into the center of the bowl. If it looks a little dry, add another tablespoon of milk, let it sit for 5 minutes, and then continue kneading until it comes together into a pliant dough. Knead until it’s elastic and smooth.
  5. Cover the dough and let it rise for 1 hour and 15 minutes while you make the roux/martookhah.
  6. Make the roux/martookhah: Melt the stick of butter with the sugar and salt in a small saucepan over medium heat.
  7. As soon as the bubbling becomes a little quieter (about 3 minutes after the butter melts), immediately add the flour and whisk continuously for about 5 to 10 minutes.
  8. The martookhah might be clumpy in the beginning, but it should thin out after a few minutes of cooking. Once it thins out, determine whether to add the extra 1 or 2 tablespoons of butter. The martookhah should thin-out into a slow-flowing viscous liquid that is thick enough that you can leave a trail with a spoon. If it is clumping together, it needs more butter. Add the additional one or two more tablespoons of butter if you need to, and continue cooking.
  9. The martookhah is ready once it is golden-brown (according to your preference); make sure you pull it off the heat when it’s about a shade lighter than you’d like it to be; it will continue to cook for another minute or two.
  10. Let the martookhah cool while the dough finishes rising.
  11. Assemble and bake the loaves: Once the dough has risen, divide it into two equal pieces and shape each piece into a smooth ball. Let the dough balls rest, covered with plastic wrap, for 30 minutes.
  12. Once the dough balls have rested for 30 minutes, preheat the oven to 350° F.
  13. Roll each ball of dough out into a circle with a thickness between 1/8 and 1/4 inch. ** Try to make the circles as symmetrical as possible by lifting the dough and rotating it as you work, and let them rest for about 3 to 5 minutes if they’re really stretchy and difficult to roll out.
  14. Move the rolled-out discs to a sheet pan.
  15. Divide the cooled martookhah evenly between the circles of dough. Smooth it out so that the martookhah is covering half of each disc, with a margin of about 1/4 to 1/2 inch around the edges. Brush a light layer of the egg wash along the border around the martookhah.
  16. Fold the dough over like you’re making a calzone and press down around the edges to start to seal them shut.
  17. Finish sealing the edges either by crimping the dough with the back of a fork or your fingers, or by folding it over on itself as you work your way down the edge.
  18. Dock the dough with a fork. Pierce all the way through to the bottom and over the entire surface of the filled part of the dough. After you fully dock the dough, gently pat the surface to make sure that all the air bubbles have been pressed out.
  19. Brush the surface of each loaf with a light layer of eggwash.
  20. Sprinkle each loaf with a teaspoon of sesame seeds.
  21. Let the loaves sit for 10 minutes.
  22. Bake for about 25 to 30 minutes, until the surfaces are golden brown and the loaves have puffed up and cooked through.
  23. Let the loaves cool for at least 30 minutes before slicing. To cut traditionally, follow the pattern pictured above. First slice it into about 5 pieces vertically, and then cut each vertical piece in half diagonally, so that you end up with a bunch of trapezoids (and a few triangles toward the ends). Or you can cut it up however you’d like, if you don’t want to go the traditional route. Store at room temperature for up to 12 hours, or the freezer for up to 3 months.

Notes

* If you overcorrect by adding too much butter, you’ll see a lot of butter pooling on the surface. Simply catch the problem toward the beginning, and add 1 or 2 more tablespoons of flour. The measured amounts in the ingredients list are tested, so you should be fine with just 10 tablespoons of butter and 3/4 cup of flour. But always trust your common sense more than ingredient quantities.

** if you’ve kneaded the dough into a smooth ball, you should not need any flour to do this, since it will be both buttery and glutinous.

find us on instagram and let us know what you made!

Filed Under: bread, breakfast, every recipe, family recipes, sweets, vegetarian Tagged With: middle eastern, sesame, 💎hidden gems💎

  • « Go to Previous Page
  • Page 1
  • Interim pages omitted …
  • Page 160
  • Page 161
  • Page 162
  • Page 163
  • Page 164
  • Interim pages omitted …
  • Page 190
  • Go to Next Page »

Primary Sidebar

Kathryn Pauline smiling

Welcome! I’m Kathryn Pauline, cookbook author, recipe developer, and photographer.

💌 Sign up for my newsletter!

Free produce guides and cooking techniques for all!

Paid subscribers receive a weekly dinner menu with a grocery list, shortcuts, and prep list.

Subscribe

🥕 What’s new?

green salad with tomatoes

A Surprisingly Flavorful Green Salad

Maple Syrup Banana Bread

Maple Syrup Banana Bread

one-banana banana bread

One-banana banana bread

lemon hummus

Lemony Hummus

roasted okra

Roasted Okra (slime-free)

Peanut Butter Banana Bread

Peanut Butter Banana Bread

Footer

read our privacy policy

© 2017 - 2026 Kathryn Pauline