• Skip to primary navigation
  • Skip to main content
  • Skip to primary sidebar
  • Skip to footer
Cardamom and Tea
  • Blog
  • Recipes
  • About
  • Cookbooks
    • Piecemeal
    • A Dish for All Seasons (my first cookbook)

watermelon jerusalem salad

July 26, 2017 by Kathryn Pauline 6 Comments

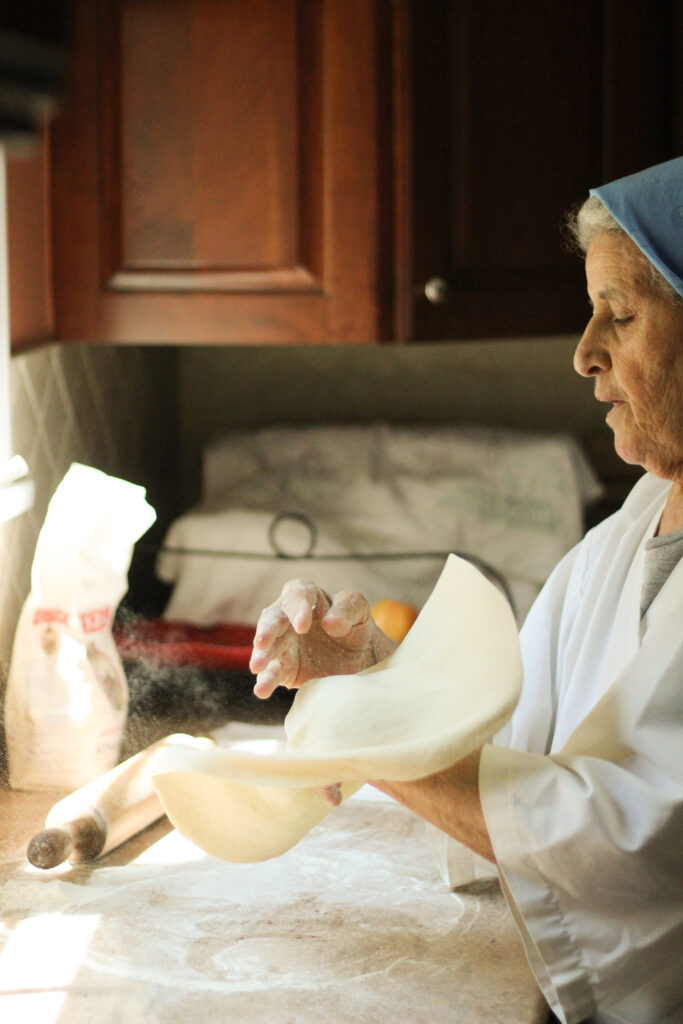
Watermelon (or shaptiya) is important to Assyrian cuisine, but it’s not really the kind of thing we usually do very much to. And it’s not that we usually eat things in their simplest forms; for instance, give us some yogurt, and we will spend days alchemically transforming it into hundreds of variations. We’ll stew up a pot of yogurt and swiss chard soup, we’ll simmer kibbeh in a yogurt broth, we’ll strain it and make labneh, we’ll eat it homemade as a savory or sweet snack, and we’ll even spoon it over prakhe. And that’s just the short list of yogurt-related recipes and pairings currently on my mind.

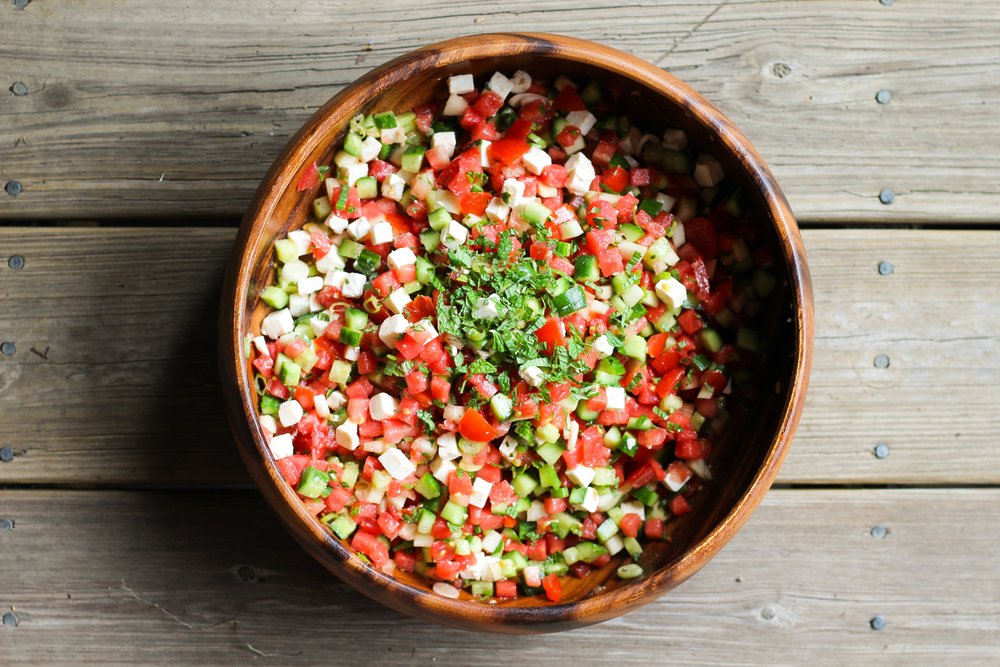
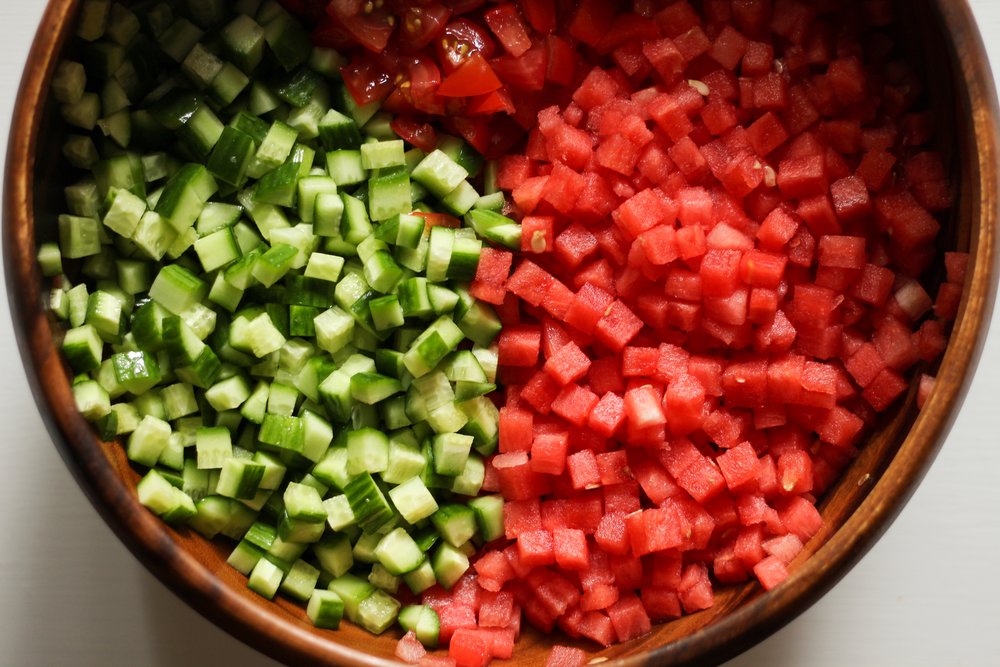
But watermelon? In my experience, it’s always served straight up. And that’s for good reason, because when it comes to watermelon, you really don’t need to do much to make it delicious. Chill it, split it open, sprinkle on a tiny pinch of salt, and enjoy the most refreshing summer treat. This beautiful simplicity is what made me think of Jerusalem salad when I was dreaming up other ways to serve watermelon. At it’s most straightforward, Jerusalem salad is just finely diced tomatoes and cucumbers, and this understated elegance is preserved even with the addition of another ingredient, watermelon. The watermelon itself looks just like the tomatoes, but it tastes a lot like the cucumbers, so if you were to serve this as a Jerusalem salad to friends, they might not be able to put their finger on what’s different about it (besides the glaringly different feta cheese). When you introduce something that doesn’t fall in line with the tomato-cucumber binary, the flavors become just a little harder to pin down.

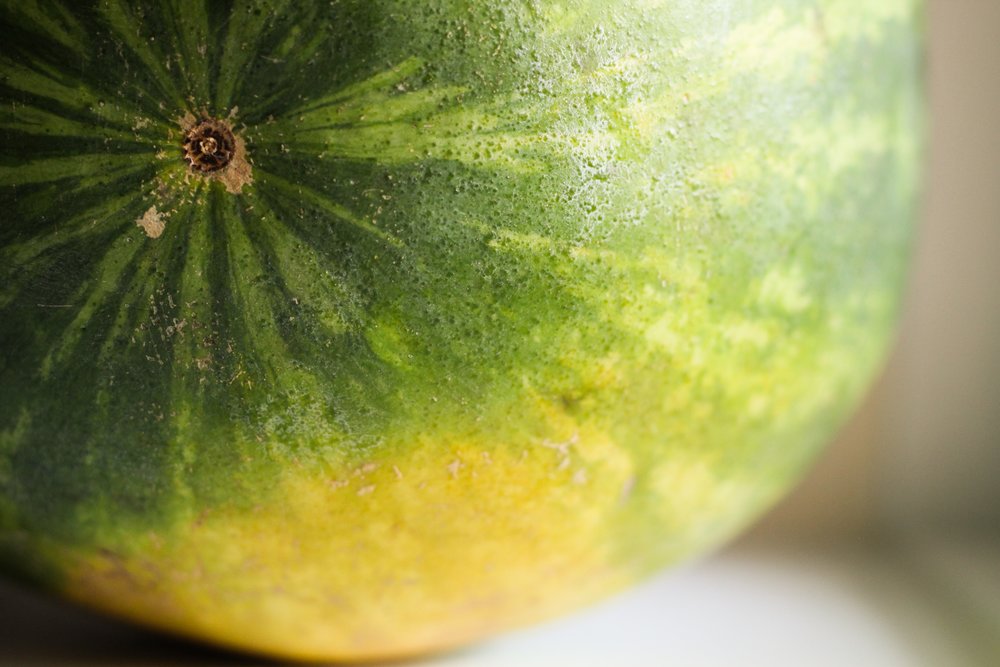
While I love watermelon, it comes with a couple hang-ups. First of all, there’s nothing worse than cutting open a mealy, bland, and pale one. The natural solution is to only shop for watermelon when it’s in season, but this isn’t always enough to guarantee ripeness. And you know a ripe melon when you taste one: it’s got that perfectly deep coral color, juicy, toothsome texture that’s not quite crunchy, but never soggy, and that delicious melon flavor that’s sweet, but with a hint of refreshing cucumber. You should definitely try to shop for melons when they’re in season because this gives you the best chance, but it’s totally possible to get a dud in the middle of July, and it’s also possible to get a perfect melon in the dead of winter.

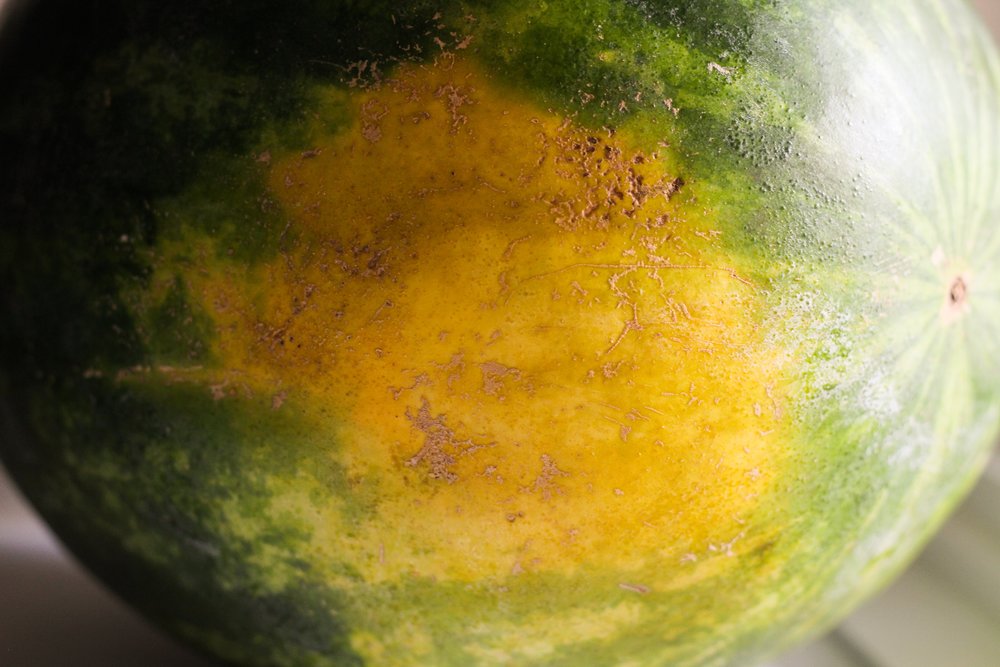
So when you can’t just rely on knowing the season, selecting a good melon might seem totally perplexing. But it’s actually somewhat straightforward if you know what to look for. Watermelons need to ripen on the vine, and there are two easy ways to tell whether a melon has had enough time to ripen.

  1. The most important thing to look for is a yellow patch on the bottom. This is where the watermelon sat in the dirt while it grew, and the patch can range anywhere from bright white to deep yellowish-orange. Generally, the yellower the patch, the riper the watermelon. You can see an example of a very yellow patch in the photo above.
  2. The watermelon should also feel pretty heavy for its size.

So if it’s in season, it feels heavy for its size, and it has a very yellow patch, you’ve found a good one.

So we’ve talked about how to find a good one, but (at least for me!) the other watermelon hangup is all that waste. First, there’s the huge pile of watermelon rind left over after you slice up all the pink stuff. And then there’s the other three quarters of a watermelon left over after you’ve made a big salad and eaten nothing but those adorably cheerful wedges for days. They start to seem a little less cheerful on day three right? There’s going to be a bonus post addressing the second problem in a few days (i.e., I’ll give you a few ideas of how to use up all that leftover watermelon, with very few additional ingredients). But this salad tackles the first problem, since I ask you to make a quick pickle of some of the watermelon rinds.

I’ve definitely been known to make some questionable meals out of extremely questionable leftover food scraps, because I just hate to see anything go to waste. But my own frugality and environmentalism aside, I’d never insist that you do the same if I didn’t think it tasted good. So I can say with total conviction that this watermelon rind quickle truly tastes good. This salad is not the same without it.

If you’ve never eaten watermelon rind, you might be skeptical, but it’s actually a really common ingredient in a few different cultures. A watermelon rind preserve post will have to wait until next summer, because I don’t want to turn this into an exclusively watermelon-themed-content food blog, and I’m afraid it might start to seem that way after this week.

Print

watermelon jerusalem salad

Print Recipe

5 Stars 4 Stars 3 Stars 2 Stars 1 Star

5 from 2 reviews

  • Prep Time: 25 minutes
  • Total Time: 1 hour 25 minutes
  • Yield: 6-8 servings

Ingredients

For the watermelon rind quick pickles:
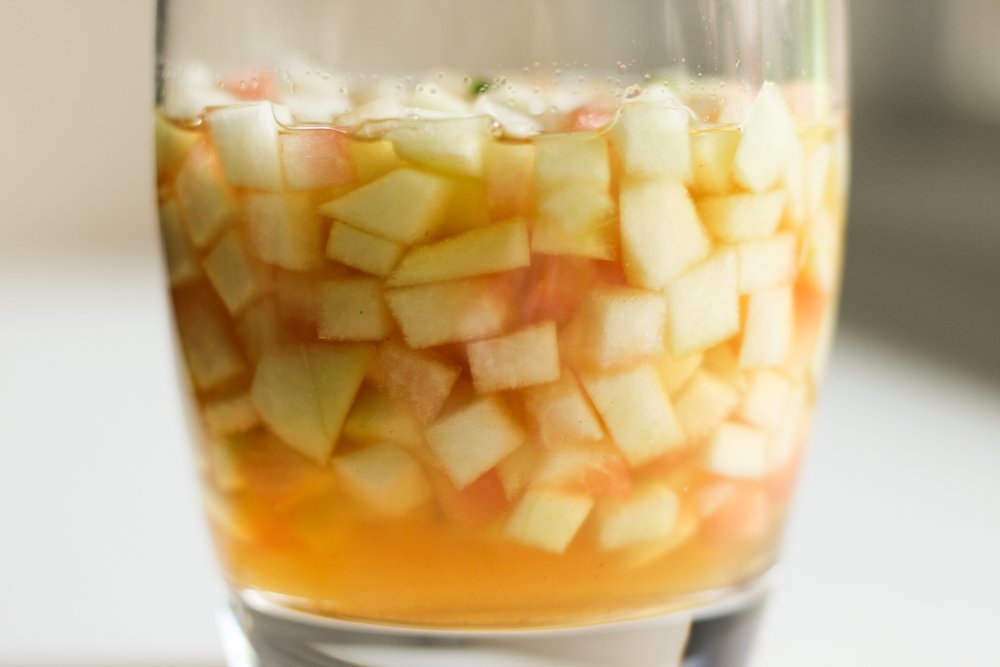
  • 1 tablespoon sugar
  • 1/4 teaspoon salt
  • 1/2 cup apple cider vinegar
  • 1 cup small diced watermelon rind (green skins removed before dicing)

For the salad:

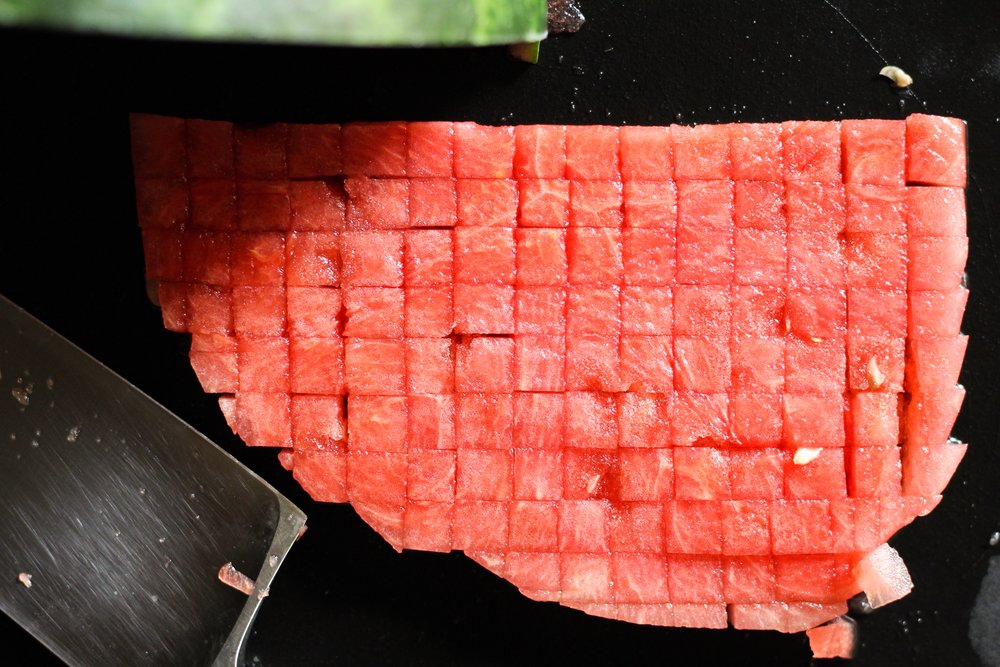
  • 4 cups small diced red watermelon (from about 1/4 of 1 medium watermelon or 1/2 of 1 mini watermelon)
  • 1 1/2 cups small diced tomato (from about 3 medium tomatoes)
  • 3 cups small diced cucumber (from about 5 Persian cucumbers)
  • 3/4 teaspoon salt
  • 1/4 cup + 2 tablespoons thinly sliced green onion (from about 2 green onions)
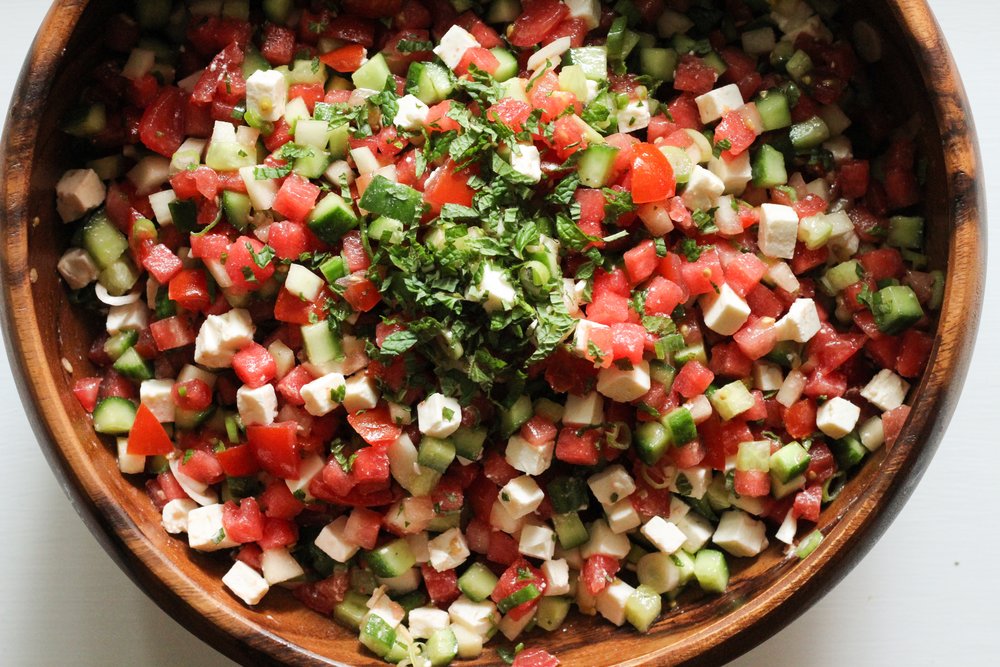
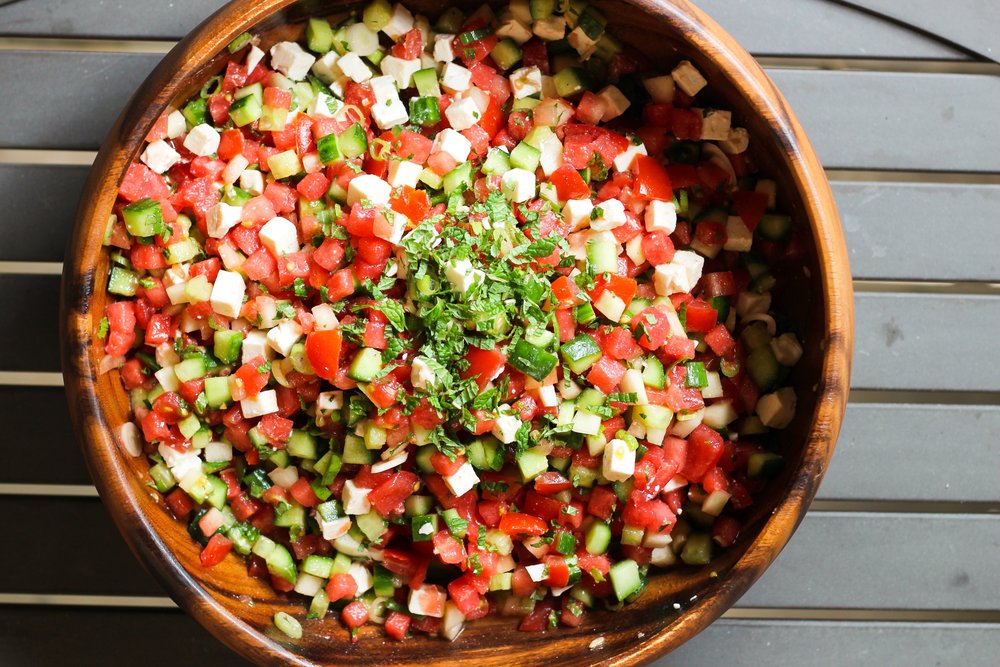
  • 1/4 cup washed, towel-dried, and minced fresh mint, plus 1 tablespoon more for garnish
  • The juice of 1 lemon
  • 3 tablespoons olive oil
  • More salt to taste (optional)
  • 8 ounces small diced firm feta (about 1 1/2 cups) *

Instructions

  1. Make the quick pickles: Mix the sugar, salt, and vinegar together until everything dissolves, and then submerge the watermelon rind in the vinegar and quick pickle it for 30 to 45 minutes while you’re prepping the rest of the ingredients. Once it’s done pickling, strain it very well and discard the vinegar or save it for another use (let the vinegar drain away for about 2 to 5 minutes).
  2. Make the salad: Gently fold together the watermelon, tomato, cucumber, and salt, and refrigerate for an hour.
  3. After an hour has gone by, strain the salad through a fine mesh colander, discarding the liquid. Do not press the salad against the colander, but gently shake the colander a few times to drain away the excess liquid. **
  4. Add the green onion, mint, lemon juice, olive oil, any additional salt, and the well-strained watermelon rind pickles, and gently fold to combine.
  5. At the last moment, very gently fold in the diced feta after you’ve made sure that the pieces are not stuck together.
  6. Garnish with another tablespoon minced fresh mint and serve immediately.

Notes

* For this recipe, a firm feta is best. If you’re using a soft feta, you should instead crumble it into big pieces and be extra careful when folding it in. If it’s soft cheese, don’t try to evenly distribute it or the pieces will just dissolve.
** Feel free to check out my original Jerusalem salad post if you want to see why I like to salt and strain Jerusalem salad. I’ve also got a recipe for Jerusalem salad pico de gallo, which doesn’t require straining.

find us on instagram and let us know what you made!

Filed Under: appetizers, dairy free, dinner, every recipe, gluten free, lunch, salads, vegetarian Tagged With: cucumber, feta, herbs, middle eastern, mint, pickles, summer, tomato, watermelon

lavash | lawasha

July 22, 2017 by Kathryn Pauline 15 Comments

Last week, I made lawasha (also known as lawash or lavash) with my great aunt, Almasy, or Masy (pronounced MAH-see) for short. In Assyrian, as well as many other languages, Almas means diamond, and her name is kismet, because Masy is one of the most beautiful people I know, but also one of the toughest. She’s in her seventies and can probably beat you in a planking contest. But if you’re not convinced—and she definitely doesn’t care whether you’re convinced—let me tell you that she can definitely beat you in a lawash contest. What would a lawash contest consist of? I’m not entirely sure, but I’d venture to guess it would include a lot of sensational dough twirling, impeccable ingredient divining, and plucking sheets of crispy bread from hot ovens with your bare hands.

Masy has been practicing this skill for so long, she makes all this look completely effortless. She is the oldest daughter in her family, so when she was a teenager growing up in rural Syria, she and her mother would hire a woman to help them make a huge batch of lawasha, which would last their family for months. Lawasha is a traditional means of preserving bread, since the very flat loaves are baked into thin, crispy crackers, and then (optionally) rehydrated later when you’re ready to eat them.

Masy’s family would load a big tannoura (or tannour, similar to an Indian tandoor) full of coals, and they would stick the thin discs of dough to the inside walls to cook them to a crisp. Masy said that she remembers the smell of her arm hair burning off whenever she would reach into the tannoura. Since neither of us has a tannoura, we just used a hot oven. Masy has come up with a brilliant method for making lawasha in an oven, and—no—it doesn’t involve a pizza stone. More on that later.

Just as Masy adapted her recipe to work with a standard indoor gas or electric oven, whenever I record someone else’s cooking, I always struggle with how much I can change it to fit the genre of the recorded, standardized recipe. While it sometimes feels really cold and scientific, this genre is important because it’s an effective way of translating one person’s food (a tangible, sensory, experiential thing) into words, and then actions, and then into someone else’s experience. But everyone has their own quirky way of doing things, and sometimes these small flourishes don’t make it into the final recipe, but they are too beautiful not to note.

There are some things about Masy’s lawasha technique that didn’t make it into this recipe, but which I’ll share in this more narrative form. When she makes the dough, she wets her hands during the kneading to add a little more water when it’s looking a little dry. In this recipe, I don’t specify the particular way to add water to the dough, since pouring a little at a time will work just fine, but I love this more interactive way of determining how much water to add.

When Masy rolls out the dough, she doesn’t just roll the rolling pin back and forth, alternating 90 degrees with each roll; instead, she gradually rotates the rolling pin as she taps one side to the counter, and then the other. It makes a skillful and bright clicking sound as she quickly moves the pin back and forth.

And while you don’t need to be able to throw lawasha to stretch it out (a rolling pin will work just fine), this technique makes Masy’s lawasha really special. She claims that you just need confidence to be able to pull this off, but she’s just being modest, because you really need a combination of confidence and skill. You can see the impeccable technique that Masy has developed since she first started baking lawasha in the photos and video below. Feel free to try this at home if you’re interested; it takes a little practice to get the hang of it, but once you do, it makes everything go much quicker. Although, your whole kitchen will be covered in a thin film of flour afterwards (my lens was covered in dust by the end of this photoshoot), but that’s part of the fun and spectacle. Now for some gratuitous photos and a video of dough flinging:

Massy making Lawash
Massy making Lawash

Once the dough is stretched out and ready for baking, you then further stretch it out over the back of a lightly greased sheet pan. Masy’s idea to use the back of a sheet pan is ingenious because it keeps the dough taut, and so keeps it from forming those really big bubbles.

While it seems like trying to replicate the intense heat of the tannoura would be the best course of action for making lawaha, it’s actually a little more complicated than that. I’ve tried this recipe without using the back of a sheet pan, just placing the rolled out dough directly on a pizza stone in the really hot oven, and it just ends up turning into a giant, crunchy pocketed pita. I’m not totally sure of the reason for this, but I have a theory: the bread is so thin and cooks so quickly in the tannoura, it most likely starts to set almost immediately, before there is a chance for the little bubbles to join together into one big bubble. But a 500° oven is a far cry from a tannoura, and so a quick burst of heat isn’t necessarily the best thing. With the fast, direct heat of the pizza stone, the bread bubbles up before it has a chance to set and crisp. The setting and crisping then happens once it’s already bubbled up and you end up with a really monstrous orb that shatters into a million clumsy pieces. But with the sheet pan, the bread has a chance to cook just a little more slowly, allowing it to set before it has a chance to puff.

In this recipe, I added the extra step of docking the dough, or pricking little holes in it with a fork. If you perfectly execute everything else, you don’t need to do this step, but for us mere mortals, it’s not a bad idea to take the extra precaution.

Print

lavash | lawasha

Print Recipe

5 Stars 4 Stars 3 Stars 2 Stars 1 Star

No reviews

  • Prep Time: 1 1/2 hours
  • Total Time: 3 1/2 hours
  • Yield: 10 big flatbreads

Ingredients

For the khmira | flourless starter:

  • 2 1/4 teaspoons (1 packet) active dry yeast
  • 1/2 cup 118° warm water
  • 1 teaspoons sugar
  • 1/8 teaspoon salt
  • 1 teaspoons vegetable oil

For the dough:

  • 27 ounces all purpose or bread flour (about 5 cups) , plus more for dusting
  • 1 3/4 teaspoons salt
  • 2 teaspoons sugar
  • The khmira (the above yeast and water mixture)
  • 3 tablespoons unsalted butter, melted
  • 1 cup warm milk, heated to 118° F
  • 3 tablespoons oil
  • 1/2 cup 118° water (divided in half)

Instructions

  1. Make the khmira/flourless starter: Combine the yeast, water, sugar, salt, and vegetable oil. Stir until the yeast dissolves.
  2. Cover it and let this sit for 30 minutes, until it becomes very foamy.
  3. Make the dough: While the khmira is proofing, sift together the flour, salt, and sugar into a big mixing bowl.
  4. Make a well in the center of the flour mixture and add the bubbly khmira, melted butter, milk, oil, and 1/4 cup of the water. Mix everything together with your hands until it starts to form a sticky ball. If the ball looks a little dry as it’s coming together, add 1 tablespoon of the remaining water at a time until it’s the right consistency. It should be sticky and soft, but it should form a ball as you knead it in the bowl (don’t make it so soft that it starts to turn into a batter instead of a dough).
  5. Knead the dough in the bowl, wetting your hands with additional water every minute or so if it looks a little dry. Knead by pulling the dough from the sides into the center of the ball and repeating. As you knead dough will start to become more elastic and will form a more cohesive ball. Continue to knead until it smooths out and becomes much less shaggy (about 10 minutes).
  6. Cover the bowl and then wrap it up in a blanket. Leave the dough to proof for 1 hour in a warm or room temperature place. The dough will more than double in size.
  7. Shape the dough: Once it has finished rising, divide into 10 equal chunks on a lightly floured surface. Knead and form each chunk into a smooth ball by folding it in half on itself a few times, and then smoothing the surface while gathering it in at one end until everything smooths out.
  8. Cover with plastic wrap and let the dough balls rise for another 45 minutes.
  9. Once the dough balls have finished rising, preheat the oven to 500° F.
  10. Place the first dough ball on a lightly floured surface and sprinkle a little flour on top. Use a rolling pin to roll it out into a disc with a thickness of about 1/4 inch. At this point, you can either toss the disc back and forth between your forearms, opening it up as you go (see video). Or you could continue to roll it out with the rolling pin. Either way, the dough needs to become very thin (thinner than 1/8 inch). You should be able to see light through it when you hold it up.
  11. Bake the dough: Very lightly grease the back of a rimmed baking sheet and place the stretched out dough on top, pulling the corners over the edges to make sure it stays stretched out.
  12. Dock the dough by poking a few holes in the surface with a fork. This prevents really big air bubbles from developing.
  13. Place the baking sheet in the middle of the oven and close the door. Let it cook for between 2 to 5 minutes (keep a close eye on it), just until the dough starts to slightly brown. It will be crispy, but very slightly pliant straight from the oven, and it will become completely crisp once it cools.
  14. Remove from the baking sheet and cool on a towel for 2 to 3 minutes.
  15. Repeat with the remaining dough balls.
  16. To serve: You can break the lawash into shards and serve them crisp, like crackers. This goes great with dips and spreads, like hummus, muhammara, labneh, jajik, banadurah harrah, and baba ganoush.
  17. Alternatively, you can rehydrate it to serve it soft. To rehydrate, evenly sprinkle a sheet of lawasha with a little water (about 1/2 teaspoon per sheet), and cover with a towel for about 10 minutes. Don’t use too much water or the lawasha will get soggy, instead of flexible. Soft lawasha can be used for wraps and sandwiches, but it also works great for the above dips and spreads.

find us on instagram and let us know what you made!

Filed Under: bread, every recipe, family recipes, meze, vegetarian Tagged With: middle eastern

  • « Go to Previous Page
  • Page 1
  • Interim pages omitted …
  • Page 161
  • Page 162
  • Page 163
  • Page 164
  • Page 165
  • Interim pages omitted …
  • Page 183
  • Go to Next Page »

Primary Sidebar

Kathryn Pauline smiling

Welcome! I’m Kathryn Pauline, cookbook author, recipe developer, and photographer.

What’s new? 🥕

cauliflower frying

Fried Cauliflower

edible cookie dough

A Better Way to Make Edible Cookie Dough

steamed kale

Steamed Kale (without a steamer)

steamed cauliflower

Steamed Cauliflower

strawberry rhubarb jam in a jar with a spoon photographed from overhead

Strawberry Rhubarb Jam

rhubarb cookies

Rhubarb Cookies

Footer

read our privacy policy

© 2017 - 2026 Kathryn Pauline