• Skip to primary navigation
  • Skip to main content
  • Skip to primary sidebar
  • Skip to footer
Cardamom and Tea
  • Blog
  • Recipes
  • About
  • Cookbooks
    • Piecemeal
    • A Dish for All Seasons (my first cookbook)

shawarma platter

April 29, 2018 by Kathryn Pauline 4 Comments

This is probably not the most inviting way to start this post, but real shawarma is pretty much impossible to make at home. But that’s okay because this recipe isn’t for real shawarma—it’s for something that tastes very much like shawarma, but isn’t made with the same technique (i.e., doesn’t require a giant spit rotisserie).

My recipe’s marinade will taste very familiar to anyone who’s ever ordered a sandwich from a halal cart. But even more importantly, this homemade shawarma’s texture replicates those crispy bits that get sheared off the surface of that giant rotating cone. So while I won’t try to convince you that this is exactly the same as the shawarma you know and love, I will say that it’s a really delicious home-made version, and makes a wonderfully flavorful, quick dinner.

There are lots of recipes online for homemade shawarma, and most of them recommend roasting medium to large pieces of marinated chicken, then slicing and serving. There’s a certain logic to this method, because with real shawarma, you do indeed slice thin pieces from a big block of cooked meat, but I think this technique is missing something important. The large cone-shaped rotisserie is actually made up of a bunch of thin marinated layers that get stacked up on the spit, kind of like receipts on one of those stabby check spindles.

Because of all this layering, every bite is super flavorful. And because of the constant heat from the rotisserie, the exterior is always getting crispy while the whole shawarma cone gradually gets whittled down. But when making shawarma at home with a conventional oven, if you leave the meat in big chunks before marinating, it becomes impossible to recreate this flavor and texture.

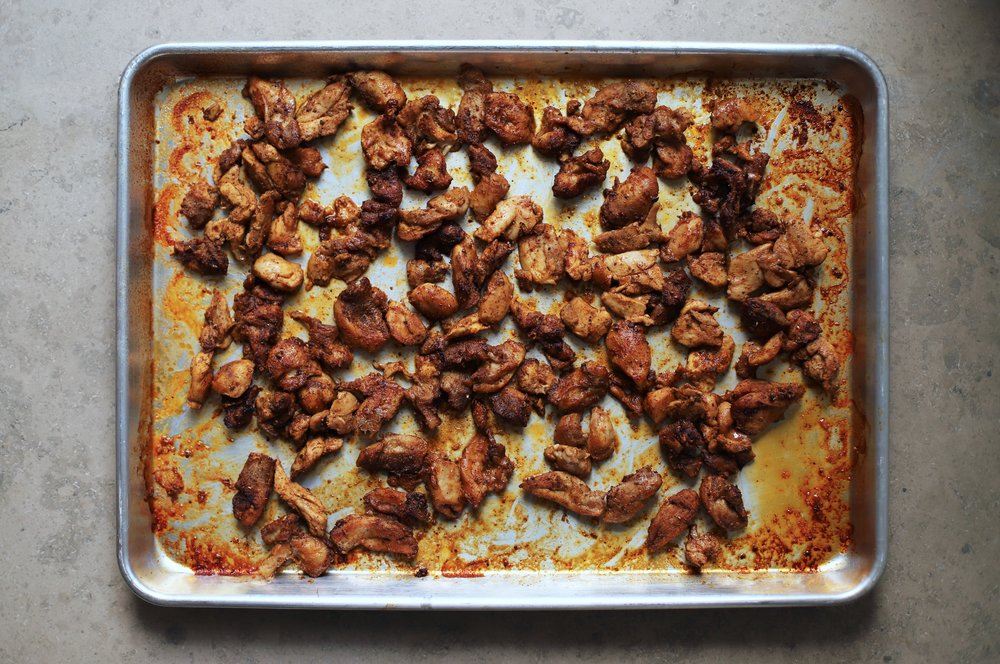
And so, even though it doesn’t look anything like real shawarma, my favorite way to recreate the flavors and textures of this dish is to simply start out with thinly sliced pieces of raw chicken before marinating and roasting. With the increase in surface area, each piece gets covered in a really good amount of marinade, and you end up with lots and lots of golden brown and delicious pieces.
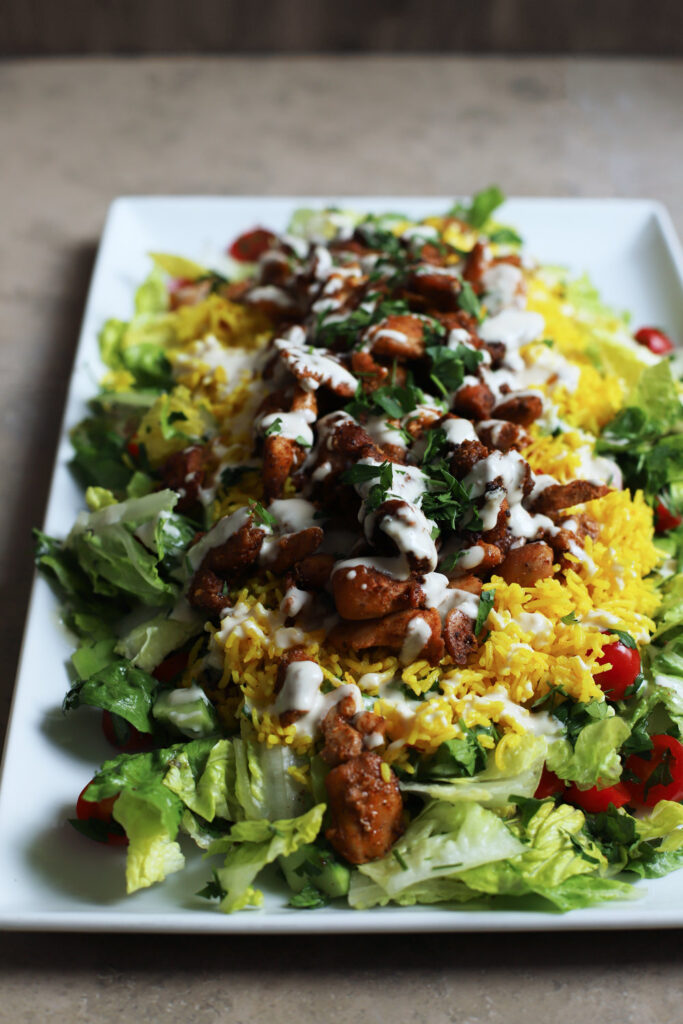
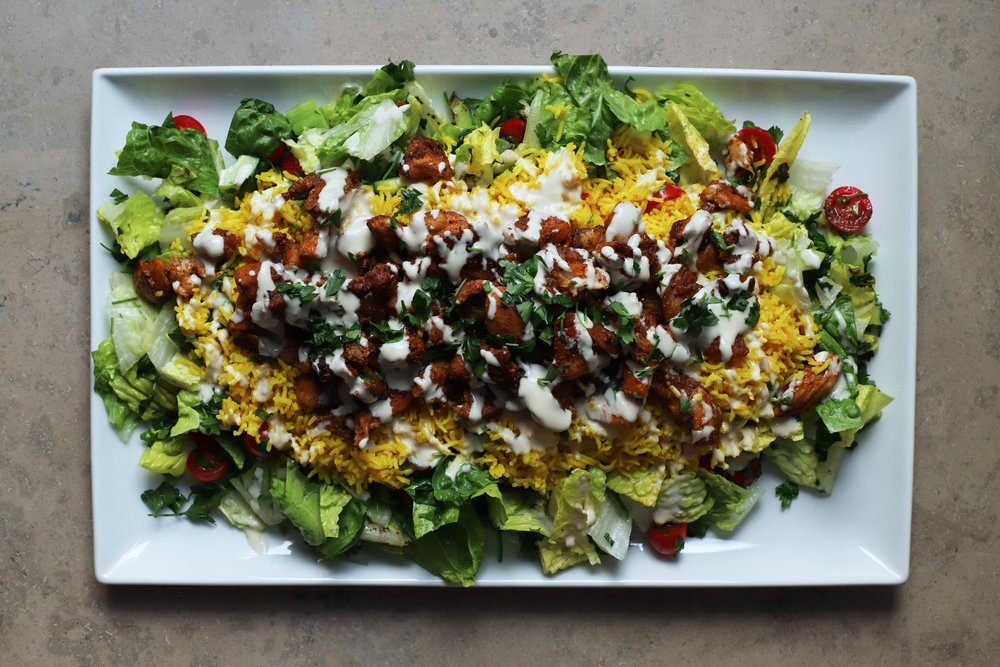
Print

shawarma platter

Print Recipe

5 Stars 4 Stars 3 Stars 2 Stars 1 Star

No reviews

or try this other method of at-home shawarma

  • Prep Time: 35 minutes
  • Total Time: 1 hour
  • Yield: 6 servings

Ingredients

For the chicken shawarma:
2 pounds boneless skinless chicken thighs *
2 tablespoons lemon juice
2 tablespoons olive oil (not extra virgin—or use another neutral oil), plus more for the pan
1 1/2 teaspoons salt (or to taste)
2 tablespoons baharat **
2 cloves garlic, crushed with a press or minced

For the yellow rice:
1 cup basmati (or another long grain) rice
2 tablespoons butter
1 teaspoon turmeric
1 pinch saffron (optional)
1 1/3 cups water (plus more for soaking and rinsing)
3/4 teaspoon salt, or to taste

For the salad:
1/2 tablespoon lemon juice
1 tablespoons extra virgin olive oil
1/4 teaspoon salt (or to taste)
1/4 teaspoon black pepper
1 teaspoon sumac (or to taste / optional)
2 plum tomatoes, large dice
3 Persian cucumbers, large dice
1 small romaine heart, cut into large pieces
2 tablespoons finely diced onion (green, red, or white)
1 small bunch parsley (or 1/2 1 large bunch), leaves coarsely chopped (reserve some for garnish)

For the lemon-tahini sauce:
1/4 cup tahini
3 tablespoons lemon juice
3 tablespoons water
1/4 teaspoon salt, or to taste

Instructions

  1. Make the shawarma: Slice the chicken into thin, flat strips. To slice, angle your knife 45 degrees against the cutting board, pointed away from your non-dominant hand.
  2. Combine the chicken thigh strips, lemon juice, olive oil, salt, baharat, and garlic in a ziplock bag. Carefully squeeze the bag to mix everything together until the chicken pieces are evenly coated. Let them marinate for at least 20 minutes (up to overnight).
  3. Preheat the oven to 475° F convection while the chicken marinates.
  4. Lightly coat a sheet pan in oil, and distribute the chicken in 1 even layer. Roast for about 25 to 30 minutes, stirring once about half-way through. The shawarma is done once the pieces are crispy and deep golden brown.
  5. Make the rice: Soak the rice for 5 minutes, covered by about an inch of water. Swish it around, strain it, and then rinse it with new water for about 15 seconds. Let the excess water drain away. If the water that drains away isn’t clear, soak it for 2 more minutes and repeat.
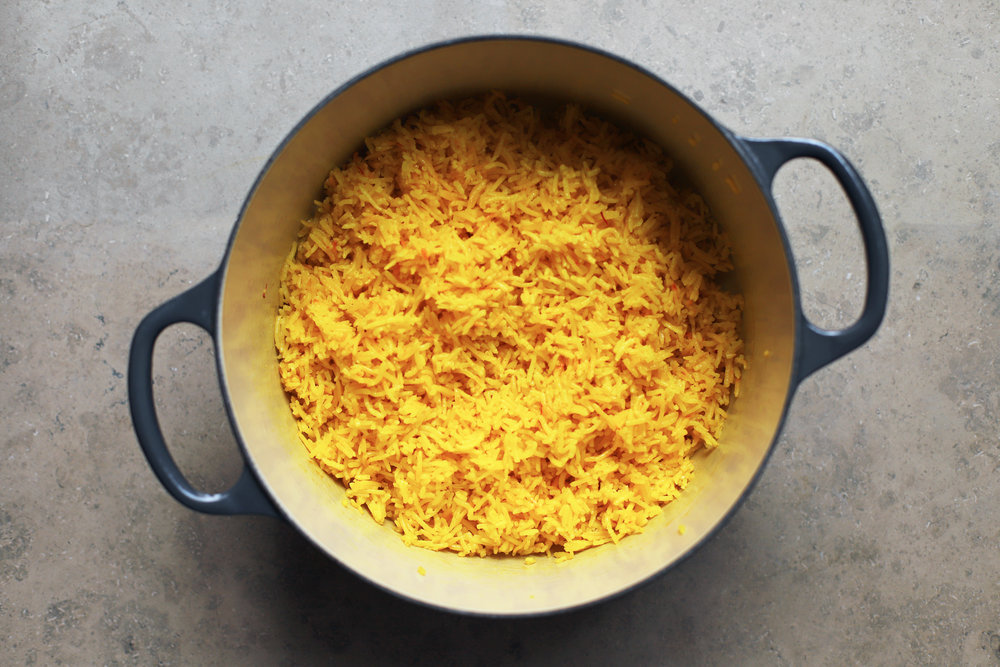
  6. Melt the 2 tablespoons of butter over medium heat. Once melted, add the turmeric and saffron and stir it for just a couple seconds.
  7. Add in the drained rice, 1 1/3 cups water, and salt, stir together, and bring to a simmer over high heat. Once simmering, reduce to low, cover, and cook for 14 minutes. Do not stir it or open the lid.
  8. Once 14 minutes have passed, turn off the heat and let it rest, covered. Do not lift the lid at any point.
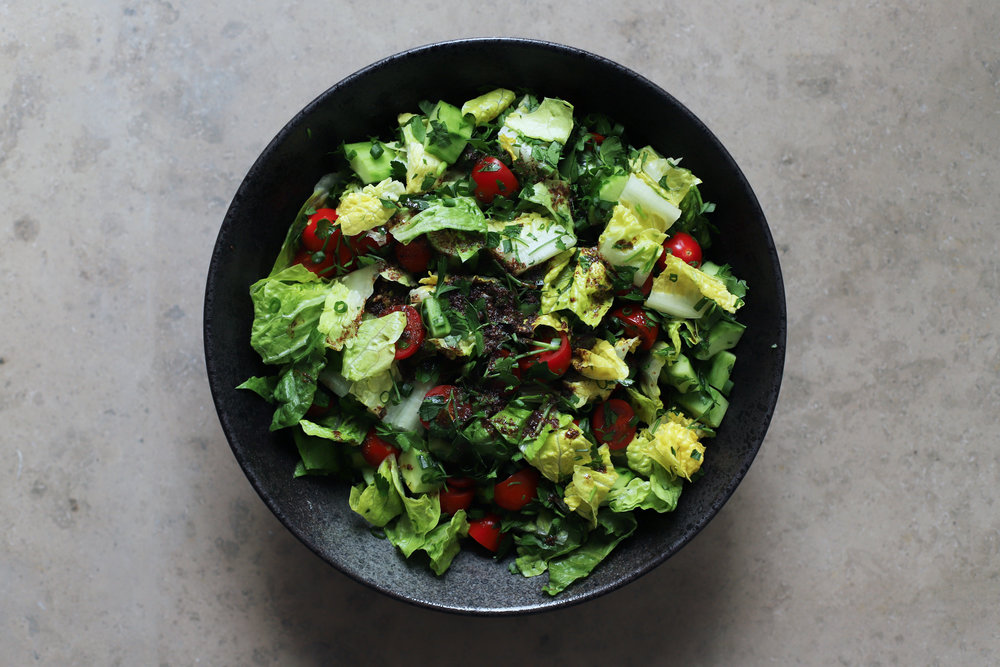
  9. Make the salad: Place the lemon juice, olive oil, salt, pepper, and sumac in the bottom of a medium mixing bowl. Add the tomatoes, romaine, onion, and parsley on top (in that order) and don’t mix everything together until you’re ready to serve (or feel free to dress it at the last minute, as pictured).
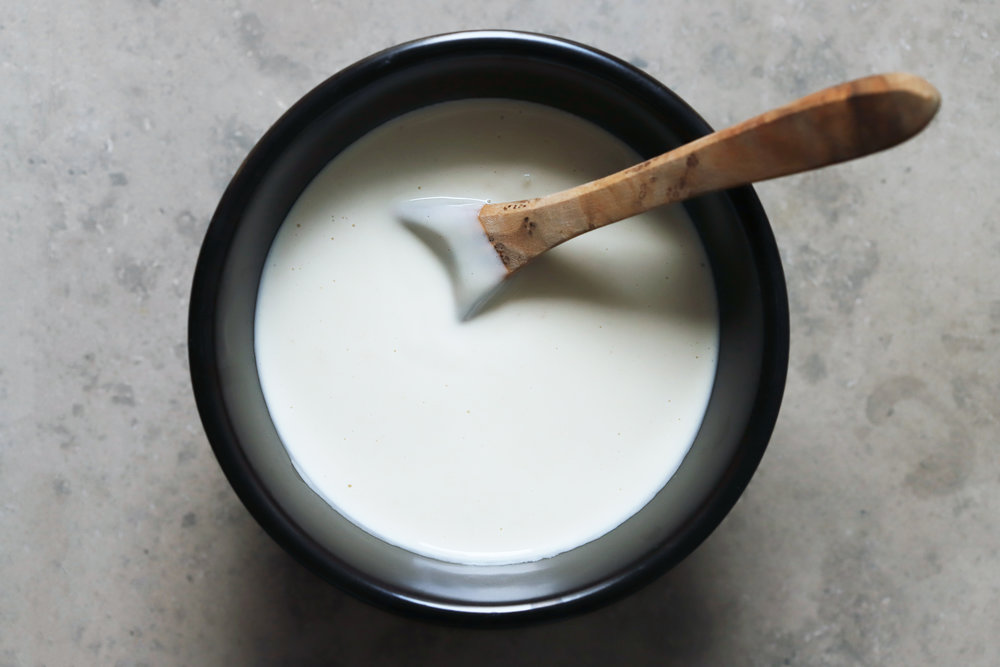
  10. Make the lemon-tahini sauce: Whisk everything together until it’s the consistency of creamy salad dressing. It’ll seem really separated and thin at first, but it will start to thicken as it emulsifies.

three ideas for serving:

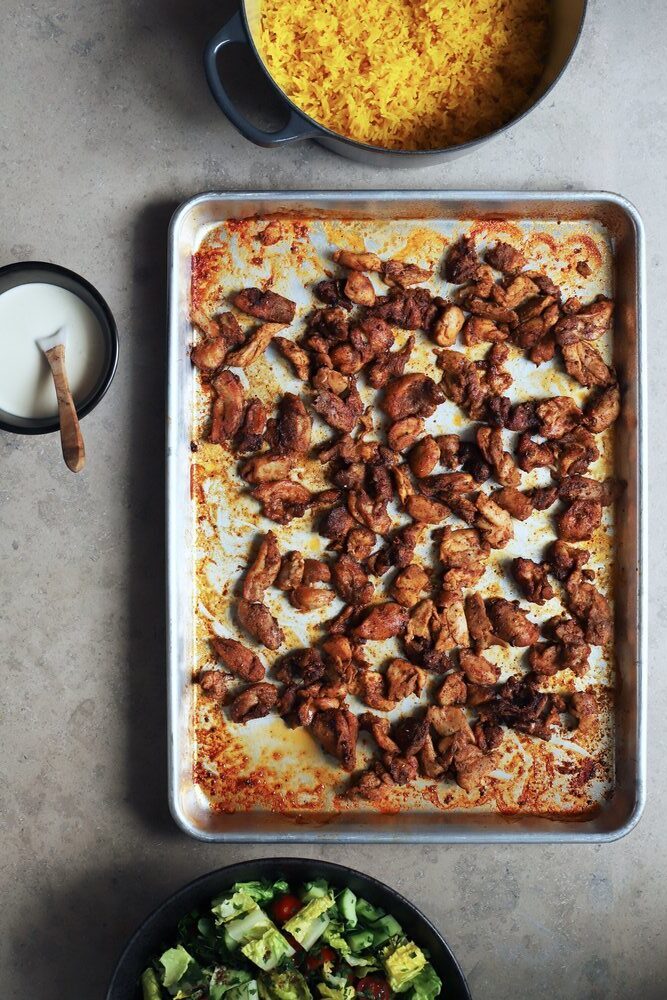
  1. Serve everything together on a big platter (shawarma, rice, salad, sauce, parsley for garnish)
  2. Serve everything family style, as separate dishes
  3. Set up a buffet and have everyone make their own shawarma bowl

Notes

* I know, chicken thighs aren’t everyone’s favorite, but they’re really the best option for making shawarma in the oven. If you use chicken breast, by the time they’re crispy on the outside, they’ll be totally dry on the inside. Chicken thighs have more fat and are delicious crispy (think of it sort of like making crispy bacon).

** If you don’t have baharat blend and don’t feel like making a 7 spice blend, simply use 2 teaspoons paprika, 2 teaspoons cumin, 1 teaspoon black pepper, 1 teaspoon coriander, and a pinch of cinnamon.

find us on instagram and let us know what you made!

Filed Under: dairy free, dinner, every recipe, gluten free, lunch, main courses, weeknight Tagged With: baharat, chicken, cucumber, greens, herbs, lemon, rice, saffron, sumac, tahini, tomato, turmeric

qatayef crêpe cake

April 25, 2018 by Kathryn Pauline 8 Comments

It’s easy to underestimate the diversity of the Middle East and North Africa, and its diaspora. Not only are there so many different nations—there are also many different cultures, ethnicities, and religions within those nations. And the lines between these broad categories are not always separate, but overlapping and intersecting. And (of course!) this breadth is reflected in our many cuisines.

Assyrians are an ethnic minority that trace our ancestry back to the ancient Assyrian empire, which means that we are an ethnic group that has largely resisted assimilation, and kept up our sense of nation without a self-governed homeland. When I first started blogging about Assyrian food, I was really anxious about determining what “counts” as Assyrian.

When you’re coming from a relatively unknown ethnic minority, most people expect your food to offer something new and never-before-seen, as if all cultures have developed and survived in a vacuum, totally unaffected by the violence of conquest and colonialism, and the peace of friendship and cultural sharing. But the truth is, it’s neither fair, useful, nor possible to expect minority cultures to define themselves only by what makes us unique.

Among all the different groups that make up the Middle East and North Africa, there are certain dishes we’ve all been eating for hundreds of years—things that are just as much part of Arab cuisine as they are Assyrian cuisine (I’m thinking, in particular, of hummus, strained yogurt, dolma, and so on). But even though I think it’s too narrow to only pay attention to the differences, there are certain things that are unique to each group, and these differences are worth celebrating.

For instance, we Assyrians have our yogurt and swiss chard soup (booshala) and roux-stuffed brioche (kadeh). And we have our particular ways of making shared dishes, like my grandmother’s vegan stuffed grape leaves with mushrooms and walnuts (eaten during fasting holidays like Lent and Advent), and my great aunt Masy’s technique for making lawash (adapted to work without a roaring hot tannur). And of course, there are certain things that distinguish the many other cultures in the Middle East and North Africa.

And that brings me to this recipe, and the reason I wrote it. This month, a few of my food blogger friends started the fabulous social media movement April is for Arab food, and they kindly invited me to participate in dessert week. While Assyrians are not actually Arab, we live in many predominantly Arab countries, and our cuisines overlap a great deal. But in the spirit of celebrating differences, I thought I would contribute a distinctively Arab dish to the month’s festivities.

Qatayef (also sometimes transliterated katayef, kataif, or atayef) is a pancake made from flour and semolina, which gets cooked just on one side, so that air bubbles sputter, pop, and eventually set into a really gorgeous, lacy pattern on top. These pancakes get stuffed with an assortment of fillings like ashta cream, walnuts, or raisins, and then a whole number of delicious things can happen to them from there. Sometimes they get folded in half and deep fried. Sometimes they are delicately crimped shut at a single point, drizzled with syrup, and dusted with ground pistachios.

And, while it’s not the most traditional, here I’ve ladled them extra-large and layered them with flower-water-scented ashta cream, in the shape of a crêpe cake. This recipe is particularly nice if you ever want to bake a cake, but don’t have an oven, or if it’s just too hot to even think about turning on the oven (two predicaments that many fellow Hong Kongers will understand). And while this is a particularly Arab dish eaten during quickly-approaching Ramadan, we all (Arab Muslims, Arab Christians, non-Arab Muslims, non-Arab Christians, and just about everyone else) indulge in them around this time of year, and I hope you will too!

Qatayef crêpe cake

serves: 8

ashta cream filling

  • 4 cups milk
  • 1/2 cup cream
  • 2 tablespoons lemon juice
  1. Combine the milk and cream in a heavy pot, and bring to a simmer over medium heat, stirring frequently and controlling the heat to make sure the bottom doesn’t scorch. Once you see a few bubbles, add the lemon juice and stir together. The curds will separate, leaving behind the translucent whey.
  2. Remove from heat and strain through a fine mesh sieve over the sink (and don’t bother washing the pot). Let the curds sit in the sieve for a few minutes while you throw together the next part.
  • 1 1/4 cups milk
  • 1/4 cup cream
  • 1 1/2 teaspoons orange blossom water
  • 1/2 teaspoon rosewater
  • 1/4 cup + 2 tablespoons sugar
  • 2 tablespoons and 1 teaspoon cornstarch
  1. Combine the milk, cream, orange blossom water, rosewater, sugar, and cornstarch in the empty pot you just used. Once it’s lump-free, place over medium to medium-high heat, and start stirring constantly while you bring it to a boil. Control the heat to make sure the bottom doesn’t scorch.
  2. Once it comes to a boil, keep cooking and stirring for just a couple more minutes to let the starches gelatinize. The mixture will suddenly thicken dramatically, at which point you should cook it for about 30 more seconds, and then remove it from heat. Immediately stir in the curds (above), and move it to the refrigerator to chill a little.*

qatayef pancakes

  • 400 grams flour (about 2 1/2 cups)
  • 90 grams semolina (about 1/2 cup)
  • 2 teaspoons baking powder
  • 1/4 cup + 2 tablespoons sugar
  • 1/2 teaspoon salt
  • 1 tablespoon vegetable oil
  • 2 3/4 cups water
  1. Mix all the ingredients together in a blender until there are no more lumps (but don’t over-mix it). **
  2. Heat a nonstick skillet for several minutes over medium heat. ***
  3. Spoon about 1/2 cup of batter onto the heated non-stick skillet and then do not disturb it (scoop with a measuring cup to keep the size consistent). It should immediately spread out into a thin pancake (not as thin as a French crêpe, but not as thick as an American pancake). In the first minute, bubbles will form around the edges. In the second minute bubbles will form in the center. In the third minute, the batter on top will cook through and will go from shiny to matte. Once the batter becomes matte, the pancake is done. The bottom should be golden-brown and the top should be pale and covered with tiny holes (see photos above). ****
  4. Placed the finished pancake on a parchment-lined sheetpan to cool, and finish cooking the rest of them the same way.

glaze and cake assembly

  • 1 tablespoon lemon juice
  • 1/4 teaspoon rosewater*****
  • 1 teaspoon orange blossom water
  • 1/2 cup powdered sugar
  • 1/4 cup ground or finely chopped pistachios, plus (optionally) more for serving
  1. Whisk together the lemon juice, rosewater, orange blossom water, and about 1/2 cup powdered sugar. It should be runny and translucent (add more powdered sugar or lemon juice to tinker with it).
  2. Take the sturdiest-looking qatayef and place it browned-side-down on a plate.
  3. Evenly brush it with the glaze (enough that it soaks in, but not so much that it’s soggy and waterlogged) and top with a thin layer of the ashta cream.
  4. Place the next pancake on top and gently press down in the center to make sure everything sticks together. Repeat with the remaining glaze, cream, and pancake layers until you have the final pancake on top. Brush the top layer with glaze and top with the ground pistachios. If you’ve got any left, drizzle the pistachios with another tablespoon of the glaze to help them stick.
  5. Chill for at least 45 minutes before slicing and serving. Optionally, serve each slice with another sprinkling of pistachios.

* Some people prefer their ashta to be totally lump-free, in which case you can purée yours with a food processor or immersion blender. I don’t like mine to be too homogenous, so I skip this step.
** If you’re mixing by hand,  whisk together the dry ingredients before adding the wet ones. Then whisk in about 75% of the water, mix until there are no lumps, and then whisk in the rest of the water.
*** If your nonstick skillet is very scratched up, or doesn’t work well, you can grease it with a little bit of oil between pancakes. But a good nonstick skillet won’t need to be oiled for this.
**** Here’s some troubleshooting, in case your pancakes aren’t doing what they should:
      If bubbles aren’t forming on the surface and the pancake is thick, you need to add a little more water to it. Add 1 or 2 tablespoons of water to the batter and try again.
      If the bottom isn’t browning by the time the pancake is cooked through on top, the pan may not be hot enough. Don’t overcompensate. Just turn it up one notch and let the pan heat for a minute or two before cooking the next pancake. Don’t try to keep cooking a pancake that is cooked through, but pale on the bottom—it’s fine if one or two are pale (as you can see from the photo, a couple of mine were too).
      If it’s over-browning on the bottom before the top becomes matte, the heat is too high. In this case, remove the pan from heat for a minute or two, and then place over lower heat.
***** I love rosewater, but too much will overpower the subtle flavors of this cake. So feel free to add a little more at this stage, but be cautious. It’s not supposed to be “rosewater cake”—it’s just supposed to be subtly scented.

Filed Under: every recipe, sweets Tagged With: cakes, orange blossom water, pistachio, rosewater, semolina

  • « Go to Previous Page
  • Page 1
  • Interim pages omitted …
  • Page 124
  • Page 125
  • Page 126
  • Page 127
  • Page 128
  • Interim pages omitted …
  • Page 183
  • Go to Next Page »

Primary Sidebar

Kathryn Pauline smiling

Welcome! I’m Kathryn Pauline, cookbook author, recipe developer, and photographer.

Footer

read our privacy policy

© 2017 - 2026 Kathryn Pauline