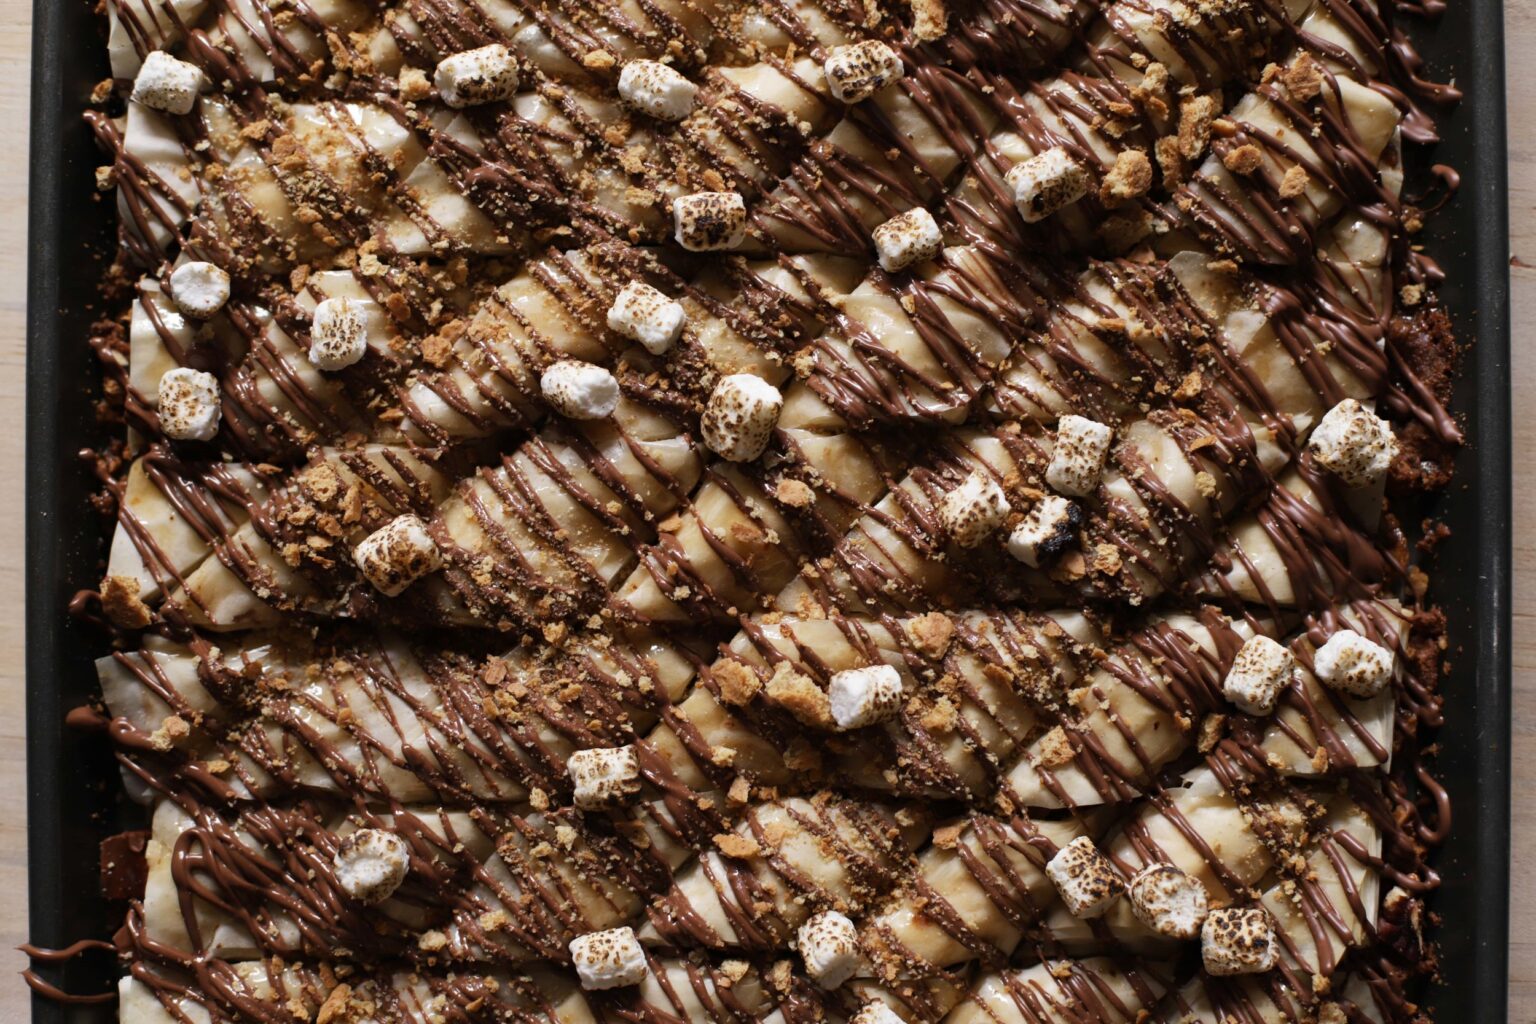
My cousin Heather is getting married next week! I live on the other side of the world and can’t make it to the wedding, so this summer when I was visiting Chicago, I baked some s’mores baklava (/baklawa) and stashed a bunch in my parents’ freezer for the shower. Heather and her fiancé are super outdoorsy and go on so many amazing backpacking trips, and we grew up with our grandmother’s cardamom baklawa, so this felt like a total Heather dessert. Wishing H&C congratulations and a lifetime of beautiful views, good food, and love ❤️
Before I get to the recipe, a few notes on how I came up with it and why I love it. The thing is, sometimes when you combine features of two foods, you end up losing something along the way, but I didn’t want to settle for anything less than 100% s’mores and 100% baklava, so this recipe doesn’t shy away from the essential features of either. It’s soaked in a toasted marshmallow syrup, filled with crumbled pecans, graham crackers, milk chocolate, and more toasted marshmallow, and topped with all the s’mores things.

The s’mores of my childhood feature milk chocolate, toasted marshmallows, and honey graham crackers. I’ve never really been a fan of those fancy adaptations with 90% cocoa fleur-de-sel-flecked chocolate and homemade graham crackers. When it comes to s’mores flavors, I only have eyes for classic.
And it might not surprise you that I have a few dealbreakers when it comes to baklava as well. It absolutely must have crisp filo layers, which are soaked in a rich syrup—the syrup has to have just enough water to penetrate every single layer, but not so much that they become soggy. And the syrup must be there not only to sweeten things, but to hold everything together and give it a wonderfully sticky texture. If the syrup is just decorative, if it just sits on top and soaks into the outermost layer, or if it doesn’t have a structural purpose, it’s not really doing its job. And while we’re at it, it has got to have some sort of nut in the filling.
This recipe has the best of both worlds in every bite—those memories of the big plates of cardamom baklawa my grandmother always had on her kitchen counter, as well as the nostalgia of camping trips with my family.
s’mores baklava

- Prep Time: about 40 minutes
- Total Time: about 3 1/2 hours
- Yield: about 6 dozen pieces
Ingredients
for the toasted marshmallows:
- One 10 oz bag mini marshmallows (280g) (it will end up split between the filling, syrup, and topping)
for the marshmallow syrup:
- 2 cups granulated sugar (400g)
- 1 1/4 cup water (295g)
- Pinch salt
- 1/2 of the tray of broiled marshmallows (above)
for the baklava:
- Butter for greasing the pan
- 2 1/3 cups pecans (200g)
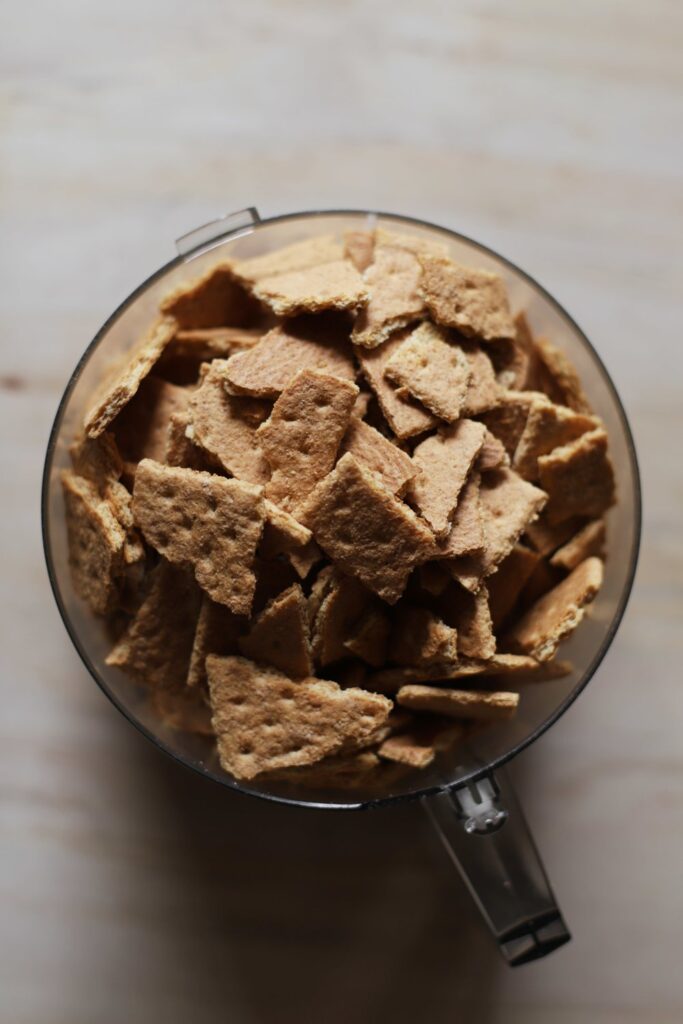
- 17 honey graham crackers, broken into pieces (240g)
- 1/2 teaspoon salt (2.5g)
- 1/2 of the tray of broiled marshmallows (above)
- 1 heaping cup milk chocolate chunks/chips for the filling (170g)
- 16 oz filo dough sheets (454g), thawed at room temperature for 4 hours
- 6.25 ounces hot melted clarified butter (177 grams, or 3/4 cup + 2 T by volume)*
- toasted marshmallow syrup (above)
for decorating:
- 1 cup milk chocolate chunks/chips for the topping (150g)
- The 1/2 cup of flame-toasted marshmallows (above)
- 1 graham cracker, crumbled
Instructions
- For the toasted marshmallows: For the toasted marshmallows: Set the oven to broil.
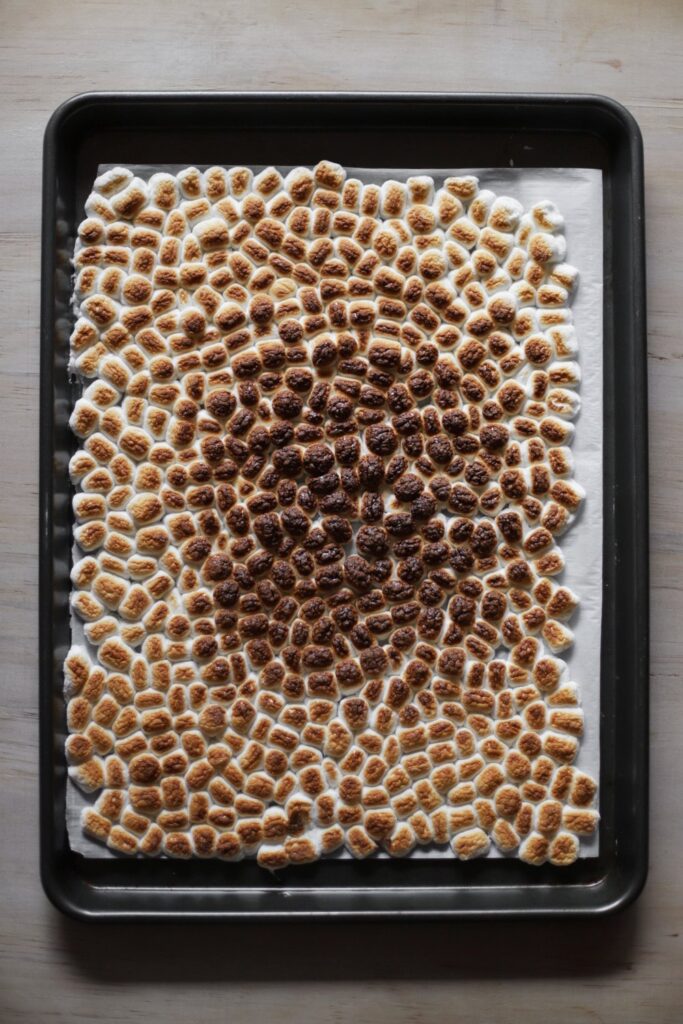
- While you wait on it to heat, set aside a handful of the mini marshmallows for the topping, about 1/2 cup (25g). Place them on a small sheet pan (on top of a towel) and carefully caramelize them with a culinary torch to give them a little char (if you don’t have a culinary torch, you can put them on a skewer and carefully roast them over a gas stove, or simply use them untoasted). Set aside for decorating later.
- Line a large sheet pan with parchment and spray with cooking spray. Spread out the rest of the mini marshmallows into a single layer (almost the entire bag, minus the 1/2 cup for the topping). Place under the broiler and toast until golden brown all over, charred in many spots, and slightly smoking (this might only take 30 seconds, so watch them like a hawk, and move the pan around a bit if your broiler doesn’t toast evenly).
- Use a butter knife to score the sheet pan of marshmallows down the center, to remind yourself to divide them in half (half for the syrup, and half for the filling). Let them cool completely before scraping them up.
- For the marshmallow syrup: Place the sugar in a small saucepan, cover it with the water, and bring to a boil over high heat, gently stirring it occasionally. Once it comes to a full boil, let it go for 3 minutes, then reduce to medium-low, and add 1/2 of the broiled marshmallows (use a greased spatula to scrape them up). Stir until the marshmallow dissolves (you can increase the heat, but do not let it boil over), and remove the syrup from heat as soon as they dissolve.
- Set aside while you make the baklava.
- For the baklava: Set the oven to 350°F/177°C convection**, and grease a rimmed sheet pan.
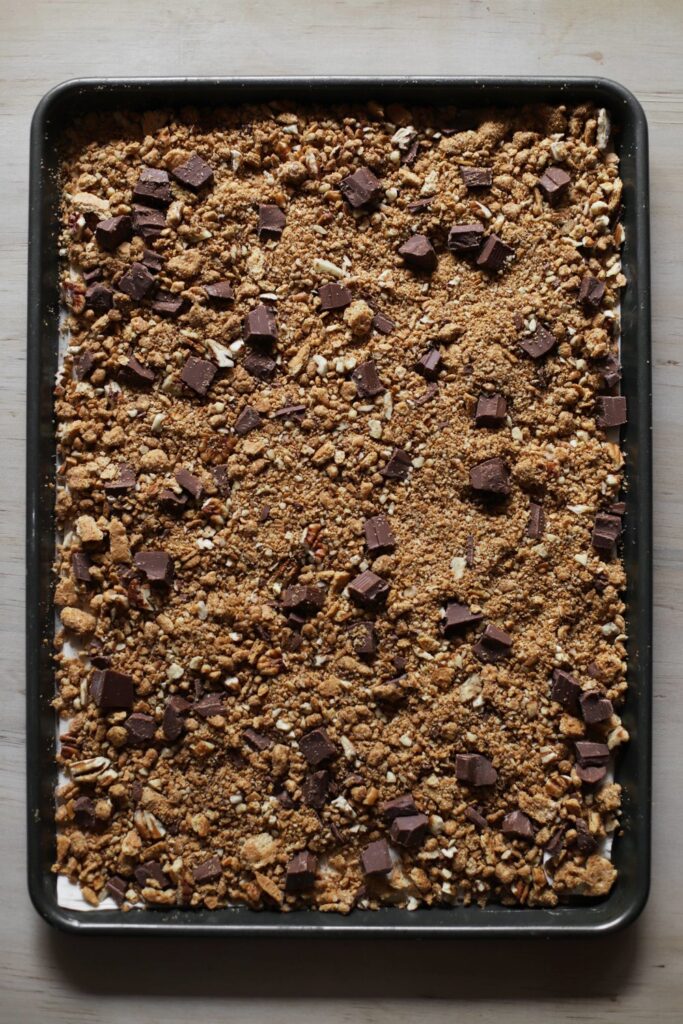
- Place the pecans, graham crackers, and salt in a food processor, and pulse a few times, until they’re coarsely ground. Remove half of the graham/pecan mixture to a mixing bowl.
- Add 1/2 of the remaining broiled marshmallows to the food processor with some of the graham/pecan mixture. Run until it’s evenly worked in and no longer clinging to the blade (don’t pulse, just let it run for about 15-30 seconds at a time, so it can fling the gooey marshmallow off the blades and work it in). Add the next 1/2 of the broiled marshmallows, and run to distribute once again. Remove to the mixing bowl and mix everything together with the 1 heaping cup (170g) chocolate chips.
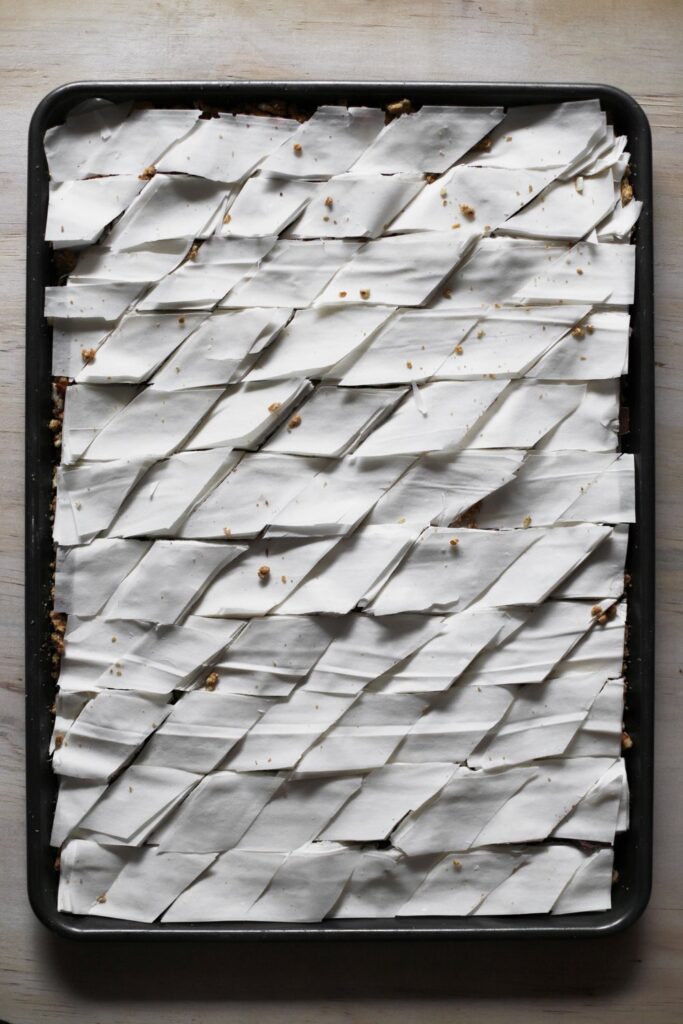
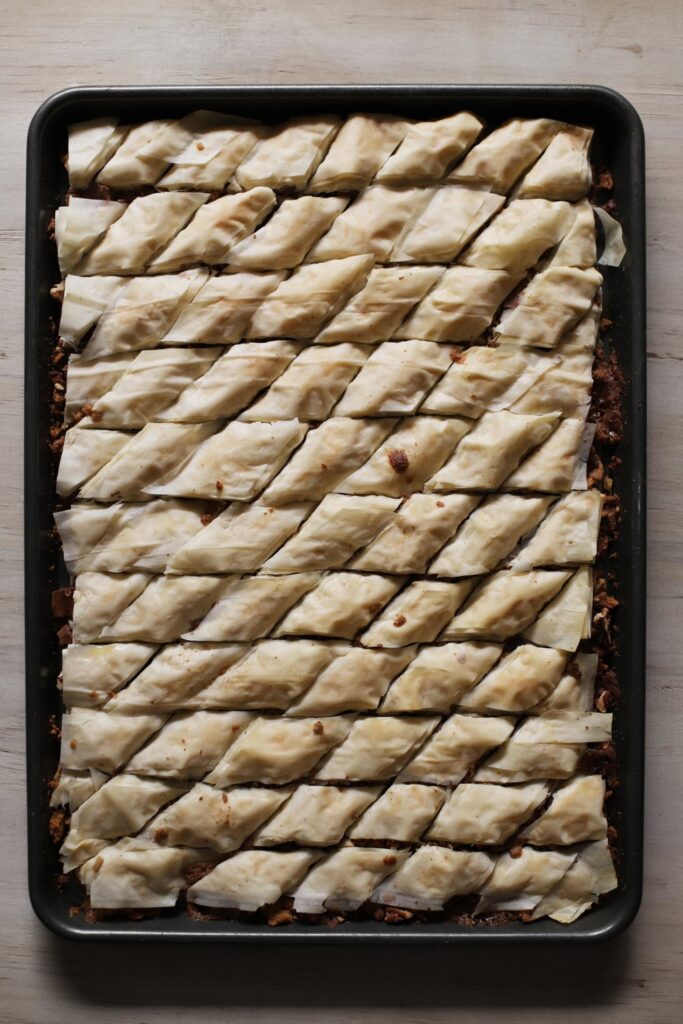
- Make sure you have all your ingredients (including the clarified butter) ready before you open the filo dough. Place half of the filo dough on the sheet pan, spread the filling evenly over it, and place the rest of the filo dough on top of the filling.
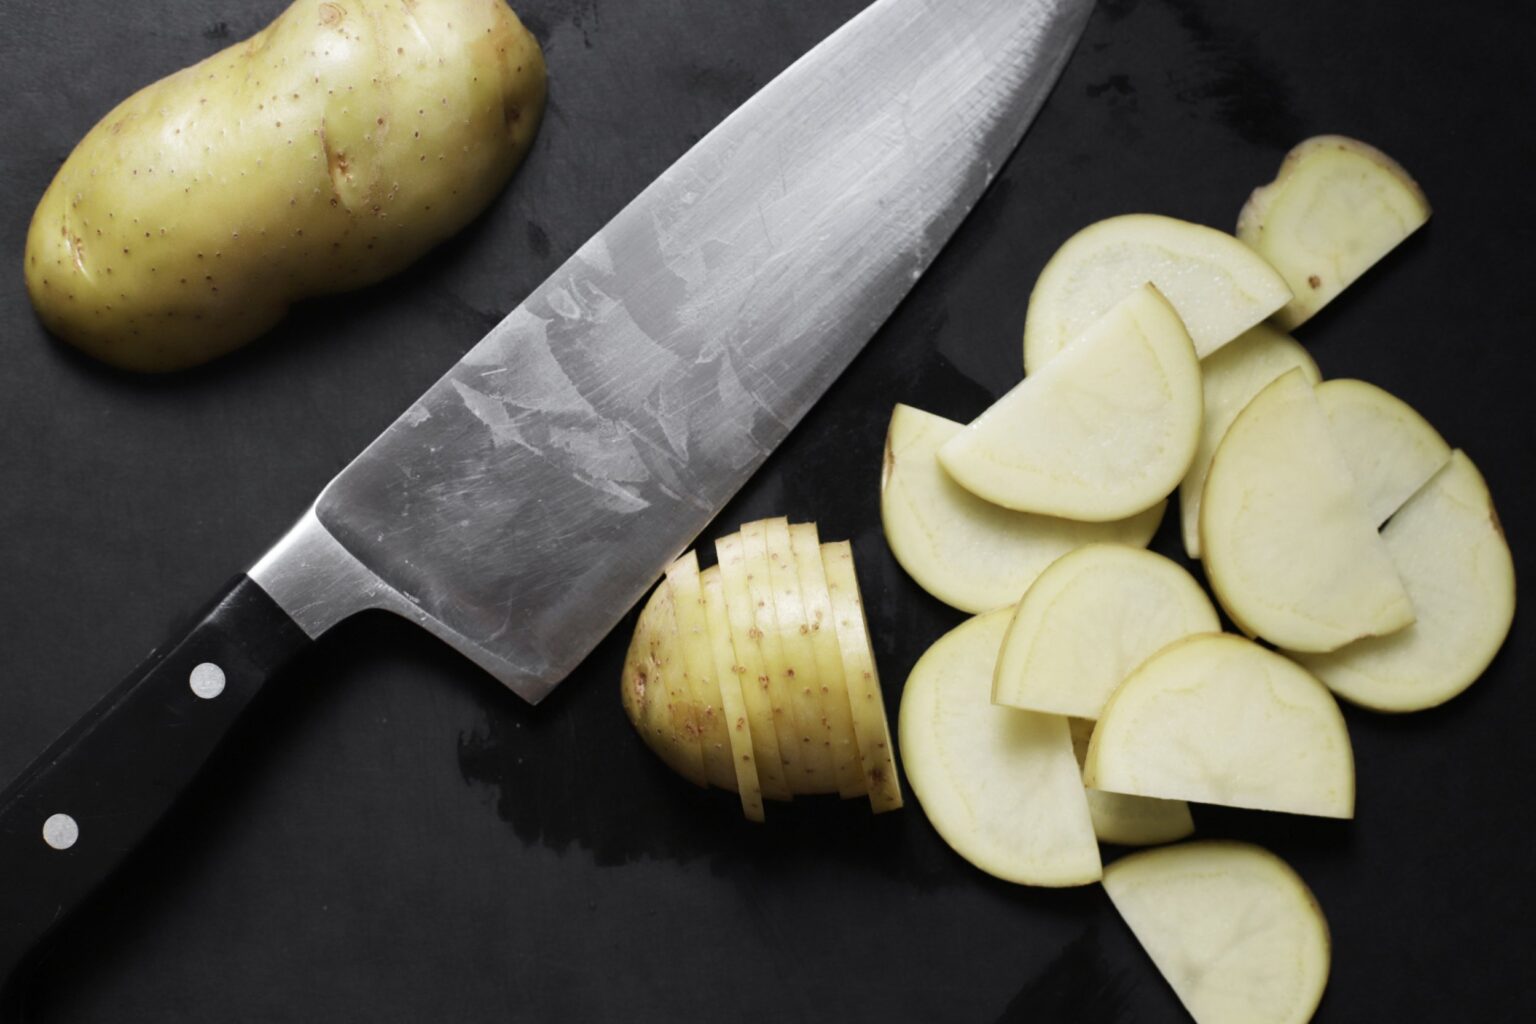
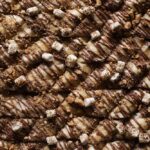
- Cut the baklava into diamonds by slicing straight across in the short direction, then diagonally (see photos in my original baklawa/baklava post). It’s best to work with a very sharp knife. It’s alright if a few of the pieces go a little awry, but you want everything to stay pretty lined up.
- Slowly and evenly drizzle the hot clarified butter over the sliced baklava.
- Bake for about 25 minutes, until it has lightly browned.
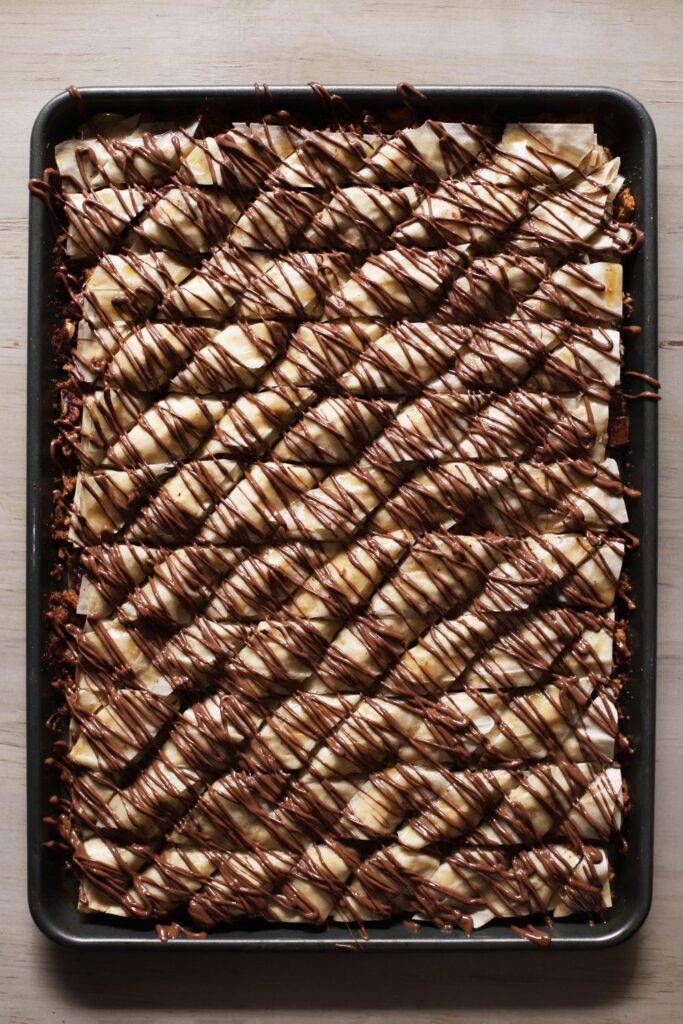
- A few minutes before the baklava is ready to come out of the oven, slightly warm the syrup on the stove so it’s not gloopy when you pour it.
- As soon as the baklava comes out of the oven, slowly pour the warm marshmallow syrup over the surface, allowing it to sink in a bit as you pour it. If any syrup runs off to the side (if your tray is a little roomy), feel free to slightly tilt the tray and spoon it back over the center (don’t worry if it looks messy).
- Let it sit until it comes to room temperature, at least 2 hours.
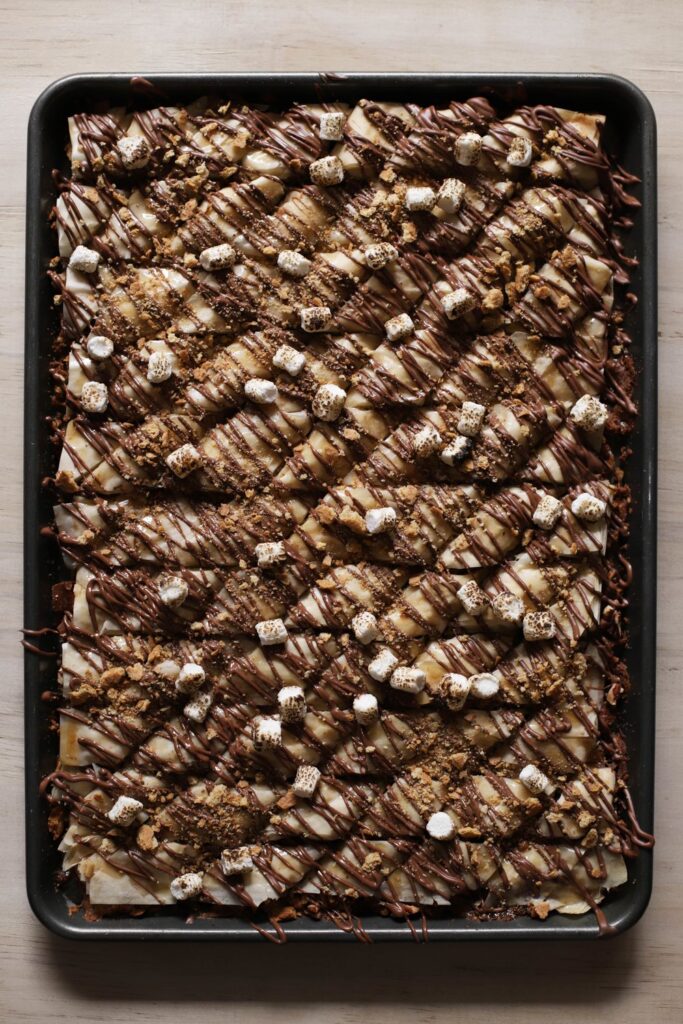
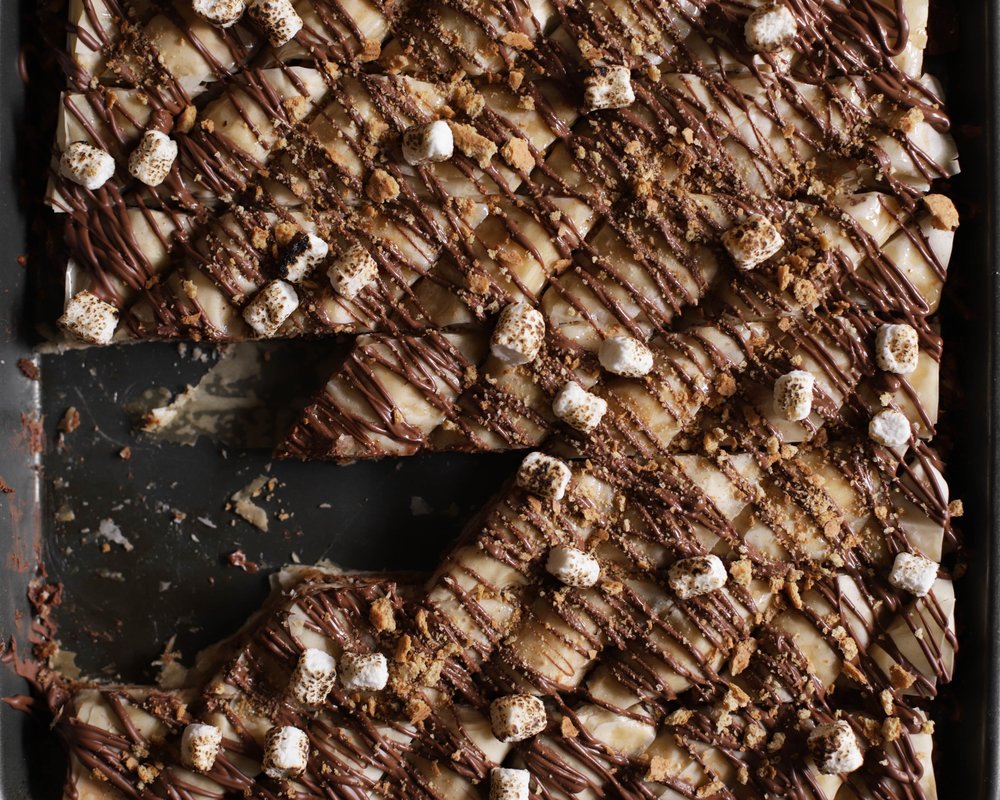
- To decorate: Temper the 1 cup (150g) chocolate (gradually melt 1/2 cup of chocolate chips in the microwave, 15-30 seconds at a time, stirring between each zap. Once melted, add the other 1/2 cup, and stir until they melt without microwaving—or microwave 5 seconds at a time if they don’t melt after a couple minutes).
- Drizzle the chocolate over the room temperature baklava (with a piping bag or spoon), and decorate with the toasted marshmallows and crumbled graham crackers.
- Wait until the chocolate hardens. Cut through the lines you made before baking, and then serve. Store at room temperature for 3 days, or the freezer for longer. It’s even better the next day.
Notes
* Clarified butter is really easy to make, and I’ve got a video and recipe here. This amount of clarified butter comes from about 8 ounces / 227 grams sweet cream butter (which is conveniently the amount in my
clarified butter recipe).
** If you don’t have convection, no worries—you might need to slightly increase the temperature and/or bake it for slightly longer. If your convection fan is particularly strong, you might want to bake without convection, otherwise the pieces of filo might go flying. I’ve only had this problem baking in commercial kitchens, and most home ovens won’t actually blow things around.