• Skip to primary navigation
  • Skip to main content
  • Skip to primary sidebar
  • Skip to footer
Cardamom and Tea
  • Blog
  • Recipes
  • About
  • Cookbooks
    • Piecemeal
    • A Dish for All Seasons (my first cookbook)

Creamy Oatmeal

March 2, 2021 by Kathryn Pauline 181 Comments

oatmeal with strawberries from overhead

I’m not one for making big splashy statements. But since oatmeal is probably the least splashy food of all time, maybe you’ll allow me just one. The way we have all decided to cook our oatmeal is not making us happy! We have turned oatmeal into a stodgy blob, and it is no longer living its best life. If you enjoy that gloopy texture, or if you’re already a fan of creamy oatmeal, you can totally sit this one out. I am not here to yuck your yum.

This post is for everyone who finds oatmeal to be a constant disappointment. So if oatmeal makes you feel as though your own personal malaise has somehow manifested in a non-newtonian fluid, this post is for you. Only 6% of folks in the US consume it (4% in the under 35 age bracket).

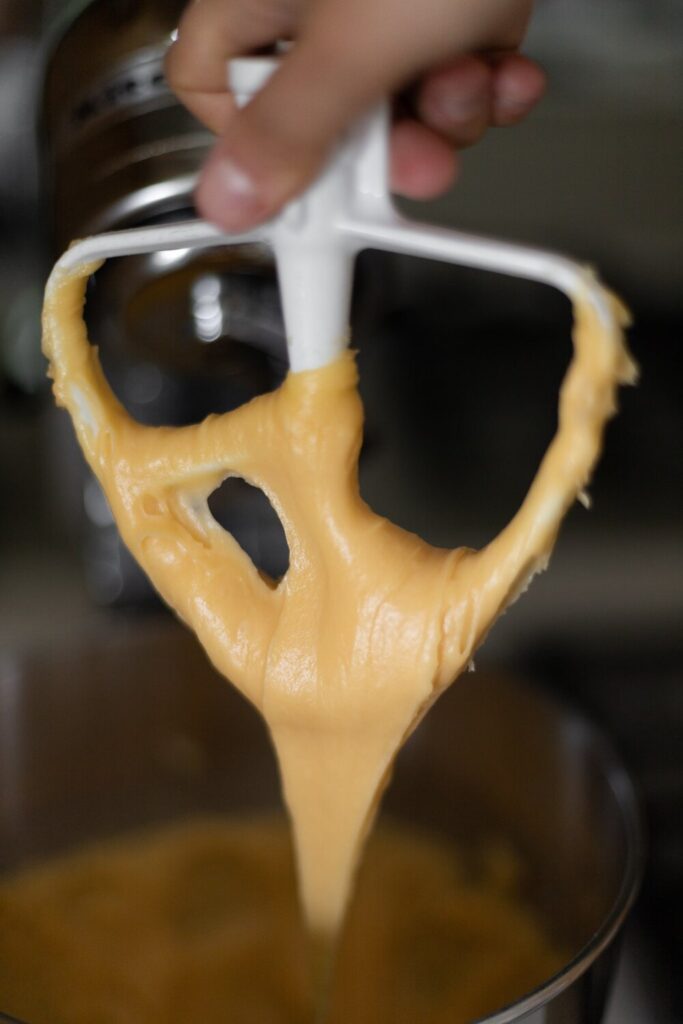
Oatmeal was never my personal favorite, until I started recreating the creamy oatmeal my grandmother makes. The technique is always super easy:

For silky-smooth and creamy oatmeal, use way more liquid than the side of the box tells you to.

Drown your oats with water and milk and simmer until they go from watery to velvety smooth. Then pour (yes, pour! not plonk!) some into a bowl and top with your favorite fruit. With stodgy/gloopy oats, the fruit pieces tend to perch atop the rock-hard surface like ducks on a frozen lake. But you’ll know you did something right when your fruit pieces gloriously nestle into the porridge.

what’s in this post

Before I get to my recipe, I’ve got a little intro to creamy oats:

  1. I’ll talk a bit about why I think rolled oats tend to be under-appreciated.
  2. I’ll also explain why I think some folks tend to be nervous about adding extra liquid.
  3. Finally I’ll share the details of this method.
  4. Or feel free to skip to the recipe if you’re already excited to try creamy oatmeal for yourself.
 

why rolled oats are under-appreciated

While steel cut oats have a pretty strong fan club, old fashioned rolled oats tend to go under-appreciated. I think that’s because folks often ask rolled oats to behave in a way that doesn’t play to their strengths. Here are a few ways I believe rolled oats are misunderstood:

1. You can’t replicate the chewy texture of steel cut oats in rolled oats:

Steel cut oats are a great idea if you’d like to really embrace the chew (though they are very versatile, and also work perfectly well in a silkier, creamier porridge). But old fashioned rolled oats are wonderful on their own terms, and are best made into a velvety, creamy porridge. Unfortunately, most recipes use way too little liquid in an attempt to create a steel-cut-adjacent texture. This results in a stodgy gloop. Best not to try to make your old fashioned oats behave as steel cut oats.

2. Overnight oats don’t deliver on their promises:

Some have tried to solve the mushy oatmeal texture problem by introducing an overnight soak for rolled oats. This supposedly retains their chew and texture. Full disclosure, the texture of overnight oats is just not for me (though again, not yucking your yum). But even if you enjoy overnight oats’ texture, you have to admit, they’re not exactly chewy. Rolled oats just can’t be expected to “retain” their chew, since they were never really chewy to begin with.

3. The ingredient ratios on the old fashioned rolled oat box are questionable:

This is the original sin, which led to the need for such interventions as overnight oats and chewy steel cut. Following the ingredient ratios on the box of rolled oats results in the gloopiest oatmeal texture ever, one that sets up even before it hits the bowl. There’s just not enough liquid.

If you don’t like oatmeal, it might just be because you’ve had it prepared this way. Again, I’m not here to tell you to stop enjoying something you love. But given oatmeal’s staggering unpopularity, as well as the entrenched status of this cooking method, I have to assume this method of preparation is not working for many people.

4. Instant oats give people watery oats anxiety, but “watery” is not the same as “smooth and creamy”:

Whenever I tell someone that I add a lot of liquid to my oats to make them super creamy, people often respond by saying “hmm, but wouldn’t that just make them super watery and mushy?” If you’ve ever had instant rolled oats steeped in boiling water or milk, you’re probably familiar with that watery/soggy texture. I’m pretty sure the soggy disaster of instant oats is the reason folks are afraid of adding more liquid to their old fashioned rolled oats. But this sets up a totally false dichotomy between watery/soggy oats and gloopy/stiff oats. There is a creamy alternative out there, which is nothing like either.

The bottom line: when cooking old fashioned rolled oats, always shoot for creamy and silky, rather than firm and chewy. When cooking steel cut oats, go for either firm and chewy or creamy and silky. And when cooking instant oats… maybe consider cracking open a box of pop tarts instead! (Save me a s’mores or strawberry one please!)

Edit (21 Aug 2024): Thanks to commenter, Chelsea, for pointing out that you can absolutely use instant oats with this recipe’s method to good results! I’ll never be a fan of instant oats steeped in hot water or milk. But they work really well cooked with this recipe’s method. Highly recommend if you’re looking for ultra-smooth custardy oatmeal.

oatmeal with strawberries

My favorite method of cooking rolled oats: 1 part oats to 4 parts liquid (by volume).

The key to perfect old fashioned rolled oats is to use about twice as much liquid as most recipes say to use. Most recipes (including oatmeal boxes) have you use a ratio of 1 part oats to 2 parts liquid by volume, but I much prefer 1 part oats to 4 parts liquid by volume (that’s about 1 part oats to 9 parts liquid by weight). Or if you don’t feel like doing the math, just follow the recipe at the end of this post.

If you’ve never made oatmeal this way, you’ll probably feel like you’ve made a huge mistake at first. Indeed, it looks like an awkwardly large amount of liquid for such a small amount of oats. It will look incredibly watery at first, like instant oats gone horribly wrong. But after about 15 minutes, its starches will swell and burst, a small amount of the liquid will cook off, and it will magically thicken into a velvety texture. It might still look slightly too thin, but it will set very slightly as it cools at the table.

As my grandmother would probably want me to remind you: Don’t forget that this method has fewer calories than thick gloopy oatmeal (depending on the kind of milk you use). So be generous with the serving size if you’re hungry. It’s very light, so you might want to eat a bigger bowl than usual if you like to start off your day with a big breakfast.

oatmeal simmering on the stove
macerated strawberries sitting on a jar in front of the stove

a world-wide love of creamy oatmeal:

This cooking method isn’t limited to just my family. Living in Hong Kong, I order porridge in cha chaan tengs, and it always shares the same texture as the oatmeal my Assyrian grandmother makes. When my sister visited Peru, her host families all cooked their oatmeal the exact same way. In Melbourne (where I live), porridge is on every brunch menu, and it’s always perfectly silky smooth, never gloopy (and often topped with rhubarb, *swoon*).

I also recently asked friends from our intersectional food writers’ facebook group, and we shared a similar experience of smooth and creamy oatmeal, having grown up in Indian, Filipino, Jewish, Puerto Rican, Korean, and Assyrian families (thanks Celeste, Nandita, Jessica, Caroline, Twilight, and everyone!).

how to top it:

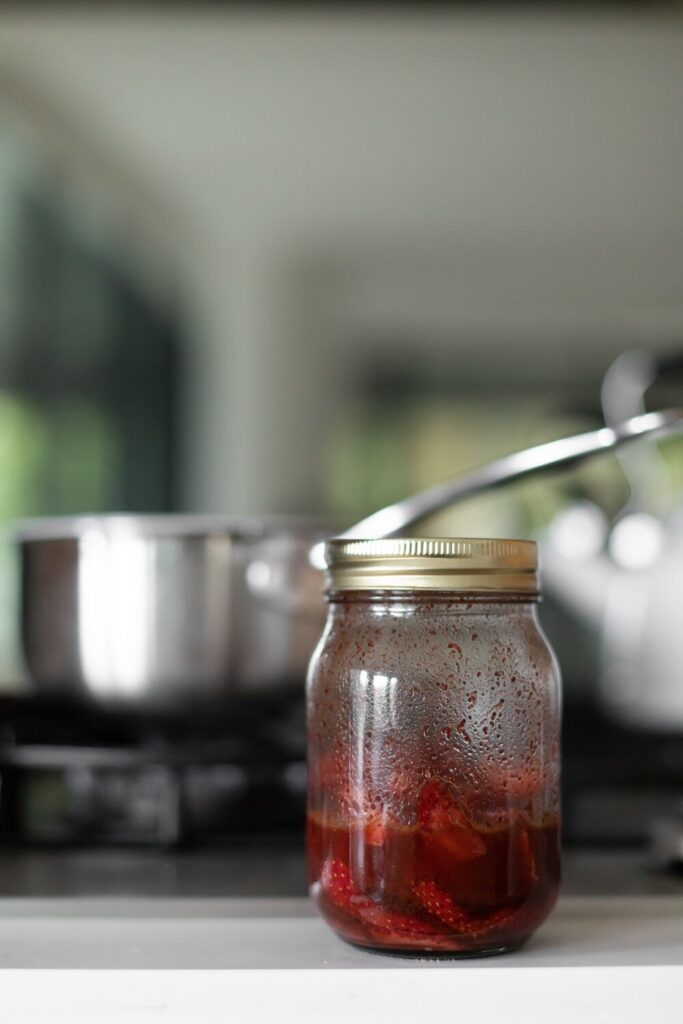
The following recipe includes instructions for macerating strawberries, a really easy method for preparing a lightly sweetened fruit topping. You can macerate pretty much any fruit (especially peaches, plums, nectarines, other berries, etc.) by sprinkling them with a little sugar, and letting their juices accumulate in the fridge for at least 30 minutes (more like 24 hours is ideal). Use the syrup that collects sparingly (or generously!) as a little sweetener.

If you’re short on fresh ingredients, you can’t go wrong with cinnamon and brown sugar.

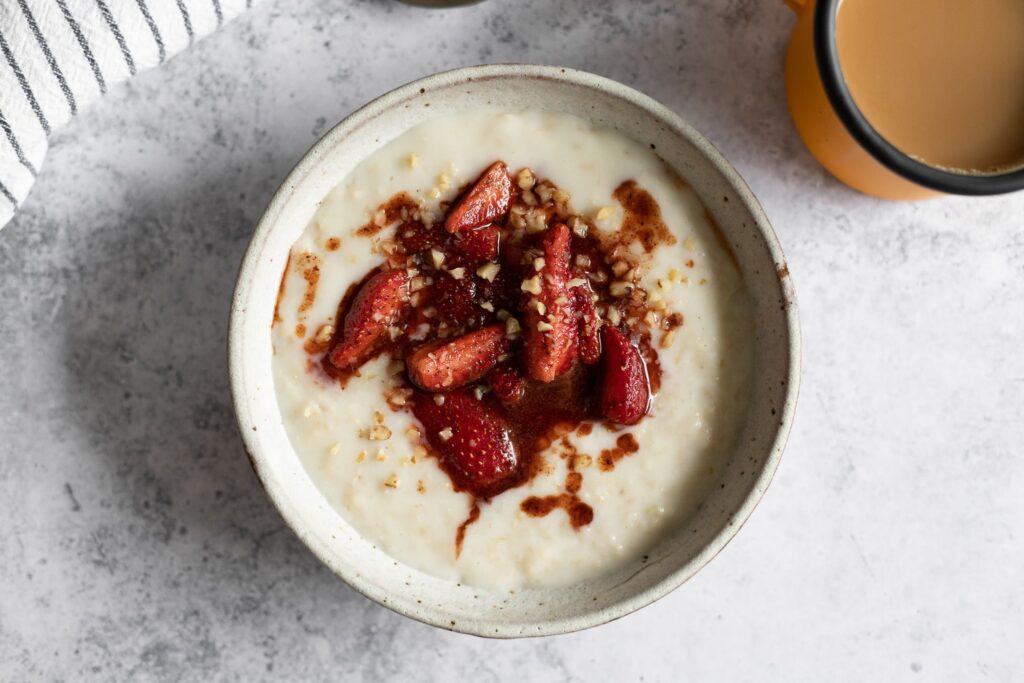
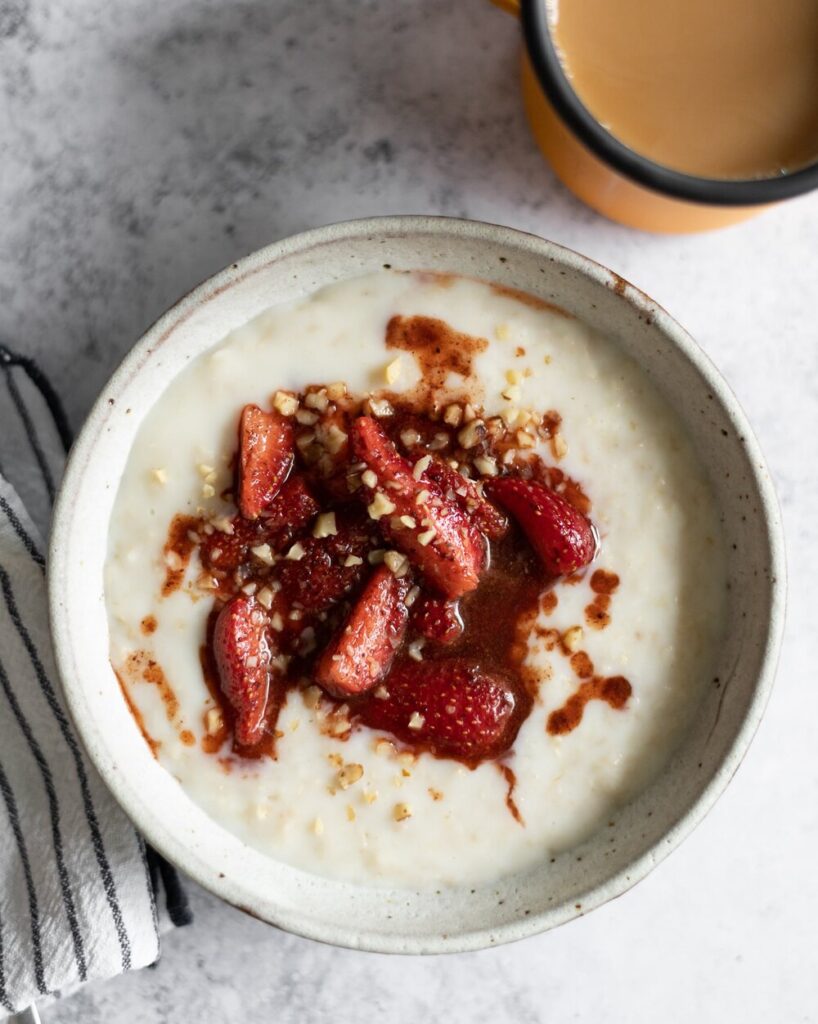
I packed some macerated berries, rolled oats, and dry milk on a camping trip a couple weeks ago, and we had such a lovely breakfast of porridge and coffee. I mostly brought the oatmeal for myself, but for lack of anything else to eat, Simon accepted a bowl of smooth and creamy oatmeal with a weary smile, and ever since, it’s become his new favorite breakfast. It was a fun turn of the tables, since Simon has always loved the outdoors, and I am a city mouse who has suddenly started to love camping after being cooped up indoors all year. It’s a good time to try something new!

oatmeal with strawberries in mugs in a picnic table, with 2 mugs of coffee, a pourover coffee maker, and a gingham-lidded jar
oatmeal with strawberries, from overhead, with coffee and a napkin around it
Print

Creamy Oatmeal

oatmeal with strawberries
Print Recipe

5 Stars 4 Stars 3 Stars 2 Stars 1 Star

4.9 from 55 reviews

  • Author: Kathryn Pauline
  • Prep Time: 5 minutes
  • Cook Time: 15 minutes
  • Total Time: 20 minutes
  • Yield: 2 large servings

Ingredients

for the oats:

  • ¾ cup old fashioned oats [75g]
  • 1½ cups water [355g]
  • 1½ cups your milk of choice* [355g]
  • ¼ teaspoon salt
  • Toppings (e.g., macerated fruit, chopped nuts, spices, etc.)

for the strawberries:

  • 8 oz container strawberries [225g]
  • 2 tablespoons brown sugar [25g]
  • 1 teaspoon cinnamon (optional)
  • 1 teaspoon sumac (optional)
  • ¼ teaspoon salt

Instructions

  1. For the oats: Bring the oats, water, milk, and salt to a simmer in a small saucepan* over medium heat, stirring every minute or so. Once it comes to a simmer, reduce the heat to medium-low and continue to simmer for about 15 minutes, stirring occasionally, until the liquid thickens and the oatmeal softens. It will start out watery, and at a certain point it will noticeably thicken (e.g., the bubbles will get bigger), while still remaining very pourable and creamy. Leave it uncovered the whole time, and be careful not to let it bubble over.
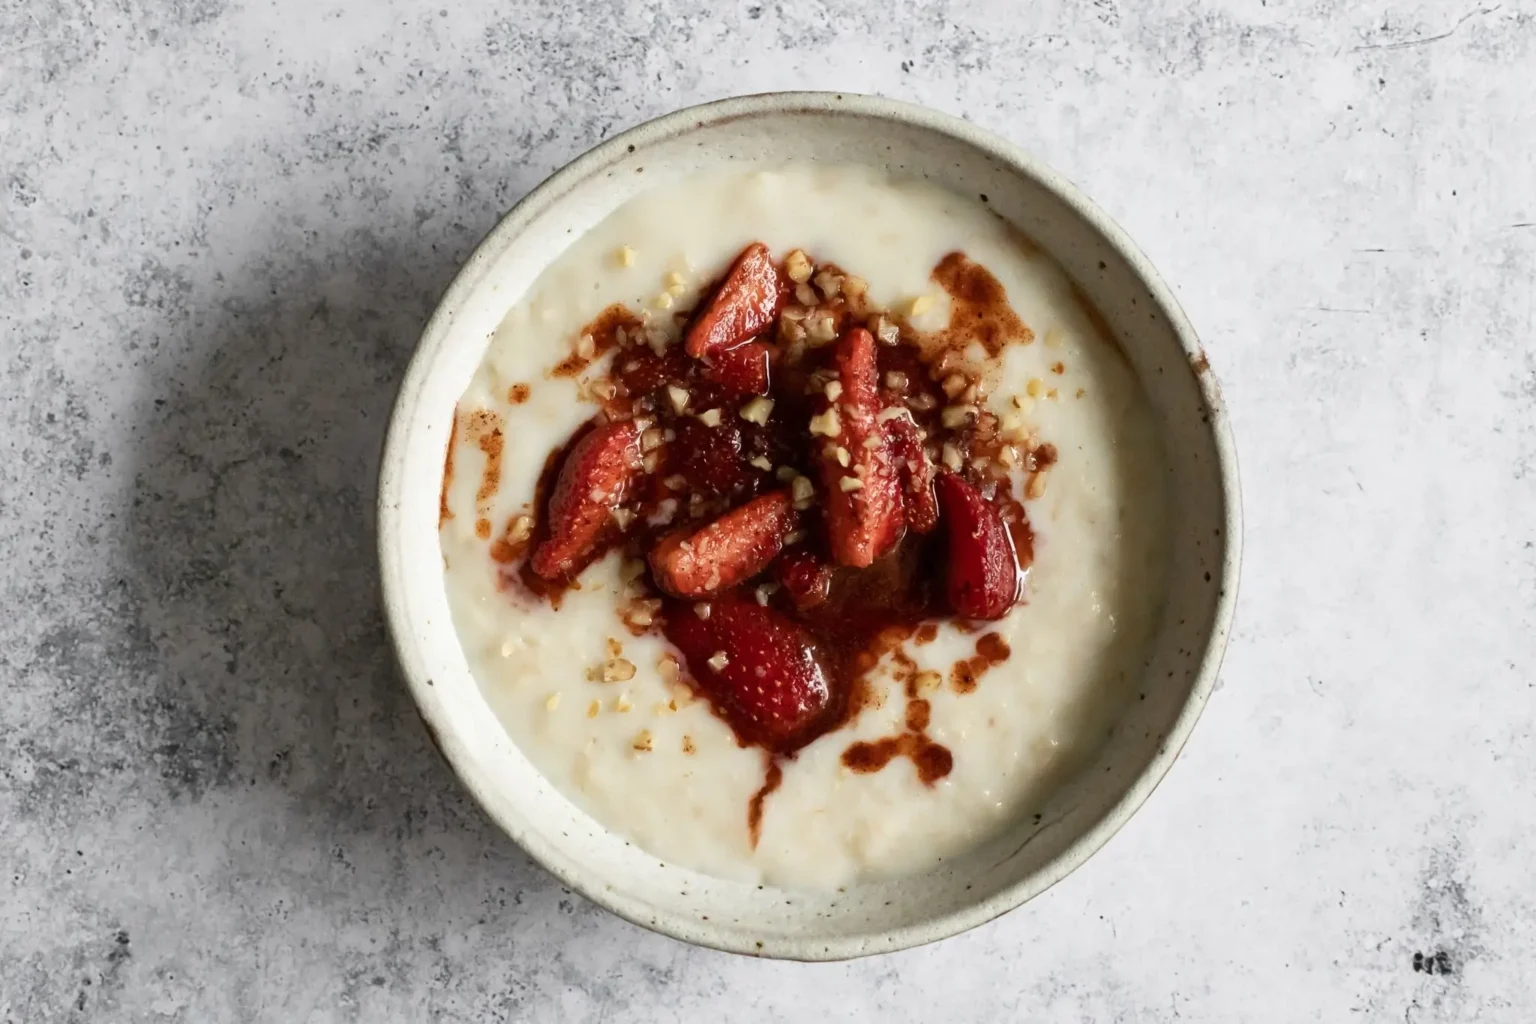
  2. Pour into bowls and let it cool off for a few minutes (it will thicken a little more after a couple minutes). Add your favorite toppings at the table (here, pictured with chopped walnuts and macerated strawberries).
  3. For the berries: Hull and quarter your strawberries, place in a jar along with brown sugar, cinnamon, sumac, and salt. Shake together until evenly coated, and place in the refrigerator for at least 10 minutes, up to overnight.
  4. Spoon the berries and rendered syrup over your oats.

Notes

* Feel free to use whole cow’s milk, or any vegan milk. Coconut milk is one of the strongest tasting vegan milks, so only use it if you’d like some coconut flavor to come through (if you’re using coconut milk, use the kind from a carton in this recipe—you can use the kind from a can, but you need to water it down to turn it into something more like the kind in the carton).

** If you’re using a wide pan instead of a small saucepan, you may need to add a bit more water as it cooks (more water will evaporate from a wide pan).

find us on instagram and let us know what you made!

Filed Under: breakfast, dairy free, every recipe, family recipes, gluten free, vegan, vegetarian Tagged With: berries, cinnamon, middle eastern, oats, porridge, strawberry, sumac

banana éclairs with orange blossom (+ variations)

February 9, 2021 by Kathryn Pauline 2 Comments

eclairs topped with chocolate ganache, a banana slice, and orange zest

Last week I promised I’d be back in March with some new recipes. But I just couldn’t resist bringing you these banana éclairs a little sooner, just in time for Valentine’s Day. Whip up a batch, box up a few to leave on your friends’ doorsteps, and don’t forget to save a few for yourself.

There’s a lot of technical stuff involved in éclair baking, but I’ve included all the important details in the recipe for orange blossom banana éclairs at the end of this post. So you should be able to tackle this project even if you’ve never worked with choux pastry before. It’s actually not as impossible as it seems, especially if you measure everything in grams. While éclairs do feature three separate components, each component is actually extremely doable.

the perfect éclair

Growing up, my family would routinely pick up desserts from the Swedish Bakery in Chicago (now sadly closed). They have a special place in my heart as the small business that gave my family so many of their first jobs after immigrating to the US. But they also just objectively had the best cakes, cookies, and éclairs in the city. So whenever I make a Swedish or French pastry, I do so with their baked goods in mind. In particular, their éclairs had a few important qualities that stand out:

1. A thick pastry cream:

Éclairs are usually filled with crème pâtissière (a custardy pastry cream). But the Swedish Bakery’s was significantly thicker than other éclairs I’ve tried. My ideal éclair’s creme pat doesn’t run or ooze easily, sets up super firmly after chilling, and doesn’t make the choux soggy. This banana pastry cream might seem like it has a lot of cornstarch, but it’s essential for the right texture.

2. Fudgy yet thin ganache glaze:

Éclair recipes are generally divided between those that include a chocolate glaze or icing and those that include a thick ganache. The Swedish Bakery topped theirs with a fudgy yet thin layer of ganache, which I’ve emulated here. It’s a little thinner than what you’d use to frost a cake, but a bit thicker than a chocolate glaze.

3. Crisp yet custardy pâte à choux:

Removing your shells from the oven at the exact right moment comes with practice, and it’s important to err on the side of a little more done if you’re ever unsure, lest they collapse at room temperature. Ideally, you’ll learn to time it so that they’re crisp enough to completely hold their shape as they cool, but not totally dried out inside, and still holding onto a very slightly custardy layer.

While I accurately recorded the times and temperatures in my recipe, it’s important to use your senses. Pay attention to what the éclairs look and feel like when you pull them out of the oven. They should feel hollow and brittle on the outside, and they shouldn’t have much give when you gently squeeze them. If you go much further beyond this point, they will burn and dry out. But if you pull them a few moments too soon, they will collapse as they cool.

pastry cream flavor variations:

The following recipe is for orange blossom-flavored banana éclairs. But you can easily change the pastry cream, ganache, and decorations. Just make sure you follow the following substitution guide, whether you’re replacing the banana, the orange blossom, or both:

  • For a more classic pastry cream, leave out the mashed banana and add 120g [1/2 cup] additional milk in its place. That’s a total of 720g [3 cups] milk, and no mashed banana.
  • You can also replace the 1 tablespoon orange blossom water with 1 teaspoon vanilla extract, rosewater, or almond extract. Feel free to do this with either banana pastry cream or plain pastry cream. Also leave the orange blossom water out of the ganache.
  • To decorate:
    • vanilla pastry cream éclairs: just go with a plain, undecorated chocolate glaze (omit the orange blossom water in the glaze).
    • rosewater pastry cream élciars: add 1/4 teaspoon rosewater to the chocolate glaze in place of the orange blossom water, and sprinkle some edible dried rose petals on top of the chocolate ganache.
    • almond pastry cream éclairs: sprinkle some sliced toasted almonds or finely ground raw green pistachios on top, and omit the orange blossom water in the glaze.
Print

banana éclairs with orange blossom water

eclairs topped with chocolate ganache, a banana slice, and orange zest
Print Recipe

5 Stars 4 Stars 3 Stars 2 Stars 1 Star

5 from 1 review

  • Prep Time: 40 minutes
  • Total Time: 2 hours
  • Yield: 12 to 14 éclairs

Ingredients

for choux pastry:

  • 235g water [1 cup]
  • 55g butter [4 tablespoons]
  • 10g sugar [2 teaspoons]
  • ½ teaspoon salt
  • 165g flour [1¼ cup]
  • 4 large eggs broken into a measuring cup [200g]

for pastry cream:

  • 600g milk [2½ cups]
  • 130g granulated sugar [⅔ cup]
  • 15g orange blossom water [1 tablespoon]
  • 2 large eggs [100g]
  • 1 egg yolk [20g]
  • 50g cornstarch [¼ cup + 1 tablespoon]
  • 1 large ripe (not overripe) banana, mashed [140g]
  • Salt

for ganache and decoration:

  • ½ cup heavy cream [115g]
  • 3.5 oz dark chocolate (at least 70% cocoa) [100g]
  • ½ teaspoon orange blossom water
  • Salt
  • Banana chips and orange zest for decoration (optional)

Instructions

for the choux pastry:

  1. Preheat your oven to 400°F [205°C].
  2. Place the water, butter, sugar, and salt in a small saucepan, and bring to a low boil over medium-high heat. Once the butter has melted and you see a few big bubbles, remove from heat and immediately dump in the flour. Stir together until it forms a firm ball. Move the ball to a stand mixer fitted with the paddle attachment. Turn the mixer to medium-low for about 15 seconds just to break it up and help it cool down. Once it stops steaming momentarily, turn the mixer back to medium-low and add the first egg while it’s running. Once the first egg has incorporated into the dough completely (about 30 to 45 seconds), continue adding one egg at a time, waiting to let each one incorporate between additions. Once the eggs have been incorporated, the pastry should drop from the tip of the lifted paddle in a distinct v shape. Transfer it to 1 large or 2 small piping bags.
  3. Line two sheet pans with parchment paper. Cut the tip of the piping bag to leave an approximately ½ to ¾-inch diameter opening. Place a small dot of pastry under the 4 corners of each parchment sheet to help it stick to the sheet pan. Pipe 4 to 5-inch-long straight lines, leaving a generous amount of space between them (they will approximately double or triple in size).
  4. Move to the oven and bake for about 15 minutes, then lower the temperature to 350°F [180°C] and bake for about 20 more minutes. Let them cool at room temperature for at least 15 minutes before cutting open or piping.

for the pastry cream:

  1. Combine the milk, sugar, and orange blossom water in a large saucepan or small stockpot. Set over medium heat and let it come up to a simmer.
  2. While it comes up to a simmer, separately mix the eggs, yolk, cornstarch, and banana together in a medium mixing bowl until there are no raw cornstarch lumps.
  3. Once the milk is just simmering, remove from heat and slowly dribble it into the egg/banana mixture while whisking constantly. Return the egg/banana/milk mixture to the saucepan and bring to a simmer over medium heat, stirring constantly. It will thicken as it comes to a simmer.
  4. Once bubbles break the surface, continue to cook for about 1 more minute, then remove from heat to cool.
  5. Once it’s not piping hot, move to a pastry bag (ideally fitted with a large round tip, but if not, just fill the bag and snip it when you’re ready to use it. If you’re not using a pastry tip, it’s usually best to slice/pipe/sandwich instead of fill, otherwise it can be tricky to get the plastic tip to insert into the end of each eclair). Pipe it while it’s warm or at room temperature.

for the ganache:

  • When you’re ready to dip, bring the cream to a bare simmer over medium heat in a small saucepan. Once the cream is barely simmering, remove from heat and add the chocolate, orange blossom water, and a pinch of salt. Swirl to make sure the chocolate is completely submerged. Let it sit for about 1 minute, and then whisk it together until it’s thickened and completely homogenous. Do not reheat, and dip within about 5 to 15 minutes of making.

to assemble:

  • Once the shells cool, slice the eclairs open along their length or poke a hole on one end. Pipe or spread pastry cream into the middle (then sandwich them back together if you sliced them open). If you’re met with resistance halfway through piping, feel free to pipe from the other side as well. Make the ganache at the last moment. Dip the eclair tops in the ganache. Decorate immediately with banana chips and orange zest, if using (go easy on the orange zest, otherwise the delicate orange blossom flavor will get lost in the shuffle).

Notes

Storage: Store éclairs the refrigerator after filling and decorating. They will be best after about 1 hour of chilling, they’ll stay very good for several more hours. Try to make them within about 12 hours of serving if you’re making them for guests, but keep in mind that they’re still very tasty for a few days afterwards (they just might start to get some condensation on the ganache, and their shells will soften slightly in texture, but they shouldn’t become soggy). They generally keep for about 2 to 3 days before they decline significantly in quality.

find us on instagram and let us know what you made!

Filed Under: every recipe, sweets Tagged With: banana, chocolate, choux pastry, icing, orange blossom water

  • « Go to Previous Page
  • Page 1
  • Interim pages omitted …
  • Page 63
  • Page 64
  • Page 65
  • Page 66
  • Page 67
  • Interim pages omitted …
  • Page 183
  • Go to Next Page »

Primary Sidebar

Kathryn Pauline smiling

Welcome! I’m Kathryn Pauline, cookbook author, recipe developer, and photographer.

Footer

read our privacy policy

© 2017 - 2026 Kathryn Pauline