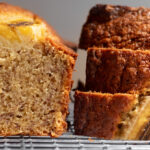
This olive oil banana bread is tender and balanced. It’s not too sweet and it’s perfectly soft. And the olive oil? While this dairy free banana bread is made without butter, that’s not done as some sort of a health swap. Olive oil makes the loaf impossibly tender and adds a richness that somehow tastes more buttery than butter itself. The result is a soft, even crumb and a straightforward banana flavor.
Jump to the recipe if you’re ready to bake, or read on for some tips for success, including instructions on making this a vegan banana bread.


How to bake a fantastic loaf of olive oil banana bread
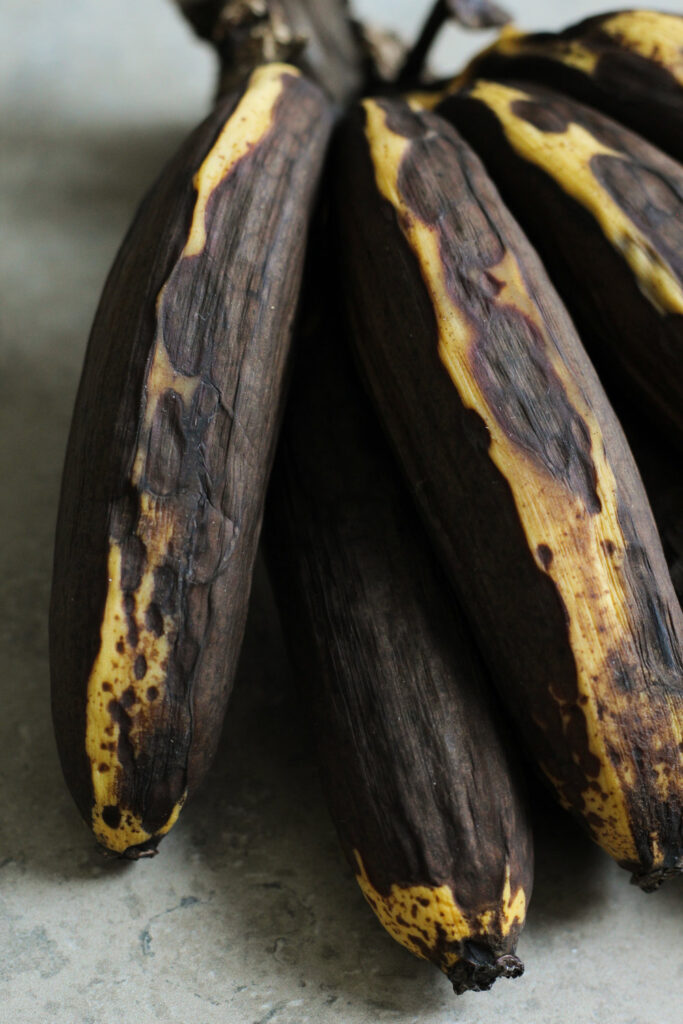
1. Use overripe bananas
This olive oil banana bread doesn’t have a ton of sugar in it. It gets some of its sweetness from the granulated sugar you add, but it gets a lot of it from the bananas. Overripe bananas are a lot sweeter, so using fresher bananas won’t yield as tasty a loaf. Make sure they’re not just speckled but actually starting to darken. Check for any signs of mold or decay and discard if they have started to actually go bad.

2. Don’t overmix.
Over-mixing is one of the main causes of dry, stale-tasting banana bread. Once you add the wet and dry ingredients together, bring them together with as little mixing as possible. This is a good lesson for most cakes, muffins, and the like.
3. Flavorings, mix-ins, etc.
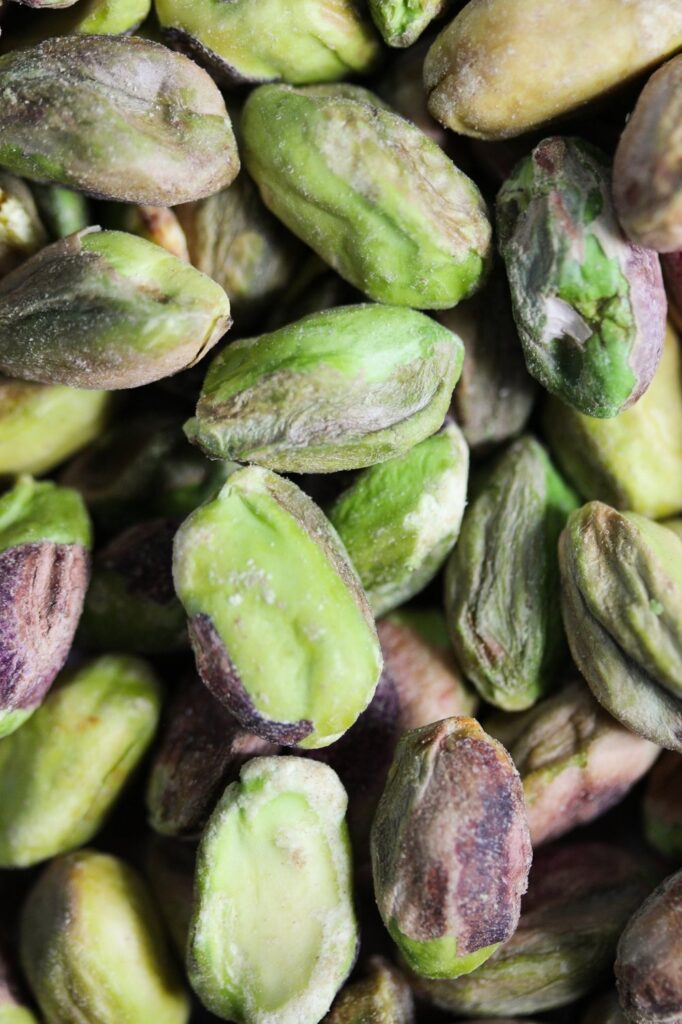
You can absolutely flavor this loaf with cinnamon, vanilla extract, or your flavoring of choice. I kept it simple while developing this recipe, so it absolutely stands on its own. But that doesn’t mean you shouldn’t add a handful of chopped walnuts, pistachios, or chocolate chips. Dry mix-ins and a small amount of flavoring shouldn’t affect the texture of the bake.

4. To cool or not to cool: that is the question!
My recipe recommends waiting 30 minutes before digging in. If you dig in early, all future slices will be a bit drier and less pretty. That might be worth it, depending on how much you like warm banana bread. If you can’t help yourself, I recommend letting it cool for a bare minimum of 5 minutes. But if you want your slices to have longevity, patience is a virtue. Waiting yields a really clean slice and perfectly-textured loaf. They’re also great toasted if you want the best of both worlds.
Why stop at dairy free banana bread? Here’s how to veganize it!
This dairy free banana bread is already halfway to vegan banana bread—the only thing standing between you and a plant-based loaf is the egg. Simply swap the eggs out for a vegan egg replacement. You can use a store-bought one, but you can also make your own. The following makes 2 vegan “eggs”:
- 1/3 cup [80g] soy milk
- 2 tsp [10g] olive oil
- 1 Tbsp + 1 tsp [15g] chia seeds (1 Tbsp for blending, 1 tsp for mixing in)
Combine the soy milk, olive oil, and 1 Tbsp chia seeds in a high-power blender. Blend on high until it turns gray and thickens. If you do not have a high-power blender, blend them with whatever you have, letting them sit halfway through to soak for about 10 minutes before blending fully. Mix in the final tsp of chia seeds in at the end.
No chia seeds on hand? Try my eggless banana bread recipe that simply uses more flour and banana.

[May 2026 update]: If you found this recipe by googling “olive oil banana bread,” then you’re probably sold on the idea (and you’re not wrong—it’s fantastic). But if you’re a little skeptical that olive oil plays well with banana bread, I also recently posted a recipe for dairy-free banana bread, which uses a neutral oil instead. Feel free to check it out if this one doesn’t sound like your cup of tea.
PrintOlive Oil Banana Bread

Ingredients
- 1 cup [240 g] mashed banana from about 3 very overripe bananas
- 1/2 cup [105 g] extra virgin olive oil
- 2 large eggs*
- 2/3 cup [130 g] sugar
- 1/2 teaspoon fine sea salt or table salt
- 1 1/2 cups [200 g] all purpose flour
- 1/2 teaspoon baking soda
- 1/2 teaspoon baking powder
- 1 ripe banana, split lengthwise (optional)
Instructions
- Preheat the oven to 350° F [180° C].
- Grease an 8 x 4 inch [20 x 10 cm] loaf pan.**
- In a medium mixing bowl, whisk the mashed bananas together with the olive oil until very well combined. Add the eggs, sugar, and salt, and whisk together until completely incorporated.
- In a large mixing bowl, whisk or sift together the flour, baking soda, and baking powder.***
- Add the wet mixture to the flour mixture and stir to combine. Do not over-mix (stop mixing as soon as there are no dry pockets of flour).
- Spoon the mixture into the loaf pan.
- Place the banana halves cut-side-up on top of the loaf (if using).
- Bake for about 1 hour. Check for doneness by inserting a toothpick or wooden skewer into the center of the loaf. If it comes out with batter, it needs more time, but if it comes out with just some crumbs, it’s ready to take out.
- Remove from the pan and cool on a rack for at least 30 minutes before cutting and serving.
Notes
* See note above recipe on turning this into vegan banana bread.
** To make this into muffins instead of a banana bread loaf, place 9 muffin liners in a muffin tin (homemade parchment liners or store bought paper ones). If using parchment ones, drizzle them lightly with olive oil. Evenly distribute the batter between the 9 liners, then top each with a 1/2 in [13mm] banana slice. Bake for about 25 minutes, until a toothpick inserted in the center comes out clean.
*** If you want to save on dishes, place a fine mesh sieve over a paper towel and add the flour, baking soda, and baking powder to the sieve. Sift the dry ingredients directly onto the wet ingredients (and don’t forget the dust that filtered onto the paper towel too).
Video note: If you don’t see the video for this post after scrolling up, please disable ad block and try reloading the page.
Note on the pan size: This recipe has never overflowed during testing and it should not overflow on you if you use a standard 8×4 inch pan. But if yours does overflow, something has gone wrong with your ingredient ratios, oven temperature, or pan depth. If you’re making this for the first time and worried it might overflow, you can place a baking sheet on the rack one level down from the rack you’re baking on.
20 October 2025 edit: Since originally posting, I’ve tried making this with a homemade vegan chia egg and it worked great, so I added that note to the notes before the recipe. I’ve also since made these as muffins, so I added a note about to the recipe card.
27 October 2025 edit: I also tried making this with just extra banana and olive oil in place of the eggs, which also worked great, so I added a note to the veganize it section.