• Skip to primary navigation
  • Skip to main content
  • Skip to primary sidebar
  • Skip to footer
Cardamom and Tea
  • Blog
  • Recipes
  • About
  • Subscribe
  • Cookbooks
    • Piecemeal
    • A Dish for All Seasons

chocolate cake with hibiscus curd

October 15, 2017 by Kathryn Pauline 14 Comments

Middle Eastern food enthusiastically embraces that type of tartness that makes you immediately salivate at the mere thought. There’s pomegranate molasses, which adds brightness and sweetness to anything it touches, there’s sumac, whose name even onomatopoeically makes your mouth pucker when you say it, there are sour plums, which we usually eat with salt, there’s so much lemon (preserved, sliced, squeezed), and—perhaps less commonly—there’s hibiscus.

Hibiscus is part of many Middle Eastern, North African, West African, Asian, Caribbean, and Latin American cuisines (the real question is where isn’t it consumed?), and it can be eaten in sweet or savory dishes, or steeped and drank as a tea. One of my favorite Mexican restaurants in Chicago makes the most beautiful hibiscus enchiladas, and iced hibiscus tea is so unbelievably refreshing. I had only had it these two ways, until recently.

It all started when I was strolling (or more like speed walking while carrying a million bags) through the market by my apartment in Hong Kong. I stopped at the stall where I usually buy tomatoes (these particular tomatoes were about to become part of ful mudammas—post coming soon!). As I waited a second while the veggie merchant was weighing some grape tomatoes for me, I noticed a gorgeous pile of these spiky, spindly, deep red pods.

I was pretty sure they were hibiscus, which the merchant confirmed, and so I impulsively bought a huge bag of them for $3 US (which, I know, is crazy—but also, mediocre feta here costs $10, and a teeny tiny, imported bunch of parsley costs $3, so it all evens out). Later, after lots of googling, I learned that these pods are called calyxes, and that they are not the hibiscus flower itself, but a fruit that grows behind the flower, which is revealed once the flower withers away and falls.

On my way home from the market, I decided that these calyxes were destined to become a cake. And once I munched one raw (after first removing the inner pod), my mind immediately went to a double chocolate cake with a layer of hibiscus curd, extra hibiscus curd on the side, and a crown of raw hibiscus on top, which all led to the recipe below. If you’ve never had hibiscus and chocolate together before, it’s sort of like a cross between chocolate-cranberry and chocolate-raspberry.

Fresh hibiscus isn’t normally eaten raw—it’s typically cooked or dried. But it adds a really nice crunchy, tangy bite to salads and baked goods, and I love the way it complements chocolate cake. The crown of hibiscus isn’t just for decoration.

But fresh hibiscus isn’t easy to get your hands on (although you never know! Keep an eye out!), and so I’ve also tested this recipe with dried hibiscus. There’s good news on the dried hibiscus front, because the curd actually develops an even more intensely concentrated flavor with the dried version, so certainly don’t feel like you’re missing out if you can’t find fresh. Dried is actually really easy to find, and I’ve included a note in the recipe with more info on where to get it. And as always, decorations are totally optional; your cake will have a purplish pink surprise on the inside, which will stun everyone who thought this was just another boring cake.

Print

chocolate cake with hibiscus curd

Print Recipe

5 Stars 4 Stars 3 Stars 2 Stars 1 Star

5 from 1 review

  • Prep Time: 1 hour 15 minutes
  • Total Time: 3 hours
  • Yield: about 10 medium pieces, or 14 small pieces

Ingredients

For the hibiscus curd

  • 4 large eggs
  • 2 egg yolks
  • 1 cup sugar
  • 1/3 cup lemon juice *
  • 1/4 teaspoon salt
  • 20 seeded fresh hibiscus calyxes (or 1/4 cup dried hibiscus) **
  • 1/2 cold stick of butter, cut into pieces (2 ounces, or 1/4 cup)

For the chocolate cake:

  • Butter for greasing the cake tins
  • 15 ounces cake flour *** (about 4 cups sifted)
  • 1 teaspoon baking powder
  • 3/4 teaspoons baking soda
  • 4 ounces cocoa powder (about 1 cup + 2 T sifted)
  • 6 tablespoons softened unsalted butter, at room temperature (3 ounces)
  • 1/2 cup olive oil (plain, not extra virgin, or use another neutral-flavored oil)
  • 1 2/3 cups sugar
  • 1/4 teaspoon salt
  • 2 large eggs at room temperature
  • 2 large egg yolks at room temperature
  • 1 cup whole milk at room temperature

For the ganache:

  • 9 ounces dark chocolate
  • 1 cup + 3 tablespoons heavy cream
  • 1 pinch of salt

To assemble the cake:

  • Optional: 10 to 15 hibiscus calyxes
  • 2 layers of chocolate cake, completely cooled (above)
  • 1 batch of hibiscus curd (above)
  • 1 batch of ganache (above)

Instructions

  1. Make the hibiscus curd: Beat the eggs, egg yolks, and sugar for about 2 minutes, until the sugar starts to dissolve and the color lightens a little.
  2. Whisk in the lemon juice and salt, and then stir in the hibiscus.
  3. Cook over medium-low heat for about 10 minutes, whisking constantly (do not stop whisking!). Turn off the heat once the mixture thickens significantly.
  4. Immediately add the butter all at once, and whisk constantly until the butter has been completely incorporated into the mixture.
  5. Blend the hibiscus curd with an immersion blender or food processor.
  6. Chill completely before filling the cake.
  7. Bake the cake: Preheat the oven to 350° F convection. ****
  8. Butter 2 8-inch round cake pans, cover the bottoms in parchment rounds, and then butter the exposed sides of the parchment rounds. *****
  9. Sift together the cake flour, baking powder, baking soda, and cocoa powder.
  10. Use a hand mixer or stand mixer to cream the butter, oil, sugar, and salt together for about 3 minutes, until the mixture lightens in color and texture.
  11. Crack the eggs and yolks into a liquid measuring cup. Add the eggs to the batter 1 at a time. Each time you add an egg, mix it in completely (about 30 seconds), and make sure that the mixture smooths out before adding the next one.
  12. Gradually add the whole milk while you continuously mix, until the batter smooths out.
  13. Carefully mix in the cake flour. Immediately stop mixing as soon as the batter comes together and there are no raw flour pockets.
  14. Divide the cake batter equally among the 2 cake pans (I use a scale to make sure they’re even). Smooth out the tops with a spatula.
  15. Bake for about 20 to 25 minutes, until a toothpick inserted in the middle comes out clean, with just a few crumbs (in my oven, set to 350° F convection, this takes 23 minutes every time, but your oven might be very different).
  16. Run a knife around the pans, staying very close to the side of the pan. Very carefully remove the cakes by inverting, and then let them cool flat-side-down on wire racks (it’s easiest to do this by putting a plate over the cake tin, flipping the whole thing over, placing a cooling rack on the upside-down plated cake, and then carefully flipping it again without squeezing everything together).
  17. Make the ganache: Heat the heavy cream in the microwave or on the stove over medium heat.
  18. Once the milk comes to a simmer, pour over the chocolate and salt, and let it sit for 3 minutes. Whisk together until everything smooths out. If there are any chunks of chocolate left, microwave for about 15 seconds and then continue to stir (repeat until there are no chunks left).
  19. To glaze a cake with ganache, you have to make a little extra, which will drip off onto a tray below. To use up the leftovers: combine the extra room temperature ganache with the cake scraps, roll into balls, coat with tempered chocolate, and let it set (enjoy as cake truffles). Or cut the ganache amount in half, and let it drip partway down the sides, for a semi-naked cake look.
  20. Assemble the cake: If using, trim the stem end of the hibiscus calyxes and pull out the seeds. You’ll be left with a crown-shaped pod.
  21. Once the cakes are completely cool, use a long serrated knife to level the cakes if they have humps. Save the scraps for cake truffles or freeze them for another day’s snack. If it looks level, use the ridge at the top edge of the cake as a guide, and cut off the hump jutting out above it.
  22. Once the cakes are level, place the first one cut-side-up on an 8-inch cake round (if you don’t have one, no worries—just be super careful when you eventually move it), and place it on a wire rack over a sheet pan.
  23. Dole out about 1/3 to 1/2 of the chilled hibiscus curd, leaving a border of about 1/4 to 1/2 of an inch around the curd (it will spread a little as the cake settles).
  24. Place the next layer cut-side-down over the curd-covered first layer.
  25. Make sure the ganache is at pouring-consistency (it should be somewhat viscous, but not gloopy. It should easily pour, but it shouldn’t be too thin). Microwave it for about 10 seconds at a time to thin it out, or let it sit at room temperature for a few minutes to thicken it.
  26. Pour the ganache over the top of the cake and use an offset spatula to smooth out the top and allow it to drip down the sides.
  27. The glaze will start to set almost immediately. Once it has started to set a little (about 1 to 5 minutes after glazing), decorate the top with the (optional) hibiscus calyxes.
  28. Move to a cake display or plate, and enjoy with extra hibiscus curd on the side.

Notes

* If possible, use a reamer, not a squeezer. Most of the lemon’s flavor is in the zest, and squeezing the whole lemon adds too much lemon flavor to the curd, which overshadows the hibiscus. Here, you want acidity with as little lemon flavor as possible.

** I used fresh hibiscus in the photos above, but I’ve also tested the recipe with dried and it works great. In fact, dried hibiscus will give you a much stronger hibiscus flavor than fresh. But using dried won’t get you the same bright pink color; it will be a little more on the purple side. You can find dried hibiscus in the tea section (cut the tea bags open!), in spice shops, at most Asian and some Middle Eastern markets, and at very well-stocked supermarkets.

*** It’s fine to use all purpose flour, but the cake won’t be quite as tender. In either case, be careful not to over-mix once you add the flour to the wet ingredients.

**** If you don’t have a convection oven, you might need to cook the cakes a couple minutes longer.

***** You can use a 9-inch pan or another size. The cook time will be shorter with a wider pan and the finished cake will be shorter and wider (and you might need a touch more ganache, since most of it ends up on top).

find us on instagram and let us know what you made!

Filed Under: every recipe, sweets Tagged With: cakes, chocolate, curds, fall

Pistachio Banana Bread

October 8, 2017 by Kathryn Pauline 24 Comments

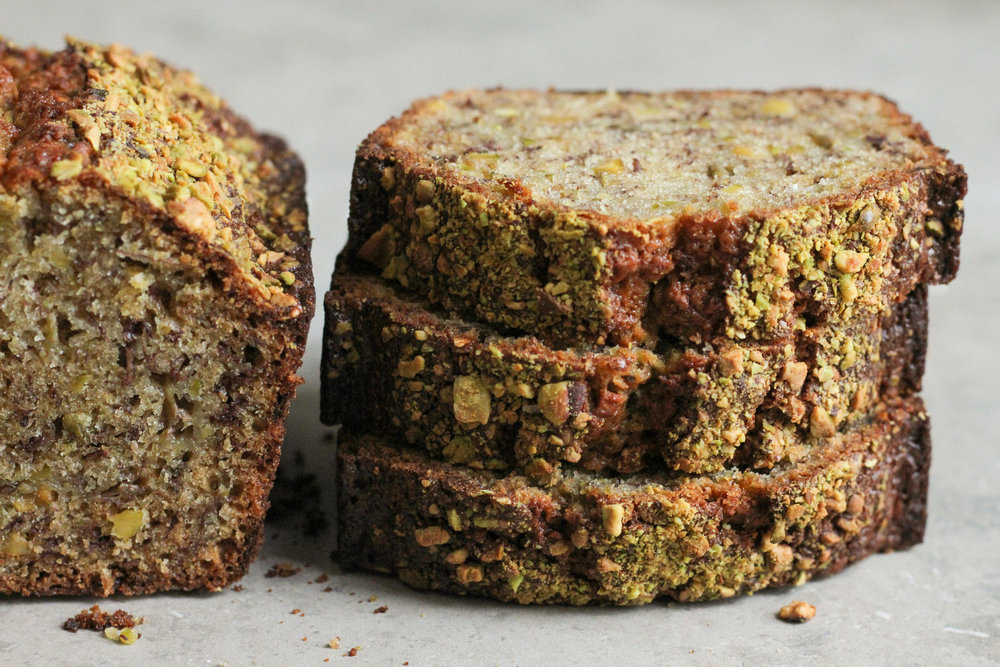
Lately, I’ve been obsessively trying to perfect my recipe for lokma (AKA Turkish delights). I might post it someday soon, but that’s all beside the point, because this post is not about the high-maintenance, fast-paced, high-stress world of candy making. This is a post about the lowest maintenance sweet of all time: banana bread! Or more specifically, pistachio banana bread.

Jump to the recipe if you’re ready to bake, or read on to learn about the secret ingredient I love to add to banana bread. And don’t miss my recipe for olive oil banana bread if you’re looking for a dairy-free alternative.

My secret ingredient for the best banana bread

It’s a bit of an obscure ingredient if you don’t do a lot of Middle Eastern baking, but my secret to the best banana bread is a little splash of orange blossom water.

Don’t worry though—you don’t have to use orange blossom water if you don’t have it on hand.

If you don’t use orange blossom water, this recipe makes an excellent loaf of pistachio banana bread. But if you do include a bit of orange blossom water, you’re in for an absolute treat. Here’s why:

What is orange blossom water?

If you haven’t tried orange blossom water, it tastes just like it sounds: it’s reminiscent of oranges, but with a definitively floral bouquet. It’s like if some really fancy cosmetic line made a subtly orange-scented perfume (rather than one that screams “generic orange-scented dishwasher detergent!!”).

In other words, orange blossom water makes plain old orange juice, orange slices, and orange peel extract seem astringent, bland, and brassy.

And why is it so good in banana bread?

There is something kind of ripe-banana-adjacent about the scent of orange blossom water. I’m not sure exactly what that’s all about, but it works incredibly well in banana desserts. It heightens the flavor of bananas by marrying them with a floral citrus-scented infusion.

I don’t stop at banana bread—I add orange blossom water to banana cream pie, banana pudding, and banoffee everything.

By the way, don’t miss my other banana bread recipes if you’re looking for something a little different:

  • Olive oil banana bread
  • Double chocolate banana bread
  • All my favorite loaf cakes! (including banana bread)
Print

Pistachio Banana Bread

Print Recipe

5 Stars 4 Stars 3 Stars 2 Stars 1 Star

5 from 3 reviews

  • Prep Time: 15 minutes
  • Total Time: 1 hour and 15 minutes
  • Yield: 1 medium loaf

Ingredients

  • 1 cup [240 g] mashed banana from 2-3 overripe bananas *
  • 3 Tbsp [45 g] melted unsalted butter**
  • 1/4 cup [55 g] olive oil**
  • 2 room temperature eggs
  • Flavorings (optional) ***
  • 1 cup [200 g] sugar
  • 1/2 teaspoon fine sea salt or table salt
  • 2 cups [230 g] sifted flour (about 1 3/4 cups unsifted)
  • 1/2 tsp baking soda
  • 1/2 tsp baking powder
  • 1/2 cup [60 g] chopped raw pistachios
  • 1 1/2 Tbsp [15g] coarsely ground pistachios (for the top) ****

Instructions

  1. Preheat the oven to 350° F [177° C].
  2. Butter a 8 x 4 inch [20 x 10 cm] loaf pan. *****
  3. In a medium mixing bowl, whisk the mashed bananas together with the melted butter and olive oil until very well combined. Add the eggs, orange blossom water (if using), sugar, and salt, and whisk together until the whole thing is completely incorporated.
  4. In a large mixing bowl, combine the flour, baking soda, and baking powder, and then pour in the chopped pistachios.
  5. Add the wet mixture to the flour mixture and stir to combine. Do not over-mix (stop mixing as soon as there are no large lumps).
  6. Spoon the mixture into the loaf pan.
  7. Sprinkle the top with the ground pistachios.
  8. Bake for about 1 hour. Start checking for doneness after about 50 minutes, by inserting a toothpick or wooden skewer into the center of the loaf. If it comes out with batter, it needs more time, but if it comes out with just some crumbs, it’s ready to take out.
  9. Remove from the pan and cool on a rack for at least 30 minutes before cutting and serving.

Notes

* I used to suggest optionally using up to 1 1/4 cup [300 g] banana, but the recipe works much better with just 1 cup. I’m just including this note for anyone who used to make it with the larger amount when it was an option. (Note from 26 August 2025)

** Feel free to use a total of 1 cup [105 g] olive oil in place of the butter + oil.

*** For example, 2 teaspoons orange blossom water. Feel free to add more orange blossom water, if you’d like. 1 tablespoon will be a bit more heightened, and if you like when things to taste like perfume, you can even add 2 tablespoons. But that is the absolute maximum.

**** The pistachios that are mixed into the loaf should simply be chopped, but the ones sprinkled on top should be ground (in other words, very finely chopped). I like to simply use the crumbs left behind from chopping the pistachios for this. But the only reason is because it looks prettier this way, so don’t sweat it.

***** Feel free to instead use a 9×5″ loaf pan if you’re very worried about spillage. But if you follow the recipe carefully, the batter should be viscous enough that it won’t overflow, but will instead puff up into a beautiful, tall loaf as it bakes. If you use a 9×5 loaf, check it for doneness about 5 to 10 minutes earlier. If your pan isn’t nonstick (or is very scratched-up nonstick), make a parchment sling for easy removal (butter the pan, place the sling, and add more butter to the parchment). Simply trace a butter knife around the bare sides and lift it out with the parchment flaps.

Video note: If you don’t see the video for this post after scrolling up, please disable ad block and try reloading the page.

find us on instagram and let us know what you made!

Filed Under: bread, breakfast, every recipe, sweets Tagged With: banana, banana bread, loafcake, orange blossom water, pistachio

  • « Go to Previous Page
  • Page 1
  • Interim pages omitted …
  • Page 154
  • Page 155
  • Page 156
  • Page 157
  • Page 158
  • Interim pages omitted …
  • Page 188
  • Go to Next Page »

Primary Sidebar

Kathryn Pauline smiling

Welcome! I’m Kathryn Pauline, cookbook author, recipe developer, and photographer.

💌 Sign up for my newsletter!

Free produce guides and cooking techniques for all!

Paid subscribers receive a weekly dinner menu with a grocery list, shortcuts, and prep list.

Subscribe

🥕 What’s new?

Peanut Butter Banana Bread

Peanut Butter Banana Bread

egg white oatmeal with strawberries on top

Creamy Egg White Oatmeal

savory oatmeal

Savory Oatmeal

cherry muffins

Cherry Muffins

orange curd

The Best Orange Curd

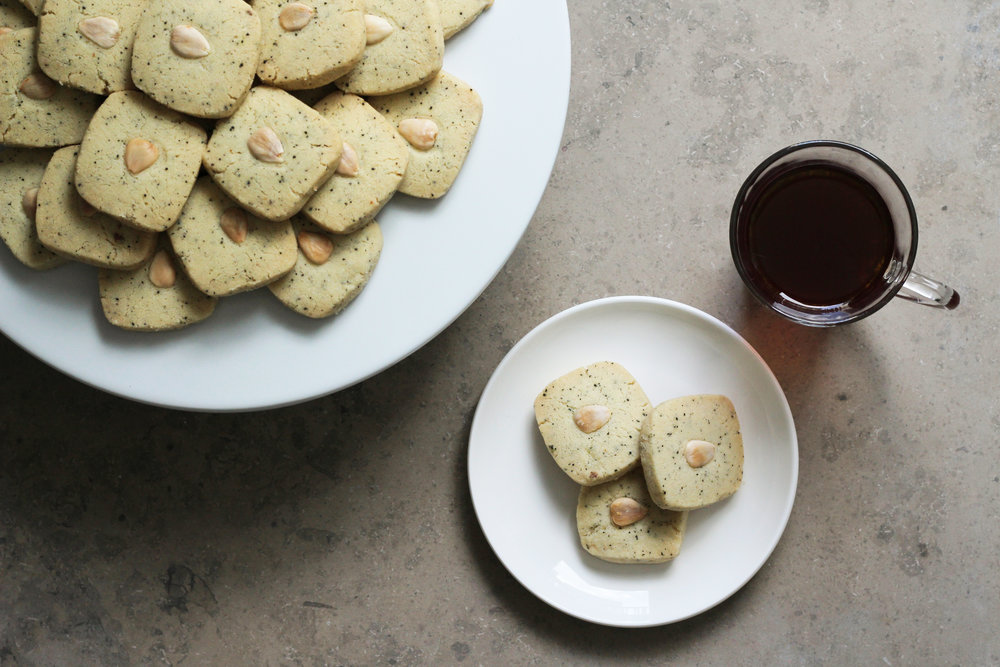
earl grey shortbread

Earl Grey Shortbread

Footer

read our privacy policy

© 2017 - 2026 Kathryn Pauline