This cardamom apple walnut pie is the perfect thing to make this time of year! I hope it finds its way onto your holiday table in one form or another.
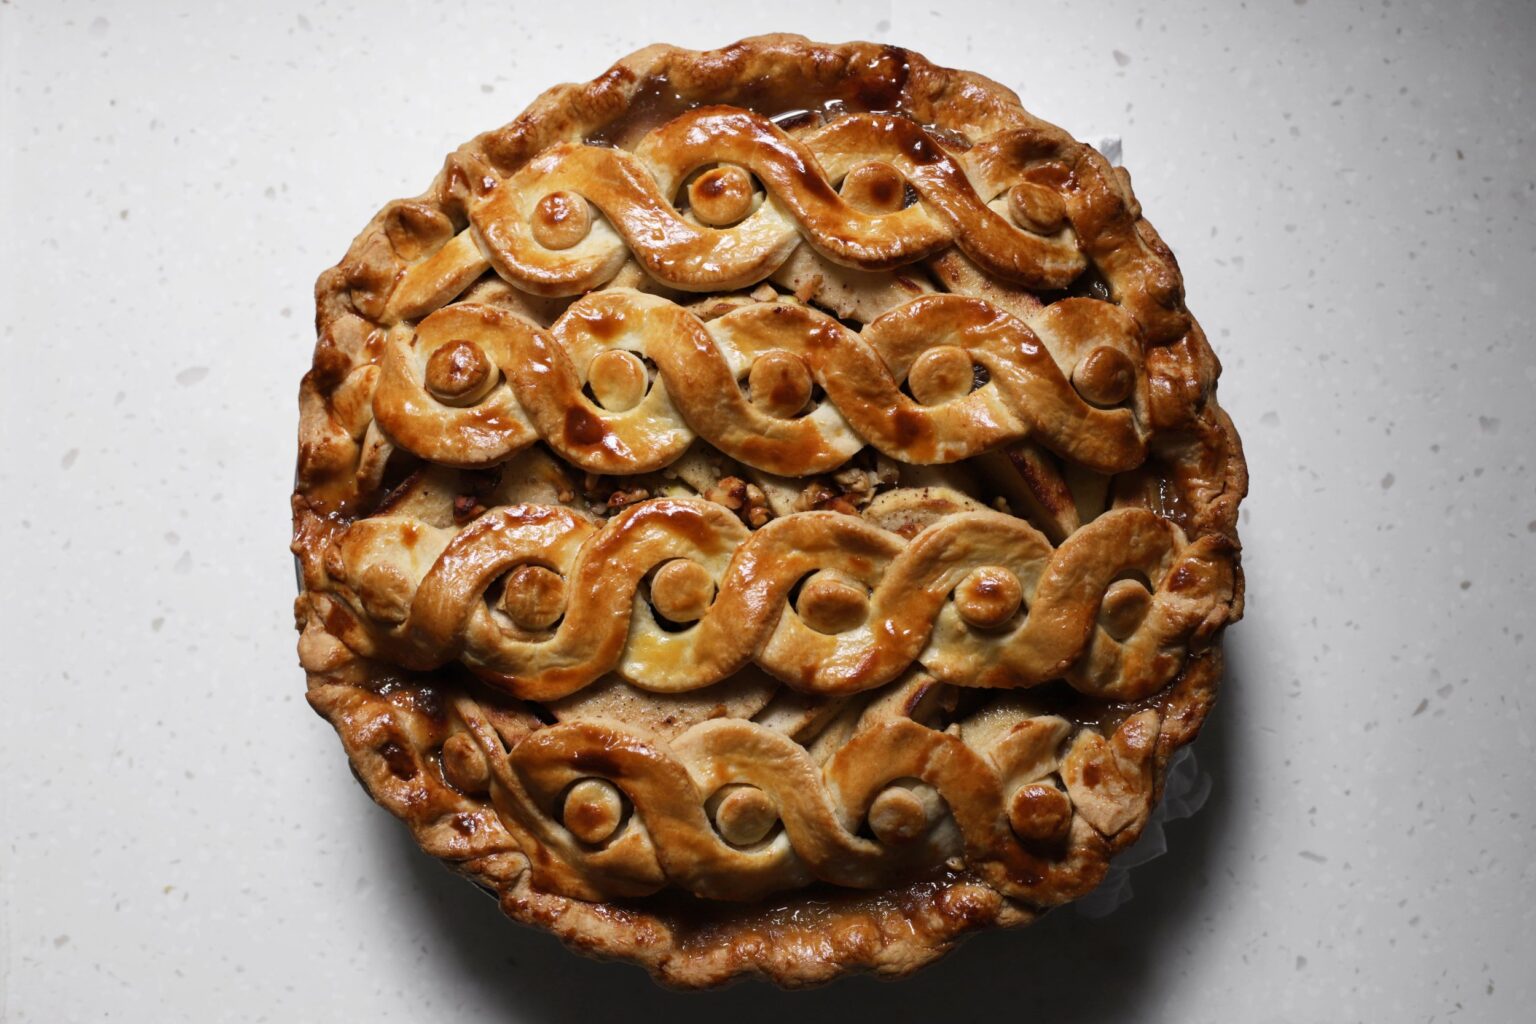
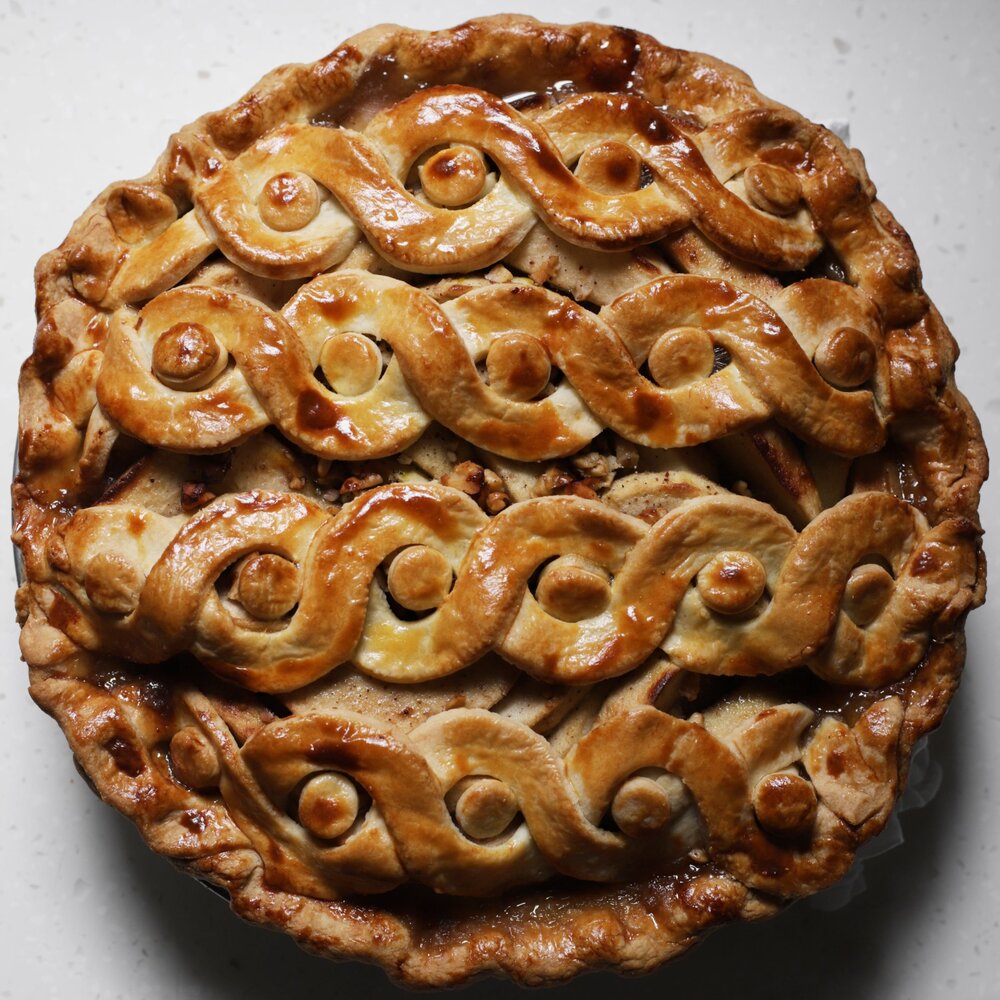
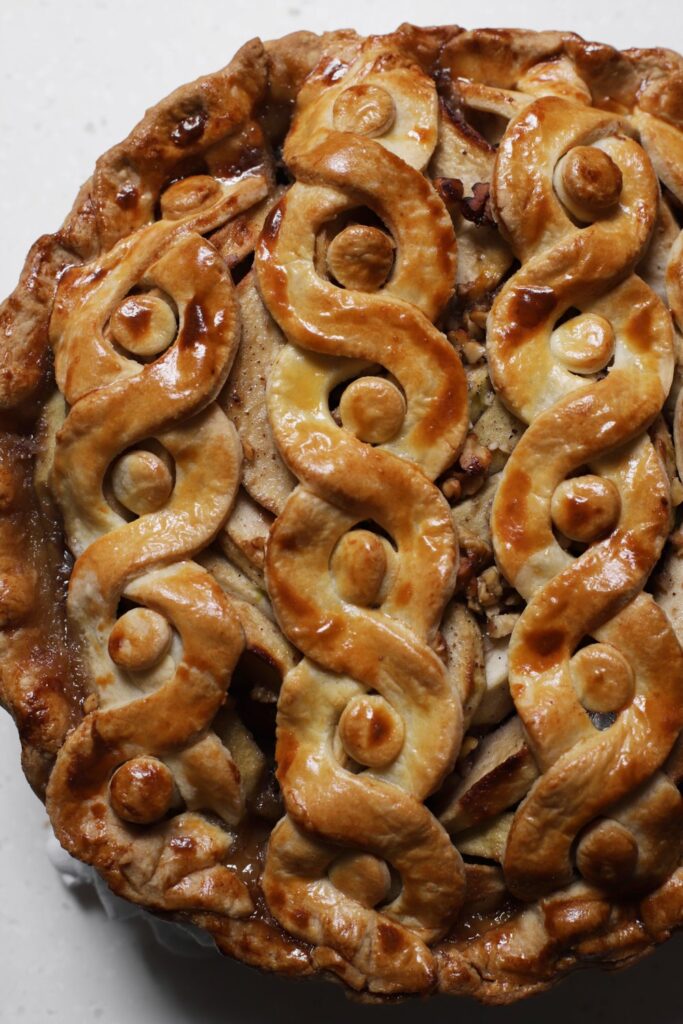
The flavors are inspired by my auntie Masy’s cardamom walnut kleicha, which are kind of like mini walnut hand pies. And the design is inspired by one of my favorite artists, Rabel Betshmuel, who has a stunning series of prints inspired by ancient Assyrian patterns (below, you can see a sample of the print that I loved so much, I baked and ate it).
If you bake this apple walnut pie, it works perfectly well with a regular old classic lattice instead. But if you want to go the extra mile, I’ve included instructions and a video below the recipe. The intricate lattice is definitely not for the faint of heart. You’ll only enjoy it if you’re the kind of person who loves flexing your fine motor skills with a task that requires precision, patience, and a steady hand. But luckily it’s totally optional!
This apple walnut pie is totally worth making with or without the extra special design. Even the most wabi-sabi lattice is always lovely!

A few quick notes about this recipe:
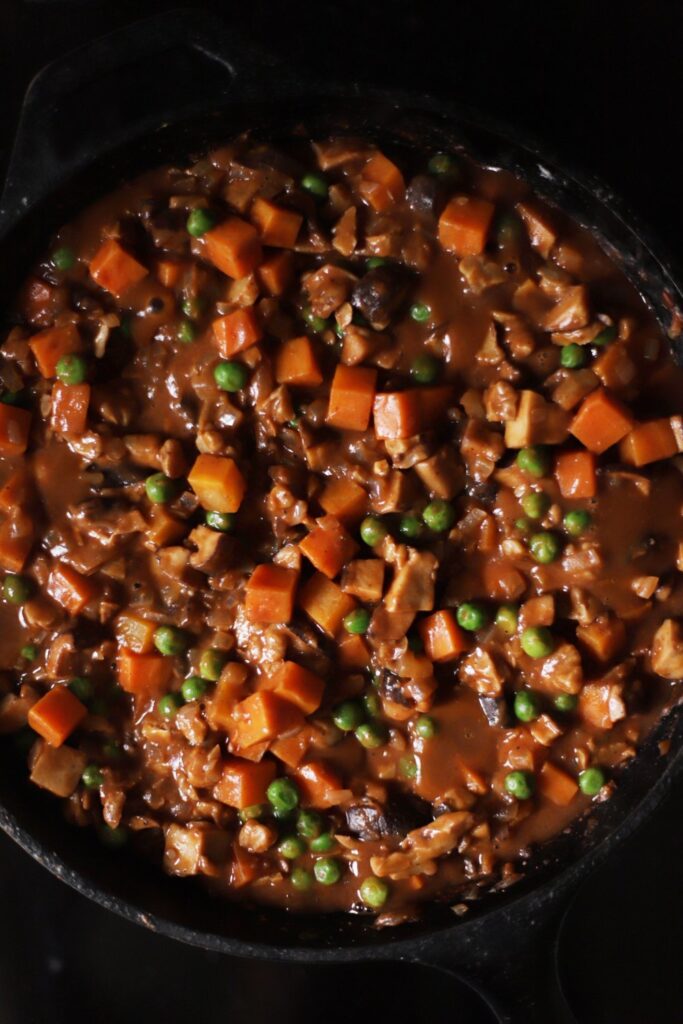
- There are basically two ends of the apple pie spectrum. There’s super gooey, soft, compote-like filling. It’s sort of like the homemade version of apple pie filling in a can. I mean that in the best way possible, because I have a major soft spot for canned pie filling. And then there’s super set, almost al dente filling with just enough moisture and sweetness to hold it together. You know, the kind where you can see the distinct layers of apple in every cohesive bite.
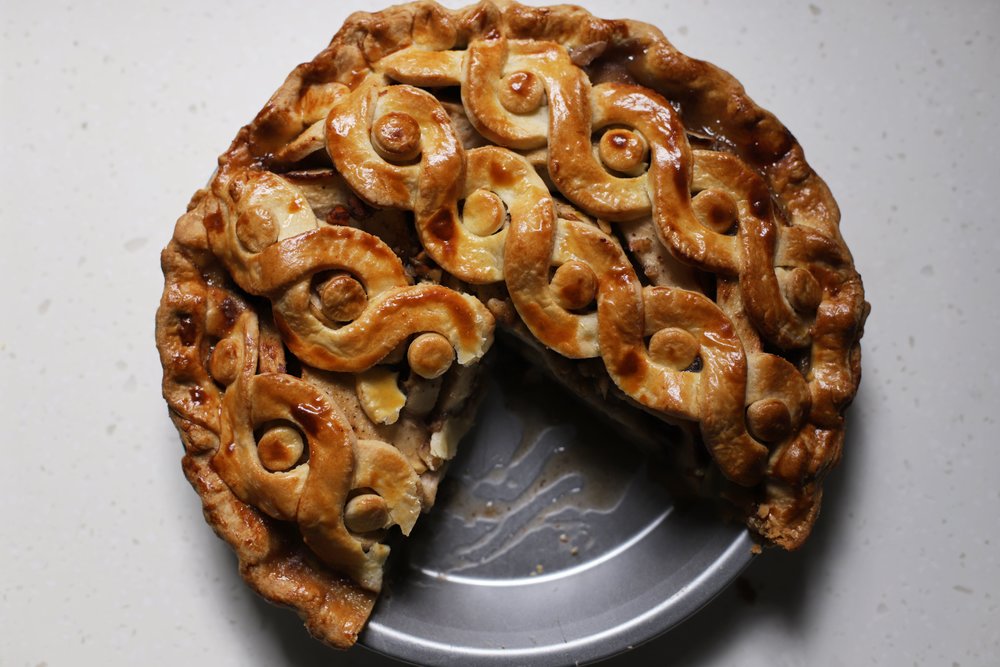
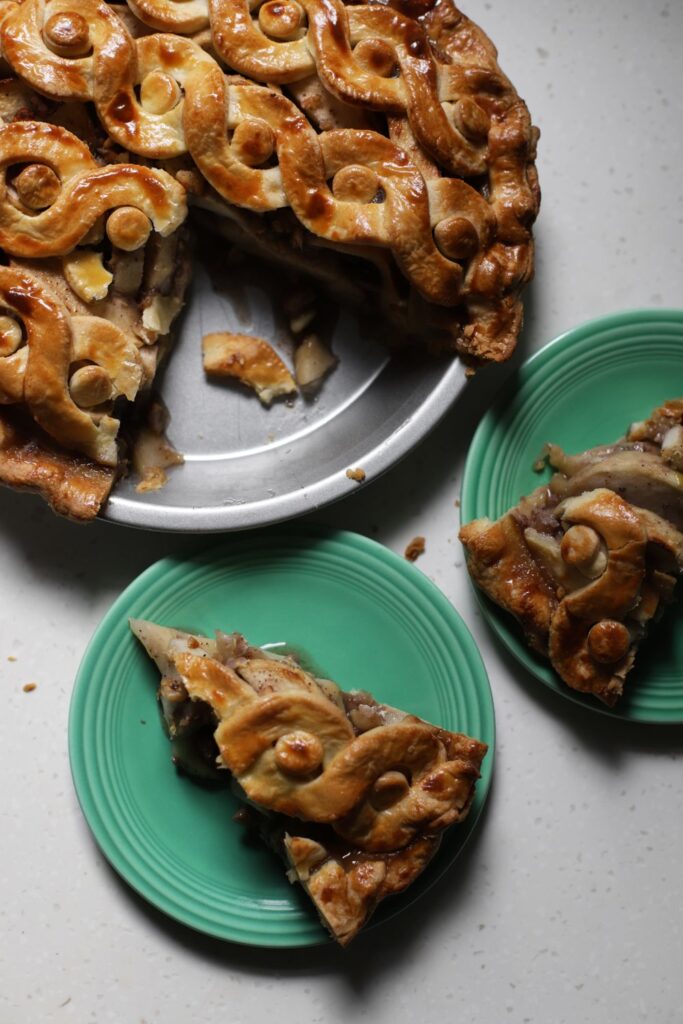
- I honestly love both kinds of pie so much, but lately I’ve been favoring the second kind, which feels a bit more restrained, and wonderfully showcases the fruit itself. So that’s pretty much what you can expect of this apple walnut pie. As you can see in the photos of it sliced, there are definite juices and a decent amount of moisture. But it’s not like a cascading gooey apple pie filling situation.
- If, however, you find yourself more strongly in the compote camp, and prefer a softer filling, and maybe even a little runniness, feel free to omit 1 tablespoon of the cornstarch, and let the apples soften a little extra in the microwave before assembling. You won’t be sorry either way, as long as you know what you want and how to get it.
Thanks again to Rabel for the inspiration, and for allowing me to include his pattern in this post. Wishing my friends and readers in the US lots of fun Thanksgiving menu planning this and next week!
Cardamom Apple Walnut Pie


- Yield: 8 servings
Ingredients
for the dough:
- 400g all purpose flour (about 3 cups)
- 7g salt (1 teaspoon)
- 230g cold unsalted butter, cut into chunks (2 sticks)
- 120g cold plain yogurt (1/2 cup)
- 30g cold water (2 tablespoons)
for the filling:
- 1180g granny smith apples (about 7 apples)
- 30g lemon juice (2 tablespoons)
- 20g cornstarch (2 tablespoons)
- 130g brown sugar (2/3 cup)
- 80g finely chopped walnuts (3/4 cup)
- 1/4 teaspoon salt
- 1/2 teaspoon cardamom
- 1/4 teaspoon cinnamon
- 1/4 teaspoon allspice
- Egg wash: 1 egg yolk beaten with 2 teaspoon cream or water
Instructions
- Place the flour, salt, and butter in a food processor fitted with the blade attachment. Pulse several times, until the butter blends into the flour, and there aren’t any lumps bigger than a tic-tac. Add the yogurt, and pulse 2 or 3 times to distribute. Evenly drizzle on the water. Pulse a few times until it can be squeezed together into a pliable and smooth dough (don’t over-process). If the dough won’t come together, add a few more drops of water. Shape the dough into 2 equal balls, flatten the balls into discs, cover each with plastic wrap, and refrigerate for just 30 minutes. Work on the filling while you wait.
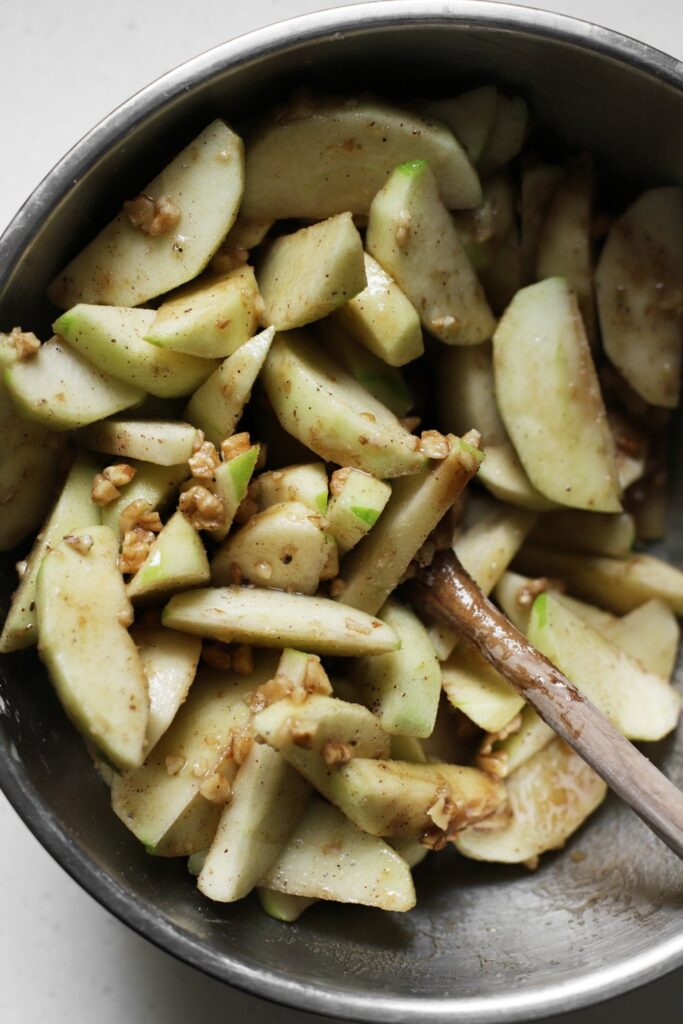
- Peel the apples and slice them into 1/2 inch-thick wedges, discarding the cores and peels. Toss them in the lemon juice as you work to keep them from oxidizing (use a microwave safe bowl). You should end up with 905g (2 pounds) apple slices.
- Stir together the lemony apples, cornstarch, brown sugar, walnuts, salt, cardamom, cinnamon, and allspice. Let it sit for 15 minutes (or longer).
- Once it’s macerated for 15 minutes and has some juices pooling in the bottom, microwave* the filling for about 3-6 minutes, just until it heats through, softens slightly, and shrinks down a bit (pause to stir it once or twice). Let it cool to room temperature for a few minutes.
- Preheat the oven to 400°F (205°C) once you’re almost ready to roll the dough out (feel free to wait a bit longer to preheat if you are doing the complicated pattern below).
- On a lightly floured surface, roll a round of chilled dough out to between 1/8- to 1/4-inch thick; it should be quite a bit wider than the pie pan (about 13-13.5 inches across). Once it’s rolled out, gently wrap it around your rolling pin to transfer it to the pie pan. Unroll it onto a 9-inch pie pan and gently press the dough into place so it’s in contact with the entire pan.
- Roll out the other round of dough into a long oval that’s about 11×13 inches (1/8-inch thick). Optionally, chill the oval on a sheet pan for a few minutes to make it easier to work with.
- Fill the pie shell with the cooled filling once you’re ready to decorate. Gently tamp it down so it’s level.
- Decorate however you wish (e.g., cut the second round of dough into strips and make a lattice top, or follow the instructions below the recipe for this pictured styling).
- Trim the excess and crimp everything together.
- Brush with the egg wash, and bake for 15 minutes at 400°F (205°C).
- After 15 minutes, reduce the heat to 350°F (175 °C) and bake for 60 more minutes. If the edges of the crust start to brown too quickly, use a crown of tin foil for the last 20 minutes of baking.
- Place the pie on a cooling rack for at least 3 hours, until it comes to room temperature.
Notes
* You can easily skip this step if you don’t have a microwave, or just use your stove. If you skip it, your apples might be a little al dente, and your pie won’t be quite as juicy, or you might have to cook it longer than this recipe suggests. Also, if you skip this step, it might have a bit of a hollow dome, or you’ll have to spend time carefully nesting them all together. I’ve made it both ways, and it’s delicious in either case.
To make this ahead: The finished pie can be stored at room temperature for about a day, but it will last longer in the refrigerator. If you’re having guests over, feel free to make it the day before serving and leave it at room temperature.
Rabel Betshmuel-inspired lattice (optional)
This is a very difficult technique, so make sure you follow the directions carefully, and only attempt if you’re already super comfortable working with pie dough (a simple lattice or double-crust would look absolutely lovely, and would be way friendlier for beginners).
- Make a stencil for the squiggly lines. Find a piece of plastic that you can easily cut through with scissors, but that’s sturdy enough to hold up to tracing around with a paring knife (I used an inexpensive soft-shell binder cover). Draw (on the plastic) an 11-inch-long wavy s-curve line (the length of a sheet of printer paper) that’s about 2 1/4 inches from peak to valley and 3/4 inch thick—use Rabel’s above print as inspiration. Carefully cut it out, and then wash it.
- When you roll out the second sheet of pie dough, place it on a piece of parchment paper on a sheet pan, and make sure its top is still lightly floured (do not do this right on the counter).
- Place the squiggly stencil as close to the edge of the dough as possible, and trace it with a paring knife on both sides. Carefully lift the stencil away (try not to lift the dough up from underneath it), and remove any excess scrappy pieces from around it. Leave the cut-out squiggly line exactly where it is on the parchment—moving it at this point will misshape it.
- Place the stencil as close to the cutout squiggly line as possible (try to get it to nest together a little), and trace another squiggly line on both sides with a paring knife. Again, remove scrappy pieces, and carefully lift the stencil away, leaving the squiggle behind on the sheet pan. Repeat until you run out of space.
- Take the scraps and gently scrunch them together (try not to overwork them). Roll them out again, transfer the dough sheet to another piece of parchment on a sheet pan, and continue tracing out more squiggly lines, and leaving them on the parchment.
- You might need to repeat the whole process one more time (collecting the scraps, and rolling them out again), but you can stop tracing squiggles as soon as you have 8 good ones (4 of which are long enough to span the center of the pie, about 10 or 11 inches).
- Use the back of a pastry tip (or something similarly shaped) to punch out little circles from the leftover scraps, and roll the scraps out one more time if you don’t have enough nice scraps leftover from the final pass. You’ll need about 20-25 little circles, depending on the size of your s-curve. Save any leftover scraps for filling in gaps later on.
- Put the sheet pans of squiggly lines and dots in the refrigerator for 30 minutes. Once they’re firm, but still slightly flexible, remove them from the refrigerator and get ready to weave. Do not skip this chilling step.
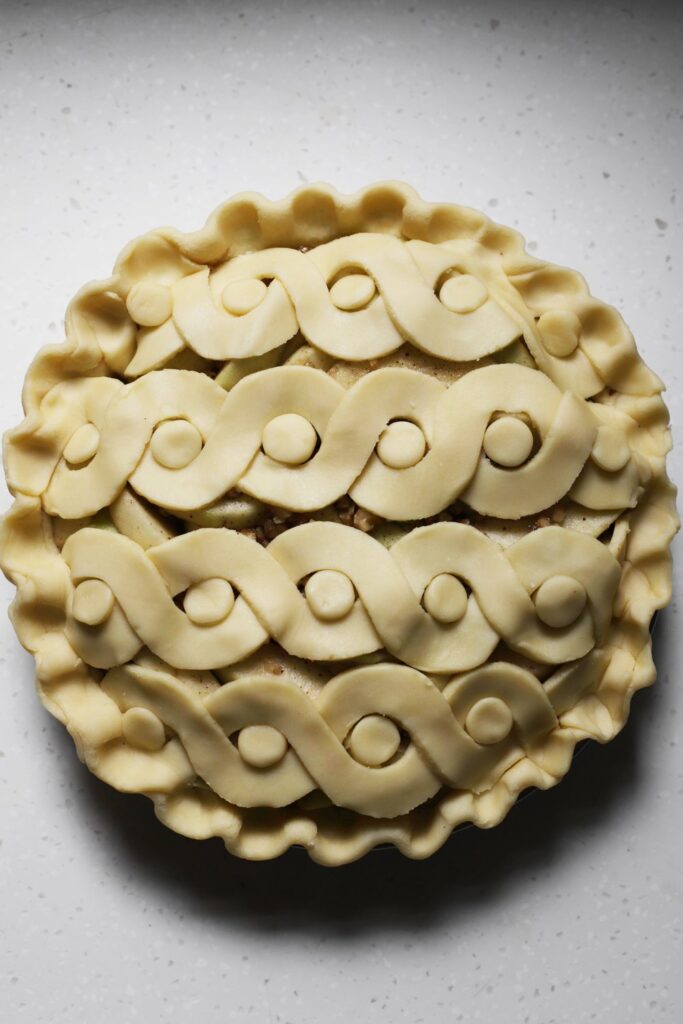
- Find 2 pieces of a similar length, and place them next to each other. They should line up so that one line’s valley is at the same level as the other line’s peak—flip over one of the squiggles like you’re turning the page of a book if it doesn’t line up right.
- Weave them together by interlocking the top two curves so they form a circle. Carefully twist it around itself all the way down, until they all line up to make circles. Adjust them slightly until they line up perfectly. Once they line up, optionally dab a little bit of water at the spots where they meet to help them stay in place.
- Once you’re done weaving all of them together, you’ll be left with 4 braids. Move them back to the refrigerator if they’re starting to become too flexible.
- Place the longest braids toward the center of the pie, and the shorter ones on the sides, all going in the same direction. Readjust them if necessary. Place the dots in the center of each of the circles (if any of the openings are way too gappy, place an extra dot or a little bit of scrap dough into the opening first, and then place a dot on top, covering the scrap dough entirely). Trim away any excess dough, and crimp everything together. Proceed with the above recipe at step 10.