You don’t have to even boil a pot of water to make this tabbouleh. And here’s the best part: instead of using plain water, the bulgur softens in lemon juice and tomato juices, which means it actually gets more flavorful as it sits. It’s great when the easiest way is also the tastiest way (and an old family tradition!).
This is the exact recipe my family makes, carefully measured so you can have the same bright, herb-packed tabbouleh I grew up with.
Jump to the recipe to hit the ground running, or read on for a few tricks for making the best tabbouleh ever.


how to make really good tabbouleh
1) Don’t use “too much” bulgur
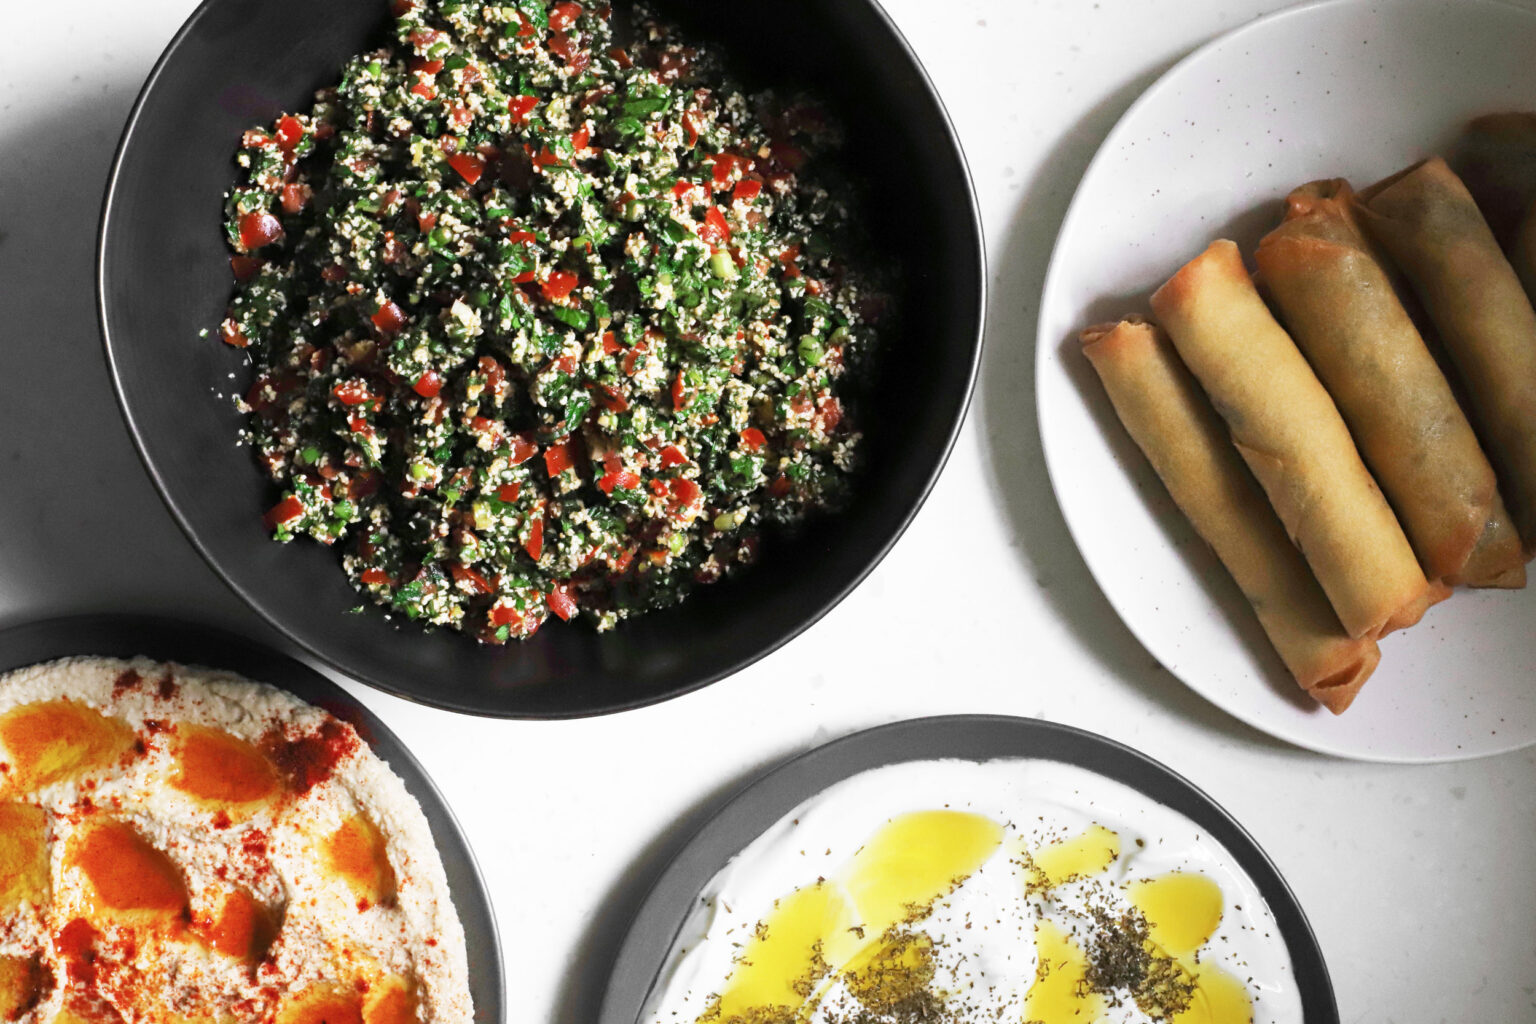
The heart of an authentic tabbouleh is in the herbs. The parsley, mint, and green onion aren’t just accents. They’re the main event! So keep an eye on your ratios and let those flavorful greens shine.
The most important ratio is bulgur:parsley. There is plenty of debate about how much bulgur to add to tabbouleh, and I tend to land somewhere in the middle. Lebanese tabbouleh is known for having the absolute least bulgur, so if you’d like to make Lebanese tabbouleh, use a bit less than what this recipe calls for.
But whether you’re in the middle or on another side of the spectrum, there’s one thing we can all agree on: there should never be “too much” bulgur in tabbouleh. What counts as ‘too much” will shift from person to person, and there is no one way to make an authentic tabbouleh, but tabbouleh should never feel grain-heavy. The bulgur is there for texture and body. This isn’t pasta salad.
2) Skip the boiling—soak your bulgur in lemon and tomato juice instead
One thing my family has always insisted on: soak the bulgur in something flavorful instead of boiling it. That might be why we use a bit more than just a pinch. We make sure every one of those grains earns its keep. This isn’t just a life hack I came up with—it’s actually an old family tradition.
Instead of boiling or soaking it in plain water, we let the fine bulgur soak up lemon juice adn tomato juices. It’s a small shift that makes a big difference. There are no extra pots and every bite is layered with brightness and depth.
Just a heads-up: this will only work with fine bulgur. If you’re using anything coarser, check the notes at the end of the recipe for adjustments.
3) Dry your herbs well and use a sharp knife
Since herbs are the backbone of any authentic tabbouleh recipe, we should take extra care with them. Start by drying them thoroughly—a salad spinner works great, but patting them dry with towels works too. Any leftover moisture can make the herbs mushy or cause them to brown, especially delicate mint.
Next, grab your sharpest knife. A dull blade will mash the herbs instead of slicing them cleanly, and this will affect the texture and appearance. If you want to get faster at chopping, check out my post on how to chop herbs.
PrintNo-cook Tabbouleh (my family’s recipe)


- Total Time: 30 minutes
- Yield: 6 servings
Ingredients
- 3/4 cup (150g) fine burghul/bulgur #1 *
- 2 cups (425g) minced tomatoes, with their juices (from about 3 medium tomatoes)
- 1/3 cup (80g) lemon juice (from about 2 lemons)
- Salt to taste
- 2 cups (100g) finely minced flat-leaf parsley leaves (from about 2 big bunches)**
- 3/4 cup (45g) finely minced green onions (from less than 1 bunch)
- 1 cup (35g) minced mint leaves (from about 1 big bunch, or 2 smaller ones)
- 1/4 cup (45g) extra virgin olive oil
- 1/4 teaspoon freshly ground black pepper
Instructions
- If you’re using fine burghul/bulgur #1, you should not cook your burghul in hot water; instead, soak the burghul in a mixing bowl with the minced tomatoes, their juices, the lemon juice, and a pinch of salt (to taste). Let the mixture soak while you prep the rest of the ingredients (about 20 minutes). The bulgur will continue to hydrate once you’ve mixed the salad together.
- Add the parsley, green onions, and mint to the bulgur and tomato mixture, drizzle with extra virgin olive oil, and sprinkle with pepper. Mix well, and let it sit for about 10 minutes before salting and serving. You can enjoy it for about 48 hours, but if you’re making it for guests, you should serve it within about 30 minutes of mixing. Season with salt (to taste) immediately before serving.
Notes
* You can find burghul #1/fine bulgur at most Middle Eastern markets, and some international sections of grocery stores. If you can’t find a source near you, you can substitute couscous, cracked wheat, or coarse bulgur. These will need to be cooked in boiling water until al dente, rinsed, strained well, and then soaked with the tomatoes and lemon juice for about ten minutes. Burghul #1 is pre-cooked and very fine, so it only needs to be soaked, rather than cooked.
** Make sure your herbs are dried very well with a towel or spin-dryer before mincing. Use the sharpest knife you have, so that you can cut through the herbs cleanly, instead of crushing them. For precision, all of the ingredients in this recipe are measured after mincing, so the 2 cups [100g] finely minced parsley is just the leaves themselves, not the weight of the entire bunch (make sure you buy enough).
Video note: If you don’t see the video for this post after scrolling up, please disable ad block and try reloading the page.
2025 update: I originally posted this recipe on 8 November 2018, and I recently updated it to make the information before the recipe a bit more organized and useful. I’ve also reorganized the recipe to be a bit more streamlined for folks using volumetric measurements (most readers), but kept both measurements. Otherwise, the recipe is essentially the same. Oh and I added a video!