• Skip to primary navigation
  • Skip to main content
  • Skip to primary sidebar
  • Skip to footer
Cardamom and Tea
  • Blog
  • Recipes
  • About
  • Cookbooks
    • Piecemeal
    • A Dish for All Seasons (my first cookbook)

cherry sumac shortcakes

June 17, 2018 by Kathryn Pauline 2 Comments

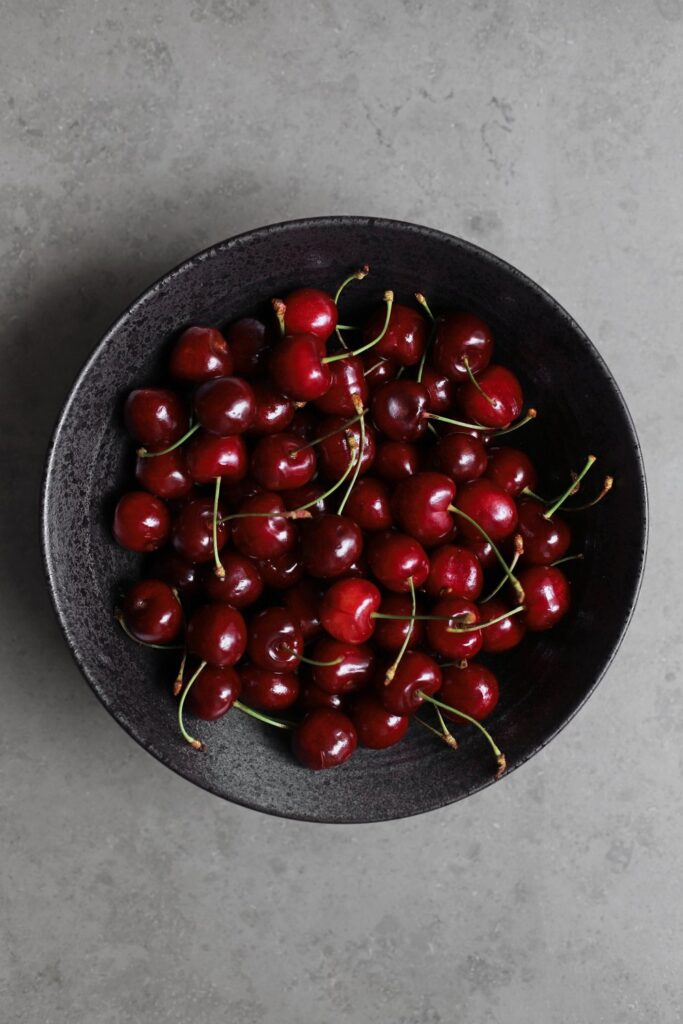
The last time I posted a recipe prominently featuring sumac was my za’atar-inspired (but definitely not za’atar-flavored) sumac thyme cake. That was way back in August, so I believe it’s high time for another sumac recipe, and so I’m back with another sweet one. But sumac thyme cakes aside, you might be most familiar with sumac as a savory ingredient. However, if it’s also your goal in life to eat as much sumac as humanly possible, you’ll be pleased to learn that it works as wonderfully with sweets as it does with, say, fattoush. Sumac has a very tangy, fruity flavor, and it’s delicious just about anywhere you’d include lemon or rhubarb.

Some of my favorite berry shortcake recipes feature a bit of lemon juice or a lot of rhubarb, and these tangy additions keep things from becoming too cloying. Sumac accomplishes the same thing, all the while tinting the syrup a deep wine-red hue, flecked with dark purple, and making things even fruitier and a teeny bit astringent (but like, astringent in a good way, like a cup of Earl Gray, a piece of dark chocolate, or a glass of malbec).

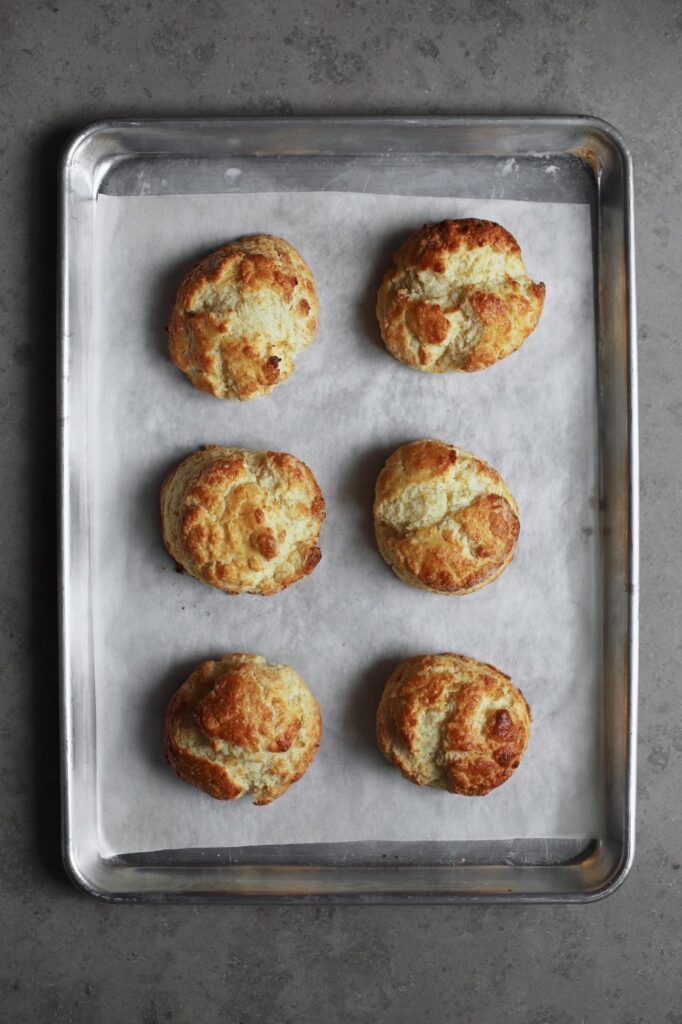
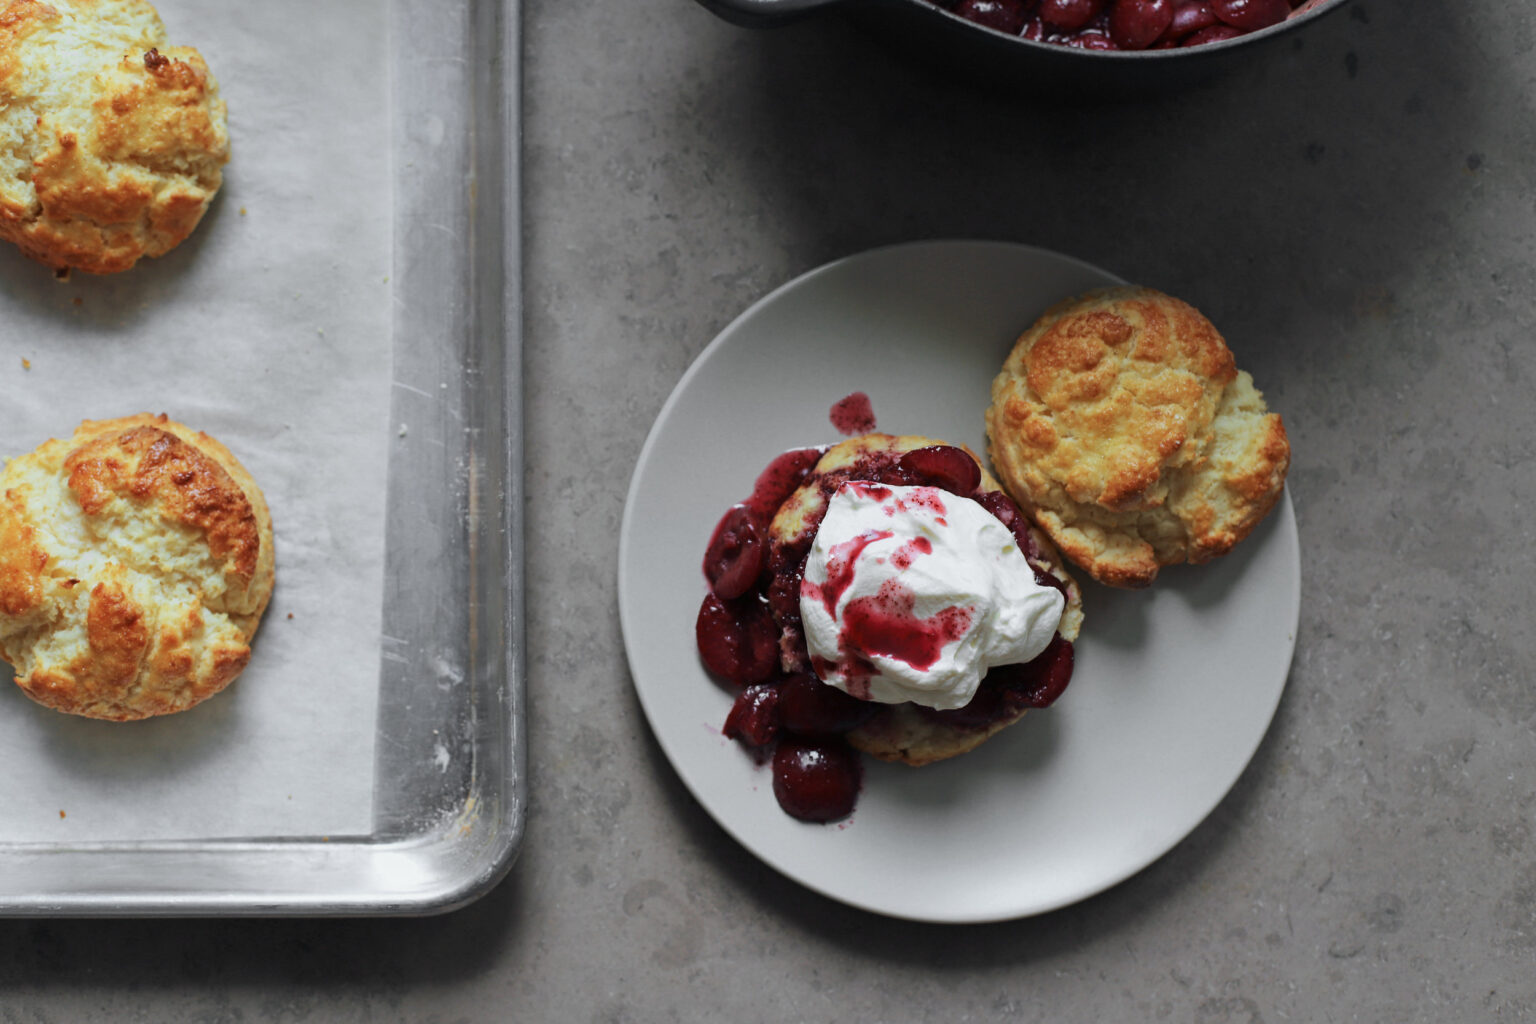
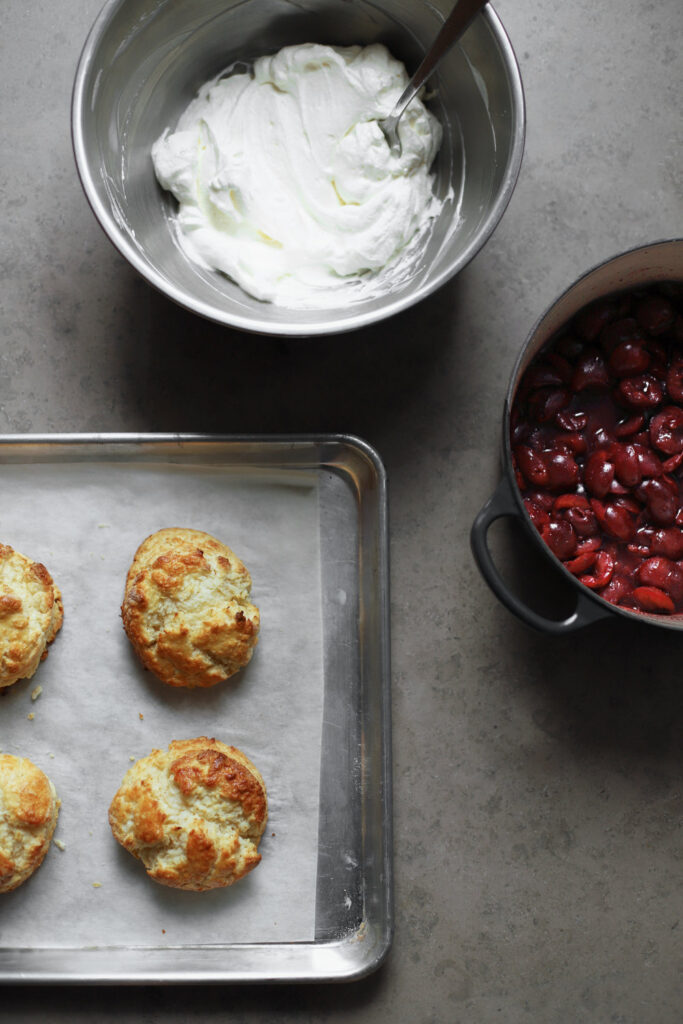
Many recipes for shortcakes have you cluster the biscuit rounds together so that they can rise higher in the oven, or have you bake a sheet of biscuits and then cut them into squares, but I personally love baking individual round biscuits, because you get way more crust that way. But baking them separately sacrifices height, so it’s important to compensate so that your biscuits end up nice and tall. Tall biscuits can easily (and prettily!) be cut in half, which is important for shortcakes, since they’re little mini sandwich cakes.

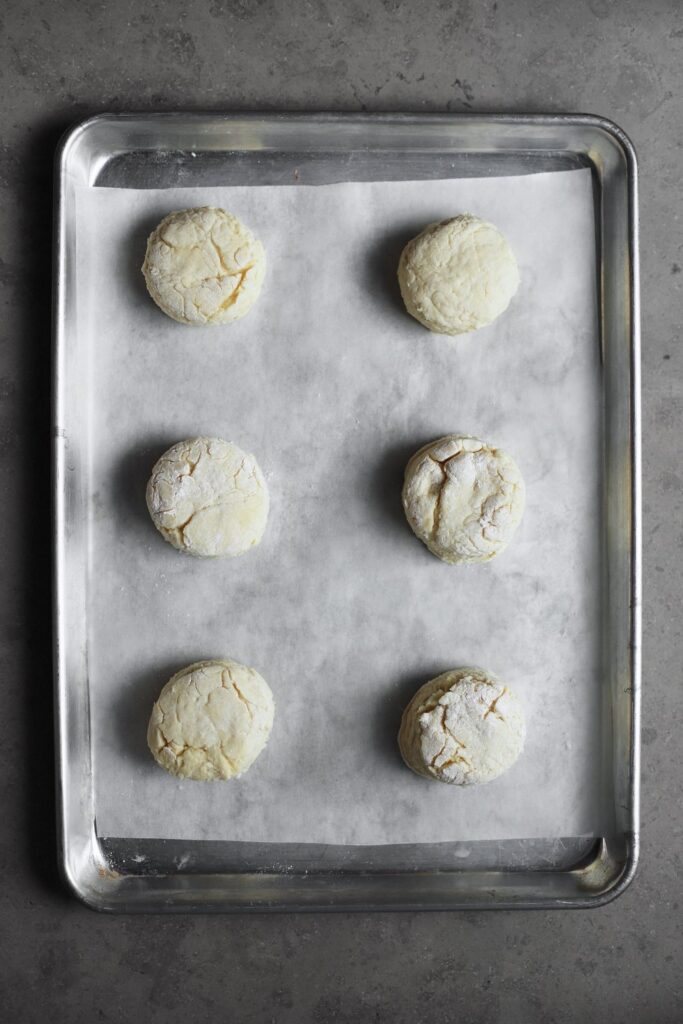
The key to picture-perfect round-stamped shortcakes is rolling the biscuit dough out thicker than you’d think, to about one and a quarter inch. If you roll the dough out to just a half inch, like some recipes specify, they won’t be tall enough. My biscuit cutter is only about an inch tall, so this means that the tops of the biscuits burst out over the cutters when stamped, but this gives them the extra height that they desperately need.

Before I leave you with the recipe, a quick note on whipping cream: I learned from my friend Erin from Cloudy Kitchen, whipping cream at a lower speed keeps it from beading. And since whipped cream changes from one stage to the next very quickly, I also like that this gives you more control over the final texture. Stiff peaks work well for piping, when you want it to be really crisp and well-defined, but medium and soft peaks work much better for dolloping. At high speed, this shift can happen in a matter of seconds, so medium speed gives you a better chance at catching it at the right moment (and at the very least, prevents you from over-whipping it into butter! Which has definitely happened to me a couple times before. Kind of a lemons-lemonade situation, but it still sucks when you’re trying to follow a recipe and only have so much whipped cream in the refrigerator).

Print

cherry sumac shortcakes

Print Recipe

5 Stars 4 Stars 3 Stars 2 Stars 1 Star

No reviews

  • Prep Time: 35 minutes
  • Total Time: 1 hours 15 minutes
  • Yield: 6 big shortcakes

Ingredients

For the biscuits:
350 grams flour (about 2 1/4 cups)
1 tablespoon sugar
1/2 teaspoon salt
1 tablespoon baking powder (3 teaspoons)
1/4 teaspoon baking soda
10 tablespoons cold butter, cut into small pieces
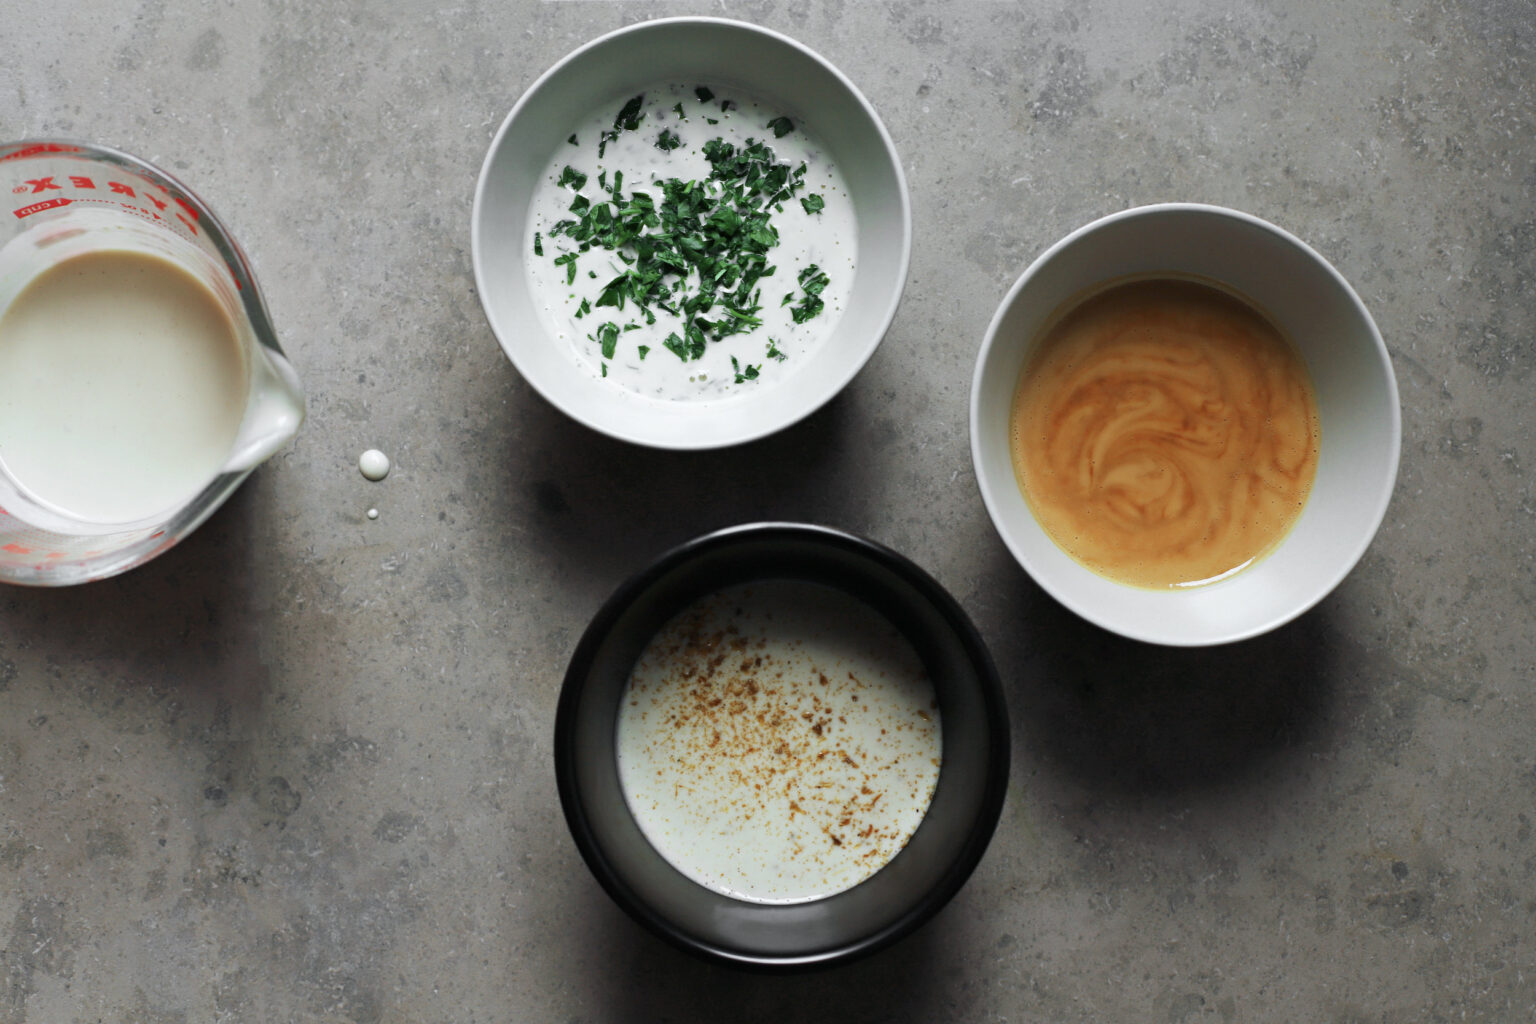
1 cup + 1 tablespoon cold buttermilk
egg wash: 1 egg, beaten with 1 tablespoon water (or skip the egg wash and just use extra buttermilk)

For the cherries:
1 pound cherries, pitted
2 1/4 teaspoons sumac
pinch salt
2 tablespoons cherry or strawberry preserves

For the whipped cream:
1 cup heavy whipping cream (very cold)
1 to 2 tablespoons sugar, to taste
a pinch of salt

Instructions

  1. Bake the biscuits: Whisk together the flour, sugar, salt, baking powder, and baking soda. Add the butter and use the tips of your fingers to work the butter into the flour (pinch a few pieces of butter in the flour, and rub them between your finger tips to flatten and break them up). Stop when there are still a few lumps of butter (like the above photo, or continue a little from there).
  2. Preheat the oven to 400° F convection*, and throw the buttery flour in the refrigerator to chill for 10 minutes. In the meantime, prep the cherries, clean and flour the kitchen counter, find a 2 1/2 inch round cutter.
  3. Make a few wells in the chilled buttery flour and pour the buttermilk over them. Mix everything together with a wooden spoon, just until there are no dry spots left.
  4. Turn the dough out onto the floured counter, flour the top, and pat it together into a cohesive dough ball (do not knead it). Roll it out to just over 1-inch thick (mine were 1 1/4 inch), dusting any sticky spots on the top or bottom with more flour as you go. Don’t worry if it’s wrinkly and imperfect.
  5. Stamp out as many rounds out as possible (probably 4), and then press the sticky unfloured sides together, patting everything back into a dough ball again (again, don’t knead it, and don’t worry if it’s lumpy). Roll it back out to just over 1-inch thick, and stamp as many more out as possible (probably 2 more).
  6. Place on a parchment-lined baking sheet, and brush the tops with the egg wash (or a little more buttermilk). Bake for about 15 minutes. Remove them from the oven once they’re golden brown and cooked through.
  7. Prep the cherries: Mix everything together in a saucepan and let it sit for 10 minutes off the heat.
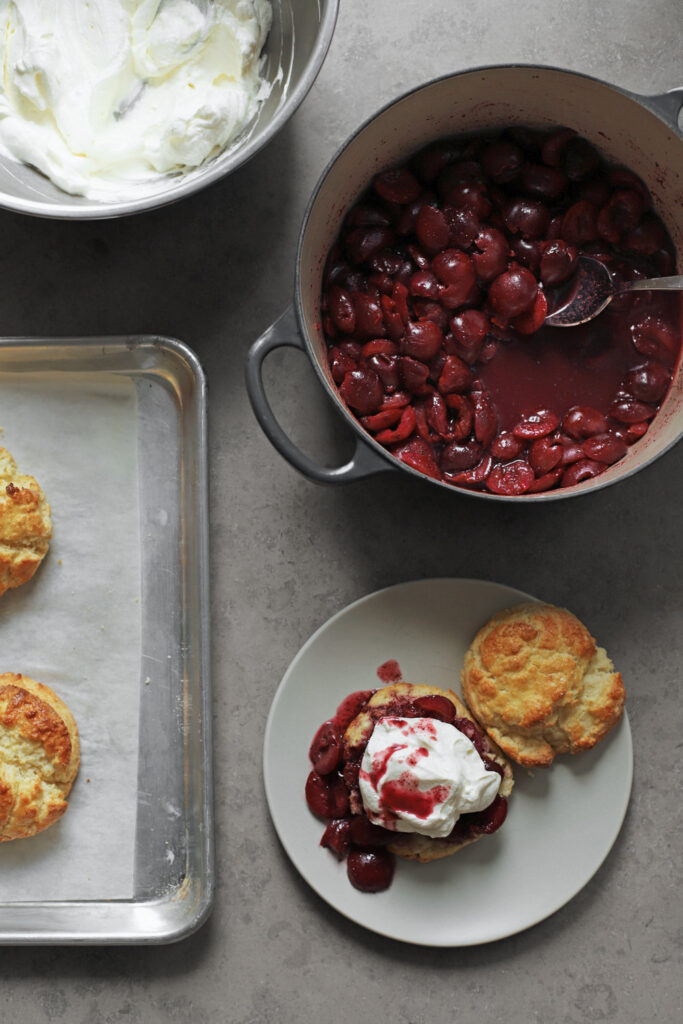
  8. Bring to a simmer over medium-high heat, then cover and simmer over medium-low for 5 minutes, just until the cherries soften a bit and give up more juices. Remove the cherries with a slotted spoon, leaving the juices behind, and continue to cook the liquid uncovered (stirring often) for about 5 to 10 minutes, until it reduces a bit. Add the cherries back into the pot, stir everything together, and remove from heat.**
  9. Whip the cream and assemble the shortcakes: Combine the cream, sugar, and salt, and whisk at medium speed, just until soft or medium peaks form. This will happen quickly, so watch it very closely (you should be able to dollop it).
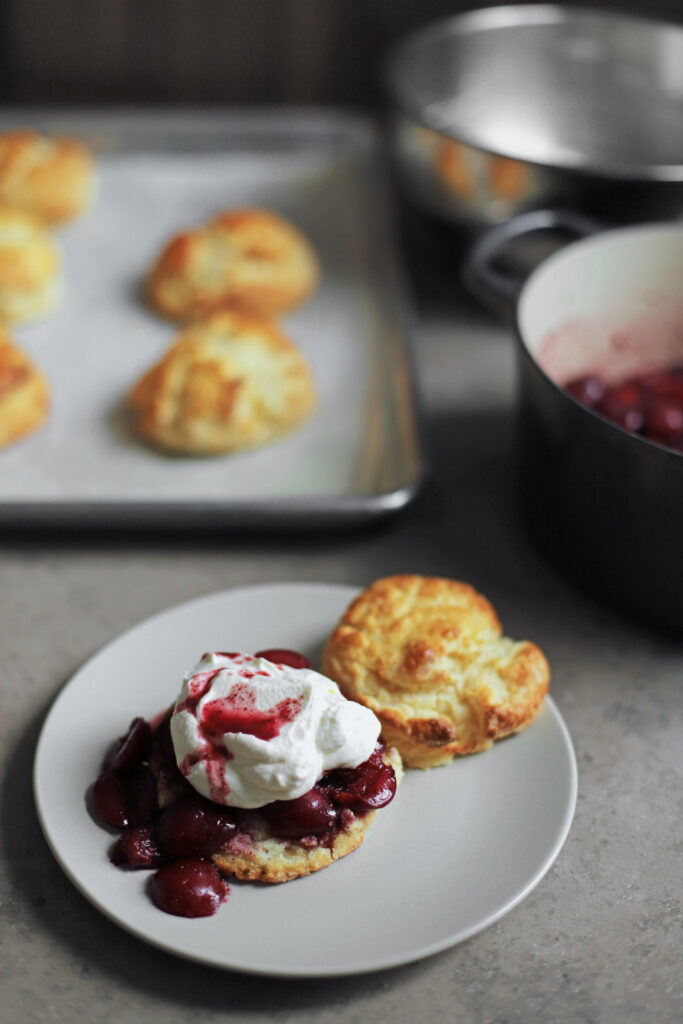
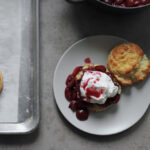
  10. Take a cooled biscuit and use a fork to cut it in half (like an English muffin). Pour some of the cherries and juices over the bottom half, top with whipped cream, spoon a little more juice over, and top with the other half. Repeat with the remaining ones, and serve immediately, or keep leftover components separately.***

Notes

* If you don’t have convection, you may need to increase the temperature a bit and/or bake them slightly longer. Keep an eye on them, and take out of the oven once they’re golden brown.

** If you want to make this without having to remove the cherries from the syrup, you can just make a compote by cooking everything together uncovered, until the cherries break down and the syrup thickens, but if you want the cherries to stay whole, you’ll have to cook them more briefly, and you’ll end up with a thin liquid. Either will be delicious though! For an even simpler option, macerated cherries are also fabulous; simply combine the 4 ingredients, plus an extra teaspoon of sugar, and let it sit in the refrigerator for at least 30 minutes, until they’ve given up a lot of juices (no cooking necessary).

*** The cherries and whipped cream will keep in the fridge, but the biscuits will keep better at room temperature. If you’re serving them more than a few hours after baking, pop the biscuits in a 350°F oven for about 2 or 3 minutes, just until they’re warmed through.

find us on instagram and let us know what you made!

Filed Under: every recipe, sweets Tagged With: buttermilk, cherries, sumac, summer, whipped cream

tahini sauce variations | sunday night meal prep

June 10, 2018 by Kathryn Pauline Leave a Comment

There’s a pretty classic comedy trope where a super methodical, high strung person gets called out for being way too uptight, and then tries to pretend to be laid back and cool (and of course fails), and that’s kind of how I’ve felt writing these last few posts in this tahini series. It’s like when Anthony Michael Hall pretends to have a girlfriend in Canada in the Breakfast Club. Or maybe it’s more like when Cameron lets Ferris borrow his dad’s Ferrari, only to let the unmanned car go crashing through the glass garage into the woods. If only you could be a fly on the wall, watching me spend forever editing and paring down my instructions until they finally seem casual enough. I am totally out of my depth.

So it probably goes without saying that I usually prefer writing extremely detailed recipes, because I don’t think it’s practical to assume that everyone already knows how to do everything (and that’s ok!). I remember when I first started learning how to cook a long, long time ago, hearing an instruction like “season to taste” meant nothing to me, and I wished that all recipes at least gave a ballpark estimation. Indeed, back then, whenever I heard “season to taste,” I would always just use a little tiny pinch, or a few shakes from the salt shaker, which is almost never enough. It took years of practice to learn how to season without a recipe, which is a skill everyone should try to develop. But if you try to learn this skill without any guidance, you’re going to eat a lot of bland food, and then a lot of inedibly salty food, before you figure it out, which is why I always let you know the amount I use. (And I just figure that people who don’t really need to be told can just ignore the instruction.)

But there are certain things that most people know how to cook without much guidance. You know how to chop ingredients up and turn them into a salad. You probably know how to cook a piece of salmon or chicken breast. You probably know how to roast veggies. And so the inspiration behind this tahini series hasn’t been techniques or formulas, but learning to pair simple food with a simple sauce for a delicious dinner.

So to close out this series, I’ve put all of the tahini sauce variations together in one place, and I’ve also included some Sunday night meal prep examples. But guyssss, the meal plans are totally caaaasual—no worries (I’m laidback now!!!). So here’s the idea: you make one or two batches of plain tahini sauce, and then, over the course of the week, you add a few simple ingredients to the sauce for a whole bunch of different meals. One simple tahini sauce ends up transforming all the usual weeknight dinners into delicious meals.

tahini lemon sauce variations

tahini sauce base

1/4 cup tahini
3 tablespoons lemon juice
3 tablespoons water
1/4 teaspoon salt, or to taste

  • Whisk everything together until it smooths out and thickens.
tahini date salad dressing / summer salad

tahini date salad dressing

tahini sauce base + 2 tablespoons date syrup (or 1 1/2 tablespoons honey)

Serve with: a sweet summer salad, fruit salad, roast veggies (especially eggplant), or anywhere you’d use honey mustard dressing, e.g., as a dipping sauce for chicken fingers. Pictured here: salad with spinach, cherries, tomatoes, cucumbers, almonds, and ground pistachios

extra-savory tahini sauce with freekeh bowl

extra-savory tahini sauce

tahini sauce base + 1/2 teaspoon ground cumin + 1/4 teaspoon ground coriander + 1 clove garlic, crushed through a press

Serve with: grain bowls, falafel, grilled meat, shawarma, roast veggies (especially fall veggies), chicken breast, London broil. Pictured here: freekeh, chickpeas, slow roast tomatoes, roast sweet potatoes and broccoli

herby tahini yogurt sauce / salmon and broccoli

herby tahini yogurt sauce

tahini sauce base + 1/4 cup plain whole milk Greek yogurt + 2 tablespoons minced herbs (any combination of parsley, mint, dried mint, cilantro, and/or dill) + 1 clove garlic crushed through a press (optional) + a pinch more of salt

Serve with: salmon, dark leafy greens, roast veggies (especially spring veggies), biryani, falafel, shawarma, slaws, salads, anywhere you’d use a creamy salad dressing

Sunday night meal prep

Make as much tahini dressing base as you’d like for the week (it will keep for at least 1 week in the fridge, and you can always make more). Choose a few of the following dinners, and shop and prep for them. When it’s time to make dinner, take some of the tahini base, mix in a few of the necessary extras, and cook dinner as usual.

easy open-face sheikh mahshi / stuffed eggplant (gluten free)

Halve lengthwise and cross-hatch some eggplants. Season them with salt, let them sit cut-side-down for 15 minutes, and then grill or broil them cut-side-up until they’re golden brown and charred in a few spots. Separately, sauté some onion and garlic, then sauté some ground beef, sprinkle on some baharat (or just paprika, black pepper, and cumin), and season everything to taste. Once it’s cooled down a little, stir chopped parsley into the ground beef. Once the eggplants are out of the oven, place them cut-side-up on a serving tray and top with the filling and tahini yogurt sauce.
To prep ahead: make the filling ahead of time, and reheat as needed.

steak salad (gluten free)

Season and grill some steaks or a London broil to medium-rare. Let it rest, and then slice against the grain. Serve over chopped romaine or iceberg, top with sliced radishes, chives, crispy chopped bacon, crumbled blue cheese, and halved cherry tomatoes, and drizzle with extra-savory tahini dressing.
To prep ahead: wash and prep the veggies and cook the bacon.

summery salad (vegan or vegetarian)

Toss together greens, your favorite stone fruit, halved cherry tomatoes, diced cucumbers, your favorite nuts, chickpeas (or another legume), and drizzle with tahini date salad dressing. Serve alongside a crusty multi-grain loaf of bead. To turn this into a vegetarian salad, add some blue cheese or parmesan shavings.
To prep ahead: wash and prep the veggies, and assemble the salad at the last minute.

your favorite grain bowl (vegan, gluten free)

Sauté some mushrooms or slow roast some tomatoes, boil your favorite grain (brown rice [gf], farro, freekeh, barley, etc.), roast some sweet potatoes and broccoli (or another leafy green), sauté some chicken breast or strain and rinse a can of chickpeas. Let everyone build their own bowl, and drizzle with the extra-savory tahini sauce.
To prep ahead: cook each component, and microwave them at the last minute.

grilled salmon (gluten free)

Grill some salmon, sauté your favorite leafy greens, make some yellow rice, and serve everything with the tahini yogurt sauce and lemon wedges.
To prep ahead: buy frozen salmon and defrost in the fridge the night before. Wash and chop the greens.

salmon with tahini lemon sauce

Filed Under: dairy free, dinner, every recipe, gluten free, lunch, main courses, salads, vegan, vegetarian, weeknight Tagged With: tahini

  • « Go to Previous Page
  • Page 1
  • Interim pages omitted …
  • Page 118
  • Page 119
  • Page 120
  • Page 121
  • Page 122
  • Interim pages omitted …
  • Page 183
  • Go to Next Page »

Primary Sidebar

Kathryn Pauline smiling

Welcome! I’m Kathryn Pauline, cookbook author, recipe developer, and photographer.

Footer

read our privacy policy

© 2017 - 2026 Kathryn Pauline