I’ve become a bit of a recipe minimalist over the years. Whenever I write a new recipe, I ask myself, “Is there any ingredient or step that I can easily skip?” Usually the answer is yes. My pomegranate fig lamb shanks are already quite pared down, but I thought I’d try simplifying that recipe even further and adapting it to feature a fall-off-the-bone-tender rack of sweet and sour ribs. As with those lamb shanks, pomegranate molasses is the real hero of this dish. And you don’t need much else to make it delicious.
This recipe makes enough sauce for one rack of sweet and sour ribs, but you can absolutely double, triple, or quadruple it to feed your whole family. But believe me, it’s so easy to throw together, you won’t necessarily feel like you need to meal-prep a big batch to make it worth your while. Whenever you feel like it, just stir together the sauce ingredients, salt/slather/flip/repeat, crimp shut in some foil, and bake for a few hours. If you want to make more than one rack, be sure to read the instructions below the recipe.
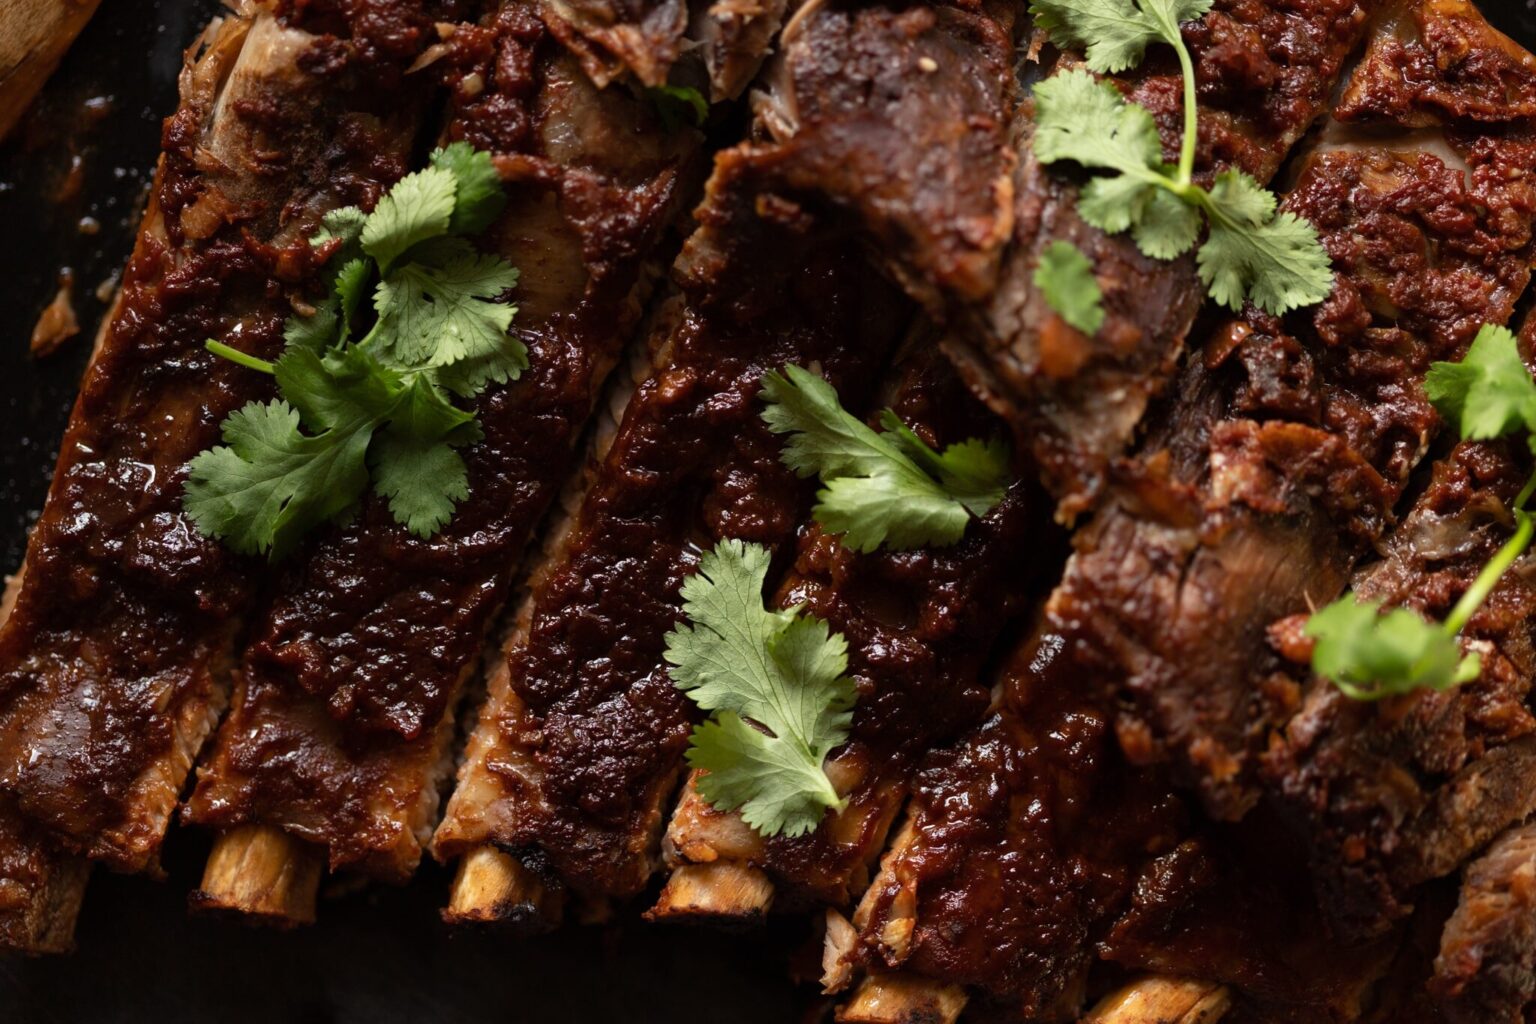
Cilantro is completely optional here, but it does add freshness, which goes wonderfully with more long-braised flavors. If you’re not a cilantro fan, feel free to use a little minced parsley, or omit it altogether. Also feel free to experiment with other sweeteners—if you use one like honey, you’ll need to slightly increase the amount of red wine vinegar to compensate. This is a super adaptable cooking technique, which works for lots of different slow-cooked meats. So have fun trying out lots of different possibilities, and enjoy!


sweet and sour ribs with pomegranate molasses


- Prep Time: 15 minutes
- Cook Time: 3 hours 15 minutes
- Total Time: 3 1/2 hours
- Yield: serves 2
Ingredients
- 1 rack of ribs** (800g / 28oz)
- 3/4 teaspoon salt (or more to taste)
- 1/4 cup tomato paste (60g)
- 1 small minced chipotle in adobo sauce (10g)
- 2 tablespoons pomegranate molasses (40g)
- 1 tablespoon red wine vinegar (15g)
- 3 medium cloves garlic, crushed through a press (15g)
- 1 handful of cilantro leaves
Instructions
- Preheat the oven to 320°F (160°C).
- Mix together the tomato paste, chipotle, pomegranate molasses, vinegar, and garlic.
- Place the ribs on a cutting board or large plate. Season the ribs evenly with salt on both sides. Place the ribs with the flattest side facing up, and slather that side with about 1/3 of the sauce.
- Place a large piece of aluminum foil on a sheet pan. Place the ribs slathered-side-down on the aluminum foil, being very careful not to puncture the foil. Slather the top of the ribs with the rest of the sauce. Place another piece of aluminum foil on top of the ribs. Crimp the aluminum foil shut around the sides, again being very careful not to puncture it.
- Bake for about 3 hours, until they’re falling off the bone. Open the foil and let them rest for a few minutes, just until they’re no longer piping hot. Move to a cutting board, slice into individual pieces, top with cilantro, and enjoy!
Notes
* Feel free to double (or triple or quadruple!) this recipe. Each rack of ribs should be cooked in its own foil pouch. You can usually double up 2 pouches side by side on a sheet pan (just make sure they’re in 1 layer).
** I developed this recipe using pork ribs, but you can absolutely use beef ribs if you don’t eat pork. Keep in mind that they may take a little longer to become tender, depending on their shape/size. But also keep in mind that they’ll be just as delicious! 😉