• Skip to primary navigation
  • Skip to main content
  • Skip to primary sidebar
  • Skip to footer
Cardamom and Tea
  • Blog
  • Recipes
  • About
  • Cookbooks
    • Piecemeal
    • A Dish for All Seasons (my first cookbook)

cheesy caraway hot cross buns

April 9, 2020 by Kathryn Pauline Leave a Comment

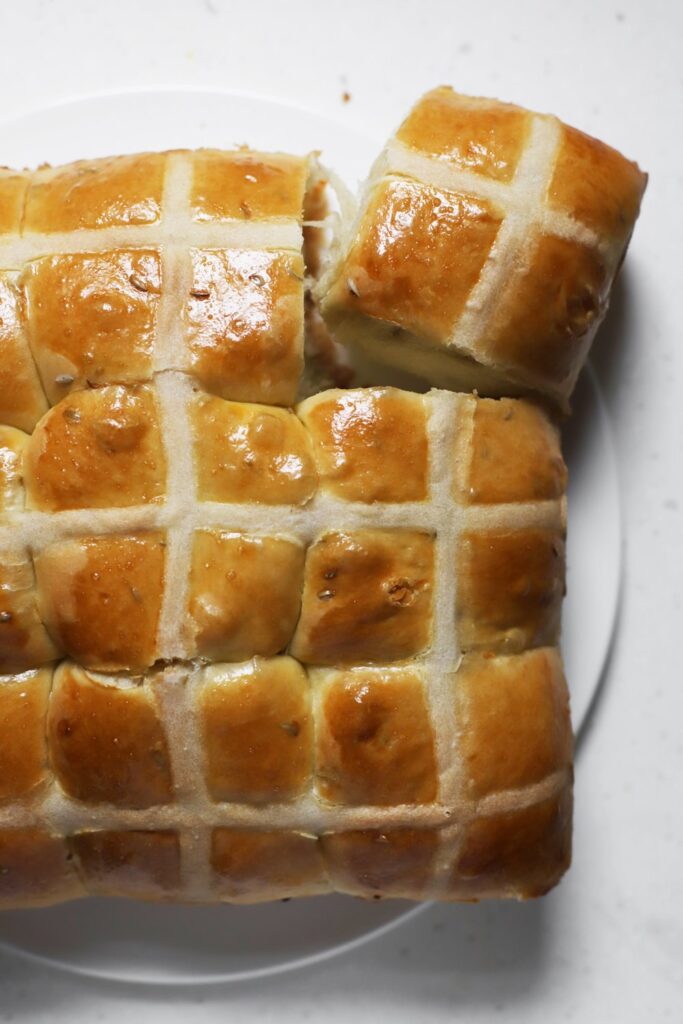
My grandmother grew up on a farm in rural Syria, where they would make big batches of gubta mtumarta, a cheese preserved with caraway seeds, packed in clay jars, and buried under ground. Every Easter, my great-grandmother would stuff one samoon with a bit of gubta, and the kid who got the stuffed roll received an extra little gift. These hot cross buns are a bit over-the-top in comparison, with every single one containing a bit of cheese. If you don’t have caraway at home, no worries—they’re lovely plain as well. Or feel free to add some of your favorite dried herbs to the dough instead.

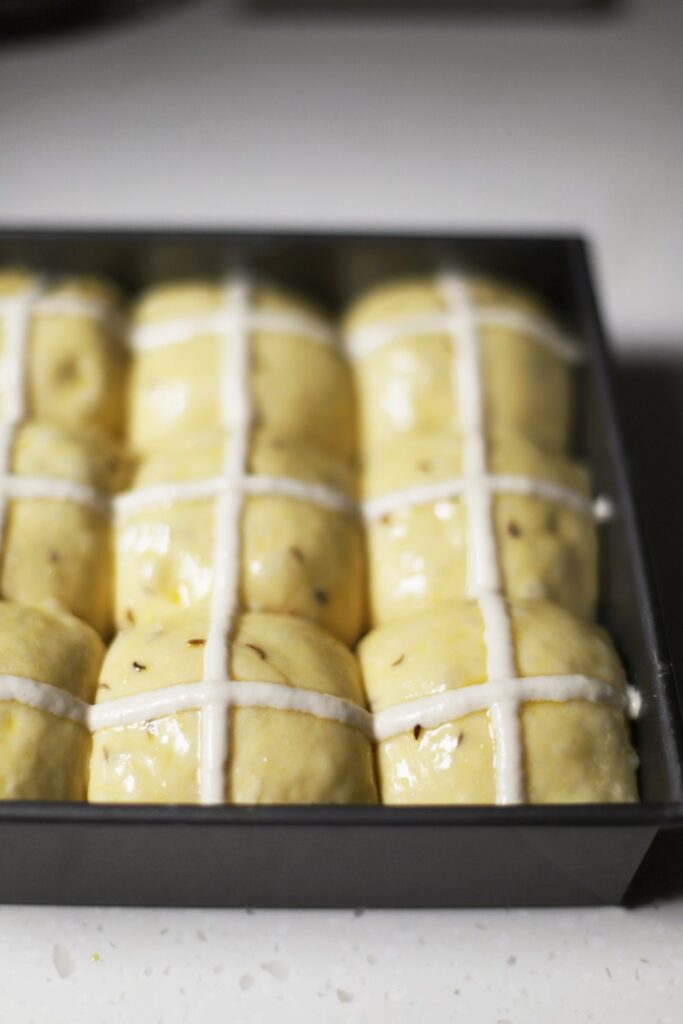
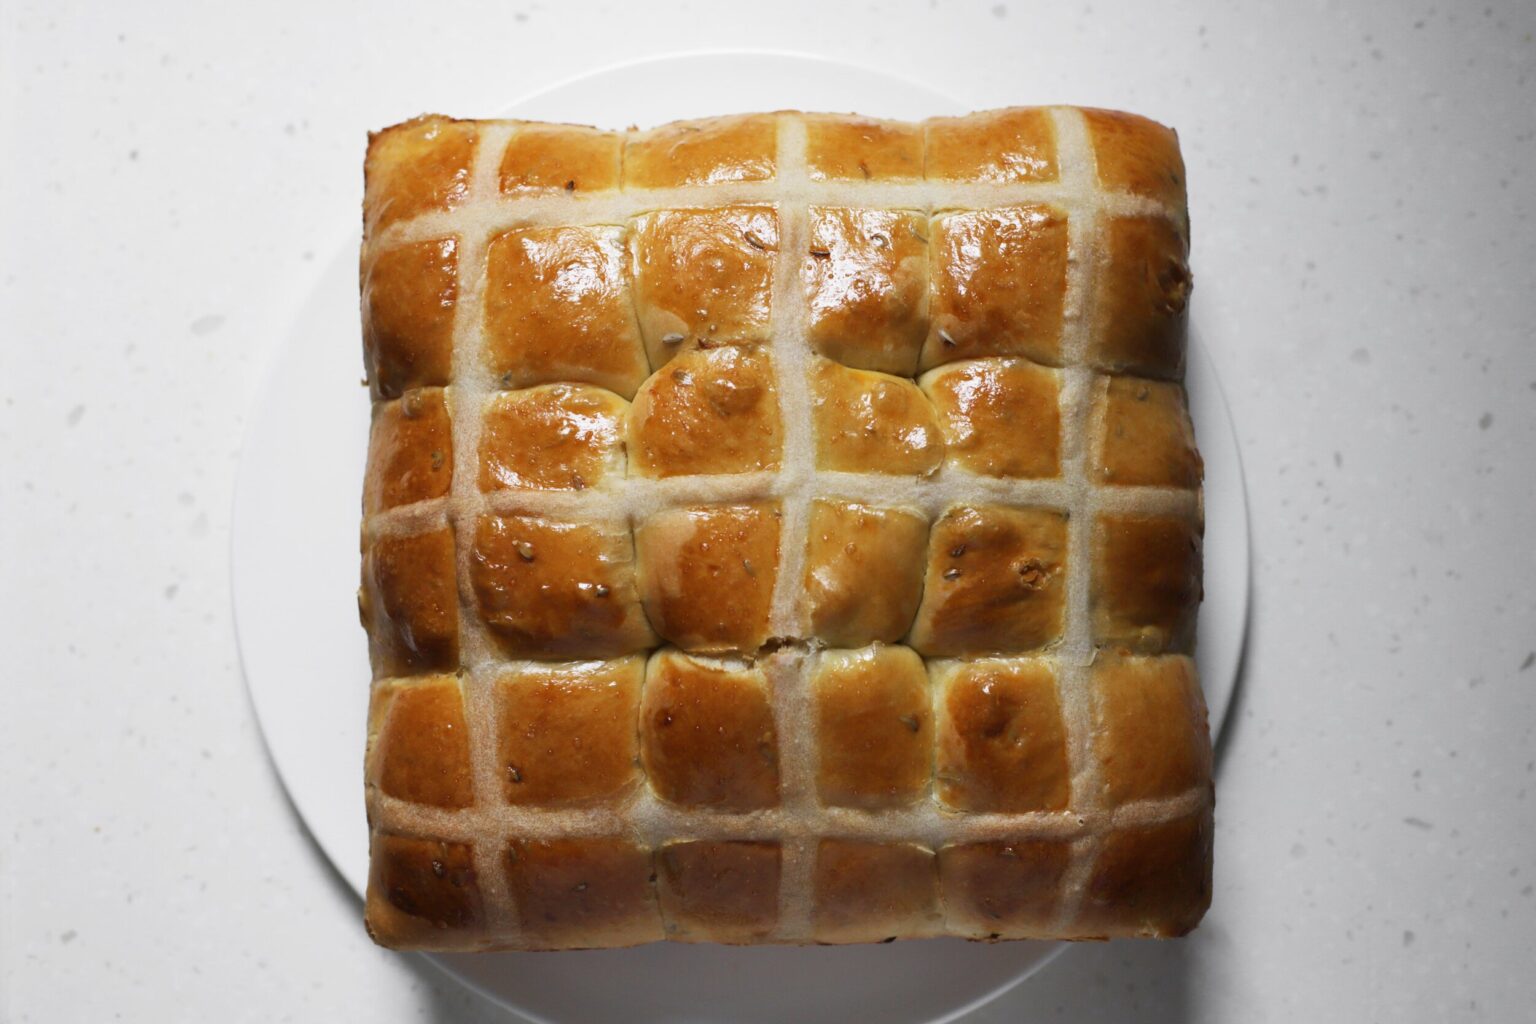
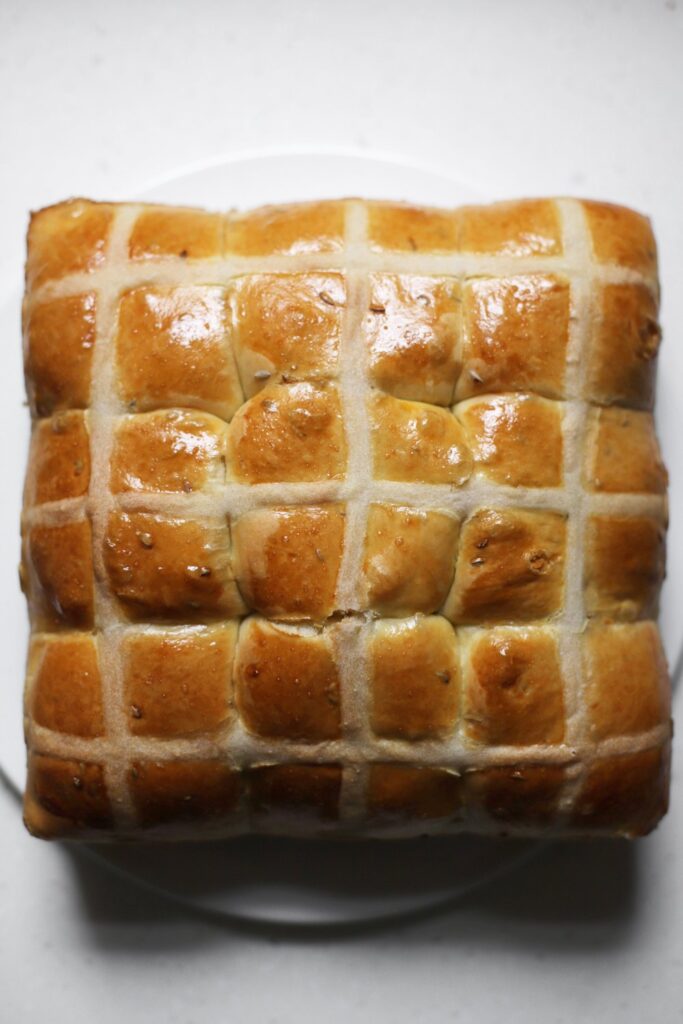
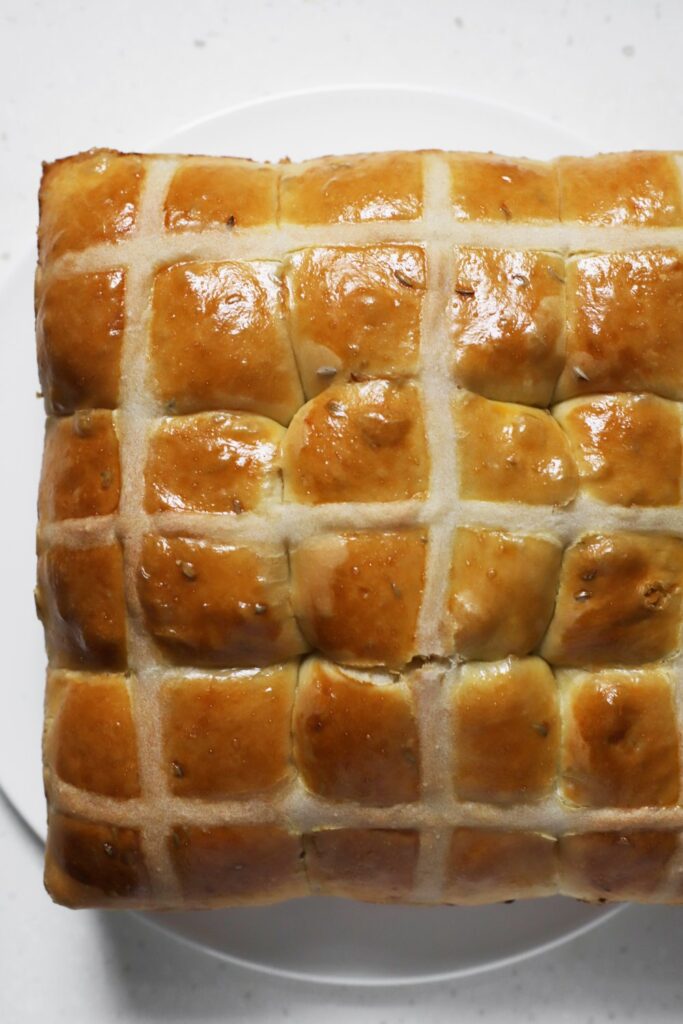
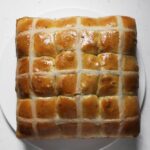
It’s a pretty straightforward challenge to get that distinctive cross pattern with sweet hot cross buns (either with icing or pastry cream), but I’ve always struggled a bit with savory ones. Sometimes the piped line of flour paste just disappears into the dough once it goes in the oven, and sometimes it awkwardly puffs up. After reading a bunch of recipes, I tried a few different strategies for styling these, and I finally found the right technique for achieving high-contrast crosses. First, you egg wash the shaped and proofed dough. Then you mix equal parts (by weight) water and flour to form a paste—if the paste is too thin, it will run everywhere, and if it’s too thick it will be awkwardly raised and too dark. But when you get the ratio just right, it stays in place and remains bright, while the buns themselves bake to perfect golden brown.

Print

cheesy caraway hot cross buns

Print Recipe

5 Stars 4 Stars 3 Stars 2 Stars 1 Star

No reviews

  • Prep Time: 35 minutes
  • Total Time: 3 hours
  • Yield: 9 buns

Ingredients

  • 180g whole milk (3/4 cup)
  • 5g yeast (1.5 tablespoons)
  • 2 large eggs (110g), at room temperature
  • 475g all purpose flour (3 3/4 cups)
  • 6g caraway seeds (1 tablespoon)
  • 6.5g salt (1 teaspoon)
  • 55g butter (4 tablespoons)
  • 120g hard melting cheese, cut into 9 cubes (e.g., cheddar, gruyere, swiss, mozzarella, etc.)
  • Egg wash: 1 egg yolk, beaten with 1 teaspoon water
  • Paste for the crosses: 60g flour (about 1/2 cup) mixed with 60g water (about 1/4 cup)

Instructions

  1. Preheat the oven to 180°F (80°C). Once it preheats, turn it off and open the door open a crack before you start making the dough.
  2. Microwave the milk until it’s about 115°F (45°C). Add the yeast to the bowl of a stand mixer (fitted with the hook attachment), stir in the warm milk, and let it sit for about 5 minutes.
  3. Add the eggs, 400g of the flour, caraway seeds, and salt to the stand mixer. Let the mixer run at low speed just until everything is incorporated into a very shaggy dough. Add the butter 1 tablespoon at a time with the mixer running at low speed, allowing each tablespoon to disappear completely before adding more.
  4. Once all the butter has been added, gradually add the last 75g of flour 1 tablespoon at a time with the mixer still running on low. Once the dough pulls away from the sides of the bowl, stop adding flour (I add exactly 50g, but you might need more or less if you don’t measure precisely with grams).
  5. Increase speed to medium, and knead the dough for about 7 minutes, until it’s smooth and elastic.
  6. Lightly oil a mixing bowl and your hands. Scrape the dough into the bowl, and use your hands to shape it into a ball (tuck itself under its bottom to smooth out the surface). Leave it in the bowl with the seam-side facing down.
  7. Cover the bowl of dough with plastic wrap, place it in the oven (again, make sure the oven heat is off and that it has cooled down for at least 10 minutes), leave the door open a crack, and let it proof for about 1 hour. The dough is done rising once it’s noticeably larger, and has approximately doubled in size. While it’s proofing, butter a 8×8” pan (and optionally line the bottom with parchment).
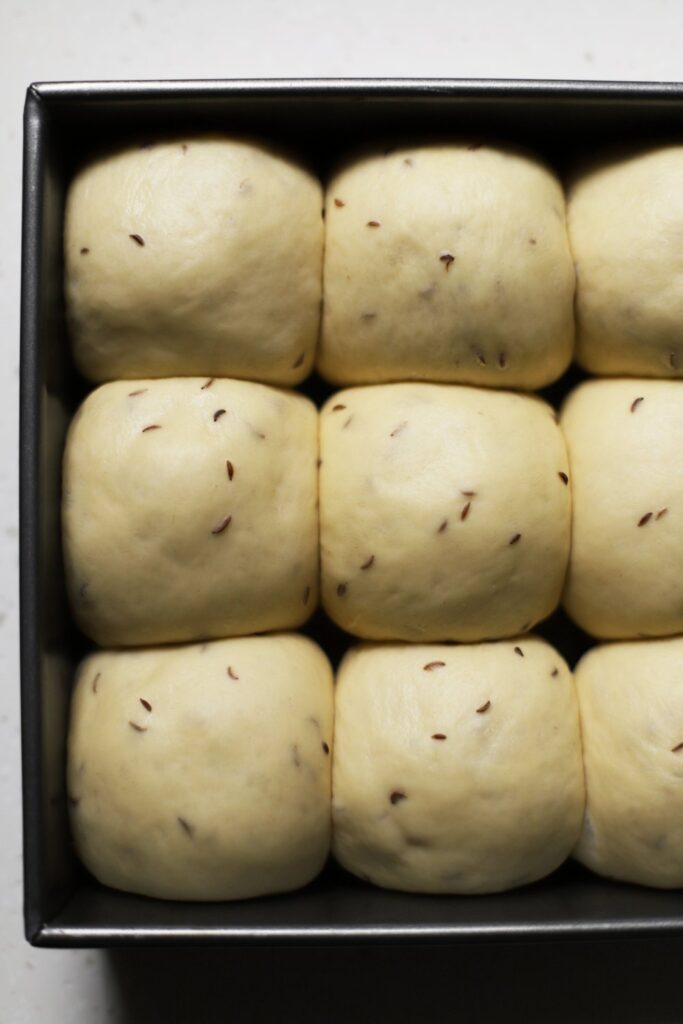
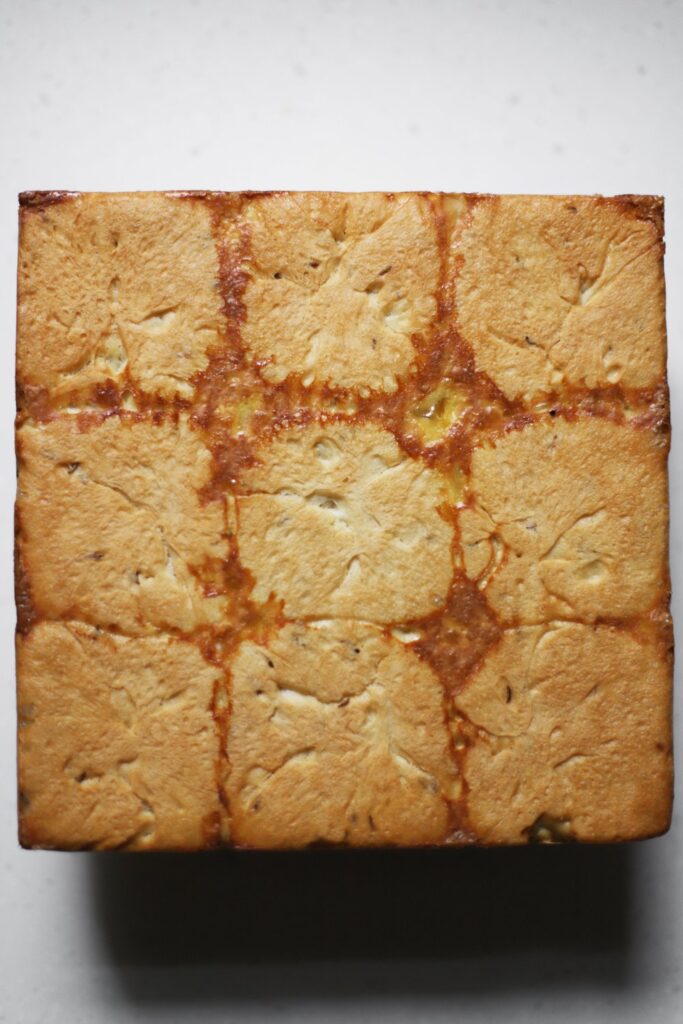
  8. Once the dough is done rising, move to a lightly floured counter, and divide into 9 even pieces (about 90g each). Stuff each piece with a chunk of cheese, and shape into a smooth, round ball. Space them evenly in the pan.
  9. Cover the pan with plastic wrap, and move back to the still warm oven for about 40 minutes (again, make sure it’s still off), just until the gaps around them almost close up.
  10. Once the buns have finished their rise, remove from the oven, and preheat it to 350°F (177°C) convection. Brush the tops of the buns with a layer of egg wash.
  11. Place the paste for the crosses in a piping bag and snip off a bit of the end. Pipe a straight line across each bun in one direction, then switch directions and pipe a straight line across each bun again (see photos).
  12. Bake for about 30 minutes, until the internal temperature reads about 195°F (about 90°C). Remove from the pan to a cooling rack, and let them cool for a couple minutes before serving (they can also be served at room temperature).

Notes

To make these ahead: shape the rolls, let them proof at room temperature for 10 minutes, and then let the whole pan chill in the refrigerator for 8 to 20 hours. Bring them to room temperature before baking and let them finish rising (unless they have already risen in the refrigerator). If you have any left over, they’ll keep at room temperature for a few hours, but leftovers should be frozen as soon as possible to make sure they stay fresh. As with any bread, do not store them in the refrigerator or they will stale even faster than at room temperature.

find us on instagram and let us know what you made!

Filed Under: bread, breakfast, every recipe, vegetarian Tagged With: caraway

Lula Kebab

March 27, 2020 by Kathryn Pauline 4 Comments

grilling lula kebab

Lula kebab is a staple of Assyrian and Armenian cuisine. It’s my mom’s favorite thing to make for an easy weeknight dinner, and it goes great with riza sh’ariyeh and fattoush. And while they’re traditionally cooked on the grill, you can absolutely make them in the oven. This recipe has you covered in either case. Read along for some delicious serving ideas, or jump to the lula kebab recipe.

lula kebab with samoon
lula kebab

Things to serve alongside lula kebab

  • Serve lula kebab with really good pot of rice, especially something like riza sh’ariyeh, bulgur pilaf, or West African jollof rice. Or, if you’ve got nothing but time and onions, make a batch of mujadara, and watch your family ignore every single other thing on the table.
  • Bake your own samoon, like I did here, or pick some up from your local Middle Eastern market. It’s a really fun activity, and you probably have the ingredients at home. Store them in the freezer if you don’t plan to eat them all in the next 24 hours (never the refrigerator).
  • Make a simple slaw with mayo (or yogurt), lemon, olive oil, and whatever you’ve got. I like using a lot of capers and black pepper. Or, while you’re at it, make fattoush.
  • Make a bean salad! If you’re improvising one, you can simply use a little splash of red wine vinegar, a spoonful of dijon mustard, a generous glug of olive oil, a clove of garlic crushed through a press (or some garlic powder), and all the dried herbs you can find (basil, chives, dill, parsley, and black pepper all work great together). Or mayo, chipotle, lime juice, and fresh cilantro.
grilling lula kebab
grilling lula kebab

make your ingredients last longer

  • Immediately freeze however many grilled kebabs you don’t plan to consume in the first couple days. It’s best to freeze things within a day or two of making them, so they’re still good quality after thawing.
  • Alternatively, you can freeze them in raw form and grill them one at a time. But I find that it’s much easier and more efficient to just grill them all at once, and enjoy the rest as leftovers.
  • Wash your leftover cilantro and green onions really well, dry them really well, and store them as described in this post. They’ll last for at least a few days, if not weeks. Use the extra in salads, guacamole, etc. Watch the video below for more info on washing them well.

(If video does not appear below, please disable ad block)

Print

Lula Kebab (grill or oven + skewers or no skewers)

grilling lula kebab
Print Recipe

5 Stars 4 Stars 3 Stars 2 Stars 1 Star

5 from 1 review

  • Prep Time: 15 minutes
  • Total Time: 30 minutes
  • Yield: 12 kebabs

Ingredients

  • 2 lb 3 oz 80/20* ground beef (1 kg)
  • 1 cup chopped cilantro (40g)
  • 1 1/2 cups chopped green onion (90g)
  • 1/2 teaspoon black pepper
  • about 1 to 1 1/2 teaspoons salt

To serve:

  • the topping from this post (optional)
  • samoon (optional)

Instructions

  1. Combine the ground beef, chopped cilantro, green onion, black pepper, and salt.**
  2. Once combined, shape into 12 ovals. If you’d like to use skewers, spear each oval and work out into a slightly longer log (like a flat hotdog around the skewer). If not using skewers, just leave it as an oval.
  3. For outdoor grilling: Heat your grill with the lid down, until its temperature reads about 400°F/205°C. Once it’s hot, place the kebabs on the grates, lower the cover, and let them cook for about 7 minutes per side. Keep an eye on them; if they are browning too quickly, lower the temperature.
  4. For broiling: If you don’t have an outdoor grill, preheat your broiler to its highest setting. Once it’s heated, place the kebabs on a clean broiler tray and place under the broiler for about 7 minutes per side. Keep an eye on them, and make sure they’re not burning or cooking too quickly.
  5. The kebabs are done once they register 160°F/71°C and are nicely charred in many spots.***
  6. Serve however you’d like (in samoon or another bread, with a dry salsa on top, or just on their own).

Notes

* This isn’t the kind of recipe where you should use lean beef—definitely go with 80% lean/20% fat.

** If you want them to have a more crumbly burger-like texture, then instead of adding the salt at this stage, you’ll want to season the outside of the shaped kebabs instead. I used to recommend salting the outside, but have since updated the recipe to opt for salting the mixture, since a firmer texture is more traditional (2025 update).

*** Lula kebabs aren’t usually served medium rare, like you’d serve a steak or a pub burger. At least in my experience, Middle Eastern ground beef tends to be either 100% raw or 100% cooked, without a ton of middle ground.

Video note: If you don’t see the video for this post after scrolling up, please disable ad block and try reloading the page.

find us on instagram and let us know what you made!

Filed Under: dinner, every recipe, family recipes, gluten free, main courses, weeknight Tagged With: beef, cilantro, grilling, herbs, middle eastern

  • « Go to Previous Page
  • Page 1
  • Interim pages omitted …
  • Page 68
  • Page 69
  • Page 70
  • Page 71
  • Page 72
  • Interim pages omitted …
  • Page 183
  • Go to Next Page »

Primary Sidebar

Kathryn Pauline smiling

Welcome! I’m Kathryn Pauline, cookbook author, recipe developer, and photographer.

Footer

read our privacy policy

© 2017 - 2026 Kathryn Pauline