• Skip to primary navigation
  • Skip to main content
  • Skip to primary sidebar
  • Skip to footer
Cardamom and Tea
  • Blog
  • Recipes
  • About
  • Cookbooks
    • Piecemeal
    • A Dish for All Seasons (my first cookbook)

Clarified Butter (all about it + the easiest way to make it)

July 13, 2025 by Kathryn Pauline 2 Comments

a measuring cup of golden clarified butter

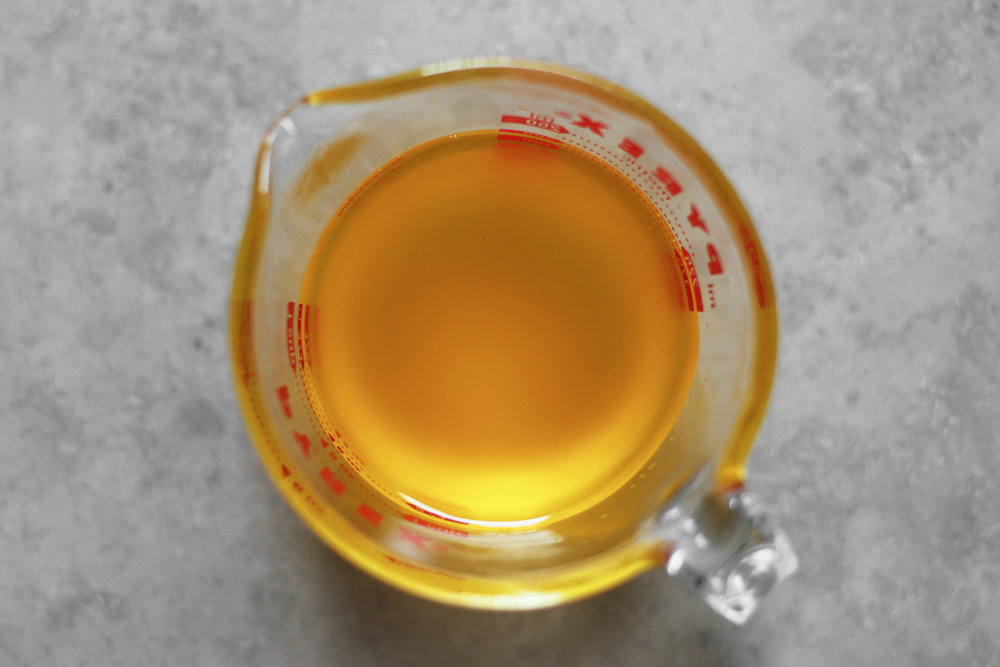
Clarified butter starts out as regular butter. You cook it gently, let the water evaporate, and skim off the milk solids or let them settle to the bottom. What you’re left with is pure butterfat—golden, flavorful, and incredibly useful.

It’s essential in traditional Middle Eastern and South Asian dishes where regular butter would mess with traditional textures and flavors. It’s also shelf stable and has a high smoke point.

If you’re ready to learn how to clarify butter (without any straining!), jump to the recipe. Or if you want to read a bit more about why clarified butter is so great, along with some ideas of how to use it, continue onward.

a measuring cup of golden clarified butter

What is clarified butter?

Regular butter is made of three components: fat, milk solids, and water. When you melt butter slowly, the water steams off, and the milk solids sink or float. Skim and/or strain, and voilà!

Why use clarified butter?

1. Better texture in baked goods

Clarified butter helps you avoid gluten development in delicate pastries. That doesn’t mean that if you bake with it, your pastries will magically become gluten free. But aesthetically speaking, they will not be as chewy, tough, and/or stretchy. Things instead become shatteringly crisp, as with ghraybeh and baklava. This is the only way to get the right texture in certain baked goods.

2. An authentic flavor and look

Removing the milk solids prevents browning, which might sound like a loss. But in many traditional pastries, a pale golden finish is actually the goal. For chocolate chip cookies? Oh, I’m using the un-clarified stuff, no doubt. But for Middle Eastern and South Asian treats? It’s clarified butter all the way.

3. It lasts longer and cooks hotter

Without milk solids, clarified butter won’t burn as easily—it has a much higher smoke point than regular butter, making it ideal for sautéing and frying.

It also keeps for months at cool room temperature in a clean, sealed container, away from the light. Discard if it starts smelling rancid at any point.
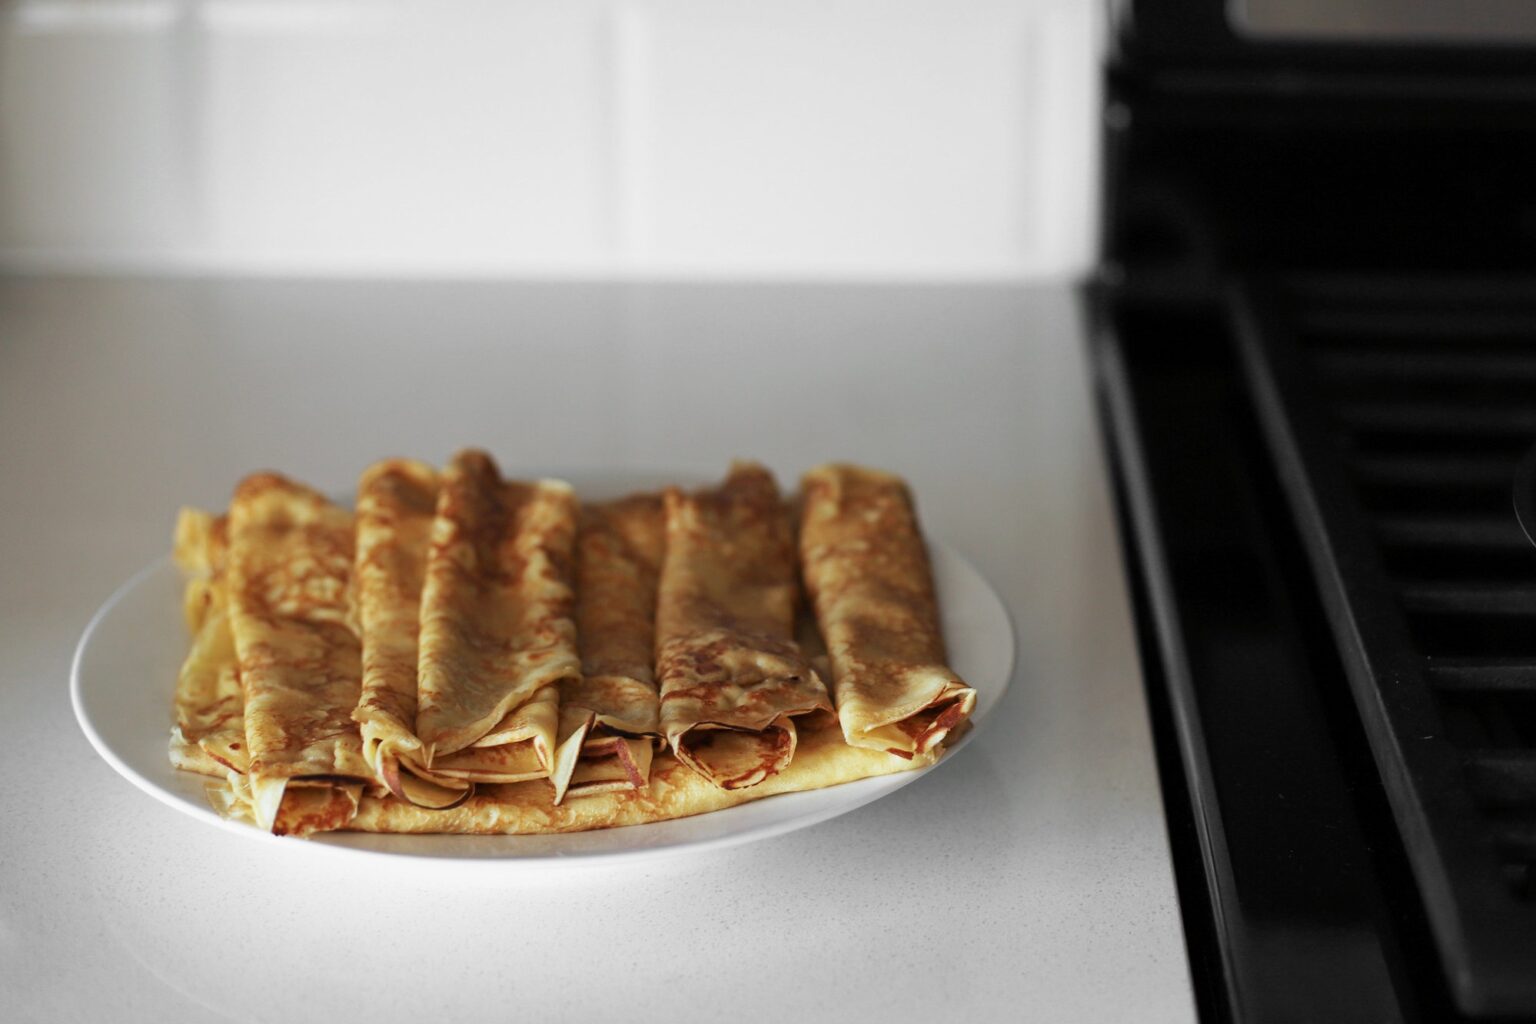
ways to use it

Check out the archives for a full list of ways to use it, or check out some of my favorites below:

  • Caramel Chocolate Baklava
  • Easy Spanakopita Spiral
  • s’mores baklava
  • rosemary cornmeal fig ma’amoul (gluten free)
  • milk tea baklawa (baklava)
  • chocolate chunk ghraybeh
  • cardamom and tea ghraybeh
  • date ma’amoul
  • Cardamom Honey Baklava
Print

How to Make Clarified Butter (no straining)

a measuring cup of golden clarified butter
Print Recipe

5 Stars 4 Stars 3 Stars 2 Stars 1 Star

No reviews

Ingredients

  • 227 grams (8 ounces / 2 sticks) unsalted butter

Instructions

  1. Melt the butter in a small saucepan over medium heat. Once the butter has melted, reduce the heat to medium-low and continue to simmer. Keep an eye on the temperature and adjust it as necessary, so that the butter solids don’t brown, and so that it doesn’t boil out of control. Within the first couple minutes, the white solids will separate from the yellow liquid (they will float to the top, and then some of them will sink to the bottom).
  2. Remove from heat as soon as the simmering has quieted down a bit, but before it goes silent—this should take about 7 minutes. Use a spoon to carefully skim off any curdled solids from the surface, and then slowly pour the liquid into a measuring cup, leaving behind any of the solids left at the bottom of the pot.

(If video does not appear below, please disable ad block)

Notes

If you start with European butter, you will end up with between 175 and 180 grams of clarified butter. If you use American butter, you will end up with a bit less. If you have trouble clarifying it by skimming and pouring it off, you can use a fine mesh strainer to filter out the milk solids instead (but it needs to be extremely fine, or they’ll go right through). Very well-clarified butter should keep for 2 to 3 months at cool room temperature, or up to a year in the refrigerator. If you want to make sure you remove every last little bit of milk solids, simply unmold the chilled butter, and scrape away the last couple solids that sunk to the bottom. Just like with sweet cream butter, if it ever starts to smell rancid, discard it (but it should last much longer than butter that hasn’t been clarified). Oh and don’t throw away the milk solids! They’re delicious on toast.

Video note: If you don’t see the video for this post after scrolling up, please disable ad block and try reloading the page.

find us on instagram and let us know what you made!

This recipe was originally on 6 August 2018. I have not updated the recipe, but reposted it with a more user-friendly introduction to clarified butter.

Filed Under: family recipes, gluten free, specialty ingredients Tagged With: middle eastern

Sweet crêpes

July 13, 2025 by Kathryn Pauline 4 Comments

If you’re craving a perfect batch of sweet crêpes—thin, tender, golden at the edges, and ready to be filled with everything from lemon sugar to Nutella—you’re in the right place! This is the sweet crêpe recipe I always turn to, thanks to my aunt Masy, who’s known in our family for her culinary wizardry.

Before the recipe, I’m going to get into why this recipe is the absolute easiest. And I’ll also include a quick list of my favorite toppings. Check those out if you’d like, or jump to the recipe if you’re ready to start crêping!

beating eggs
beating eggs

Why this sweet crêpes recipe is 100x easier

1. No blender required (though you can use one!)

crêpe batter
crêpe batter

Most crêpe recipes call for a blender to avoid lumps in the very thin batter. But Masy’s method only needs a mixing bowl and a whisk. By adding the liquid in stages, you can easily achieve a smooth, silky batter without the blender.

But you can use a blender if that’s what is easier for you. It works either way!

2. Less clean-up

crêpe batter
making sweet crêpes

The recipe in this post has both volume and weight measurements. So if you have a digital scale, use that instead of measuring cups to save on dishes. Or use the volumetric measurements if that’s your preference. Either way, one bowl keeps the cleanup to a minimum.

3. A faster cooking process (with more flavor!):

making sweet crêpes
making sweet crêpes

Masy cooks these sweet crêpes over higher heat than most recipes suggest. A properly preheated pan (where the butter sizzles right away) gives them a gorgeous caramelized edge and a toasty, brown butter aroma that deepens their sweetness. Sweet crêpes just got a whole lot sweeter (and a whole lot faster).

Crêpe topping ideas

This recipe for sweet crêpes is a perfect blank canvas. Here are a few ideas to get you started:

sweet crêpes
sweet crêpes
  • Fresh lemon juice and powdered sugar with a smear of jam
  • Passion fruit with a dash of orange blossom water and a drizzle of sweetened condensed milk
  • Nutella and sliced strawberries
  • Berries with whipped cream
  • Sweetened ricotta or mascarpone topped with chocolate sauce
Print

Sweet Crêpes (with topping ideas + a video)

crêpes with orange blossom passionfruit
Print Recipe

5 Stars 4 Stars 3 Stars 2 Stars 1 Star

5 from 1 review

for a vegan version, try this recipe

  • Total Time: 30 minutes
  • Yield: about 12 big or 15 medium crêpes

Ingredients

  • 4 tablespoons (57 grams) butter, melted
  • 3 tablespoons sugar (41 grams)
  • 6 large eggs at room temperature* (308 grams)
  • 1/2 teaspoon vanilla extract (2 grams)
  • 1/4 teaspoon salt (1.5 grams)
  • 1 1/4 cup flour (200 grams)
  • 2 cups room temperature milk (470 grams) (which you’ll add in 2 additions)
  • More butter for the pan (have a half stick ready, although you won’t use it all)
  • Toppings!

Instructions

  1. In a large mixing bowl, beat the butter, sugar, eggs, vanilla, and salt until well combined. Don’t add the milk yet.
  2. Add the flour to the egg mixture, and whisk together until there are no dry lumps (don’t worry too much about over-mixing, but do stop when there are no more dry lumps).
  3. Slowly dribble in the first half of the milk, while whisking. Then whisk in the other half of the milk. You should end up with a smooth, lump-free batter.
  4. Place a non-stick skillet over medium-high heat, and let it pre-heat for a couple minutes. Get ready to move.
  5. Peel back the butter wrapper halfway, and swipe the butter over the surface of the hot pan. It should sizzle and begin to turn brown after a couple seconds (but it shouldn’t burn). Pour about 1/4 cup (more or less, depending on the size of your pan) into the buttered pan, and quickly tilt the pan around to coat the surface evenly. Let it cook for about 1 minute, then flip and cook for 30 more seconds (the fastest way is to flip it mid-air with the pan, but that takes a little practice. Watch some youtube tutorials and give it a try).
  6. Remove finished crepes to a plate, and continue cooking the rest of the batter. Serve immediately, or cover and refrigerate for a few days (reheat in the same pan for about 30 seconds, or microwave briefly). Storage suggestions: Crêpes have a high ratio of egg:flour, so they do alright in the refrigerator, but for longer-term storage, place them in a gallon-size freezer bag and freeze for up to 3 months. You can use wax paper between each crêpe to make them easier to thaw 1 at a time (you can also use wax paper in the refrigerator as a precaution, but I find that they usually peel apart pretty easily). To thaw, simply leave them in the refrigerator overnight or gently microwave them.
  7. Fold the crêpes up into rolls or triangles

Notes

* Put the in-shell eggs in hot tap water for about 5 to 10 minutes to bring them to room temperature. For the milk, microwave it for a few seconds to take the chill off.

Topping suggestion (optional—see list above post for more ideas):

  • 6 ripe passion fruits
  • 1 to 1 1/2 teaspoons orange blossom water
  • sweetened condensed milk

Make the topping: Carefully scrape the passion fruit pulp into a bowl. Add a little orange blossom water, to taste (between 1/8 – 1/4 teaspoon per 1 passion fruit—keep it subtle), and gently stir together. Serve with the passion fruit and sweetened condensed milk on the side at the table.

Video note: If you don’t see the video for this post after scrolling up, please disable ad block and try reloading the page.

find us on instagram and let us know what you made!

This was originally posted in March 2019, but I recently updated it to streamline the recipe and to gave a bit more context for the recipe, and then reposted it (in 2025). The actual recipe is still the same (same technique and ingredients), so if you’ve been making it since then, don’t worry—that is the one thing that hasn’t changed.

Filed Under: breakfast, every recipe, family recipes, sweets, vegetarian, weeknight Tagged With: orange blossom water, vanilla

  • « Go to Previous Page
  • Page 1
  • Interim pages omitted …
  • Page 36
  • Page 37
  • Page 38
  • Page 39
  • Page 40
  • Interim pages omitted …
  • Page 183
  • Go to Next Page »

Primary Sidebar

Kathryn Pauline smiling

Welcome! I’m Kathryn Pauline, cookbook author, recipe developer, and photographer.

Footer

read our privacy policy

© 2017 - 2026 Kathryn Pauline