• Skip to primary navigation
  • Skip to main content
  • Skip to primary sidebar
  • Skip to footer
Cardamom and Tea
  • Blog
  • Recipes
  • About
  • Cookbooks
    • Piecemeal
    • A Dish for All Seasons (my first cookbook)

winter toast toppings

January 3, 2018 by Kathryn Pauline 4 Comments

A couple weeks ago, I got to hang with one of my favorite bloggers, Abeer Najjar. Over the last few months, we’ve become friends on instagram, and it was so wonderful actually getting to meet in person. We grabbed lunch at Jerusalem Café in Oak Park (I drank so much carrot juice and ate so much delicious fattoush). We had a blast talking for hours, and we covered just about everything, including commiserating about avocado toast. It’s not that I hate avocado toast, I’m just a little stunned that it’s so quickly become the default topping, when there are so many other options out there.

I love getting creative with toast, and I tend to change the toppings depending on the season, so I thought it would be fun to put together a list of my favorite cold weather toast toppings (although most of these would be delicious year-round). In the wintertime, I tend to crave warm aromas, preserved flavors, and lots (and lots) of dairy. So my apologies to my vegan friends, since there is only one vegan toast here, but I hope it’s some consolation that the vegan one is my favorite, and also the one I’ll kick things off with:

tahini, banana, cardamom toast

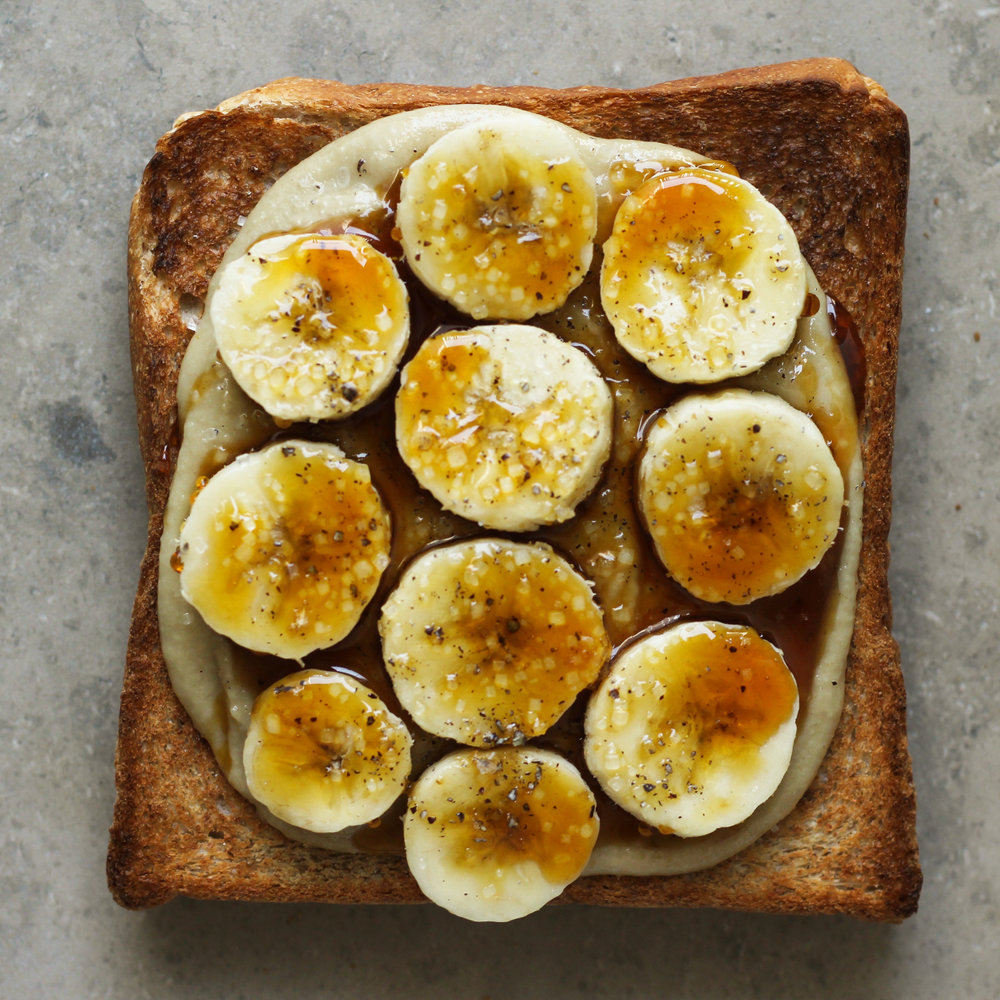
tahini + banana + cardamom + honey *

Combine 1 part honey with 2 parts tahini, and spread it on toast. Top it with banana slices, sprinkle with a very, very small pinch of cardamom, and (optionally) top with a little more honey and/or coarse sugar to make it extra sweet and pretty.

* Feel free to use black strap molasses, date molasses, agave, or another syrup if you want to make this vegan (or to use what you have).

banadurah harrah

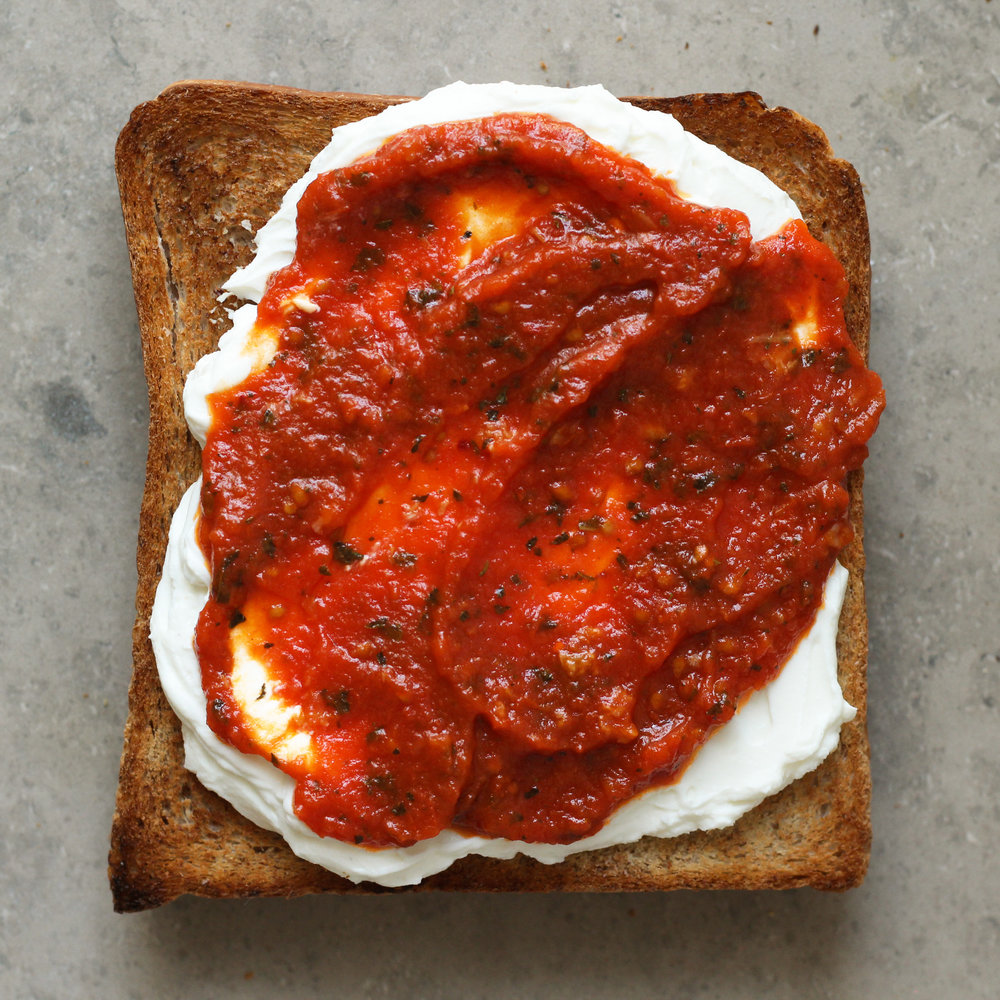
labneh * + banadurah harrah

Not much explanation necessary: smear some labneh, then smear some banadurah harrah, and enjoy!

* If you don’t have labneh around, feel free to use cream cheese, goat cheese, or Greek yogurt here.

squash toast

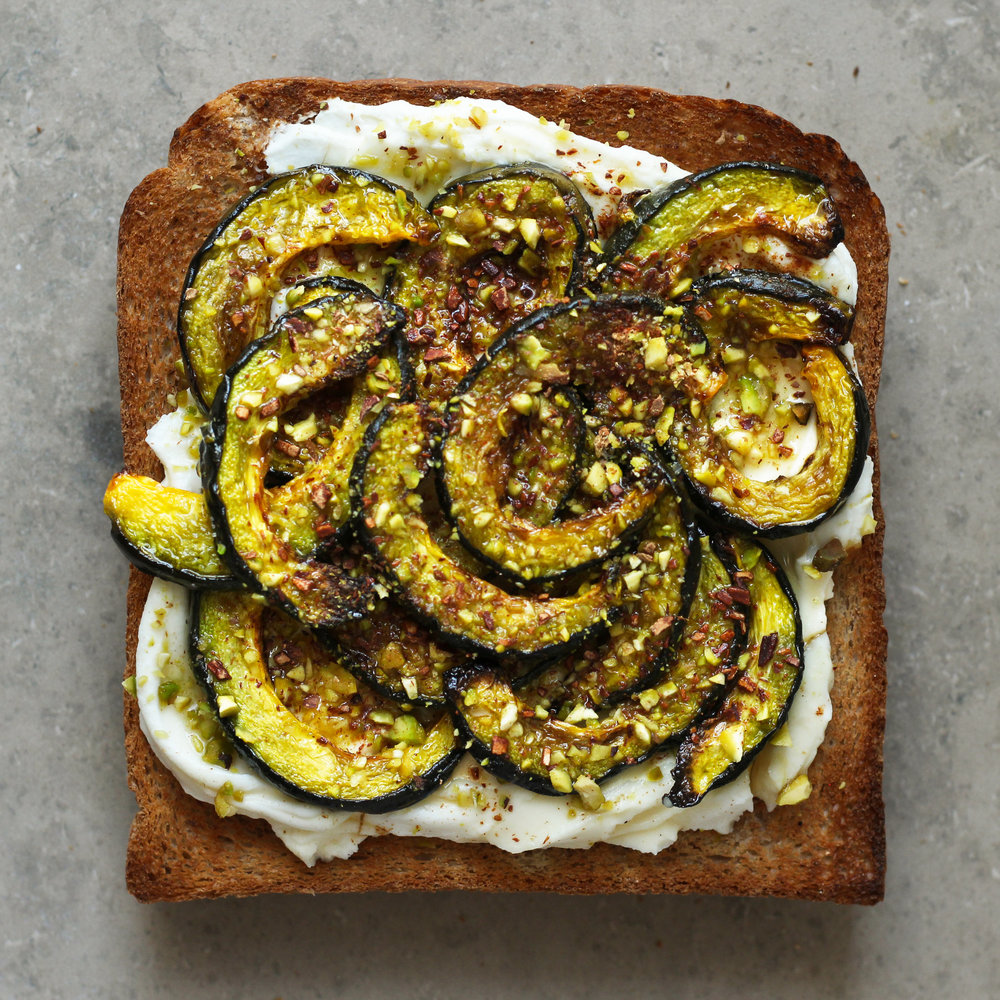
roast squash + pistachios + honey + cinnamon + cream cheese

If you like pumpkin pie, you’ll like this toast. If you don’t like pumpkin pie, you’ll like this toast. Slice your squash of choice (pictured here: mini kabocha) into 1/2-inch slices and roast at 400° F until soft on the inside and a little crispy on the outside. Spread cream cheese on toast, top with roast squash, drizzle with honey, and finish with finely chopped pistachios and a sprinkle of cinnamon.

cilantro feta toast

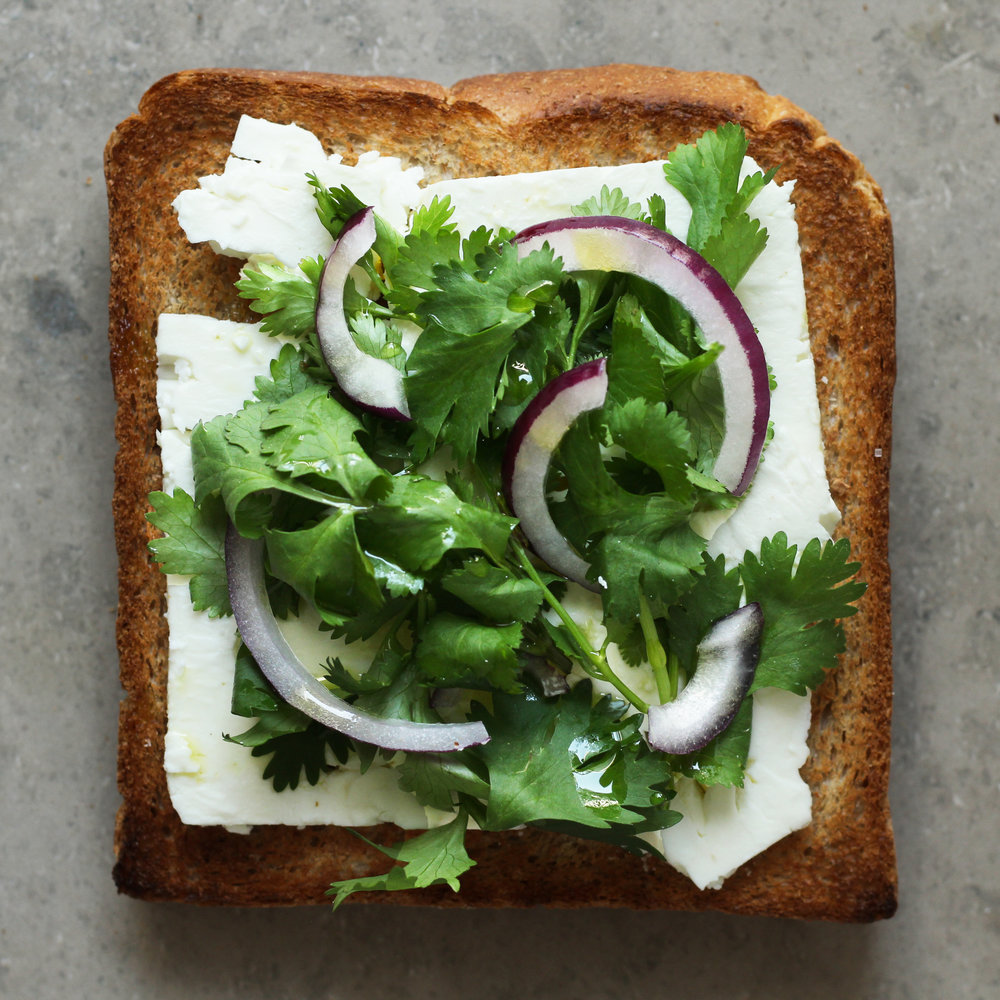
cilantro + feta + olive oil + sliced red onions

Thinly slice or crumble feta on toast, top with a big heap of cilantro (or parsley, mint, or basil), a few thin slices of red onion, and a drizzle of extra virgin olive oil. If there’s one thing I’ve learned from my mother and grandmother, it’s that you can eat leafy herbs in a salad-like-quantity (not much sprinkling going on around here).

za'atar toast

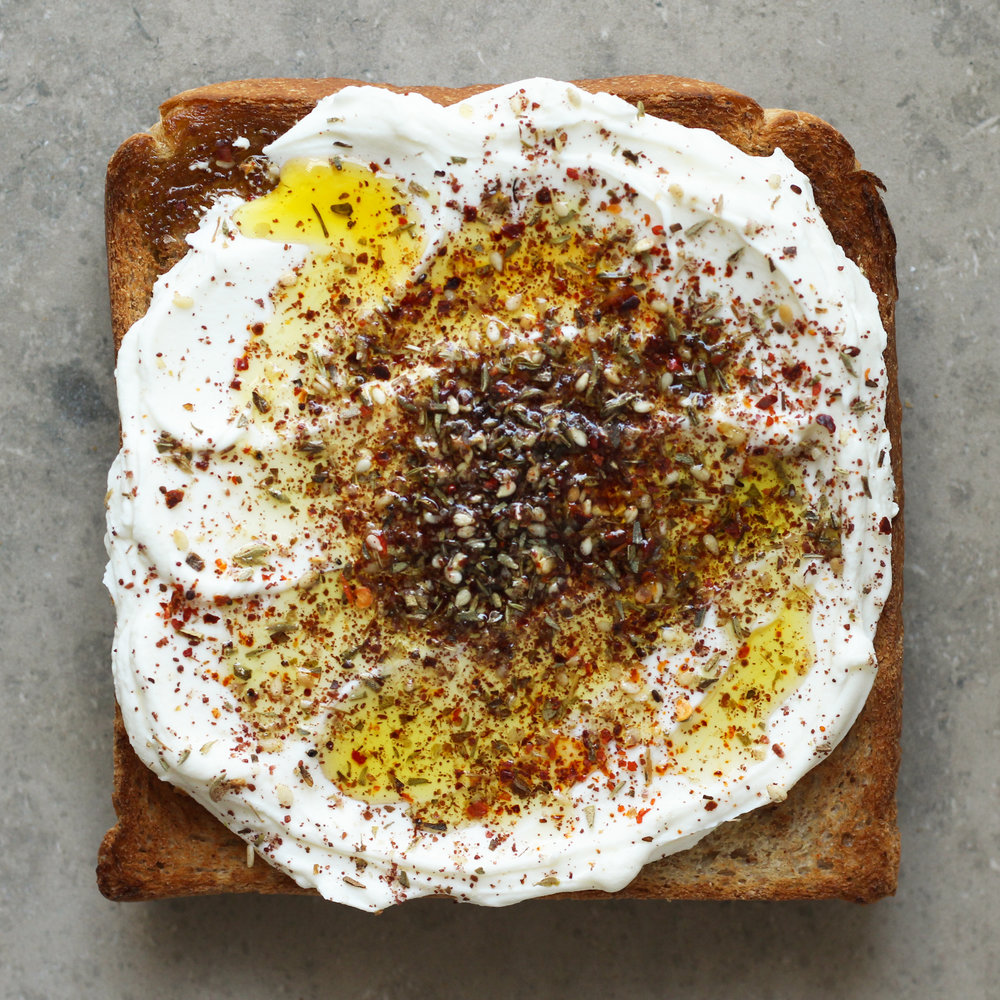
Labneh + za’atar + red pepper flakes + olive oil

This is another easy one. Simply spread some labneh, sprinkle liberally with za’atar and a pinch of crushed red pepper, and drizzle with extra virgin olive oil.

gubta mtumarta toast

crumbly cheese + caraway + green onions + cucumber

Combine your favorite crumbly cheese with caraway seeds (or make my recipe for gubta mtumarta / buried cheese), crumble on toast, and top with chopped green onions and sliced cucumber.

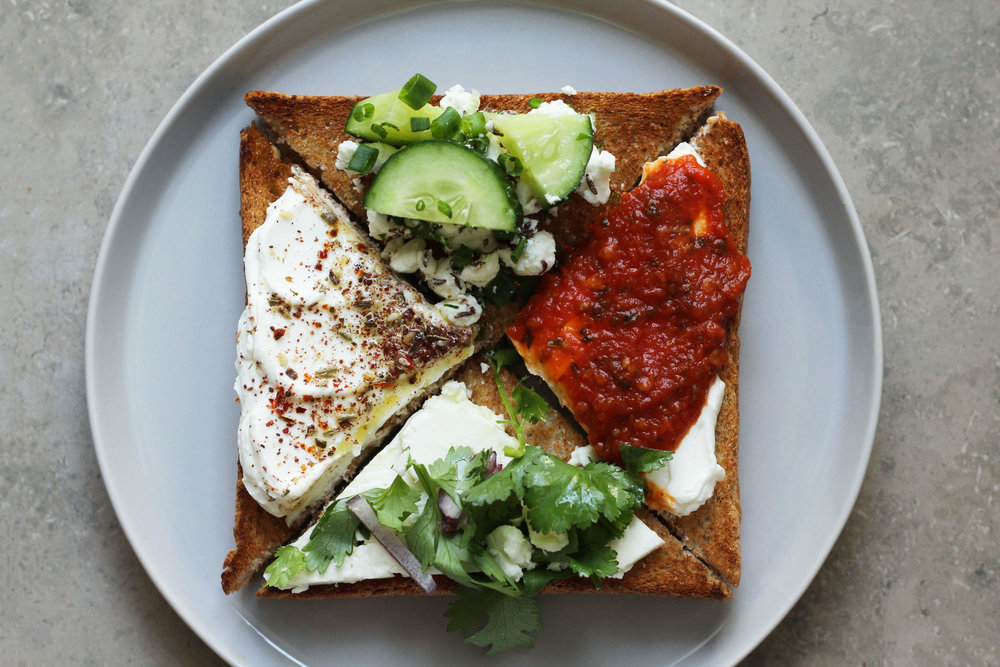
how to eat more toast

If you’re trying to find more toastable moments, breakfast is a clear winner. But gorgeously topped toast also makes for wonderful hors d’oeuvres, especially when cut into little canapés before broiling. Just use a small round cookie cutter, or if you don’t have a tiny cookie cutter, just scrub an empty can of tomato paste and use that instead (just watch out for the edges). It also makes a wonderful snack, or a side dish for lunch or dinner. Toast is what you make of it.

sweet
savory

more toast inspiration

Abeer Najjar’s breakfast pitas
Tracy Benjamin’s toast 12 ways
Buzz Feed’s 21 Breakfast Toasts
Bon Appétit’s toast round-up

Filed Under: appetizers, bread, breakfast, dairy free, dinner, every recipe, lunch, side dishes, vegan, vegetarian Tagged With: banana, feta, herbs, honey, labneh, tahini, za'atar

baklava-filled honey cake

December 23, 2017 by Kathryn Pauline 2 Comments

No one’s family baklawa (AKA baklava) recipe is exactly the same as anyone else’s. My grandmother makes her baklawa with lots of cardamom, walnuts, and pistachios. She cuts through all the layers before baking, and then pours on the butter, instead of brushing each layer individually. And instead of using perfectly clarified butter, she takes a shortcut and runs the melted butter through a fine mesh sieve, pouring it over scored layers of nuts and dough while catching most of the milk solids in the process. But the most noteworthy thing about my grandmother’s baklawa is that she saturates it with honey instead of rosewater syrup.

This cake, on the other hand, isn’t baklawa itself—there’s no crispy filo dough in the recipe, and I add a couple extra things you’d never find in baklawa, like cream cheese frosting. But this cake is very much inspired by my grandmother’s recipe. A syrup drizzle is crucial to any baklawa, so I’ve included honey-caramel, which gets poured over the top and encouraged down the sides. Baklawa filling holds together layers of spiced honey cake, and gets rolled into cute little rose-scented bobbles that sit on top of the cake. The whole thing is just perfect when you’re looking for something elegant and warming, especially this time of year.

The recipe itself is a little baroque, since layer cakes often have so many different components, but it’s actually simpler than it seems. You essentially make a walnut baklawa filling, some cream cheese frosting, a honey caramel drizzle, and the cake layers. Then you shape part of the baklawa filling into the cake toppers. The rest of the baklawa filling gets mixed with part of the frosting to fill the space between the layers. And the rest of the frosting is used to decorate the cake.

The two trickiest parts are rolling the cake toppers and making the honey caramel sauce. The cake toppers are extremely sticky and a little hard to work with, so it’s important to oil your hands as you go, to keep them from sticking to you while you’re trying to get them to stick together. If you do this, you should be just fine. The honey caramel sauce is only as tricky as any caramel sauce ever is. As long as you follow my instructions and keep an eye on the temperature, you should be just fine. But if you end up measuring wrong or pulling the caramel at the wrong temperature, no worries! You can always serve the sauce on the side if it’s too runny, and you can always skip the decorations. It looks and tastes delicious with or without.

baklava-filled honey cake

honey caramel

  • 1/4 cup honey
  • 2/3 cup sugar
  • 1/2 cup heavy cream
  • 2 tablespoons butter
  • 1 pinch salt
  1. Measure all of the ingredients and have them ready by the stove. Measure the honey by first lightly spraying the inside of a measuring cup.
  2. Place the honey and sugar (in that order) in a deep-sided saucepan and place over medium-high heat without stirring for about 30 seconds. After 30 seconds, give it a stir, and let it sit for 2 more minutes.
  3. At this point, start to gently and constantly stir it for about 8 to 9 minutes, until it goes from pale amber to medium brown. *
  4. Once it is medium brown / 334° F, remove from heat and immediately add the butter and cream, stirring to combine. It will bubble up, so be careful.
  5. Once the bubbling subsides, let it sit uncovered for about 10 minutes, then cover and let it cool to room temperature before pouring over the cake (be patient and let it cool all the way!).

* The amount of time it takes will depend on your range and the particular pan you’re using. I’ve tested this on induction burners and a gas burners, and it takes only a couple minutes on the induction burner (sometimes as few as 2 minutes!), and about 8 or 9 minutes on a gas range. Temperature is the only sure way to determine whether to add the cream and butter, and won’t vary from stove to stove. Theoretically, it should be fine anywhere between 325 – 338° F, because at this stage, the syrup is made up entirely of sugar (no water), but the sugars haven’t yet burned, but I strongly recommend 334° F.

spiced Butter Cakes

  • 19 ounces cake flour *
  • 1 tablespoon baking powder
  • 1/4 teaspoon baking soda
  • 1 teaspoon cardamom
  • 1 teaspoon cinnamon
  • 1 teaspoon allspice
  • 2 1/4 sticks softened room temperature butter (9 ounces)
  • 1 1/2 cup sugar
  • 1/4 teaspoon salt
  • 1 1/4 cup honey
  • 4 large eggs, at room temperature
  • 3/4 cup whole milk, at room temperature
  1. Preheat the oven to 350° F convection. **
  2. Butter 3 8-inch round cake pans, cover the bottoms in parchment rounds, and then butter the exposed sides of the parchment rounds. ***
  3. Sift together the cake flour, baking powder, baking soda, cardamom, cinnamon, and allspice.
  4. Use a hand mixer or stand mixer to mix together the butter, sugar, salt, and about 1/4 cup of the honey. Once everything is combined, add the other half of the honey, and beat everything for about 3 to 5 minutes, until the mixture is light and fluffy.
  5. Crack the eggs into a liquid measuring cup. Add the eggs to the batter 1 at a time. Each time you add an egg, mix it in completely (about 30 seconds), and make sure that the mixture smooths out before adding the next one.
  6. Add the whole milk and mix together for about 30 seconds, until the batter smooths out.
  7. Carefully mix in the cake flour mixture. Immediately stop mixing as soon as the batter comes together and there are no raw flour pockets.
  8. Divide the cake batter equally among the 3 cake pans (I use a scale to make sure they’re even). Smooth out the tops with a spatula.
  9. Bake for 25 to 30 minutes, until the tops are golden brown and a toothpick inserted in the middle comes out clean, with just a few crumbs.
  10. Run a knife around the pans, staying very close to the side of the pan. Remove the cakes by inverting, and then let them cool flat-side-down on wire racks.

* It’s fine to use all purpose flour, but the cake won’t be quite as tender. In either case, be careful not to over-mix once you add the flour to the wet ingredients.
** If you’re not using a convection oven, you may need to slightly increase the temperature and/or cook them just a minute or two longer.
*** You can use a 9-inch pan or another size. The cook time will be shorter with a wider pan and the finished cake will be shorter and wider.

spiced walnut mixture

  • 3 cups chopped walnuts
  • 3/4 cup powdered sugar
  • 1 teaspoon cinnamon
  • 1 teaspoon cardamom
  • 1 teaspoon allspice
  • 2 tablespoons cooled melted butter
  • 1/4 cup honey
  • Pinch of salt For rolling:
  • cooking spray
  • 1 to 2 tablespoons rosewater
  • 6 tablespoons coarsely ground pistachios (or finely minced)
  1. Mix the first set of ingredients together. You should be able to take a chunk and roll it into a cohesive ball.
  2. Divide the mixture into 1/3 and 2/3.
  3. Shape the 1/3 of the mixture into 12 balls (you will use these to decorate the top). Occasionally spray your hands with cooking spray to keep the balls from sticking while you shape them.
  4. Dip the first ball in the rosewater and then roll it around in the ground pistachios. To make sure the pistachios stick and cover the surface, gently squeeze the pistachio-covered ball in your fist, and then roll it in the pistachios again, repeating until it’s covered. Repeat with the remaining baklava filling balls.

honey cream cheese Frosting

  • 3 8-ounce cream cheese bars, softened at room temperature
  • 3/4 cup honey
  • Pinch of salt
  1. Whip together the cream cheese, honey, and salt, until light and fluffy (about 2 to 3 minutes).
  2. Divide the frosting into 1/3 and 2/3. The 1/3 will go toward the frosting-walnut cake filling, and the other 2/3 will frost the outside of the cake.

frosting-walnut cake filling

  • 1/3 of the frosting
  • The remaining walnut mixture (2/3 of the total walnut mixture)
  1. Stir together the smaller portion (1/3) of the frosting with the larger portion (2/3) of the walnut mixture.

assembling the cake

  • 3 layers of spiced butter cake, completely cooled to room temperature
  • Walnut-frosting filling
  • Honey cream cheese frosting (room temperature)
  • Honey caramel (cooled to room temperature)
  • Spiced walnut decoration
  1. Once the cakes are completely cool, use a long serrated knife to level the cakes if they have humps. Save the scraps for cake pops or freeze them for another day’s snack. If it looks level, use the ridge at the top edge of the cake as a guide, and cut off the hump jutting out above it.
  2. Once the cakes are level, place the first one cut-side-up on a rotating cake tray with a cardboard cake round underneath. If you don’t have a turntable or a cardboard cake round, simply place the cake on the tray or the plate you will use to serve it.
  3. Dole out half of the walnut-frosting filling, spreading it out over the first layer.
  4. Place the next layer over the covered first layer. Spread the remaining walnut-frosting filling on this layer in the same way.
  5. Place the final layer cut-side-down over the middle covered layer.
  6. Inspect the cake to make sure each of the layers line up perfectly, and adjust things as necessary.
  7. Top the cake with about 2/3 of the frosting and start smoothing it out with an offset spatula, rotating the turntable instead of moving your spatula around, or smoothing it out as best you can if you don’t have a turntable. As the frosting starts to drip over the sides, start to smooth it out over the sides while filling in the gaps between the cakes.
  8. Continue to smooth out the top, working the frosting down the sides, until everything is covered in a thin layer of frosting.
  9. Add another blob of frosting to the top of the cake and smooth it out.
  10. Place the edge of your offset spatula up against the side of the cake at a 45 degree angle. Rotate the turntable, grazing the surface with your spatula, exposing the side of the cake.
  11. Using quick motions, lightly smooth the upper edge into the center of the cake to get rid of the big ridge you just made. Smooth out the top gently and carefully if necessary.
  12. Chill the cake for 40 minutes in the fridge.
  13. Pour about 3/4 of the cooled caramel sauce over the top of the chilled cake, and then carefully encourage it to drip down the sides, using a clean offset spatula. If there are any thin-looking spots on the top of the cake, pour on a bit more of the caramel to cover them up.
  14. Wait for it to settle and stop dripping, and then move the cake to a cake display or plate. Place the walnut decorations in a circle around the top (to make sure it’s even, start with 12:00, 3:00, 6:00, and 9:00, and then fill in the rest of the hours).
  15. Enjoy immediately or keep it chilled for a few hours before serving. If you have any cake left over, it keeps really well in the freezer, cut into individual pieces and tightly wrapped in plastic. These aren’t pretty enough for guests, but perfect for late night snacks.

Filed Under: every recipe, sweets Tagged With: cakes

  • « Go to Previous Page
  • Page 1
  • Interim pages omitted …
  • Page 138
  • Page 139
  • Page 140
  • Page 141
  • Page 142
  • Interim pages omitted …
  • Page 183
  • Go to Next Page »

Primary Sidebar

Kathryn Pauline smiling

Welcome! I’m Kathryn Pauline, cookbook author, recipe developer, and photographer.

Footer

read our privacy policy

© 2017 - 2026 Kathryn Pauline