When I wrote up my recipe for combination dolma earlier this month, I briefly thought about trying to simplify it, but I decided against it, because dolma is so essentially labor-intensive. But as much as I love the process, and as much as quick dolma goes against my sensibilities, I also love eating dolma, and sometimes I don’t have time to make it, so I finally came up with a way to make it on a weeknight.


If you’ve never made a big pot, let me give you a sense of what you’re missing: First you chop a million different ingredients for the stuffing (separately!). Then you prepare the wrappers—all those grape leaves, cabbage leaves, and onion layers need to be blanched, separated, and trimmed, and all those veggies need to be completely hollowed out with a zucchini corer. Once you’re done with the wrappers and the stuffing, you’ll probably feel like there should be something edible to snack on by now, but alas! There’s not. There are just piles of raw meat, uncooked rice, and par-cooked veggies. But nevertheless, you continue on to the most time-consuming part: the wrapping and stuffing. You spend forever folding, rolling, and building the pot. And then it cooks and rests for an hour and a half.
I might sound kind of whiney, but I actually love this process. It’s therapeutic to make a big pot of dolma on your own when you have an afternoon to yourself to catch up on your podcasts, and it’s so much fun to make dolma with a big group of family. While too many cooks spoil the broth, many hands make light dolma. Little kids can help out by separating the leaves, and older kids can even help roll. But for days when you don’t have time, but still want dolma, I’ve got you covered. Here’s what makes this recipe easier:
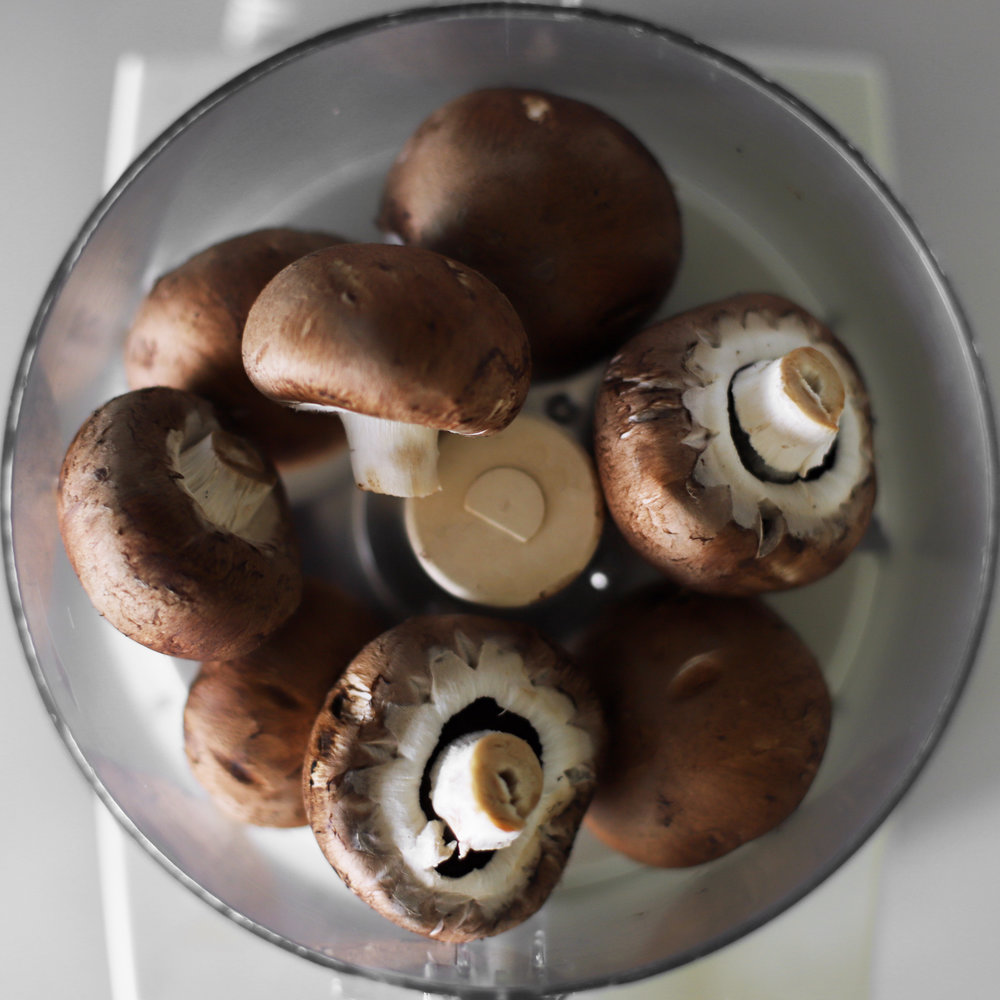
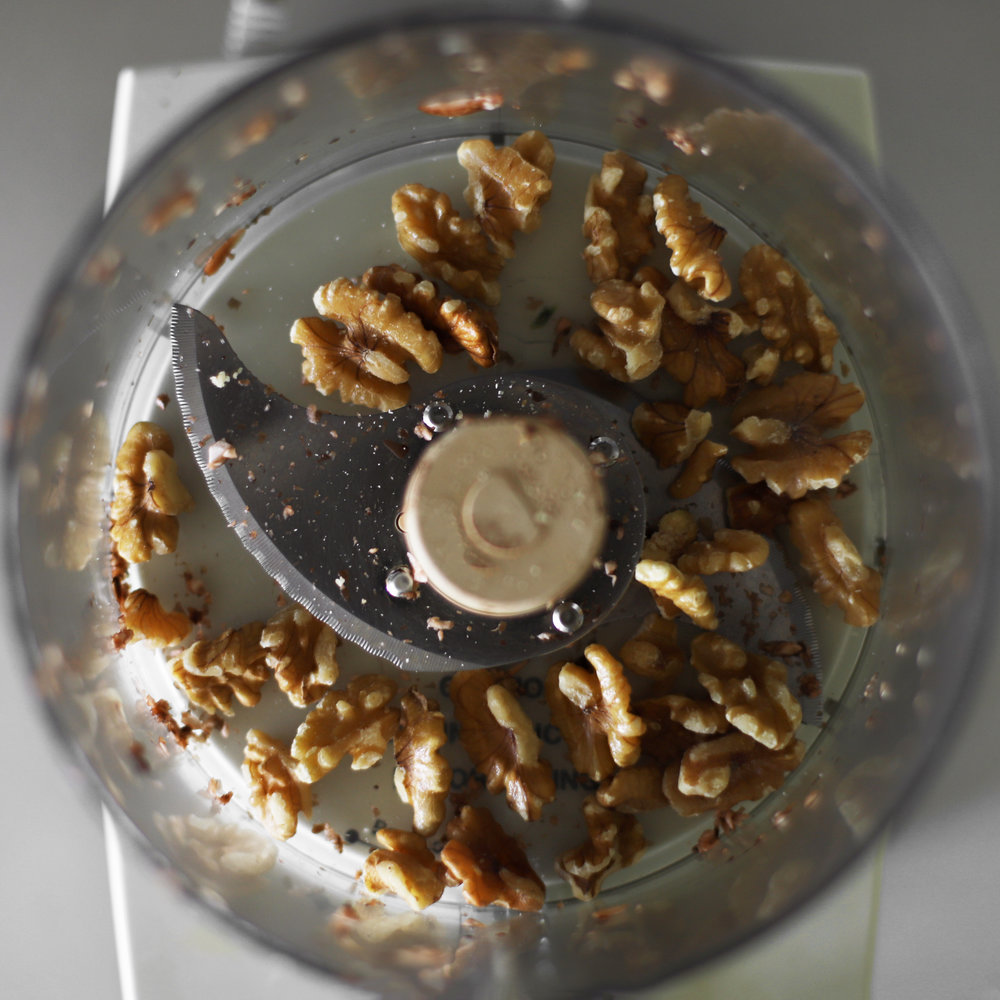
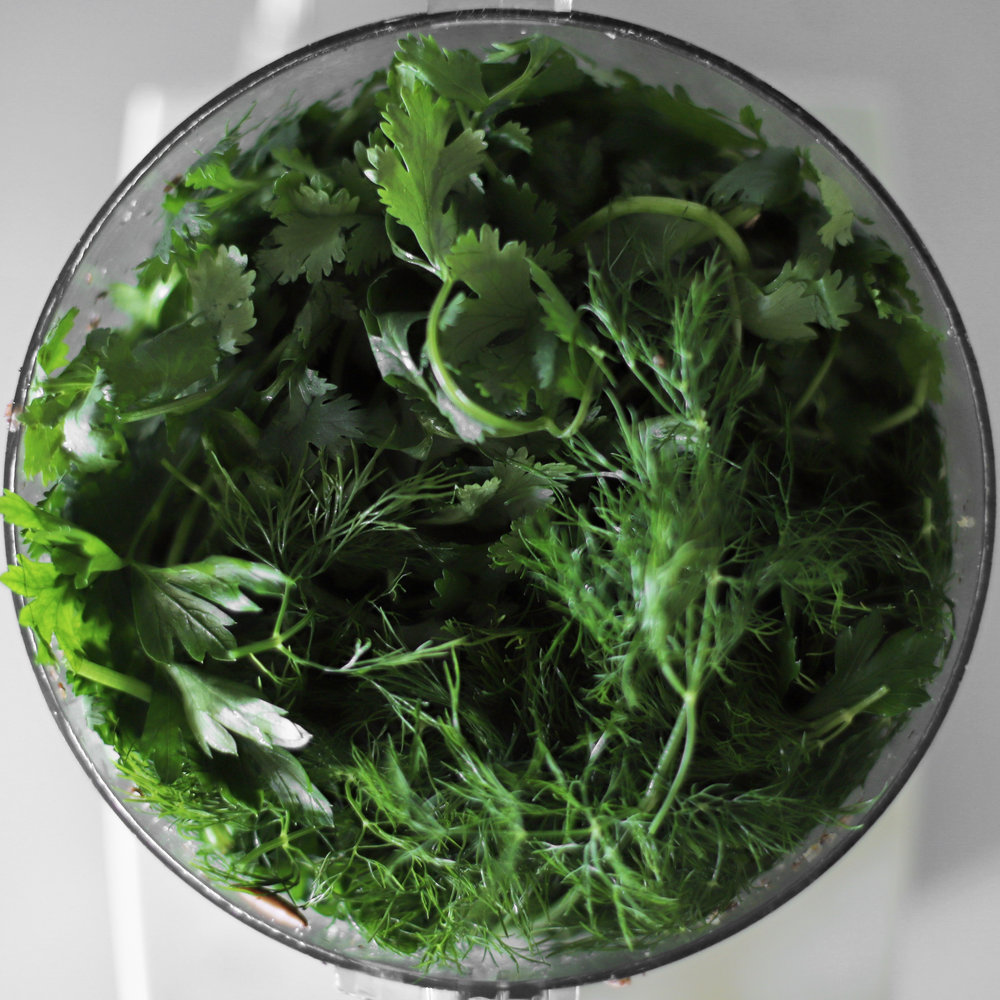
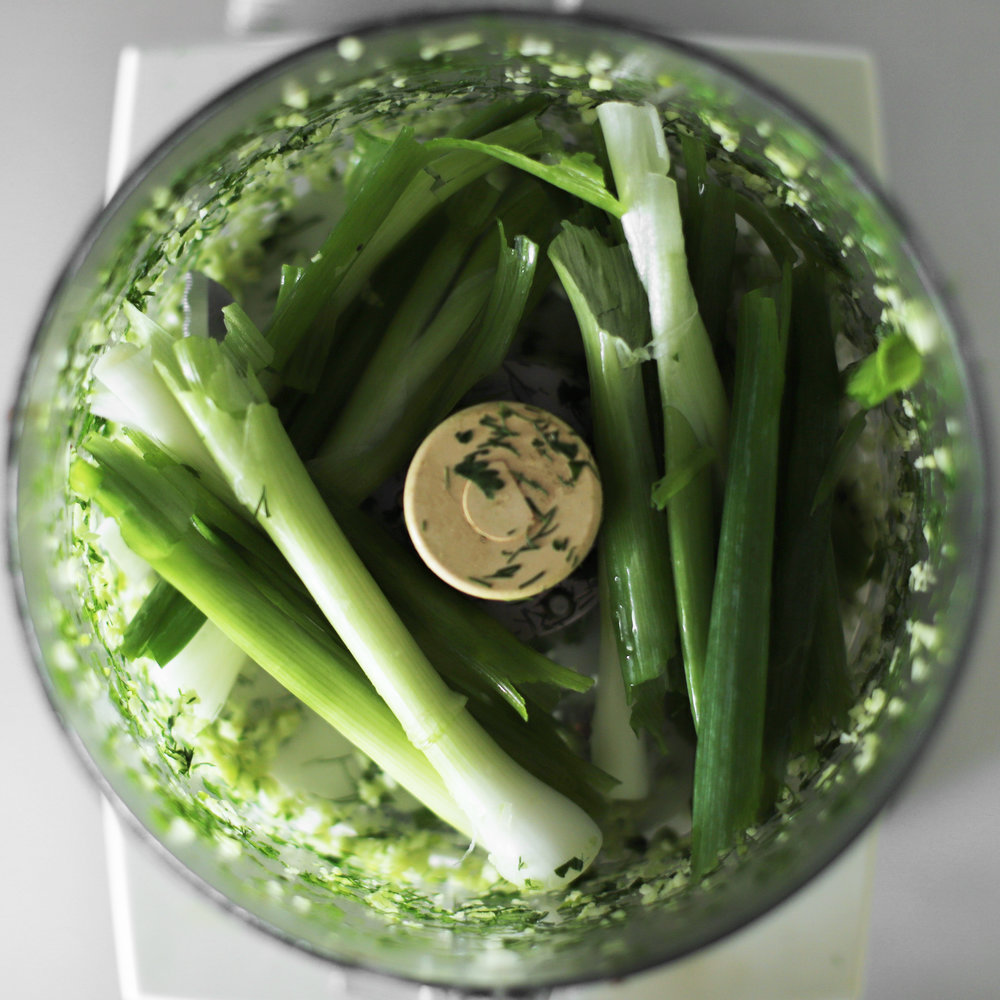
1) Instead of mincing by hand, you use a food processor. Plus, I came up with the right order to chop ingredients in the food processor, so that you don’t need to wash it between uses. You just add, blitz, empty, repeat. The above series illustrates the process, and the stuffing comes together so quickly, you’ll feel like you’re in a real-life Tasty video.
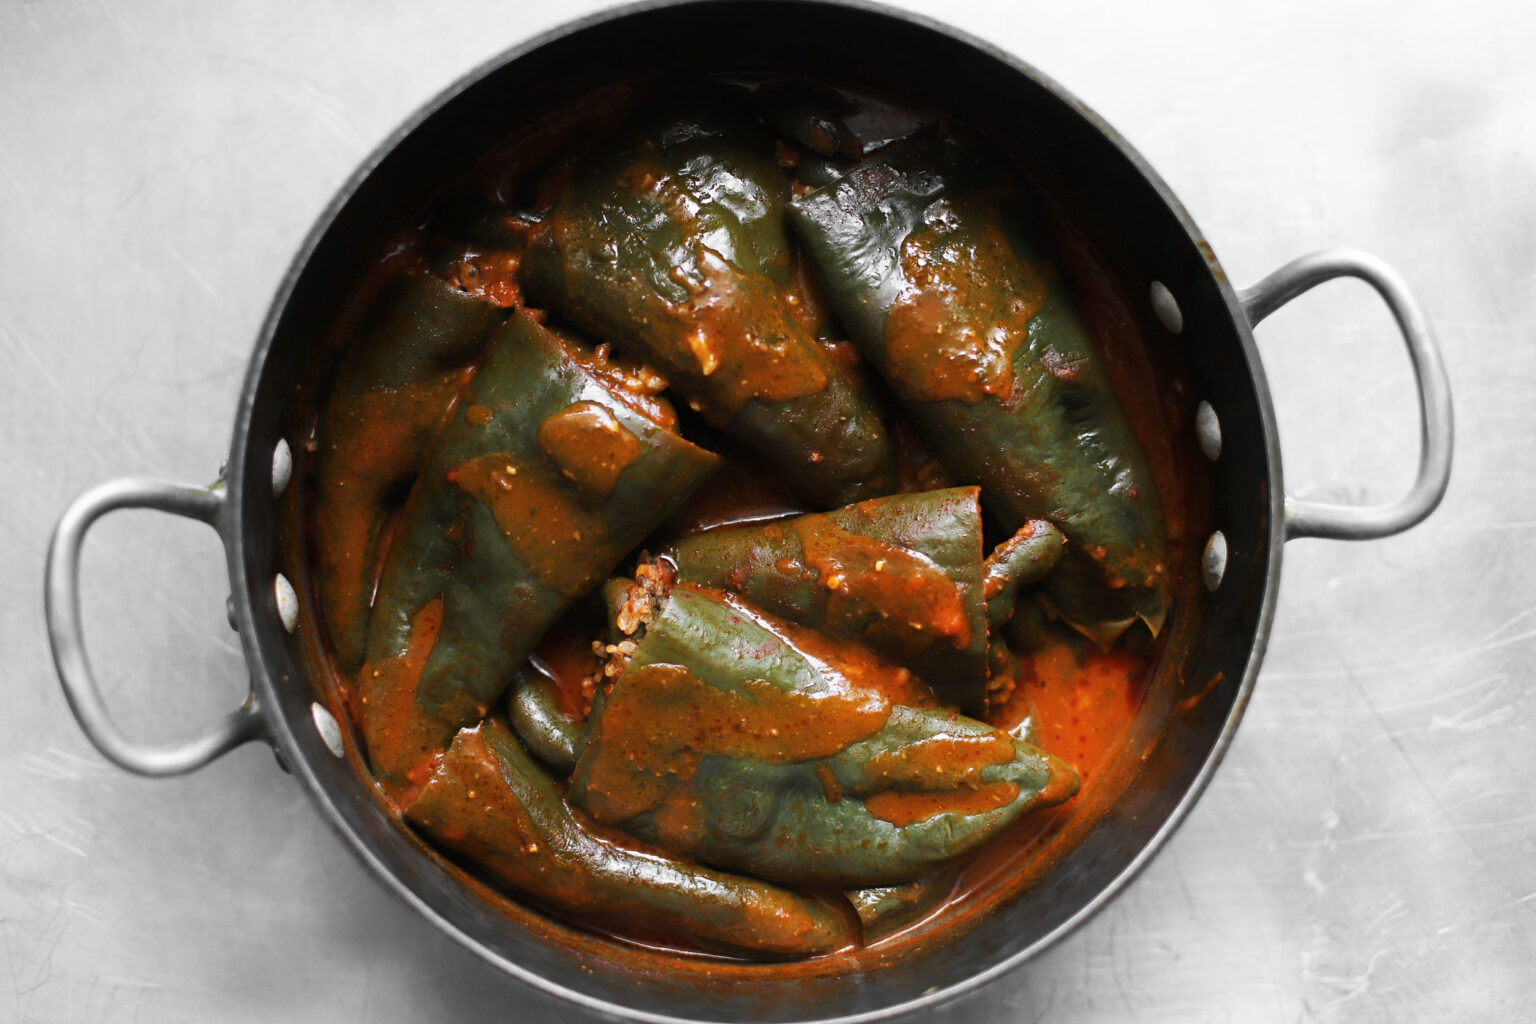
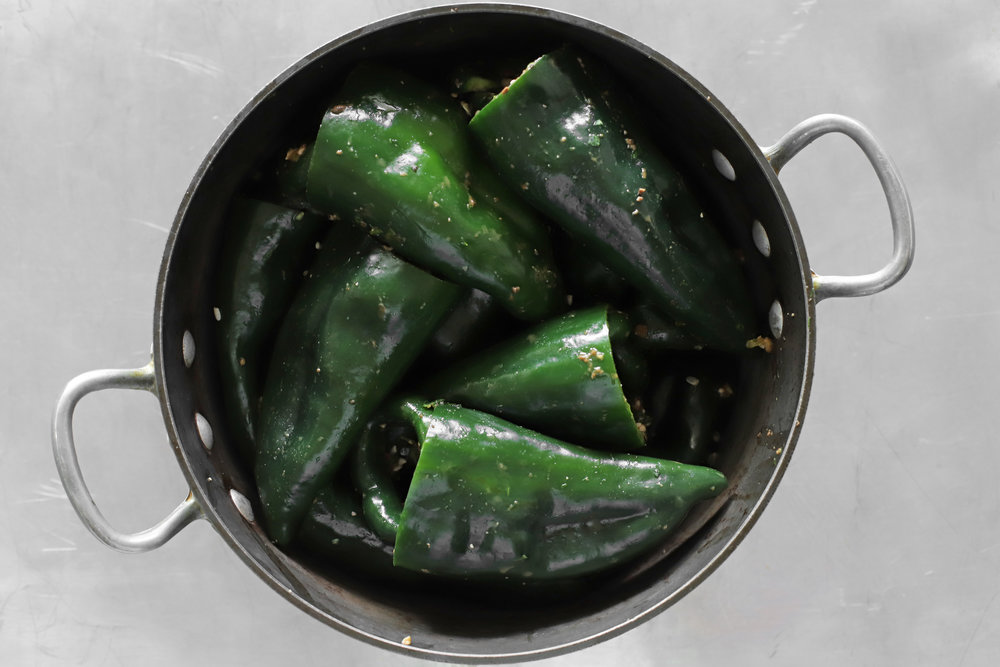
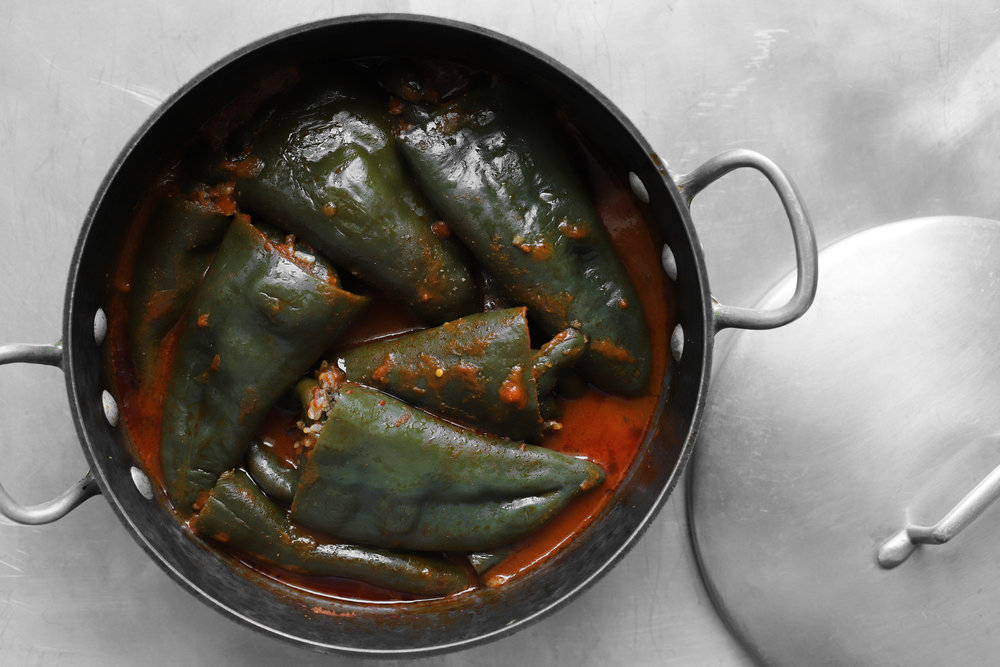
2) I’ve chosen the easiest veggie my family makes dolma with: peppers, like cubanelles and poblanos. They’re big and already hollow, and they take almost no time to core and stuff. We don’t normally make an entire pot with these peppers, but they’re in every batch of combination dolma, and the peppers are always a nice break from stuffing the grape and cabbage leaves. Here, they make up the entire pot, so the whole thing is easy, and it turns out delicious.
3) I went with a vegan stuffing. My family’s meat-stuffed dolma has beef that’s been minced by hand, rather than commercially ground. Mincing by hand is very time consuming, so my family’s vegan dolma is way easier. The vegan stuffing in this recipe is the one we make for fasting holidays like Lent and the commemoration of Jonah’s prophecy. You could of course use ground beef instead of the mushrooms and walnuts—it’s just a personal preference, and everyone tends to like dolma the way they grew up with it.
4) You briefly cook the mushrooms for about 5 minutes, and then don’t wash the pot because you’ll be cooking the dolma in it in a few. Easy cleanup, and more flavor!
5) Because it’s a smaller batch, it can cook for a little less than a giant pot of combination dolma. This one only needs 30 minutes of cooking and 15 minutes of resting. Make sure it’s at a gentle boil (above a simmer, below a rapid boil), don’t skip the plate weight, and don’t peek too often, and it’ll cook in no time.
A note on the kind of pepper: poblanos vary a lot in spiciness, but you can control this a bit by using a zucchini corer or paring knife to remove the pith from the inside. But that kind of defeats the purpose of making this easy, so if you want a milder pepper, I’d suggest going with cubanelles instead, which are not very spicy (even if you don’t remove every bit of pith). If you use poblanos, get ready for a couple unbelievably spicy ones (I like that sort of thing, but you might not, so buyer be ware!). I don’t really recommend using bell peppers here, because they are harder to nest together in a small batch like this. I’ve also tried making this with mini sweet peppers, but they take way too long to core and stuff. Give yourself a break and go for poblanos or cubanelles!
weeknight vegan pepper dolma


- Prep Time: 25 minutes
- Total Time: 90 minutes
- Yield: 6 main servings
Ingredients
for the filling:
- 1 1/2 cups uncooked medium grain rice (e.g., Calrose)
- 8-ounce container mushrooms
- 1 teaspoon olive oil
- salt
- 1/2 cup whole walnuts
- 1 medium bunch parsley *
- 1 medium bunch cilantro
- 1 medium bunch dill
- 4 cloves garlic
- 1 medium bunch green onions
- 8 ounce can tomato sauce
- 1 teaspoon black pepper
- 2 tablespoons extra virgin olive oil
- 3 tablespoons tomato paste
for the stuffing and cooking liquid:
- 2 pounds 9 ounces poblano or cubanelle peppers (about 12 peppers) ***
- 2 cups vegetable juice ****
- 1/4 cup lemon juice
- 2 tablespoons extra virgin olive oil
- salt to taste †
Instructions
- To make the filling: Soak the rice for 10 minutes, and then rinse and strain it. Add it to a medium mixing bowl.
- Heat a medium-large dutch oven over medium-high heat for a couple minutes. While you’re waiting, pulse the mushrooms in a food processor to finely chop them (but then don’t wash the food processor until otherwise noted!).
- Add the 1 teaspoon olive oil to the pot, followed by the mushrooms and 1/4 teaspoon salt (or to taste), and cook, stirring frequently for about 5 minutes, until the juices evaporate and the mushrooms brown a bit. Remove the pot from heat and add the mushrooms to the mixing bowl (but then don’t wash the dutch oven).
- In the same food processor, pulse the walnuts until they’re finely chopped,** then add them to the mixing bowl. Do the same with the parsley, cilantro, and dill (you should end up with about 2 to 2 1/2 cups chopped herbs), and add to the mixing bowl. Next mince the garlic in the food processor, and add the green onions right on top of the minced garlic, pulsing it to chop (you should end up with about 1/2 to 2/3 cup of chopped green onion), and add to the mixing bowl. (Now you can wash the food processor.)
- Add the tomato sauce, 1 teaspoon salt (or to taste), black pepper, 2 tablespoons extra virgin olive oil, and tomato paste to the mixing bowl. Stir everything together until it’s completely mixed.
- To stuff and simmer the peppers: Trim and discard the stems off the peppers, and then cut the tops off (save them). Use a paring knife or zucchini corer to get rid of the seeds and (optionally) some or all of the pith (the more pith you get rid of the less spicy they will be).
- Stuff the peppers with the filling, being careful not to over-stuff them (the rice needs room to expand). There shouldn’t be any large gaps, but they shouldn’t be absolutely packed in and stuffed to the brim.
- Place the pepper tops sort of halfway over the tops (they’ll kind of awkwardly stick out, which is totally fine). Use your tetris skills to fit one layer of the peppers in the bottom of the mushroomy dutch oven (they should be on their sides). Add on one or two more layers, trying to create a snug fit.
- Pour the vegetable juice, lemon juice, and extra virgin olive oil over the tops of the stuffed peppers. Place a heavy heat-proof plate face-down over the center of the peppers. Bring everything to a boil over medium-high heat, and keep an eye on it while it heats. Once it reaches a gentle boil (a few big bubbles breaking the surface, but not a rapid boil), cover the pot (with the plate and lid) and reduce the heat to medium-low to maintain a gentle boil.
- Cook this way for about 35 minutes. Check on it intermittently to make sure it’s at a gentle boil, and adjust the heat as necessary. Don’t open the lid too often, or the top layer won’t cook through enough. Once it’s done, keep the lid on and let it rest for about 15 minutes, undisturbed.
Notes
* All the herbs need to be washed and dried well, and their stems need to be removed. But don’t spend too much time on it for this recipe. Just rip the top of the bunch off with one twist, and sort through them to remove any big stems, then wash and dry them. They don’t need to be perfect, since the stems will totally soften as they cook. But please don’t tell my grandmother (if you’re reading this, sorry Nana! <3)”
** A reader notes below that this is really delicious with more coarsely chopped walnuts, which I love the sound of! Dolma is a very soft food in general, especially vegan dolma, and it’s nice to introduce something a little crunchier.
*** Find the biggest peppers you can, and look for ones that aren’t crooked. This will make stuffing quick. Poblanos are pictured here, but cubanelles work great too, and are much less spicy. If you plan to carefully remove the pith from the poblanos to make sure they’re not too spicy, just go with the cubanelles, which you won’t have to be as careful with.
**** I use V8, and 2 cups is conveniently just about 3 15.5-ounce cans.
† Many vegetable juices already have a lot of sodium (e.g., V8). If yours is low sodium, you should season it with some salt. I don’t add salt to the vegetable juice if it’s already seasoned.