• Skip to primary navigation
  • Skip to main content
  • Skip to primary sidebar
  • Skip to footer
Cardamom and Tea
  • Blog
  • Recipes
  • About
  • Cookbooks
    • Piecemeal
    • A Dish for All Seasons (my first cookbook)

mango fish tacos

June 13, 2019 by Kathryn Pauline Leave a Comment

I’m back in Hong Kong, and thinking about all the wonderful food from our trip to Chicago. When we were out and about we ate nothing but tacos. There are a million amazing taquerias in Chicago. So no matter where we happened to be, we could always find good tacos within minutes. But one day I actually made some tacos at home for a change. So I just had to share them with you, because they’re my current favorite thing to make for dinner: mango fish tacos!

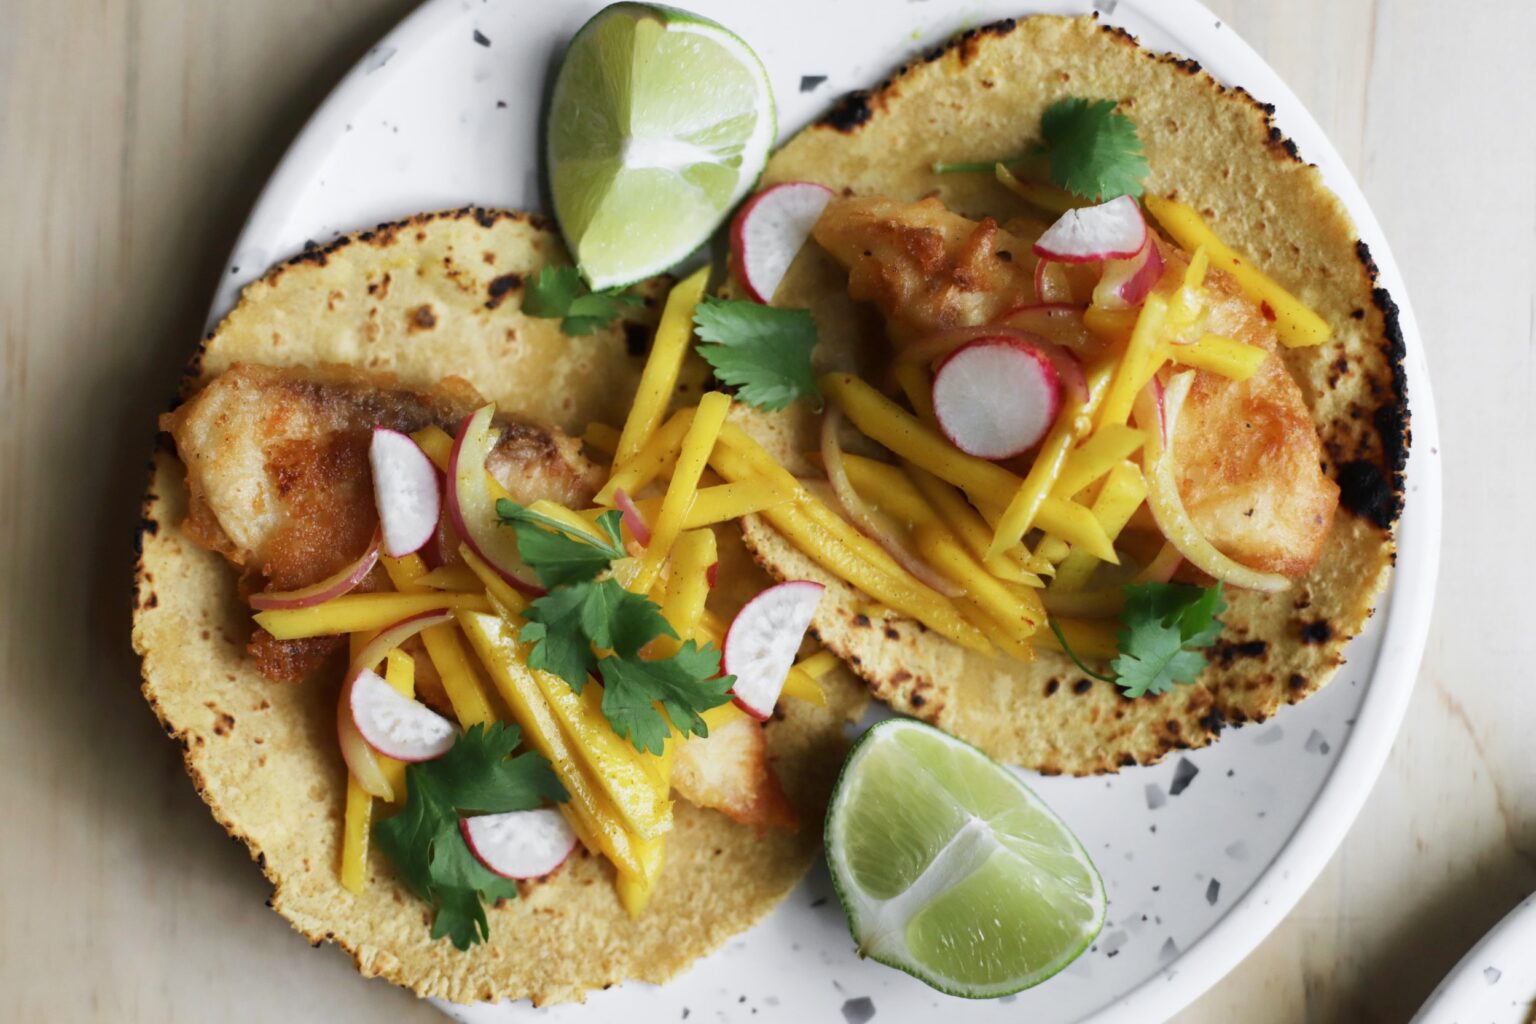
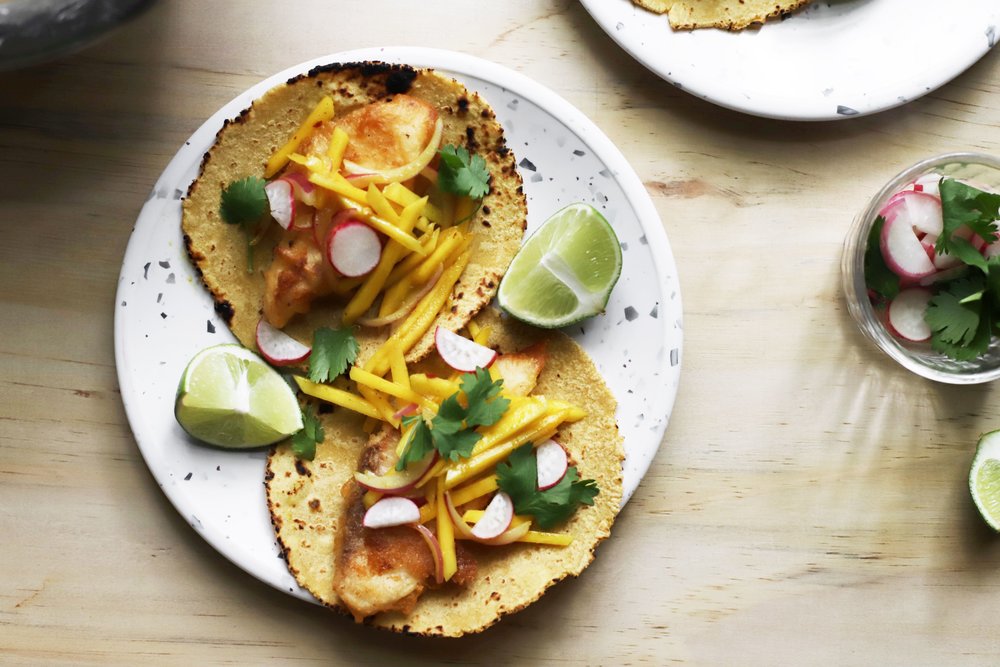
They’re beer-battered and topped with quick-pickled mango, cilantro, radishes, and a little squeeze of lime juice. And I hope they become your new favorite dinner too!

The quick-pickled mango is inspired by amba, one of my favorite ingredients of all time. In case you haven’t encountered it, amba is essentially pickled green mango. It’s unbelievably tangy and bright, and it goes perfectly with fried food. Store-bought versions are almost always made with mango. But some homemade versions are even made with cabbage, carrot, or peppers. The uniting feature is that they’re all pickled in a fenugreek brine.

Traditionally, amba goes with falafel (in Iraq and many other places). So it’s no surprise that it also works wonderfully with perfectly crispy Mexican-lager-battered tilapia. Here, instead of classic amba sauce made with green mango, I’ve chosen semi-ripe mangoes, which are delicious on these tacos as more of a slaw than a condiment.

Hope you enjoy these mango fish tacos as much as we have!

Print

mango fish tacos

Print Recipe

5 Stars 4 Stars 3 Stars 2 Stars 1 Star

No reviews

  • Total Time: 45 minutes
  • Yield: 20 tacos (about 2-3 tacos per serving)

Ingredients

for the amba (quick pickled mango):

  • ½ of 1 medium red onion, sliced thinly
  • Apple cider vinegar
  • 1 large semi-ripe mango, peeled and julienned*
  • ¾ teaspoon yellow curry powder
  • 1 tablespoon extra virgin olive oil
  • Salt, to taste (about ⅛ teaspoon)
  • 1 pinch crushed red pepper

for the tacos:

  • 1–2 cups neutral oil, for frying (e.g., canola, sunflower, peanut, etc.)
  • ¾ cups all purpose flour (90g) + about ⅓ cup more for dredging
  • ¼ teaspoon black pepper
  • ¼ teaspoon salt + more to taste
  • Half of an 11.2 ounce bottle Mexican-style lager
  • 1 ½ pounds tilapia (675g), cut into about 20 pieces
  • 20 small corn tortillas, warmed for a few seconds in the microwave or on the stove
    Amba/pickled mango (above)
    5 limes, each cut into 4 wedges
    8 radishes, sliced thinly
    Cilantro leaves for garnish

Instructions

  1. For the amba: Soak the red onion in a couple tablespoons apple cider vinegar for 10 minutes.
  2. Strain the red onion (discard the oniony vinegar), and combine with the mango, curry powder, extra virgin olive oil, salt, crushed red pepper, and some fresh apple cider vinegar to taste (about 1 teaspoon). Set aside.
  3. For the tacos: Let ¾-inch of oil heat in a 10-inch frying pan (preferably nonstick or cast iron) set over medium heat, and make the batter while you wait on the oil to heat. The oil is ready when you dip the end of the fish in it and it immediately sizzles.
  4. In a small mixing bowl, combine the flour, black pepper, and ¼ teaspoon salt, then pour in the half bottle of beer, mix everything together (don’t overmix, and enjoy the leftover beer while you cook), and set aside.
  5. Pat the fish dry with paper towels, and season with more salt (to taste). Once the oil is hot, dredge the fish in flour, shake off all the excess, and dip in the batter. Remove the fish from the batter and flap the fish on the side of the bowl once or twice to let the excess drip off.
  6. Gently lower the fish into the hot oil, and then repeat with about 4 more pieces. Let them cook for about 3 minutes per side (carefully flip them over once they’ve turned golden brown on one side, and cook thick pieces a bit longer). Lower the heat if they brown too quickly, and keep an eye on them.
  7. Remove the fried fish to a paper towel-lined plate, and work in batches until they’re all fried (you can keep the plate in a 200°F oven for about 30 minutes to keep them warm).
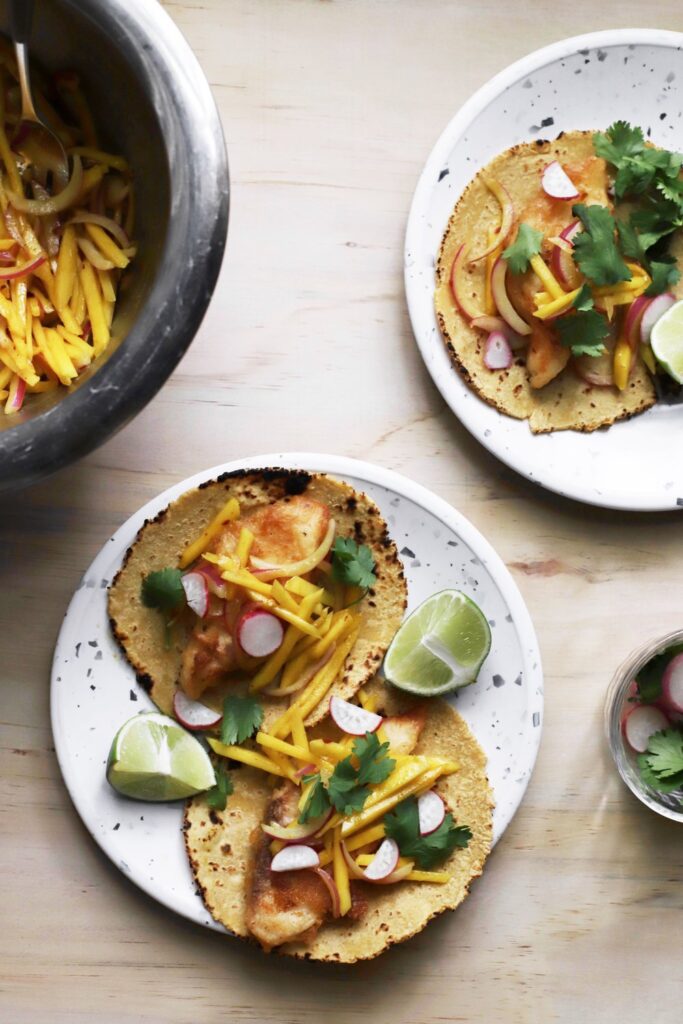
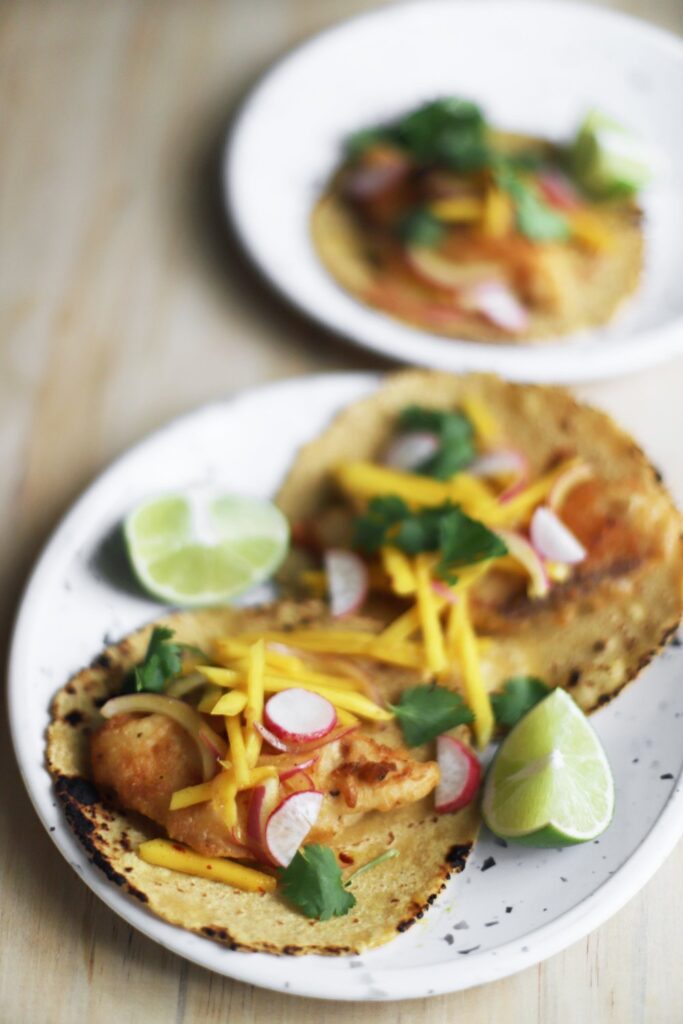
  8. Build the tacos at the very last second before eating (or set up a taco bar/taco table if you’re cooking for a group). Each corn tortilla should be topped with a piece of fish, some pickled mango, radishes, and cilantro leaves. Serve with a lime wedge on the side.

Notes

Make ahead the day before: Prep all the components (mix together dry ingredients for batter, cut the fish into pieces, prep the limes, radishes, and cilantro). Make the mango topping and store in the refrigerator overnight. Soon before frying and serving, set everything out on the table or buffet. Whisk together the batter and fry the fish about 30 minutes before you plan to eat. Bring the fish to the table while they’re still hot.

How to store leftovers: Leftovers keep in the refrigerator for a couple days, and can be reheated in a toaster oven at 350°F until crispy on the outside and warmed through. They’ll be a little dryer leftover, but still delicious. The mango topping keeps in the refrigerator for several days. You can even freeze everything if you’d like to store it longer than a couple days (freeze the fish on a plate or sheet pan, then place in a tightly sealed plastic bag, and reheat in the oven. Keep the mango slaw in the freezer, and then let it thaw in the refrigerator overnight, or microwave it on low until it thaws. The texture of the mango will be softer after thawing, but it’s still super delicious and holds up pretty well. And, of course, corn tortillas freeze beautifully).

* Semi-ripe mangos are firm, but yield slightly to pressure. Their flesh is tangy and sweet, and firm enough to hold its shape when sliced. Slice a bit off the bottom to steady it, then slice big fillets from the wide sides, and little fillets from the skinny sides. Peel the fillets with a vegetable peeler. Slice thinly, then julienne the slices (use the GIF series following this recipe as a guide).

find us on instagram and let us know what you made!

slicing and peeling a semi-ripe mango (for mango fish tacos)

  • 1) slice the bottom off to stabilize it
  • 2) slice fillets off the sides
  • clean up any bits you missed
  • Peel and slice the pieces

Filed Under: dairy free, dinner, every recipe, lunch, main courses, weeknight Tagged With: amba, cilantro, curry powder, fish, herbs, lime, mango, radish, tacos

strawberry sumac pie

May 30, 2019 by Kathryn Pauline 2 Comments

A few weeks ago, I shared my recipe for halva cardamom banana cream pie, and declared this my summer of pies. But as it turns out, this isn’t so much the summer of pies as it is the summer of strawberry rhubarb alternatives. First, there was the late-spring combination of strawberry and jarareng, and now I’m posting this strawberry sumac one, inspired in large part by Majed Ali’s cherry sumac date molasses pie and Jerrelle Guy’s strawberry sumac granola tart. As it turns out, sumac is a great way to add some bright berry-like acidity to strawberries, which tend to get that very dull *McDonalds strawberry syrup flavor* when cooked for a long time.

While rhubarb is the more typical antidote to the cooked strawberry dulness, I just never seem to find it. Or, more accurately, I never seem to stumble upon it. In Hong Kong, it’s usually only available through restaurant suppliers or ridiculously fancy supermarkets, and when I’m visiting Chicago, I spend most of my shopping time loitering in the Ziyad aisle of local supermarkets and making quick runs to Trader Joe’s and Target.

Sumac, on the other hand, is available year round, it pretty much never goes bad, it’s something you should have in your kitchen at all times, and it works beautifully in desserts. Sprinkle it on mango slices, make a mountain of fattoush with every meal, and bake this pie for those times when you just don’t feel like making a special trip for a bundle of rhubarb.

Print

strawberry sumac pie

Print Recipe

5 Stars 4 Stars 3 Stars 2 Stars 1 Star

No reviews

  • Prep Time: 1 hour
  • Total Time: 3 hours 45 minutes
  • Yield: 8 servings

Ingredients

for the crust:

  • 400g all purpose flour (about 3 cups)
  • 7g salt (1 teaspoon)
  • 230g cold unsalted butter, cut into chunks (2 sticks)
  • 120g cold plain yogurt (1/2 cup)
  • 30g cold water (2 tablespoons)

for the filling:

  • 850g hulled and quartered strawberries (7 cups sliced, from about 900g/2lb whole)
  • 150g light brown sugar (3/4 cup)
  • 20g sumac (3 tablespoons)
  • 1.5g teaspoon salt (1/4 teaspoon)
  • 60g quick cooking minute tapioca (1/4 cup + 2 tablespoons)
  • Egg wash: 1 egg yolk beaten with 2 teaspoon cream or water

Instructions

  1. To make the crust: Place the flour, salt, and butter in a food processor fitted with the blade attachment. Pulse several times, until the butter blends into the flour, and there aren’t any big lumps. Add the yogurt, and pulse 2 or 3 times to distribute. Evenly drizzle on the water. Pulse a few times until it can be squeezed together into a pliable and smooth dough (don’t over-process). If the dough won’t come together, add a few more drops of water at a time.
  2. Shape the dough into 2 equal balls, flatten the balls into discs, cover each with plastic wrap, and refrigerate for just 30 minutes. Work on the filling while you wait.
  3. To make the filling and assemble the pie: While the dough chills, combine the berries, brown sugar, sumac, salt, and tapioca, and let it sit for 15 minutes.
  4. Preheat the oven to 400°F (205°C) .
  5. On a lightly floured surface, roll a round of chilled dough out to between 1/8- to 1/4-inch thick; it should be quite a bit wider than the pie pan (the dough should be about 13-13.5 inches across).
  6. Once it’s rolled out, gently wrap it around your rolling pin to transfer it to the pie pan. Unroll it onto a 9-inch pie pan and gently press the dough into place so it’s in contact with the entire pan.
  7. Fill the pie shell with the strawberry filling, and spread out into an even layer.
  8. Roll out the other disc of dough into a rounded-off rectangle that’s about 11×13 inches (1/8- to 1/4-inch thick). Cut it into 6 2-inch-wide strips.
  9. Assemble the lattice top: First, place 3 strips going in one direction, with narrow gaps in between them (use shorter strips for the 2 sides). Then fold back every other strip and place another strip perpendicular to them near the edge of the pie. Drape the lifted strips back over the perpendicular strip. Repeat, alternating which of the parallel strips are lifted, adding the next perpendicular strip each time, until the whole pie is covered.
  10. Dab a bit of egg wash under each strip of lattice, to make sure it stays connected to the crust. Use scissors to trim away the excess crust (crimp it if you’d like, or don’t if you prefer this look), and place the pie in the freezer for about 10 minutes (or the refrigerator for about 30).
  11. Once the dough is firm to the touch, brush with the egg wash, and bake for 15 minutes at 400°F (205°C).
  12. After 15 minutes, reduce the heat to 350°F and bake for another hour. If the edges of the crust start to brown too quickly, use a crown of tin foil for the last 20 minutes of baking.
  13. Place the pie on a cooling rack for at least 2 hours, until it comes to room temperature.

find us on instagram and let us know what you made!

Filed Under: every recipe, sweets Tagged With: berries, pies, strawberry, sumac, summer, yogurt

  • « Go to Previous Page
  • Page 1
  • Interim pages omitted …
  • Page 90
  • Page 91
  • Page 92
  • Page 93
  • Page 94
  • Interim pages omitted …
  • Page 183
  • Go to Next Page »

Primary Sidebar

Kathryn Pauline smiling

Welcome! I’m Kathryn Pauline, cookbook author, recipe developer, and photographer.

Footer

read our privacy policy

© 2017 - 2026 Kathryn Pauline