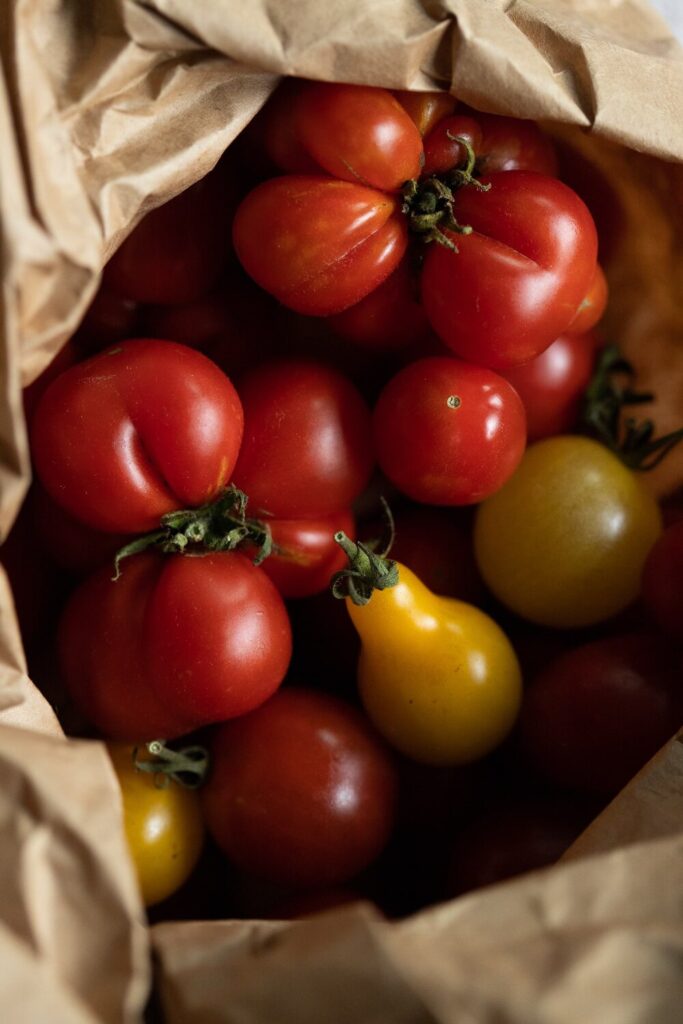
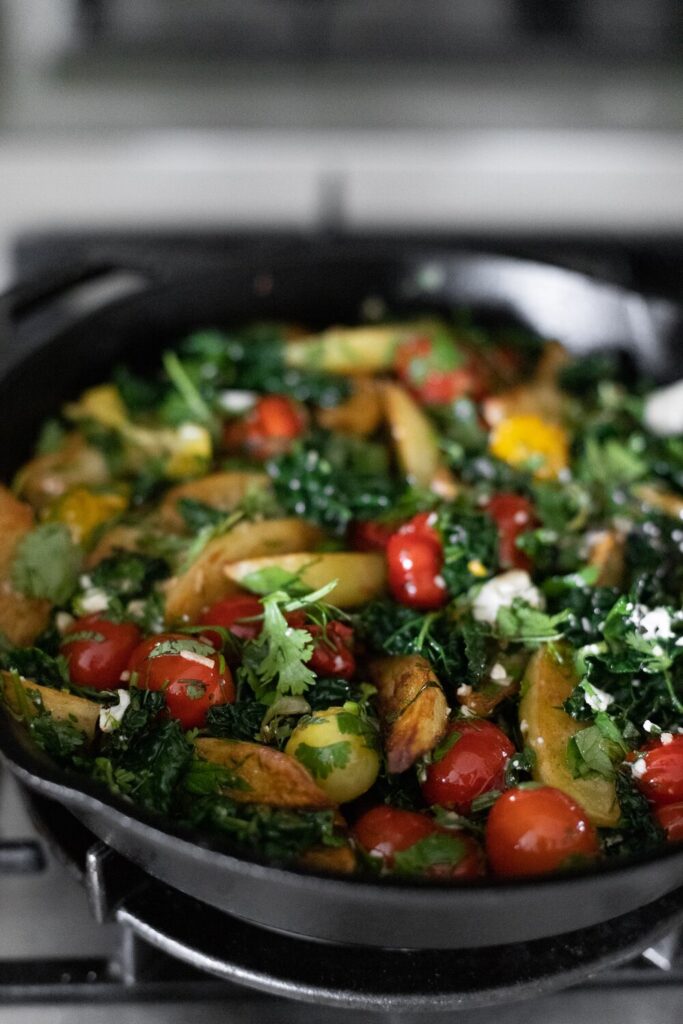
• Skip to primary navigation
  • Skip to main content
  • Skip to primary sidebar
  • Skip to footer
Cardamom and Tea
  • Blog
  • Recipes
  • About
  • Cookbooks
    • Piecemeal
    • A Dish for All Seasons (my first cookbook)

Vegan Crêpes

May 1, 2020 by Kathryn Pauline Leave a Comment

vegan crêpes with figs and tahini

These light, delicate vegan crêpes come together without eggs or dairy, but you won’t miss either. The best part? They’re made entirely with staples you likely have on hand. Olive oil takes the place of butter, while soy milk steps in for both milk and eggs. And instead of topping them with whipped cream, you’ll whip up a silky one-ingredient tahini cream that’s rich, nutty, and perfect for drizzling.

vegan crêpes with figs and tahini

A recipe for successful vegan crêpes

1. Let them cook fully before flipping

Like, let them cook a bit longer than you normally would with conventional crêpes. Without eggs, they’re a bit more delicate and they need a bit longer to set.

2. Don’t make them too large

Relatedly, don’t make them too large. They’re much easier to flip when they’re on the smaller side.

The easiest way to flip these is with a large spatula. If you make your vegan crêpes too large, they will tear from their weight. So if you make them too large, you might want to use the technique of sliding the crepe onto a lightweight cutting board, and then flipping it back onto the pan.

3. Make sure your batter is smooth and fully blended

Whether you’re using a blender or mixing with the one-bowl technique described in the next section, make sure your batter is completely smooth. This isn’t like making muffins, where you want to avoid over-mixing the batter. In this case, it’s actually good to develop a little gluten. This will give these vegan crêpes that classic chewy-tender texture.

vegan crêpes with figs and tahini

How to get away with not using a blender

You can make this recipe for vegan crêpes with a blender, but if you don’t have one, don’t sweat it! I’ve made this recipe in many-an-airbnb with no blender in sight. All you’ll need is a whisk and a bowl.

The key to making these without a blender is to add the liquid in stages rather than all at once. Whisk until completely smooth before adding the next addition of soy milk.

I’m including my video for classic crêpes here, even though it has different ingredients, because the technique is exactly the same:

(If video does not appear below, please disable ad block)

Print

Vegan Crêpes

vegan crêpes with figs and tahini
Print Recipe

5 Stars 4 Stars 3 Stars 2 Stars 1 Star

No reviews

  • Total Time: 30 minutes
  • Yield: 12 to 15 crepes

Ingredients

  • 1 1/4 cups flour (200g)
  • 2 tablespoons sugar  (25g)
  • 1/4 teaspoon salt (1.5g)
  • 1/4 teaspoon vanilla extract (1g)
  • 2 1/2 tablespoons extra virgin olive oil (33g)
  • 2 1/2 cups soy milk (590g)
  • Neutral oil for coating the pan (canola, vegetable, etc.)

Serving inspiration:
Tahini cream: equal parts tahini and water (measured by volume, e.g., 1/4 cup of each), whisked together until smooth and creamy
Date molasses (or grape molasses or honey)
Bananas, sliced
Figs, sliced

Instructions

  1. Whisk together the flour, sugar, and salt in a medium mixing bowl.
  2. Add the vanilla, olive oil, and just 1 cup of the milk*. Whisk together until it’s completely smooth.
  3. Add 1 cup more of the milk, and whisk together until well combined. Repeat with the final 1/2 cup.
  4. Place a non-stick skillet over medium to medium-high heat, and let it pre-heat for a couple minutes.
  5. Dip a paper towel in oil, and use tongs to swipe it across the pan, coating it evenly and lightly. Or use cooking spray to evenly spray the pan with a layer of oil.
  6. Pour about 1/4 – 1/3 cup of batter (more or less, depending on the size of your pan) into the oiled pan, and quickly tilt the pan around to coat the surface evenly. Let it cook for about 2 minutes, then flip and cook for 30 more seconds.**
  7. Remove finished crepes to a plate, and continue cooking the rest of the batter. Serve immediately, or cover and refrigerate for a few days (reheat in the same pan for about 30 seconds on each side, or microwave briefly).

Notes

* You can use a blender for this recipe. If you do, just add all the milk at once and blend until completely smooth.

** These vegan crepes are more delicate than classic eggy crepes, so make sure they cook all the way through on the first side before you flip them. Also, the thicker you make them, the harder they are to flip without tearing (totally counterintuitive, but true). If you ever have trouble flipping crepes, make them smaller, so they’re easier to manage.

The best thing to do is make them on the small side, let them cook through, use a big spatula to gently peel them up, and carefully flip them over with the spatula. Or toss them in the air if you can swing it!

find us on instagram and let us know what you made!

Filed Under: breakfast, dairy free, every recipe, sweets, vegan, weeknight Tagged With: banana, figs, tahini

cheesy caraway hot cross buns

April 9, 2020 by Kathryn Pauline Leave a Comment

My grandmother grew up on a farm in rural Syria, where they would make big batches of gubta mtumarta, a cheese preserved with caraway seeds, packed in clay jars, and buried under ground. Every Easter, my great-grandmother would stuff one samoon with a bit of gubta, and the kid who got the stuffed roll received an extra little gift. These hot cross buns are a bit over-the-top in comparison, with every single one containing a bit of cheese. If you don’t have caraway at home, no worries—they’re lovely plain as well. Or feel free to add some of your favorite dried herbs to the dough instead.

It’s a pretty straightforward challenge to get that distinctive cross pattern with sweet hot cross buns (either with icing or pastry cream), but I’ve always struggled a bit with savory ones. Sometimes the piped line of flour paste just disappears into the dough once it goes in the oven, and sometimes it awkwardly puffs up. After reading a bunch of recipes, I tried a few different strategies for styling these, and I finally found the right technique for achieving high-contrast crosses. First, you egg wash the shaped and proofed dough. Then you mix equal parts (by weight) water and flour to form a paste—if the paste is too thin, it will run everywhere, and if it’s too thick it will be awkwardly raised and too dark. But when you get the ratio just right, it stays in place and remains bright, while the buns themselves bake to perfect golden brown.

Print

cheesy caraway hot cross buns

Print Recipe

5 Stars 4 Stars 3 Stars 2 Stars 1 Star

No reviews

  • Prep Time: 35 minutes
  • Total Time: 3 hours
  • Yield: 9 buns

Ingredients

  • 180g whole milk (3/4 cup)
  • 5g yeast (1.5 tablespoons)
  • 2 large eggs (110g), at room temperature
  • 475g all purpose flour (3 3/4 cups)
  • 6g caraway seeds (1 tablespoon)
  • 6.5g salt (1 teaspoon)
  • 55g butter (4 tablespoons)
  • 120g hard melting cheese, cut into 9 cubes (e.g., cheddar, gruyere, swiss, mozzarella, etc.)
  • Egg wash: 1 egg yolk, beaten with 1 teaspoon water
  • Paste for the crosses: 60g flour (about 1/2 cup) mixed with 60g water (about 1/4 cup)

Instructions

  1. Preheat the oven to 180°F (80°C). Once it preheats, turn it off and open the door open a crack before you start making the dough.
  2. Microwave the milk until it’s about 115°F (45°C). Add the yeast to the bowl of a stand mixer (fitted with the hook attachment), stir in the warm milk, and let it sit for about 5 minutes.
  3. Add the eggs, 400g of the flour, caraway seeds, and salt to the stand mixer. Let the mixer run at low speed just until everything is incorporated into a very shaggy dough. Add the butter 1 tablespoon at a time with the mixer running at low speed, allowing each tablespoon to disappear completely before adding more.
  4. Once all the butter has been added, gradually add the last 75g of flour 1 tablespoon at a time with the mixer still running on low. Once the dough pulls away from the sides of the bowl, stop adding flour (I add exactly 50g, but you might need more or less if you don’t measure precisely with grams).
  5. Increase speed to medium, and knead the dough for about 7 minutes, until it’s smooth and elastic.
  6. Lightly oil a mixing bowl and your hands. Scrape the dough into the bowl, and use your hands to shape it into a ball (tuck itself under its bottom to smooth out the surface). Leave it in the bowl with the seam-side facing down.
  7. Cover the bowl of dough with plastic wrap, place it in the oven (again, make sure the oven heat is off and that it has cooled down for at least 10 minutes), leave the door open a crack, and let it proof for about 1 hour. The dough is done rising once it’s noticeably larger, and has approximately doubled in size. While it’s proofing, butter a 8×8” pan (and optionally line the bottom with parchment).
  8. Once the dough is done rising, move to a lightly floured counter, and divide into 9 even pieces (about 90g each). Stuff each piece with a chunk of cheese, and shape into a smooth, round ball. Space them evenly in the pan.
  9. Cover the pan with plastic wrap, and move back to the still warm oven for about 40 minutes (again, make sure it’s still off), just until the gaps around them almost close up.
  10. Once the buns have finished their rise, remove from the oven, and preheat it to 350°F (177°C) convection. Brush the tops of the buns with a layer of egg wash.
  11. Place the paste for the crosses in a piping bag and snip off a bit of the end. Pipe a straight line across each bun in one direction, then switch directions and pipe a straight line across each bun again (see photos).
  12. Bake for about 30 minutes, until the internal temperature reads about 195°F (about 90°C). Remove from the pan to a cooling rack, and let them cool for a couple minutes before serving (they can also be served at room temperature).

Notes

To make these ahead: shape the rolls, let them proof at room temperature for 10 minutes, and then let the whole pan chill in the refrigerator for 8 to 20 hours. Bring them to room temperature before baking and let them finish rising (unless they have already risen in the refrigerator). If you have any left over, they’ll keep at room temperature for a few hours, but leftovers should be frozen as soon as possible to make sure they stay fresh. As with any bread, do not store them in the refrigerator or they will stale even faster than at room temperature.

find us on instagram and let us know what you made!

Filed Under: bread, breakfast, every recipe, vegetarian Tagged With: caraway

  • « Go to Previous Page
  • Page 1
  • Interim pages omitted …
  • Page 67
  • Page 68
  • Page 69
  • Page 70
  • Page 71
  • Interim pages omitted …
  • Page 182
  • Go to Next Page »

Primary Sidebar

Kathryn Pauline smiling

Welcome! I’m Kathryn Pauline, cookbook author, recipe developer, and photographer.

Footer

read our privacy policy

© 2017 - 2026 Kathryn Pauline