• Skip to primary navigation
  • Skip to main content
  • Skip to primary sidebar
  • Skip to footer
Cardamom and Tea
  • Blog
  • Recipes
  • About
  • Cookbooks
    • Piecemeal
    • A Dish for All Seasons (my first cookbook)

Lahm bi Ajeen

March 29, 2017 by Kathryn Pauline 3 Comments

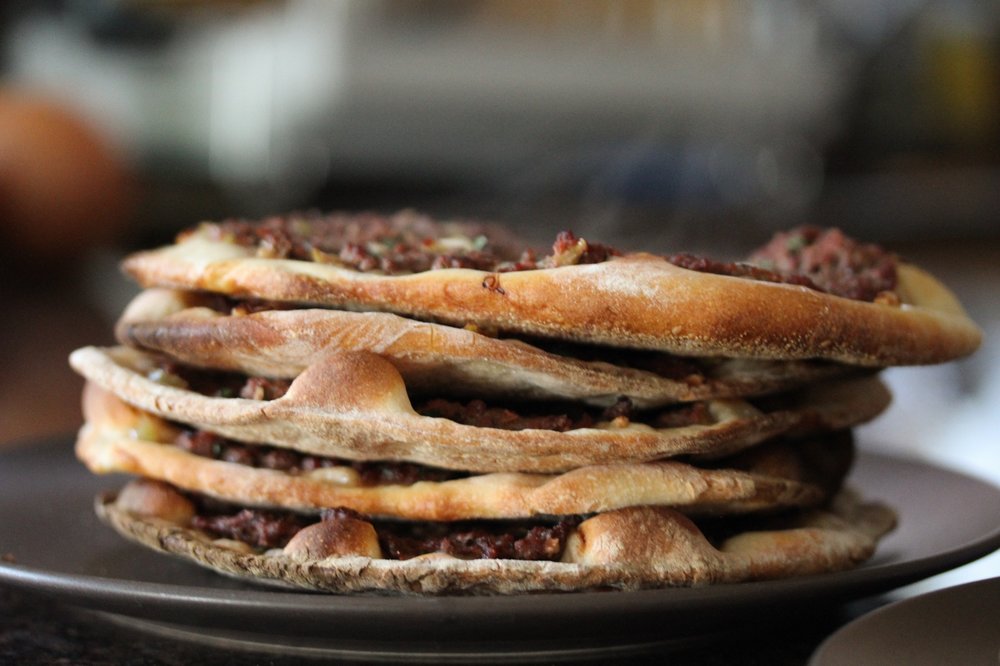
If you’re been craving a homemade lahm bi ajeen that’s chewy, tangy, and packed with flavor, this recipe delivers. These crisp, thin, perfectly charred pies are brought to you by my cousin, Kris. His approach to food is part precision and part intuition. He’s spent years fine-tuning this recipe, balancing bold flavor with a dough that bakes up just right. And I’m so excited to be able to pass it along here.

Jump to the recipe if you’re ready to hit the pizza stone, or read on for a few tips and tricks.

What makes lahm bi ajeen special?

Lahm bi ajeen is often described as “Middle Eastern pizza,” but that comparison only gets you so far. Yes, both involve thin dough baked with toppings. But lahm bi ajeen flips the script.

Instead of layering on sauce and cheese, you mix the tomato base directly into the meat, skip the cheese entirely, and add bold ingredients like parsley, peppers, and the real game-changer: pomegranate molasses.

Why pomegranate is essential 🫡 (but also… how you can get away with substituting it 😳)

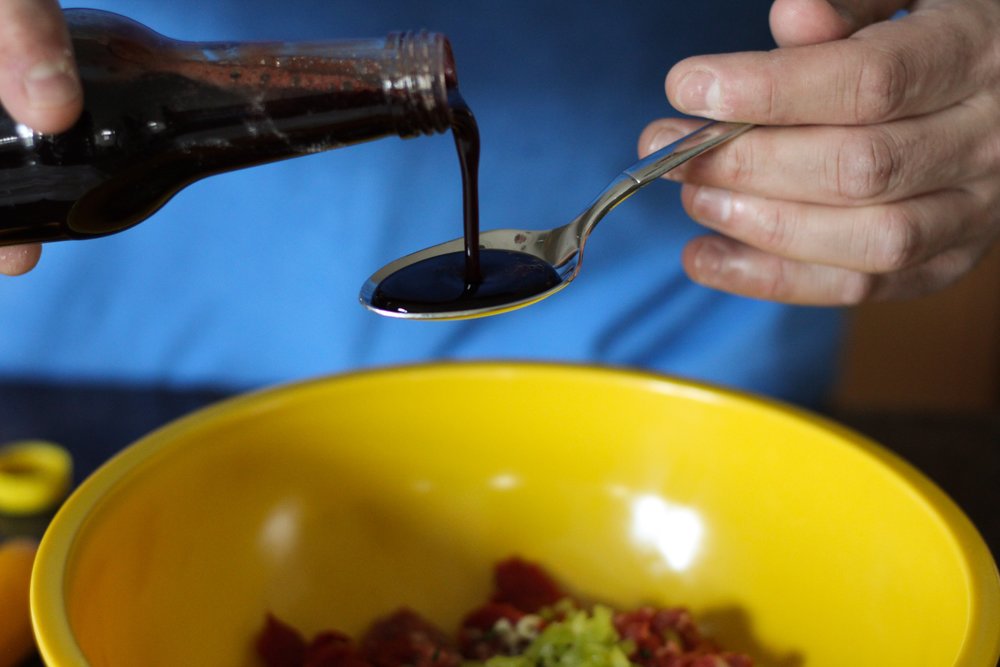
Pomegranate molasses is the heart of this dish. On its own, it’s shockingly tart, but when mixed into the meat, it adds a rich, sweet-sour brightness that cuts through the fat and deepens the flavor. It’s not a background note. It’s the thing that makes lahm bi ajeen taste like lahm bi ajeen.

And I’d say no substitutions, but I know some of you might want to make this without having pomegranate molasses on hand. While you can’t replicate the flavor without the real deal, you can do something similar by adding a drizzle of syrup like agave or maple and a dash of lemon juice. Is it pomegranate molasses? No. Does the resulting lahm bi ajeen taste 100% correct and exactly the same as if you used pomegranate molasses? Also no. But it adds a certain something similar, and it works do create something similar and good in a different way.

Where to find pomegranate molasses

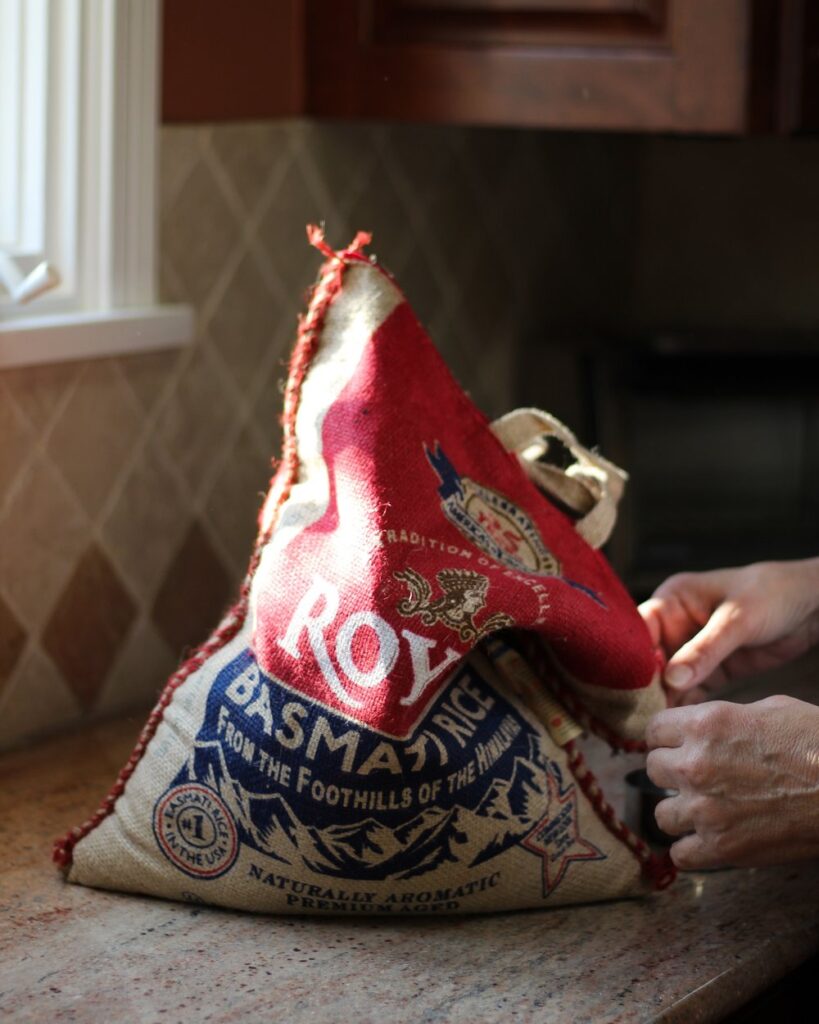
If you’re going for it and making the recipe as written, you’re going to need to track down a bottle of pomegranate molasses. You’ll find it in the international aisle of some US supermarkets, although that can be hit and miss. Most Middle Eastern markets carry it, and it’s very easy to order online. While you can make your own, I recommend just buying it because homemade is usually much less tangy. And most recipes featuring pomegranate molasses are developed using the store-bought stuff.

The bottle should last for quite a while, but if you’re looking for ways to use it up (besides this recipe on repeat), here are some ideas:

  • A sweet-and-sour boost in salad dressings or marinades
  • Swirled into yogurt
  • Drizzled over veggies after roasting
  • As a marinade and glaze for grilled lamb
  • In cocktails or mocktails as a deeper more molassesey substitute for simple syrup
  • Drizzled over chocolate ice cream

Lahm bi ajeen shortcuts

  • Kris’s dough recipe is excellent, but you can totally use store-bought pizza dough if you’re looking for ways to save time.
  • Instead of chopping and mixing everything, you can use a food processor to chop the banana pepper, parsley, and onion, and then use it to bring the rest of the meat ingredients together.
  • Use a stand-mixer to knead the bread dough if you’re going the homemade route.
Print

Lahm bi Ajeen

Print Recipe

5 Stars 4 Stars 3 Stars 2 Stars 1 Star

5 from 1 review

For an easier recipe, try this alternative

  • Total Time: between 4 and 26 hours
  • Yield: 8 small pies

Ingredients

For the dough:

  • 1 1/2 teaspoons active dry yeast
  • 1/2 teaspoon sugar
  • 1 1/2 cups room temperature water, divided into 1 cup and 1/2 cup
  • 12 ounces (2 cups) all purpose flour
  • 5 ounces (1 cup) 00 flour (or substitute additional all purpose flour)
  • 3/4 teaspoon salt

For the meat mixture:

  • 1 pound 5 ounces lean, ground beef
  • 2 1/2 tablespoons pomegranate paste/molasses (see ingredient note preceding the recipe)
  • 2 tablespoons tomato paste
  • 1 banana pepper, minced
  • 1/4 cup chopped parsley, loosely packed
  • 1/2 small onion, minced
  • 3/4 teaspoon salt (plus more to taste, if you prefer)
  • 1/4 teaspoon ground black pepper

To bake the pies:

  • Additional flour, for sprinkling
  • Semolina or cornmeal, for sprinkling
  • Ground meat mixture
  • Risen dough
  • Finishing salt

Instructions

  1. Make the dough: Proof the active dry yeast with the sugar and 1 cup of the water until the water looks a little foamy on top (about 5-10 minutes).
  2. Add the all purpose flour, 00 flour, and salt to a bowl (the bowl of a stand mixer, if you plan to knead by machine).
  3. Add the water/yeast/sugar mixture and stir until the dough starts to come together into a dry, shaggy mess.
  4. Gradually add a little of the remaining 1/2 cup of water at a time, about 1 tablespoon at a time, until the whole thing comes into a dough ball. Do not use all of the water, unless you need it. If you use too much water, compensate with a little more flour; likewise, if the dough looks too dry, add a little more water and let it sit for a few minutes to absorb. The dough ball should not be too sticky or dry (somewhere in between is best). It should look a tiny bit firmer than store-bought pizza dough.
  5. Knead until the dough ball passes the window pane test. It should come together into an elastic ball that has a smooth surface. Kneading should take about 5-15 minutes by machine with a dough hook, or 10-20 minutes by hand. Pay more attention to the dough’s consistency than the time you’ve spent kneading.
  6. Place the dough in a bowl, cover it, and let it sit at room temperature for 20 minutes, and then in the refrigerator overnight. If you don’t have time to wait overnight, you can let it rise at room temperature for 1 1/2 to 2 hours (resting it in the refrigerator will help it develop a better flavor and texture).
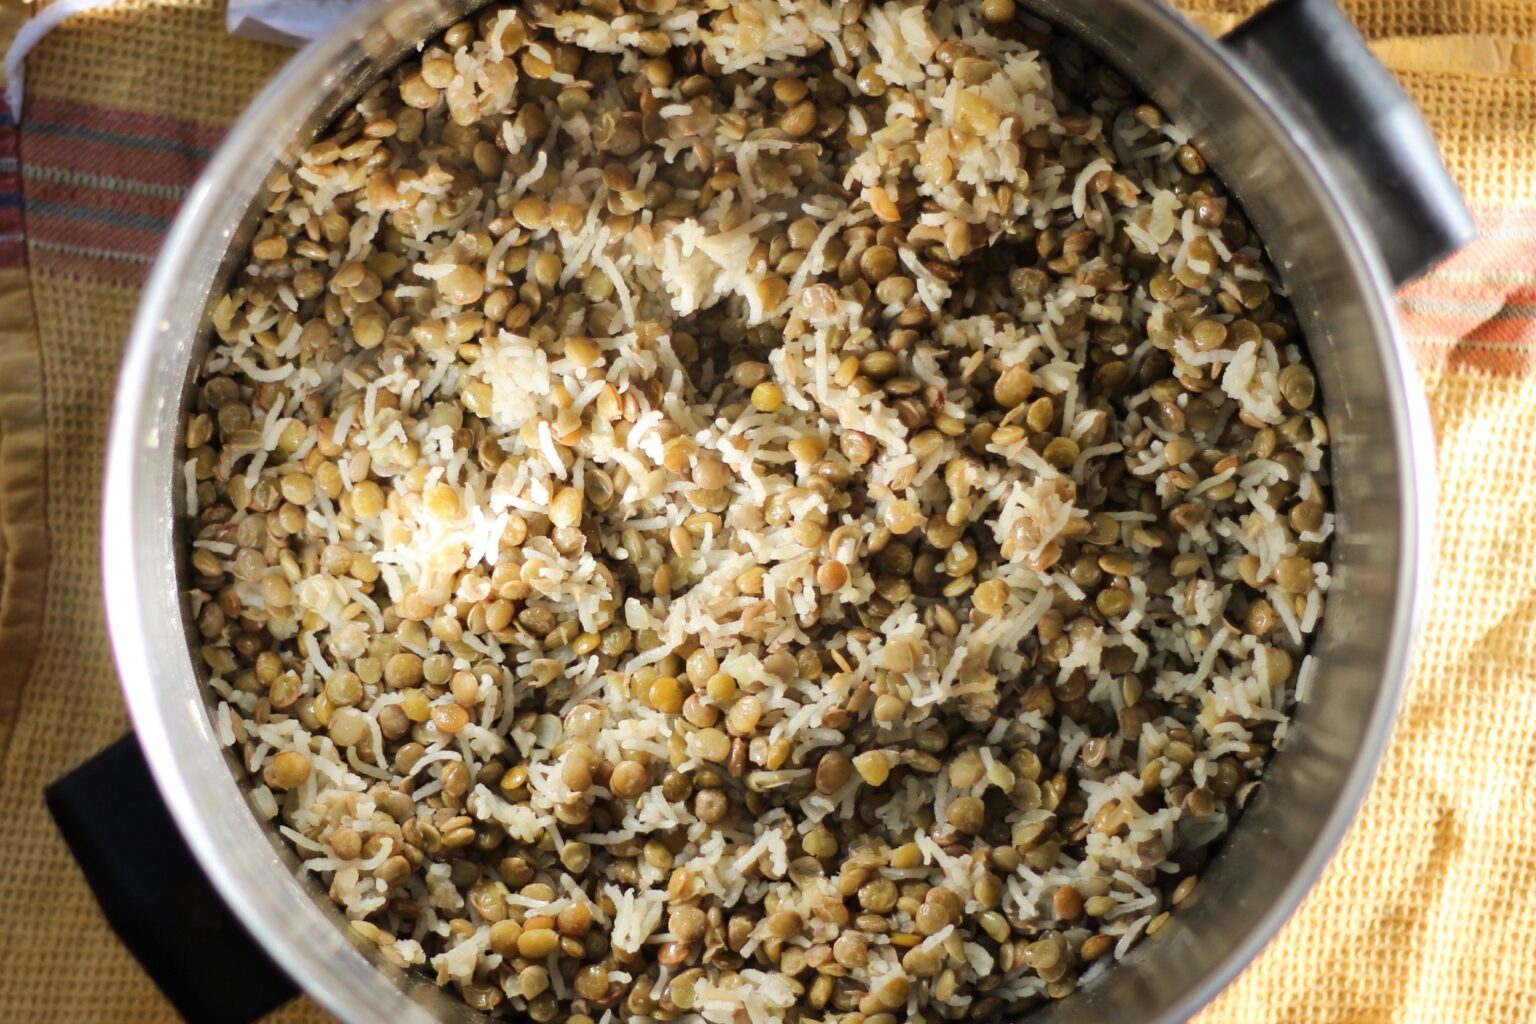
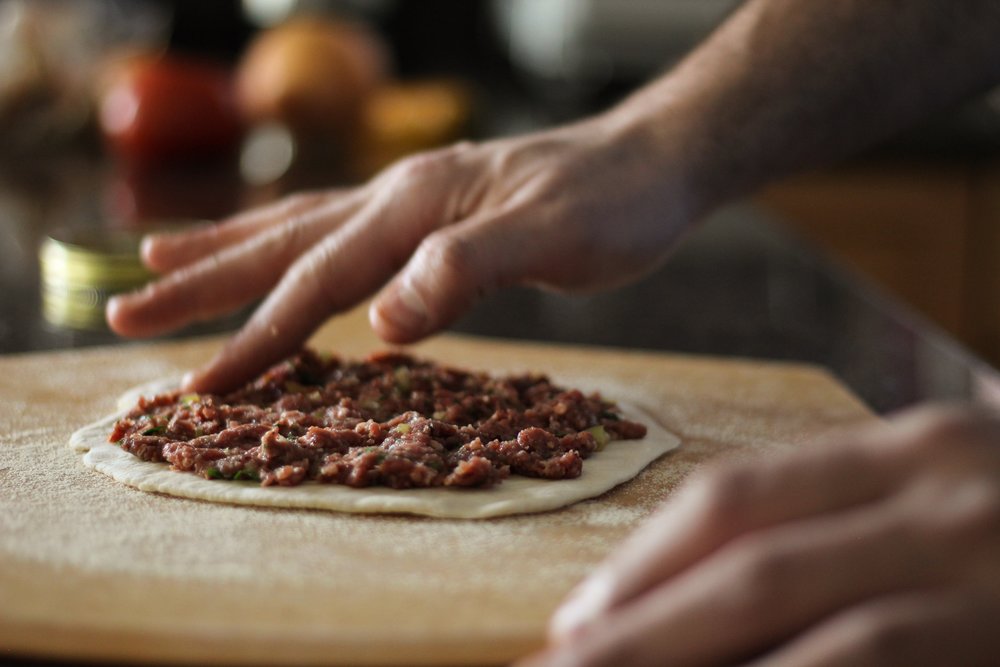
  7. Make the meat mixture: Combine the ground beef, pomegranate molasses, tomato paste, banana pepper, parsley, onion, salt, and pepper, being careful not to over-mix.
  8. Shape and bake the pies: Lightly flour a clean, food-safe work surface, use a knife or bench scraper to divide the dough into 8 equal pieces, and shape each chunk into a round ball.
  9. Place a pizza stone (or sheet pan) on the oven floor, move the oven racks up and out of the way, so you can easily access the pizza stone, and pre-heat the oven to 500° F.
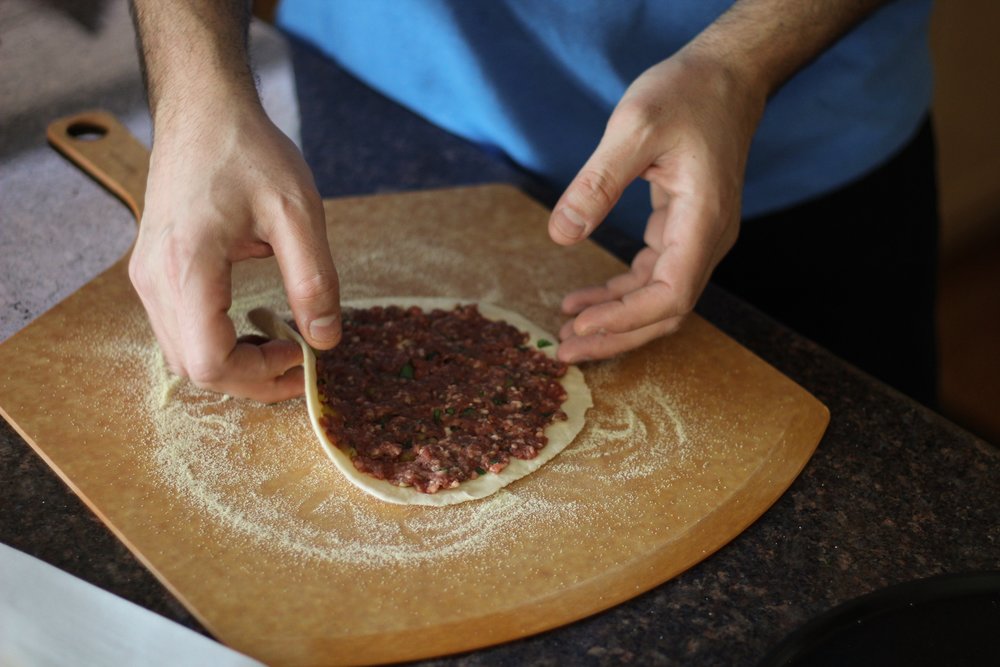
  10. Roll each dough ball into a circle, about 1/8 inch thick. This is very thin, but not paper-thin (see above photos). To keep the round shape, rotate the disc about 90 degrees after each time you roll it out, and be sure to re-flour the surface every so often. Separate the discs with wax paper and let them rise for about 25 minutes.
  11. Divide the ground meat mixture into about 8 equal pieces.
  12. Sprinkle a pizza peel (or rimless sheet pan) with a tablespoon or two of semolina or cornmeal.
  13. Place a rolled-out disc of dough on the semolina/cornmeal.
  14. Put one of the pieces of meat on top of the dough disc. Work the meat into a thin, even layer over the dough, so that it doesn’t separate from the crust and shrink to the center as it cooks. Sprinkle with a little additional salt, if you’d like.
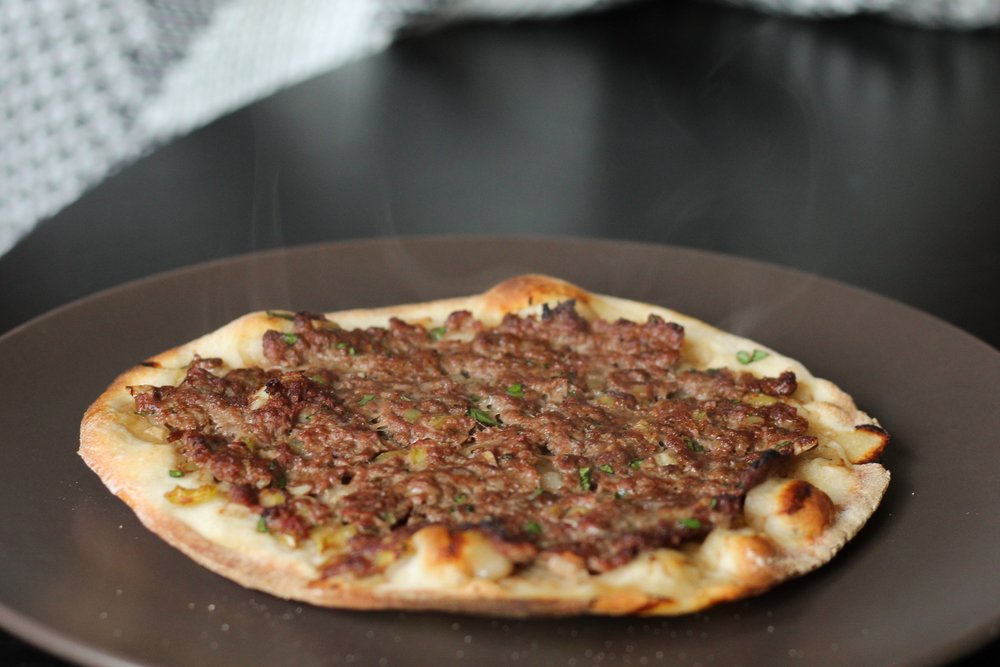
  15. Once the oven has preheated, use a quick motion to move the pie from the pizza peel onto the pizza stone. Bake for about 5-10 minutes, until the meat starts to brown and the bread is cooked through and starting to char. The dough should be crispy and chewy, like really good brick oven pizza.
  16. Repeat with the remaining 7 pies.

Notes

Kris’ dough recipe is phenomenal, but if you don’t have time and still want to make this recipe, feel free to use store-bought pizza dough. It won’t be quite the same, but it’ll still be delicious.

find us on instagram and let us know what you made!

Filed Under: bread, dairy free, dinner, every recipe, family recipes, lunch, main courses, meze Tagged With: beef, herbs, middle eastern, pomegranate molasses

Easiest Lentils and Rice

March 19, 2017 by Kathryn Pauline 20 Comments

lentils and rice

Looking for a lentils and rice recipe so simple it practically makes itself? This is the one! No fussy steps or long list of ingredients—just the classic, cozy combo done exactly right.

This one comes straight from my mom’s kitchen, and it goes to show: an easy recipe does not have to be boring.

With just four main ingredients, lentils and rice can either turn out bland and mushy or absolutely perfect. The difference? It comes down to technique, and this recipe walks you through exactly what to do.

What makes this recipe the easiest

It’s made with just 4 simple ingredients

You probably have all 4 on hand: rice, lentils, olive oil, and onion. (And also salt and water, but do those even count?)

You don’t have to caramelize the onions

Just a quick sauté adds a ton of flavor. Don’t get me wrong, I love mujadara too, but a long caramelization process is not weeknight-compatible.

It only uses one pot!

Cutting down on dishes is always good. And this recipe only uses one pot! The downside of using one pot is that the scum from the lentils sometimes mucks things up. But my mom taught me a great technique for eliminating the lentil scum, while still just using one pot.

lentils
lentils and rice

Tips for lentils and rice sucess

1. Rinse it like you mean it

I’ve done everything possible to eliminate any redundant steps in this recipe. But the rinsing step? That’s totally essential. Without it, you end up with a mucky mess. This is the difference between fluffy and gunky.

So rinse the lentils after boiling them. Rinse the rice thoroughly before cooking. And wipe down the sides of the pot before combining everything.

The good news is that you can reuse the same strainer for all of this, so don’t throw it in the sink just yet!

2. Nail the timing

Lentils and rice don’t cook at the same pace. This recipe staggers the cooking times so each component turns out just right. And I include tactile cues in case your lentils are a little different than mine.

The lentils might take longer to par-cook, but the key is to catch them when they’re “unpleasantly al dente”—technically cooked through with a little bit of a bite, but pretty gross and raw-tasting on the inside. At this point, they should cook right alongside the rice to perfect doneness.

3. Do not peek. Do not stir.

While the lentils and rice are cooking, do not peek inside the pot. Having said that, I know some people will not listen to my instructions. That’s not ideal, but not the end of the world.

However: if you do not listen to my instructions and happen to peek, for the love of all that is good in this world, do not stir them. Once you’ve stirred and shaken the pot into an even layer and placed them over heat, you should not stir them again. Stirring leads to a pot of lentils and rice that is somehow gloopy and undercooked at the same time. It’s truly the worst of both worlds.

Likewise, once the pot comes off the heat, do not peek while it rests for 10 minutes. They need the residual steam to coast to doneness, and they’re actually cooking under there. If you lift the lid, they may not finish cooking through all the way.

4. Use the right kind of lentils.

This recipe will work with a variety of different lentils. That’s why I give tactile clues about how to par-cook lentils instead of relying on time alone. That way, it will work with most any brown or green lentils you might find at the supermarket.

However, if you’ve got red lentils, those will not work in this recipe. Red lentils are a split variety, so they cook extremely quickly. They’re just not the right kind of lentil to use here. But if you want an idea of something equally delicious to make with red lentils, check out my red lentil soup recipe.

lentils and rice

All that said, this recipe is super easy if you follow the instructions. All of the above advice is baked into the recipe below. Hope you enjoy this recipe and that you do something fun with all that time you saved not having to caramelize the onions. 😎

Print

Easiest Lentils and Rice

lentils and rice
Print Recipe

5 Stars 4 Stars 3 Stars 2 Stars 1 Star

5 from 1 review

  • Yield: 6 to 8 servings

Ingredients

  • 1 pound lentils (brown or green)
  • 1 cup basmati rice
  • 1/4 cup extra virgin olive oil
  • 1 small onion, diced
  • 3 cups boiling water
  • 2 teaspoons kosher salt

Instructions

  1. Rinse the lentils and sort through them for little pebbles. Add enough water to cover the lentils and rice by about 3 inches.
  2. Turn the heat to high. Once the pot of water and lentils comes to a boil, turn the heat to medium and boil uncovered for about 10 to 15 minutes.
  3. While the lentils are cooking, rinse the rice until the water runs clear and set it aside.
  4. Start testing the lentils for doneness before the 10 minute mark. The lentils are ready once they are unpleasantly al dente. You should be able to chew one (it should be somewhat soft and no longer hard in the center), but it should still be gritty and mealy.
  5. Once the lentils are ready, strain them and rinse them until the water runs clear.
  6. Use a damp paper towel to wipe down the sides of the pot that you cooked the lentils in until the scum is completely gone.
  7. Add the olive oil to the pot, turn the heat to medium and add the diced onion. Cook, stirring occasionally, until the onion softens (about 5 minutes).
  8. Add the lentils back into the pot, along with the rinsed rice, kosher salt, and 3 cups boiling water. Stir together and shake everything out into an even layer.
  9. Turn the heat to high. Once the water comes back up to a boil, cover, lower the heat to low, and cook for 15 minutes. Do not look inside the pot while the lentils and rice are cooking. If you do look, absolutely do not stir.
  10. Once 15 minutes have passed, open the lid, do not stir the lentils and rice, and take a taste. If they taste done, cover, continue to heat for another 30 seconds, and then turn the heat off, keeping them covered.
  11. Keep the pot covered for another 10 to 15 minutes after you’ve turned off the heat.
  12. After 10 minutes of resting, fluff the lentils and rice with a fork and serve.

Notes

Video note: If you don’t see the video for this post after scrolling up, please disable ad block and try reloading the page.

find us on instagram and let us know what you made!

Filed Under: dairy free, dinner, every recipe, family recipes, gluten free, lunch, main courses, vegan, vegetarian Tagged With: beans, lentils, middle eastern, rice

  • « Go to Previous Page
  • Page 1
  • Interim pages omitted …
  • Page 176
  • Page 177
  • Page 178
  • Page 179
  • Page 180
  • Interim pages omitted …
  • Page 183
  • Go to Next Page »

Primary Sidebar

Kathryn Pauline smiling

Welcome! I’m Kathryn Pauline, cookbook author, recipe developer, and photographer.

Footer

read our privacy policy

© 2017 - 2026 Kathryn Pauline