This is the mujadara I make when I want something cozy and deeply satisfying—a little humble, a little celebratory, and absolutely packed with sweet, jammy, golden onions.
It’s based on how my mom taught me to cook lentils and rice: lots of rinsing, gentle cooking, and plenty of onions. Over time, I started adding more and more onions—some caramelized slowly, others fried until crisp. And in the form of this mujadara recipe, they’ve become the main event.
Jump to the recipe if you want to hit the ground running, or stick around to decide whether this is the one for you.

why I love this mujadara recipe
1. It’s unapologetically onion-heavy.
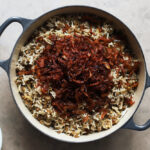
There are so many caramelized onions, they peek over the top of the pot like an iceberg. And that’s exactly the point. They’re the star of the show.
2. There are two separate textures of onion: fried and jammy.
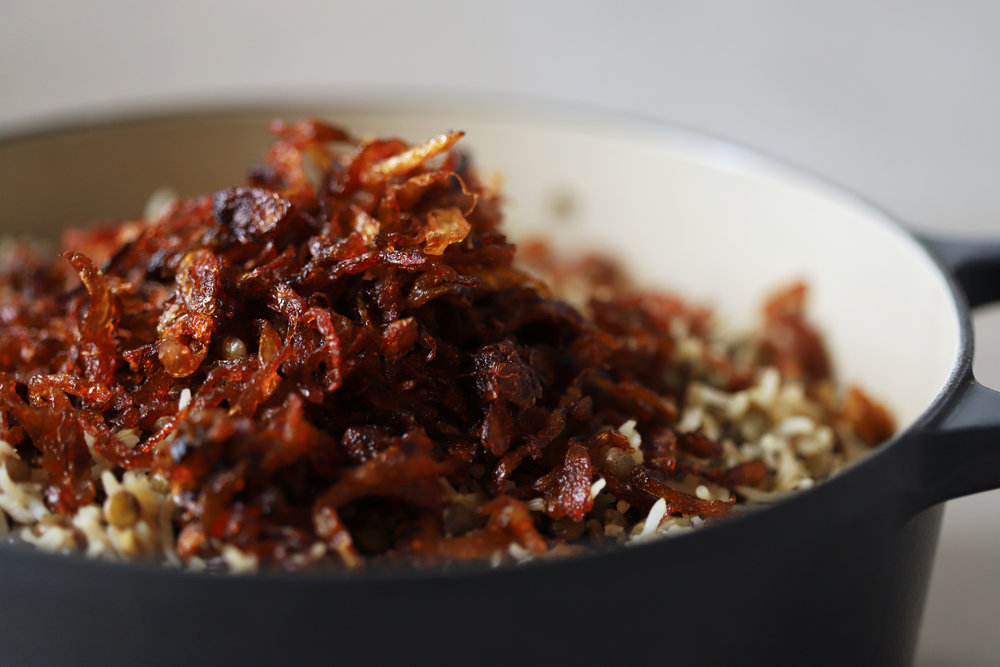
First, all the onions get slowly cooked until they’re the color of salted caramel. Then you fry a portion of those until they’re golden and crispy. This two-step process is pretty efficient and yields the most golden, crispy onions of all time. The result is a mix of soft and crunchy onions.
3. It’s the kind of dish that’s perfect for company.
Those extra steps—caramelizing, frying, layering—turn a humble lentils and rice dish into something worth sharing. It’s easy to make some of the components ahead of time and then throw on the stove as guests are arriving. And it’s vegan and gluten free, so it’s ideal for a group with a mix of dietary restrictions.
notes on caramelizing onions
If you’ve ever read a recipe that says you can caramelize onions in 10 minutes, I regret to inform you that you were misled.
This all came to a head in onion-gate 2012, when writer Tom Scocca published a rant/investigation titled “Layers of Deceit” in Slate. In it, he pointed out what many home cooks already know: nearly every recipe wildly underestimates how long it takes to caramelize onions.
Since then, caramelized onions have become a kind of recipe honesty litmus test.
So let’s be honest: any good mujadara recipe will have you spend a solid 40 minutes caramelizing the onions. And my recipe is no exception. They should be deeply golden, soft all the way through, and starting to take on a jammy texture and sweetness.
If you were looking for an easy weeknight lentils and rice, mujadara is just not the recipe. Try my mom’s classic lentils and rice instead and save this one for the next time you want to cook something cozy and celebratory to share.
PrintMujadara (lentils and rice with crispy onions)

- Prep Time: 55 minutes
- Total Time: 2 1/2 hours
- Yield: 8 servings
Ingredients
To caramelize the onions:
- 1/4 cup olive oil
- 2 pounds 12 ounces sliced onions (from about 3 large or 4 medium onions)
- 1 teaspoon salt
For the lentils and rice:
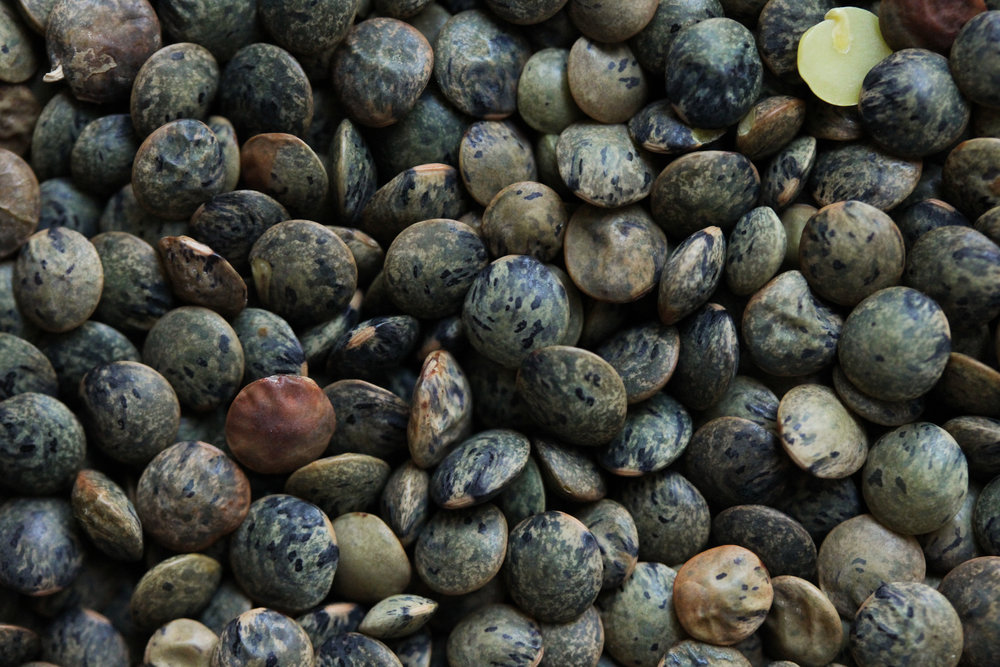
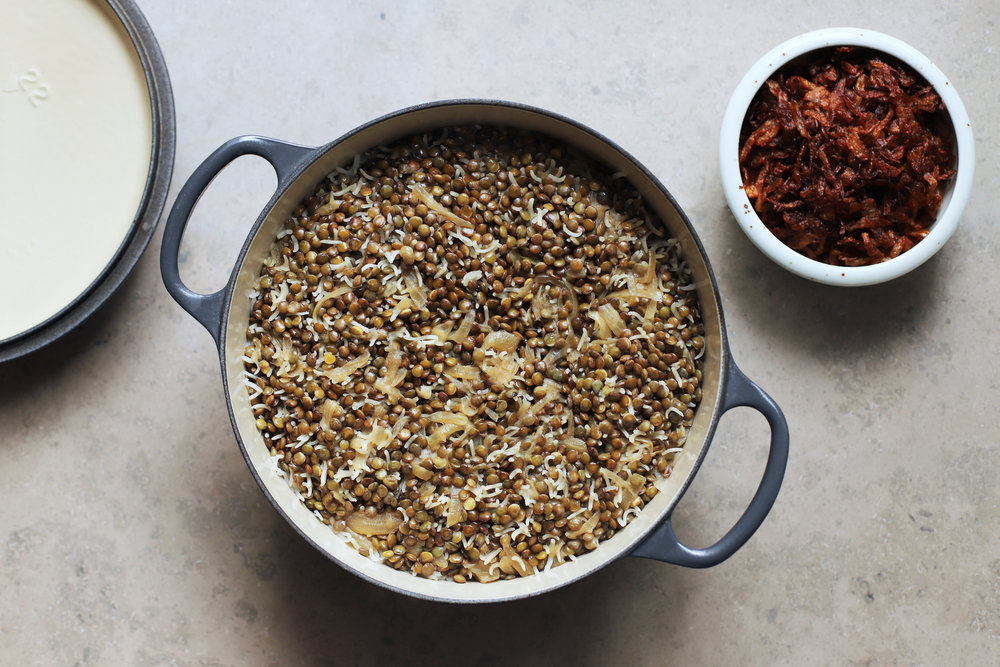
- One 16 ounce bag of green or brown lentils, sorted and rinsed
- 1/3 of the caramelized onions (above)
- 1 cup basmati rice (rinsed)
- 1 1/2 teaspoons salt, or to taste
- 2 3/4 cups water
To fry the caramelized onions:
- 1 cup olive oil (plain, not extra virgin; or use another neutral-flavored oil)
- 2/3 of the caramelized onions (above)
Instructions
- Caramelize the onions: Heat a wide pot (like a large dutch oven) over medium or medium-high heat for 2 minutes. Once the pan is hot, add the oil, followed by the sliced onions and salt. Stir to coat, and cook for 20 minutes, stirring and scraping the bottom of the pan every 2 or 3 minutes.* They should be loudly sizzling and lightly browning, but not burning on the bottom.
- Reduce the heat to medium-low or medium, and cook for another 20 minutes, stirring and scraping once every 5 minutes or so. They should still be audibly sizzling, but more quietly than before.
- Reduce the heat to low, and cook for 40 minutes, stirring and scraping about every 10 minutes. You should still be able to hear a faint whisper of sizzling.
- Increase the heat to medium-high, and cook, stirring and scraping constantly for 5 to 10 more minutes. The onions are done once they have significantly deepened in color. Divide into 1/3 and 2/3 and set aside.
- Par-cook the lentils: Cover the lentils in a couple inches of water in a stock pot. Bring everything to a boil over high heat. Once they’re boiling, set a timer for 10 minutes, and reduce the heat to medium to maintain a good simmer.
- Start testing the lentils for doneness around the 10 minute mark. The lentils are ready once they are unpleasantly al dente. You should be able to chew one (it should be somewhat soft), but it should still be gritty and mealy. If they still have a hard center, continue to cook for a few more minutes (they shouldn’t take longer than 15).
- Once the lentils are ready, strain them and rinse them until the water runs clear. *
- Use a damp paper towel to wipe down the sides of the pot that you cooked the lentils in until the scum is completely gone.
- Cook the lentils and rice together: Add the lentils back into the pot, along with 1/3 of the caramelized onions, rice, salt, and water. Stir together and shake everything out into an even layer.
- Turn the heat to high. Once the water comes back up to a boil, cover, lower the heat to low, and cook for 15 minutes. Do not open the lid while it’s cooking.
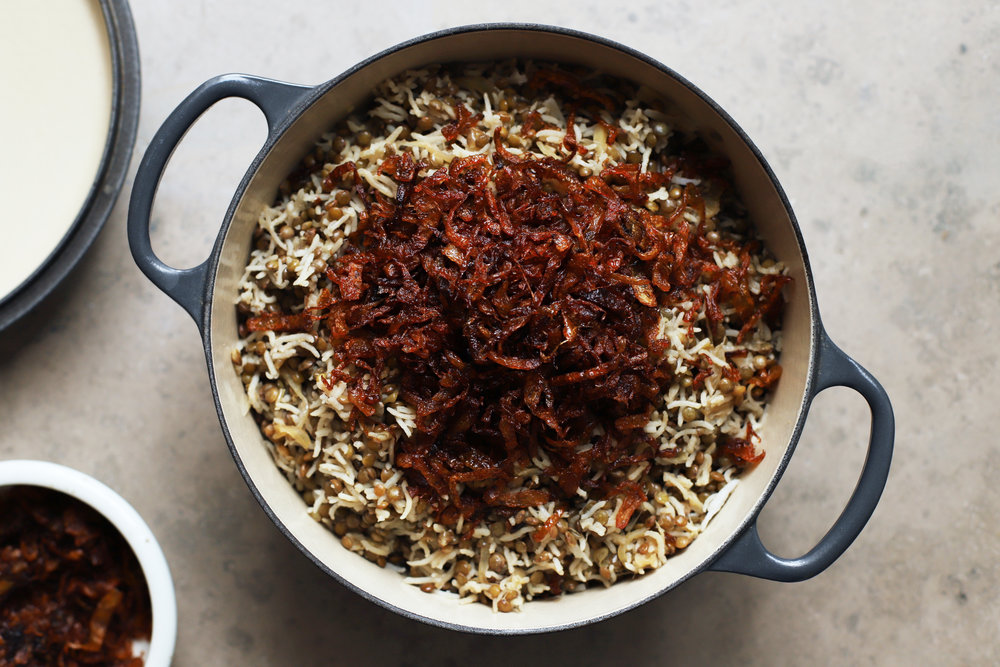
- Once 15 minutes have passed, turn off the heat and keep the pot covered for another 10 minutes (up to 30). While you’re waiting, fry the rest of the onions.
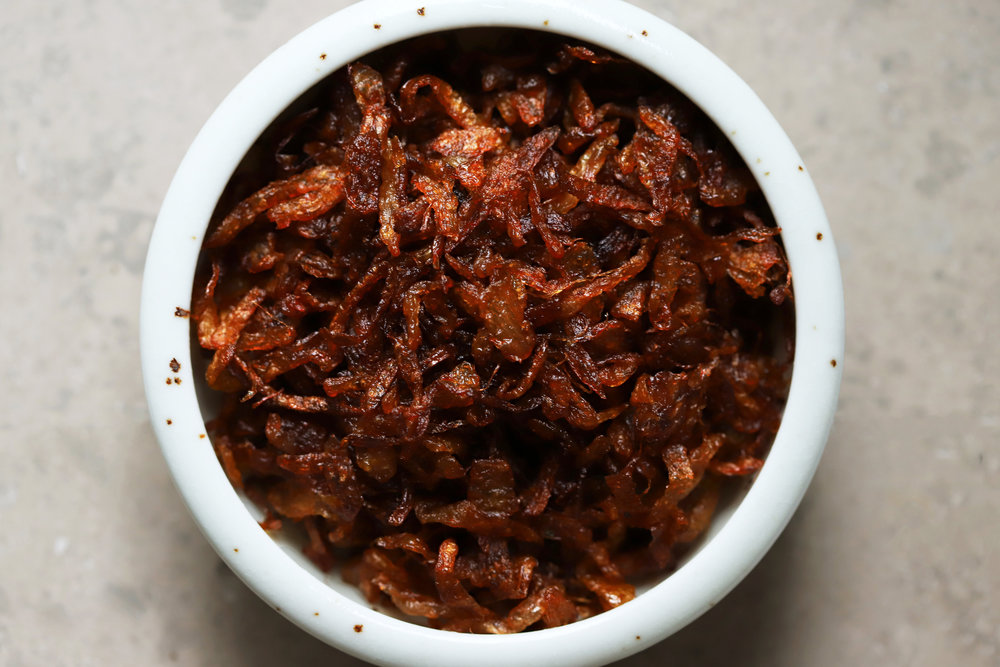
- Fry the onions: Heat the oil in a skillet over medium-high heat until it shimmers (about 4 minutes). Carefully add a scoop or two of the remaining caramelized onions and use tongs to spread them out into a single layer on the bottom of the pan.
- Cook for about 5 minutes until crispy-chewy and deeply golden brown. Before they burn or become too brittle (perhaps with your stove, before 5 minutes), remove them with a slotted spoon to a paper-towel-lined plate, and add a couple more scoops of the onions to the pan, working in batches until they’re all done. Discard the remaining oil.
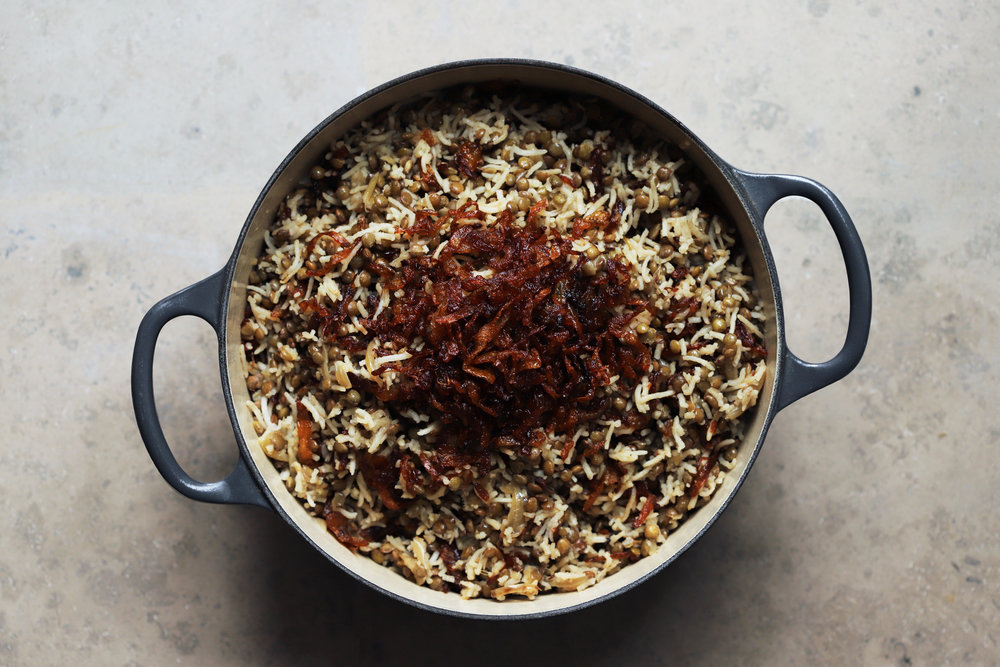
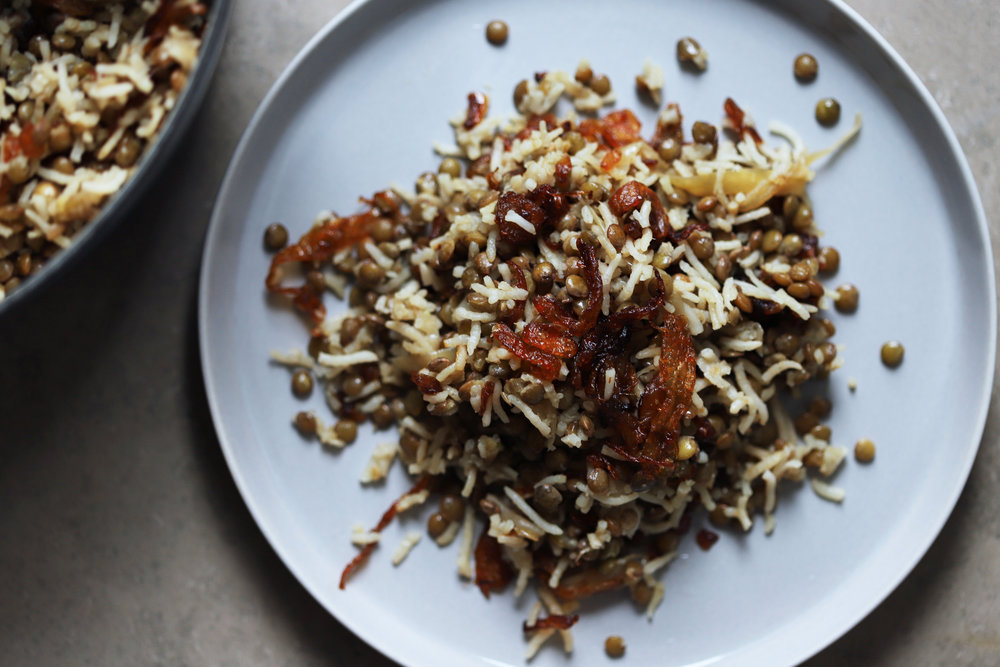
- To serve: Once it’s rested, fluff the lentils and rice with a fork.
- I like to stir some of the crispy onions into the mujadara, stir it together, and then top it with the rest (this results in a lot of different textures, which I like). But you can serve them all on top, or even on the side, to give everyone a chance to include as much onion as they prefer.
Notes
* At any point while you’re cooking the onions, if they look like they’re browning too quickly, reduce the heat a little. At any point, if there is a lot of fond that’s developing on the bottom of the pot, and you can’t easily scrape it up, simply deglaze with about 2 tablespoons of water, scraping up the bits. If either of these things happen, your onions might be a little on the dark side, but as long as you don’t let them burn, they’ll taste delicious.
Video note: If you don’t see the video for this post after scrolling up, please disable ad block and try reloading the page.