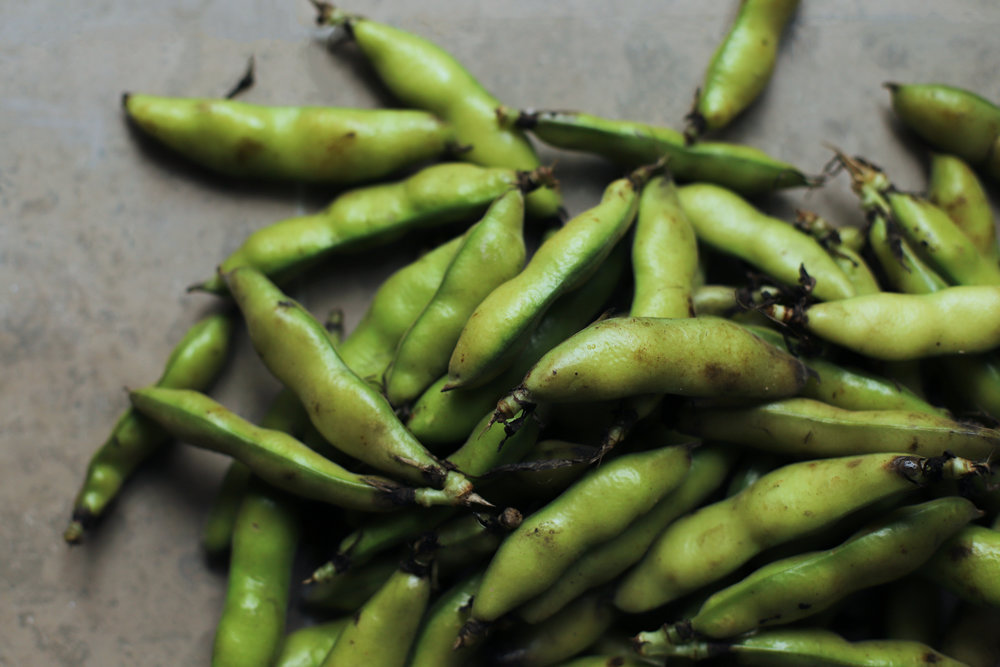
Fresh fava beans are finally having their moment! While dried and canned versions are always on the shelf, spring is the short-but-glorious window when you can find them fresh (although they’re also often available throughout the summer, while supplies last!).
I’ve been scooping up armfuls from my neighborhood market all week, and along the way, I’ve cracked the code on how to prep and enjoy these beauties.
Yes, they’ve got a bit of a diva reputation, but trust me—once you know what you’re doing, fresh fava beans are much less high-maintenance than they seem. They’re extremely easy to shell (read on for more). And they’re even easier to cook. Jump to the recipe if you’re ready to go, or read on for more. Or check out my ful medames recipe if you’re looking for a way to cook dried favas.
Fava beans are lower-maintenance than they seem
1) shelling fresh fava beans is easy (if you use my method)
After a week of fava bean experiments, I’ve landed on a shelling method that is way faster than the popular “string-removal” technique.
You know the method everyone says you should try: break off the top bit, pull the string down one side, then the other, and—supposedly 🙄—the pod splits open like magic. Except… it doesn’t! For me, the strings never slice deeply enough, so I’m left clawing at the stubborn shells like it’s 1998 and I’m trying to peel that sticker off the top of a CD case.
✨ There is a better way!
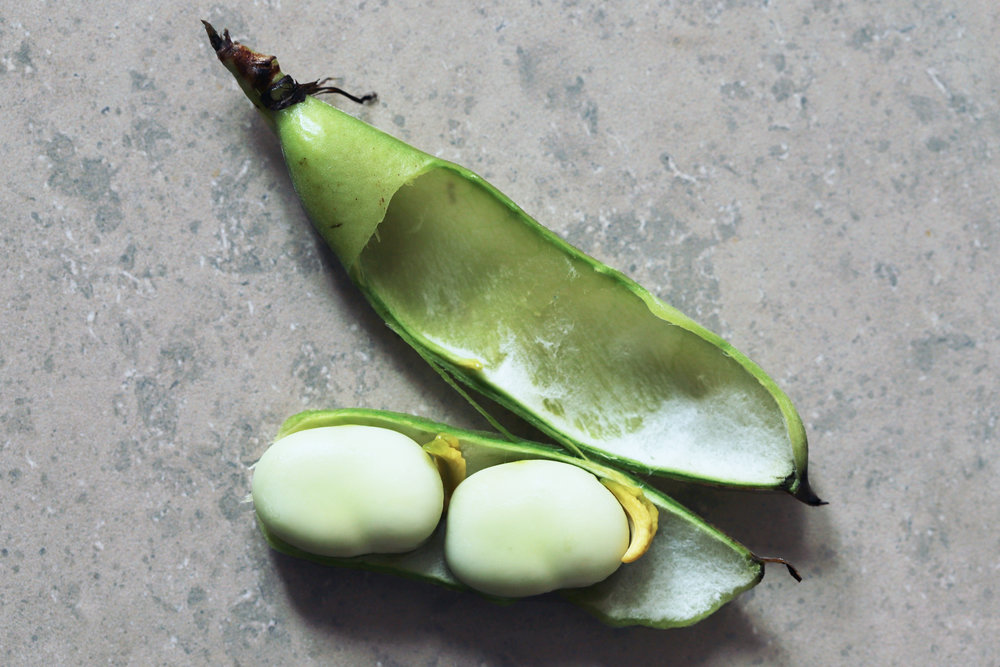
The outer shell
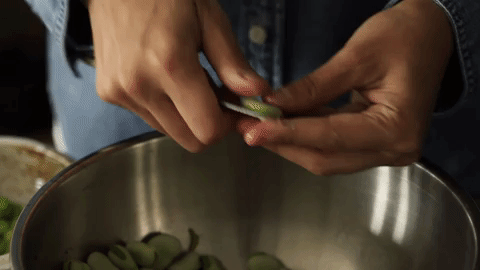
Here is the gist (see photos and GIF below): Hold the tippy-top of the stem flat between your thumb and the side of your index finger, then snap it backwards in one smooth motion. Use the flap you just created like it’s a pull tab. Then (and this is the key!) pull one entire side of the shell off in one clean motion.
It’s quick, easy, and honestly kind of fun. Once you get a rhythm going, you’ll be breezing through in seconds.
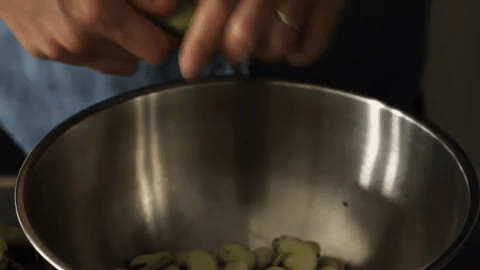
The inner skins
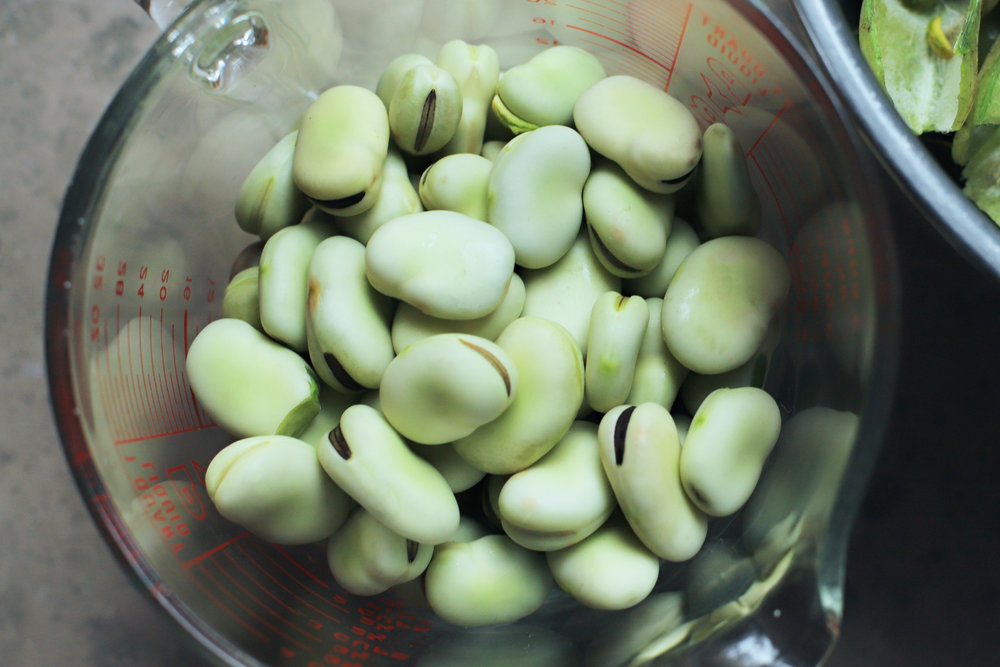
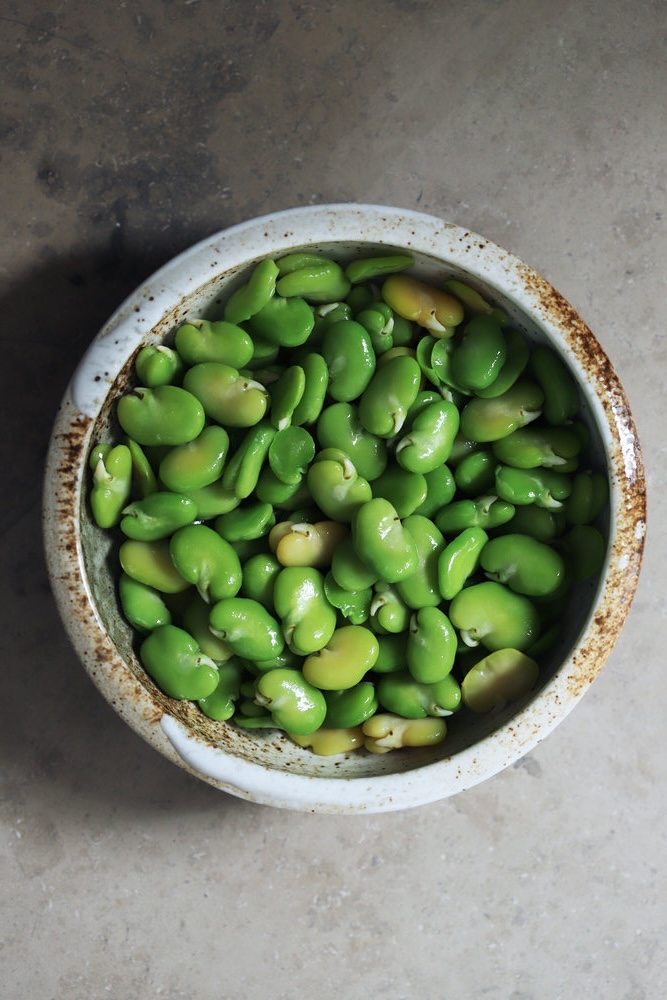
Peeling the inner skin from the pod is simple as well. After shelling, you’ll blanch the beans and then peel off the pale, inner skins. Just use the flat side of a paring knife and the side of your thumb to pinch the edge of the membrane, and pull. Then just pop the bean out of the slit you’ve made.
See the GIFs below, and you’ll see just what I mean.

2) they don’t have to be pretty on the outside
My friend Abeer and I were recently having a conversation about how much pressure there is these days for produce to look picture-perfect. But often, a few blemishes are no big deal—like the spots on ripe persimmons or the chalky “bloom” on old chocolate, which melts away with heat.
Fava beans fit right into this category. Their pods tend to look a little rough—scuffed, bruised, like they’ve seen some things. But the shells don’t matter much, since you’re tossing them anyway. The beans inside are what count, and they’re usually in great shape. If you’re unsure, you can ask the produce seller whether you can pop one open to see for yourself.
3) fava beans are best kept simple
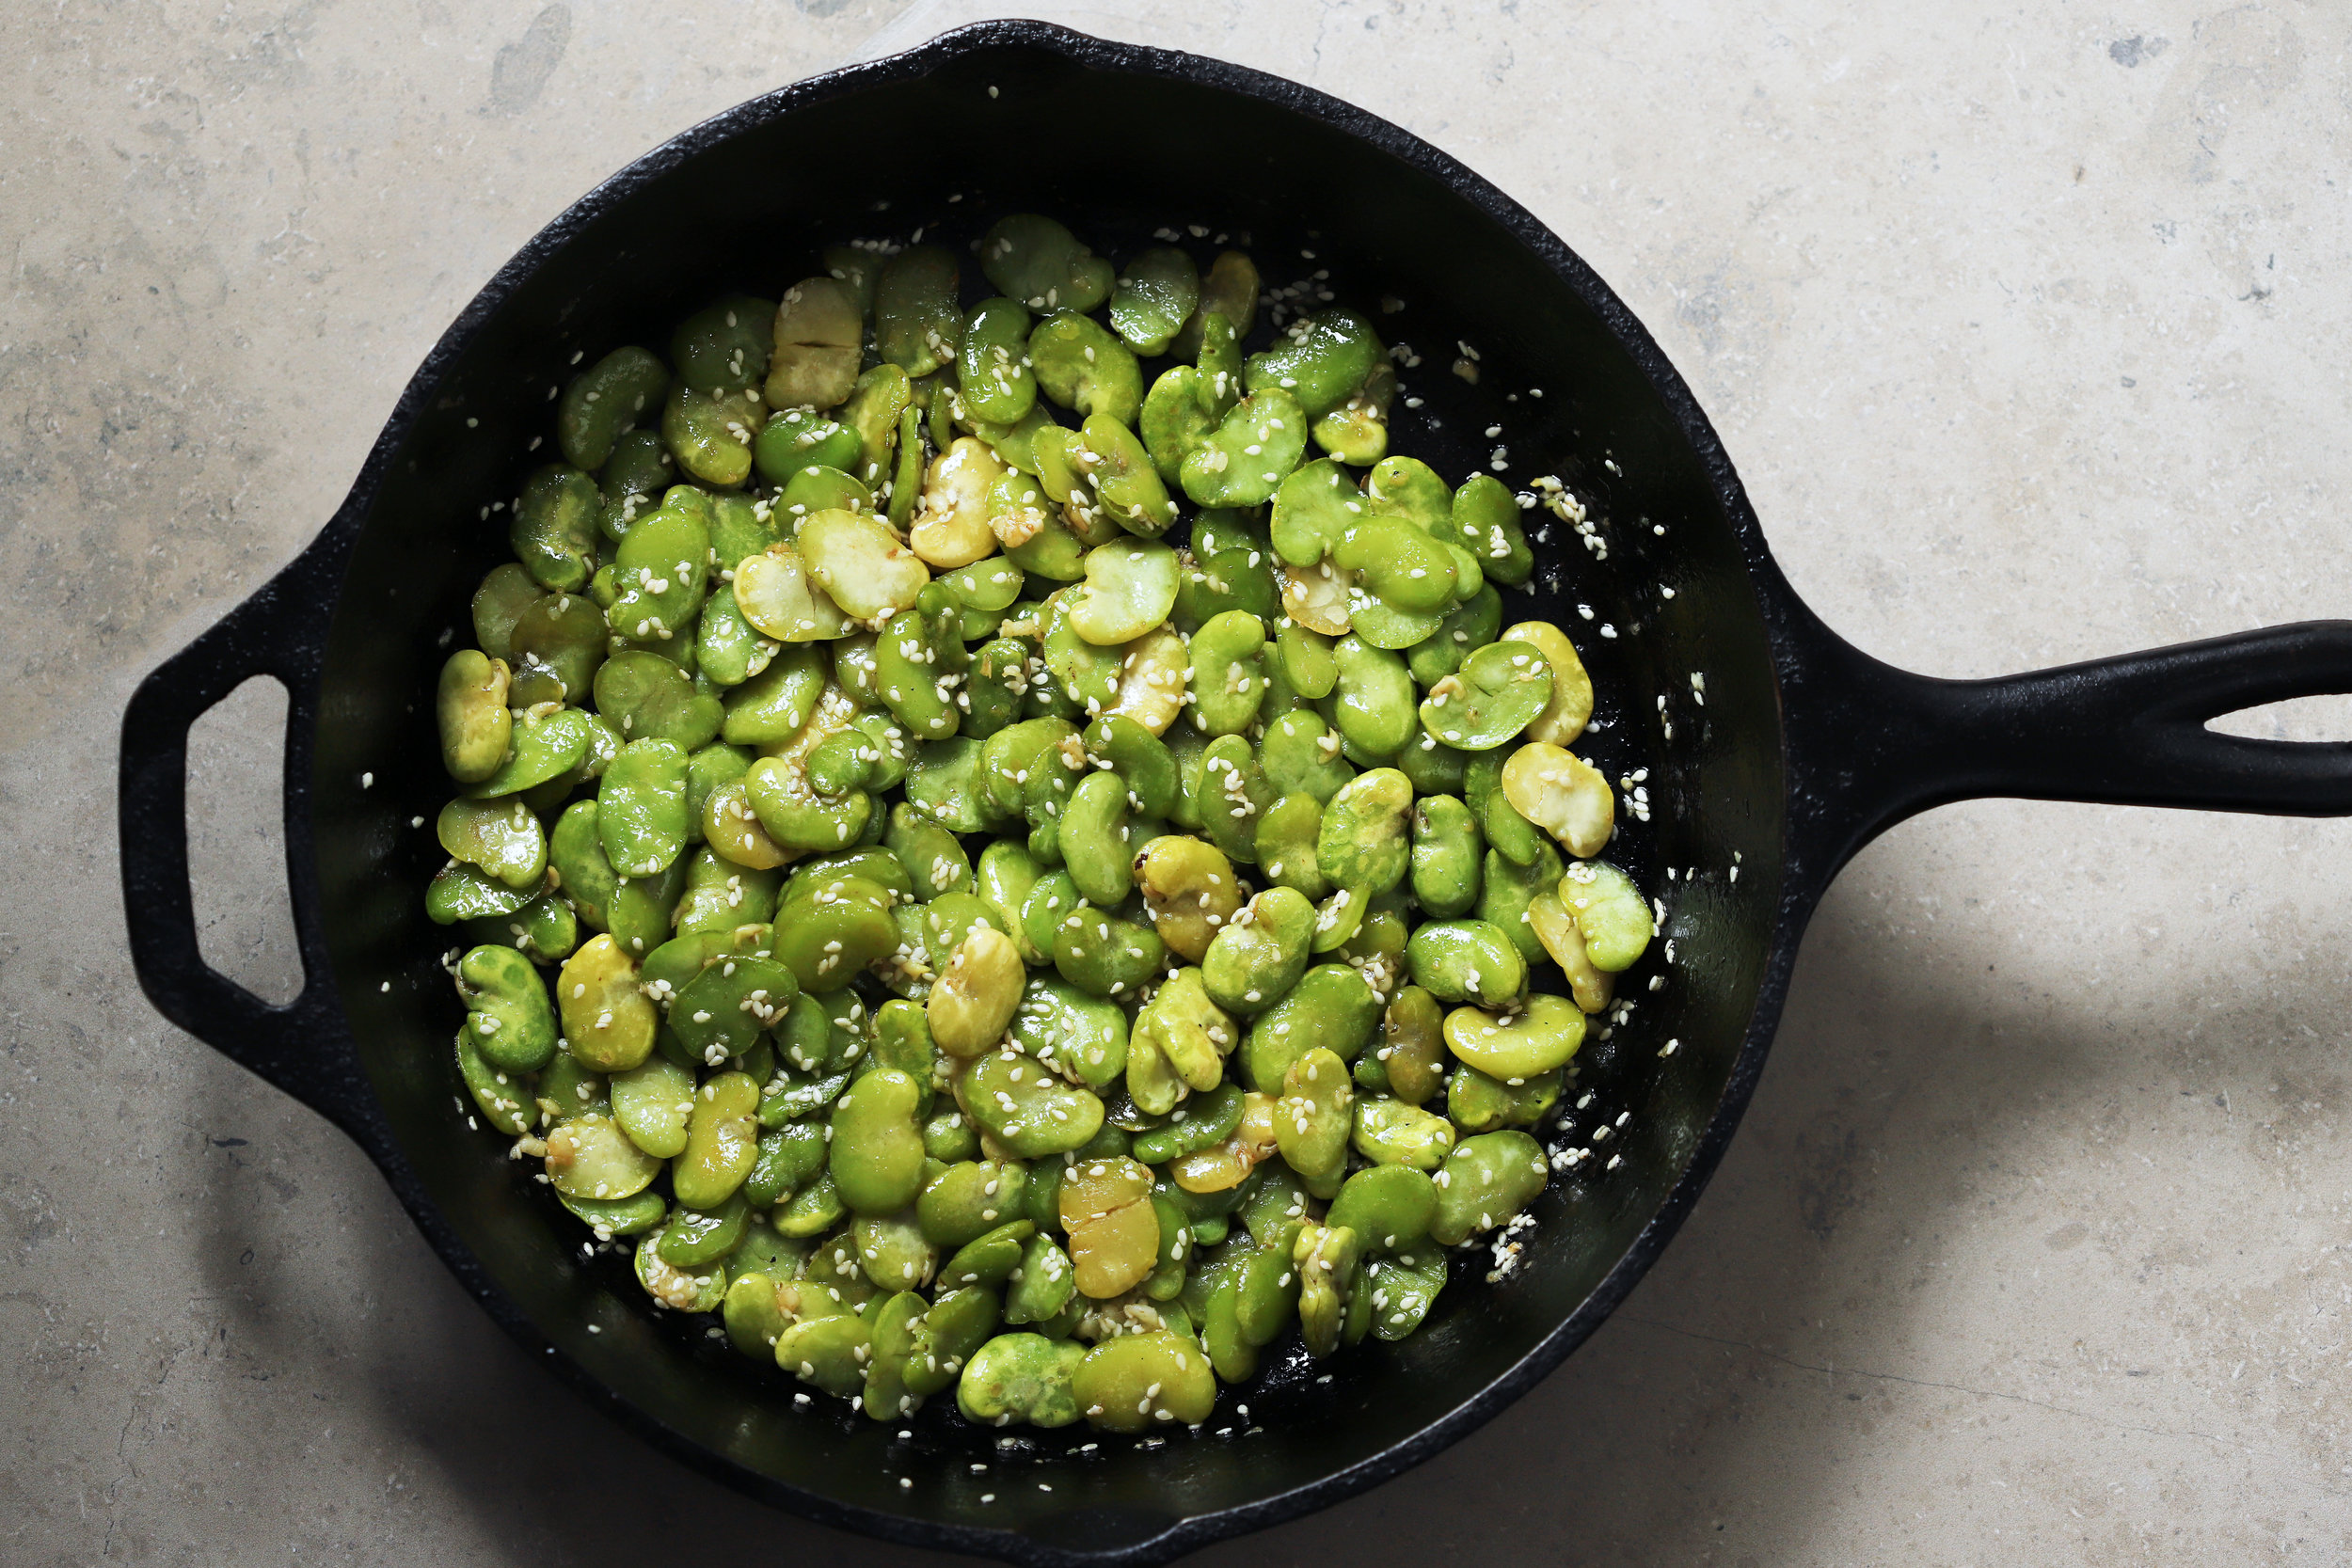
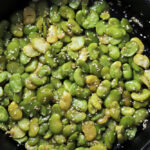
Yes fava beans take a little extra prep. But the good news is that they don’t need much else. While some purists might claim that they’re at their best right out of the blanching pot, I think they need like 2 additional minutes to impart some fat and flavor. This lets their flavors really sing.
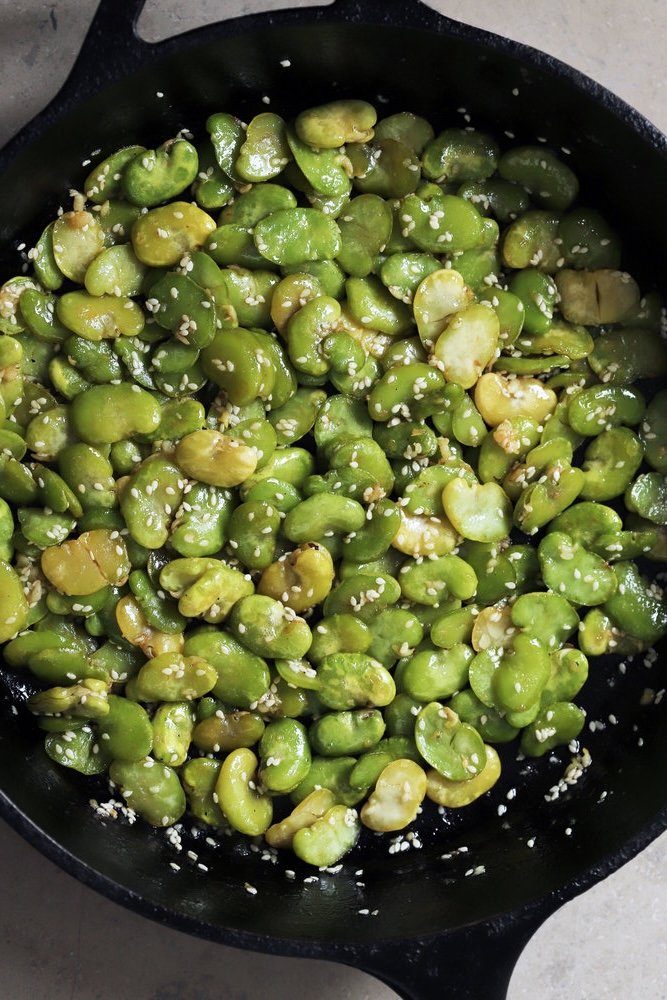
In the recipe below, you’ll sauté the peeled beans in a generous amount of butter, then finish with a touch of garlic, sesame (optional), and lemon juice. That’s it. It’s barely more effort than eating them plan, but the result is rich, bright, and totally worth the shelling time.
Allergy warning: Some people have a genetic enzyme deficiency, which can make it dangerous to eat favas. Read a little about favism to make an informed decision about whether to try them, and be sure to inform your guests too. If you’re looking for a good substitute for this recipe, try cooking about 2 cups of shelled, fresh soy beans this way.
Printfresh fava beans with butter and garlic

- Prep Time: 20 minutes
- Total Time: 30 minutes
- Yield: 4 servings
Ingredients
- 1 3/4 to 2 pounds fresh fava beans (in their shells)
- 4 tablespoons butter (see note below)
- 1/4 teaspoon salt (or more to taste)
- 1 to 2 cloves garlic, crushed with a garlic press
- 2 teaspoons to 1 tablespoon lemon juice (to taste)
- 1 tablespoon sesame seeds (optional)
Instructions
- Bring a large stockpot of water to a boil over high heat.
- While you wait on the water, peel the outer shells from the fava beans. Here’s the easiest way to do this: using your thumb and the side of your index finger, pinch one end flat and feel for the hollow part right above one of the beans, then snap it back so half of the tip is severed, and then roll half of the bean back over your index finger, while peeling the other half away with your other hand (see the above GIF and photo). Pop out the pods and discard the shell.
- Once the water is boiling, add the shelled fava beans and boil for 45 seconds. While they’re boiling, fill a bowl with ice water.
- Strain the fava beans in the sink, and then immediately shock them in the ice water for about 3 minutes. To finish prepping the beans, peel the membranes. The easiest way is to carefully use a paring knife and your thumb to peel away a patch of film, and then pop the bean out (see the above GIF). Some of them might come out split in half, which is totally fine. this takes about 5 seconds/bean–a little longer than the shells, but also not too bad. Make sure they’re nice and dry before proceeding.
- Melt the butter over medium-high heat. Let it bubble for about a minute after it melts (careful not to let it brown or smoke), and then add the prepped favas and salt. Cook stirring every 30 seconds for about 5 to 6 minutes, until the beans are a little creamy on the inside, and no longer mealy. Lower the heat if the butter begins to brown. In the last minute of cooking, add the garlic. *
- Add the sesame seeds and lemon juice, toss together, and serve.
Notes
* If you don’t want all that butter to end up in the final dish: after letting the garlic sizzle for a few minutes, you can carefully pour off the remaining butter, or use a paper towel to sop some of it up. You must do this while the beans are still sizzling in the butter, and before you add the sesame seeds and lemon juice. Doing it this way, you can get rid of 1 to 2 tablespoons of butter. (If you’re wondering, I like to leave all 4 tablespoons.)
Do you use salted or unsalted butter?
You can use either! Just be sure to season to taste.
i’ve been cheating with frozen fava beans usually, but this makes me want to sit down and peel ’em with a podcast playing in the background! will definitely try your peeling method (awesome GIF btw)
It’s sooo therapeutic! I totally listened to a bunch of podcasts while peeling the favas to develop this recipe. (But as you know, frozen works fabulously too). Hope you enjoy! 🙂
This recipe is so good and an easy side dish. I really appreciate the step by step method laid out-just like all of the recipes! So helpful.
Yay I’m so glad!! 😀