I truly believe that if you don’t like raisins, you probably don’t know the secret that every Middle Eastern cook knows: You’ve got to caramelize those babies! I learned this technique from my grandmother’s rice with vermicelli recipe, and it’s the key to the best plate of rice you’ll ever have.
If you love raisins (or if you plan to omit them no matter what I say 😉), feel free to skip ahead, or read on if you wanna talk about it!
Table of contents
Why caramelizing raisins is delicious (and easy!)
What’s so great about this recipe
Important recipe notes
✨The recipe✨
Why caramelizing raisins is delicious
If you hate raisins, I’m sure you’re skeptical. You’ve heard it all before:
“You should try soaking them!”
(Ew, no thank you—that just makes them squelchy, not good.)
“Well then, you should try rehydrating them in apple juice!”
(No, because the problem isn’t that they are not sweet. It’s that they are gross.)
The thing is, I get it. I do not like raisins in most contexts. But caramelizing them changes absolutely everything. It takes them from stale little Milk Duds to the most amazing salted caramels.
And all you’ve got to do is fry them in some oil or butter for a minute or two. It’s as easy as that, but it completely changes their texture. They go from stale to soft and chewy. And definitely not squelchy!
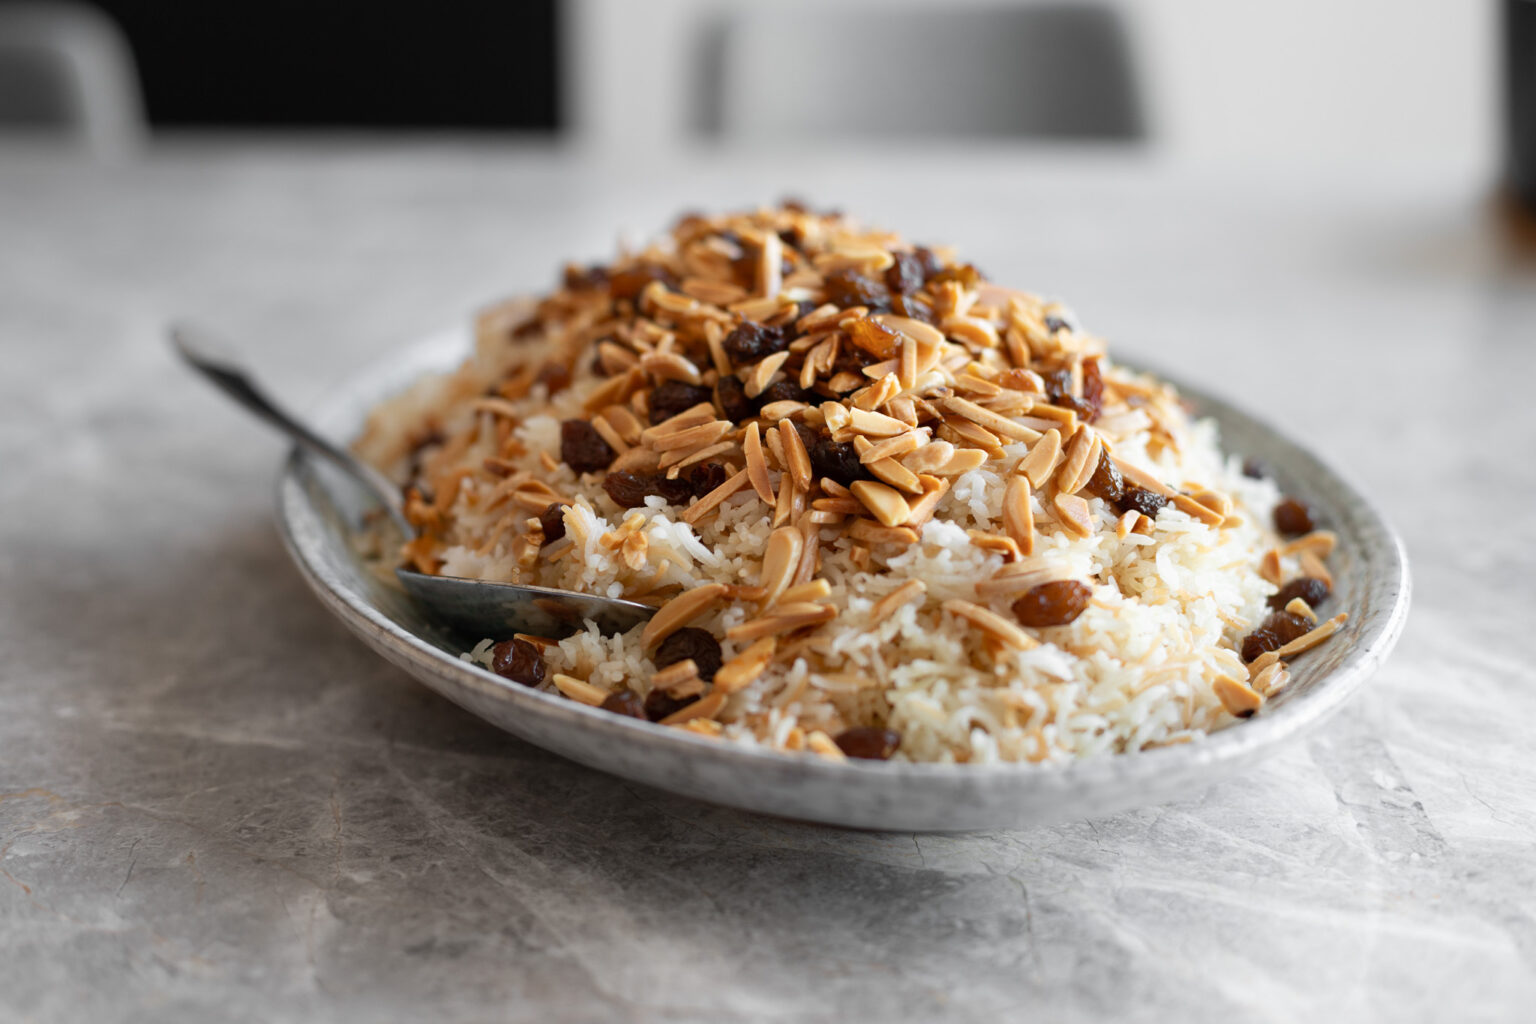
What’s so great about this rice with vermicelli
- One pot: This is a new-and-improved, streamlined version of an old recipe I posted way back when I first started blogging. It’s based on the way my Assyrian grandmother makes rice with vermicelli, but I’ve tinkered with it so it uses way fewer dishes.
- Olive oil: This recipe is traditionally made with either olive oil or butter, but lately I’ve been using olive oil, which has a funny way of tasting even butterier than butter itself. And for anyone who is vegan or trying to add more monounsaturated fats into their diet, this recipe is a great option. Alternatively, you can absolutely substitute butter in place of the olive oil (use an equal amount everywhere except at the “make the rice” step—there, you should add 2 Tbsp butter to the rice instead of 1 Tbsp olive oil).
- Substitutions: There are a lot of possible options for the vermicelli itself, so don’t sweat it if you can’t find any. There are even notes at the end of the recipe for a gluten free substitution.
Important notes
If you follow the recipe, you should be all good, but here are some things to keep in mind:
- No peeking! You might be tempted to lift the lid while it’s resting, but resist that urge! It’s okay to peek in once or twice (just a tiny little crack) while it’s simmering. But after that point, it needs to stay sealed so the steam can work its magic. And peeking too much while it cooks can let too much water evaporate.
- No stirring! If you follow the no peeking rule, you won’t be tempted to stir it, but it’s so important, I gave it its own bullet point. This “absorption” rice method depends on not stirring it once you put that lid on. The rice forms a beautiful structure as it simmers with lots of room for steam to get around. If you stir it, you’ll smush everything together and the steam won’t be able to circulate evenly. Your rice will turn out mushy, mealy, and broken. Just let it do its thing, and it’ll turn out great.
- Mise en place: Things move pretty quickly, and you don’t want to leave your nuts, raisins, or vermicelli unattended while they’re toasting. So make sure you have everything you need handy at the stove. The recipe should set you up for success, but here’s a list of everything you should have at the stove when you get started:
- paper towel lined plate + more paper towels
- your rinsed rice
- slotted spoon
- olive oil
- almonds, raisins, vermicelli (+ measuring tools, or measure them ahead)
rice with vermicelli

- Active time: 10 minutes
- Total Time: 30 minutes
- Yield: 8 servings
Ingredients
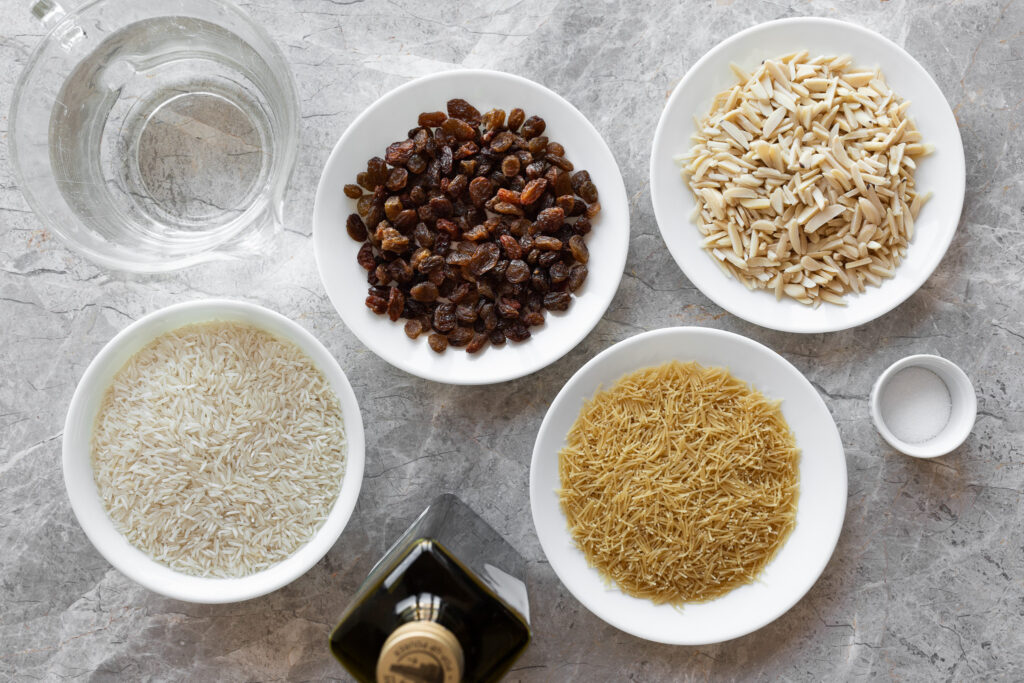
- 2 cups [400 g] long grain rice (e.g., basmati)
- Extra virgin olive oil
- 1 cup [120 g] slivered almonds
- ¾ cup [110 g] golden raisins or sultanas*
- 1 cup [80 g] broken wheat vermicelli**
- 3 cups [705 g] cold water
- 1½ tsp salt
Instructions
- Line a plate with paper towels. Use a fine mesh colander to rinse the rice under cold water. Set both near the stove.
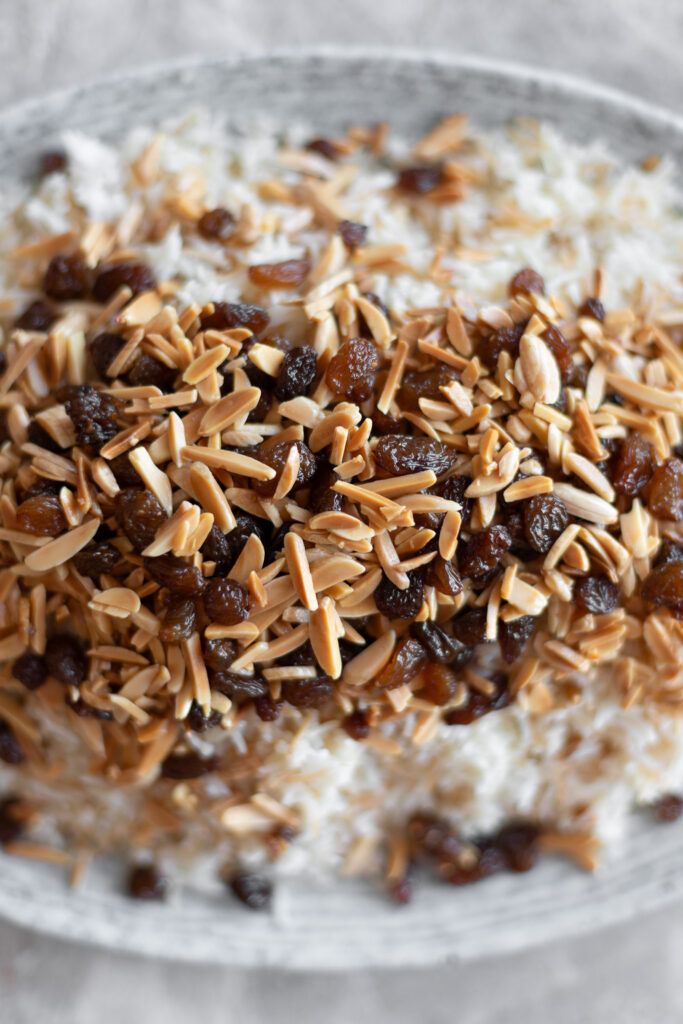
- Toast the almonds: Add 2 Tbsp olive oil and the almonds to a large saucepan or small stockpot. Place over medium low heat and stir constantly until they become golden brown, about 5 to 7 minutes. Turn the heat off and remove with a slotted spoon to the paper-towel-lined plate.
- Toast the raisins: Add the raisins to the remaining olive oil and place back over low heat. Stir for about 1 to 2 minutes until they puff up a little and caramelize slightly. Turn the heat off again and remove with a slotted spoon to the plate with the almonds.
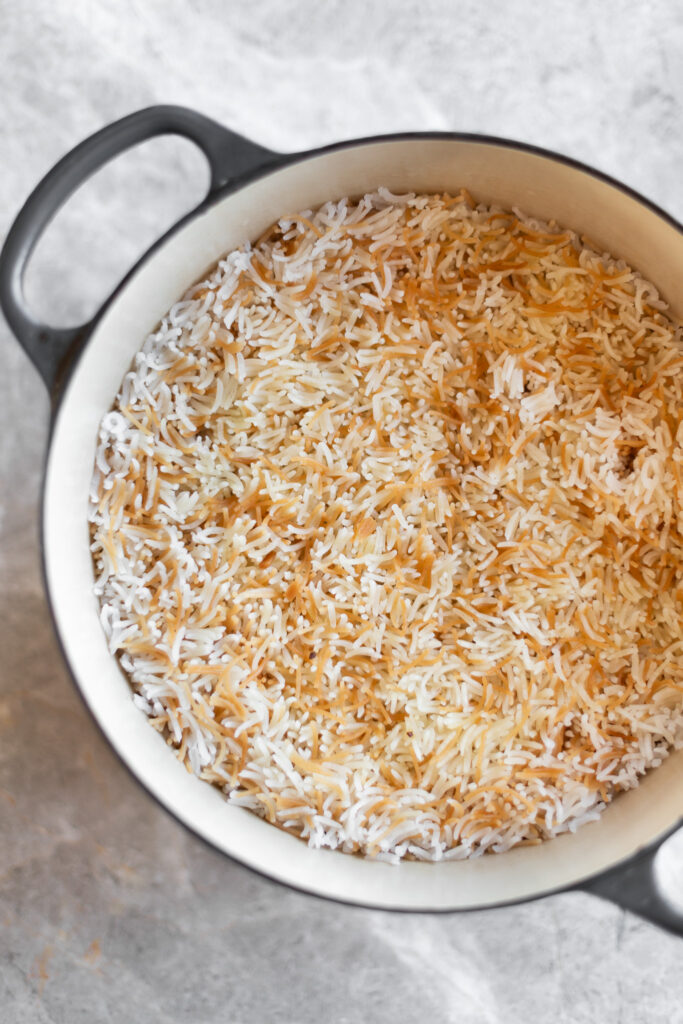
- Toast the vermicelli: Discard any remaining spent oil and give the pot a quick wipe with a paper towel. Add the vermicelli and another 2 Tbsp oil to the pot, place over medium low heat, and stir constantly until it turns light brown, about 3 minutes.
- Remove the toasted vermicelli from heat and immediately stir in the rinsed rice (this cools the vermicelli down so it doesn’t over-toast). Stir in the water.
- Make the rice: Place the pot of vermicelli, rice, and water over high heat. Add the salt and another 1 Tbsp extra virgin olive oil. Once it comes to a boil, cover, reduce heat to low, and cook for 15 minutes. Keep covered the whole time.
- Rest the rice: Once 15 minutes are up, remove from heat but do not uncover (do not even peek). The residual heat is going to keep cooking the rice for a couple more minutes as it rests and cools. Let it rest for at least 5 minutes, up to 30.
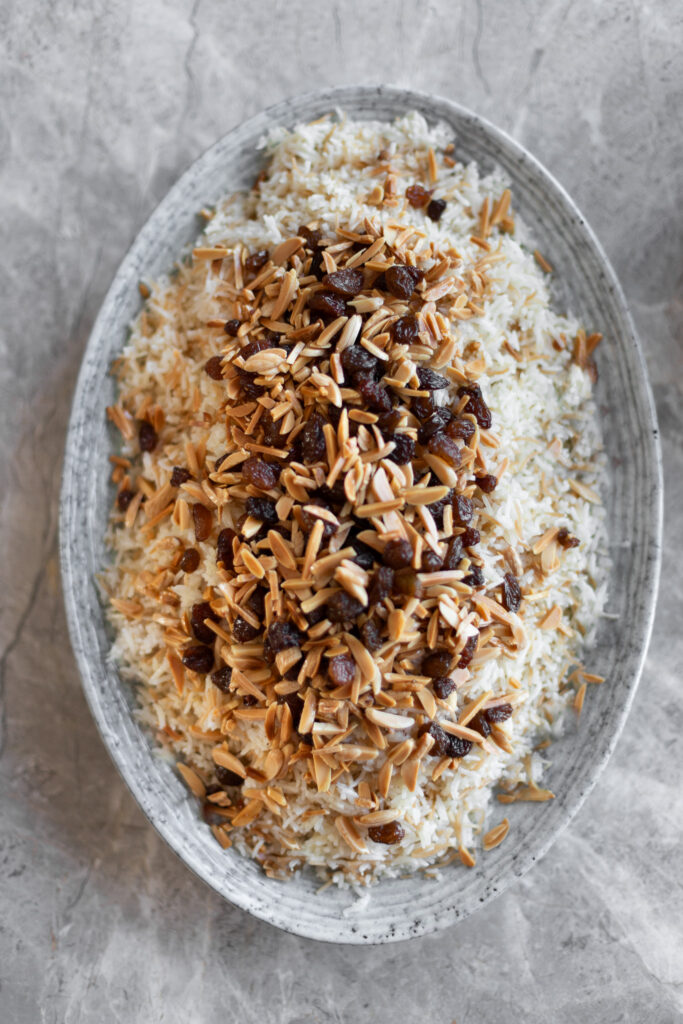
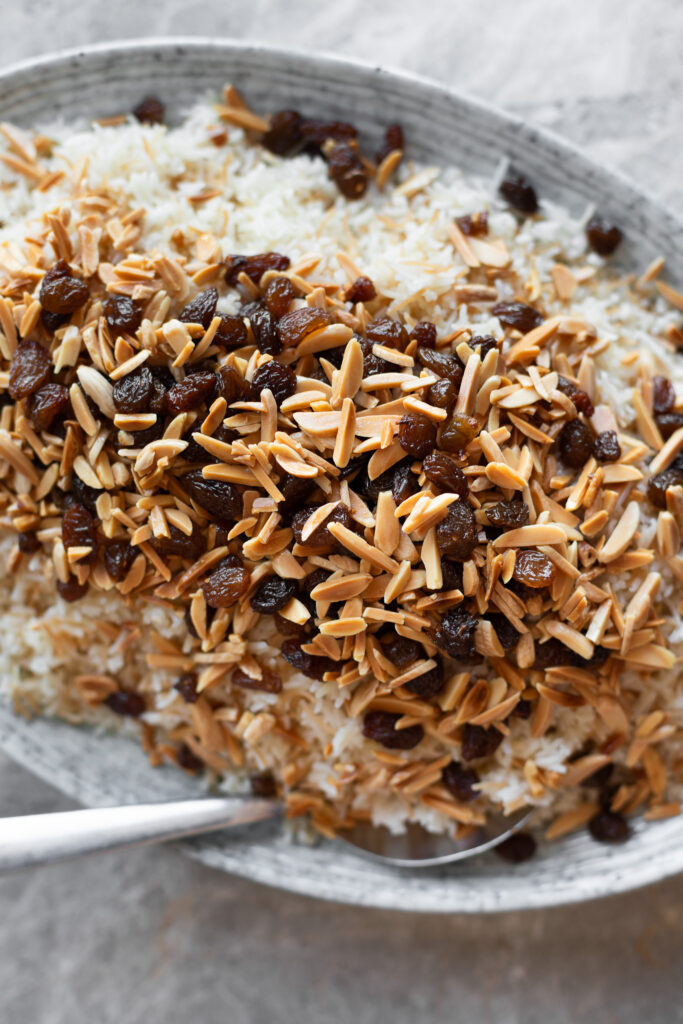
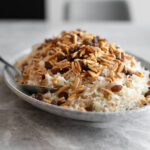
- Once it’s rested, fluff the rice with a fork. Spoon onto a serving dish and cover with the almonds and raisins.
Notes
* I swear these raisins are not like other raisins (sorry I know that makes them sound like pick-me raisins). But you can leave them out if you really hate raisins. I explain at the top of the blog post, so feel free to give it a read if you’re curious. Or leave them out if you need to—you do you!
** You can buy pre-broken vermicelli in Middle Eastern markets and sometimes the international aisle of the supermarket (sh’arieh in Arabic, tel şehriye in Turkish).
If you can’t find that, buy vermicelli egg noodles and crush them up with your hands. If you go the vermicelli egg noodle route, they should be wheat-based (not rice-based), usually made with semolina. If you’re crushing up your own noodles, make sure they’re crushed very compactly (particularly if you’re not measuring with weight). If they’re loosely packed and not well-crushed, 1 cup won’t be enough, which will mean there will be too much water, which will result in soggy rice. Or use a scale and don’t even sweat it.
To make this recipe gluten free, you can even use crushed up gluten free angel hair/capellini, or even gluten free spaghetti.
I’ve even used regular old broken-up spaghetti in a pinch when I didn’t have any vermicelli around. It’s not exactly the same but totally works if you can’t find vermicelli anywhere.