
This carrot loaf cake bakes up moist and not-too-sweet. A generous swoop of cream cheese and honey frosting brings it all together, and the batter comes together in a flash. Stick with the classic version, or fold in optional extras like pistachios, cardamom, or raisins—whatever suits you.
However you make it, the result is delicious and perfect for sharing. Jump to the recipe to start baking, or read on for my tips for success.
Tips for a successful carrot loaf cake:
Have fun decorating it
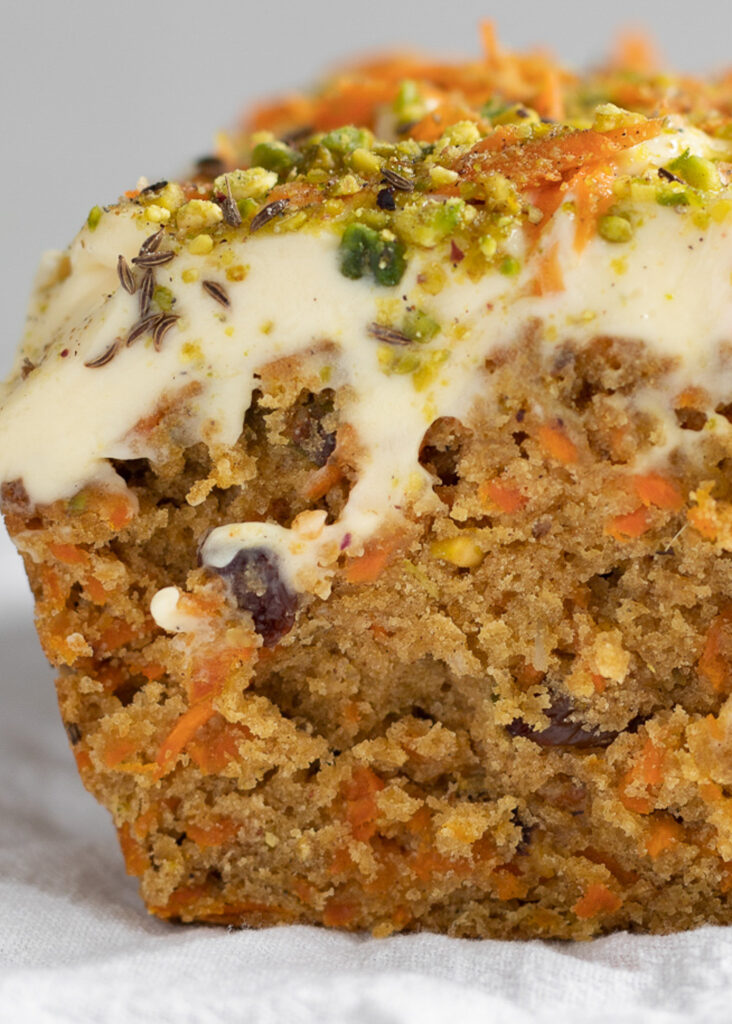
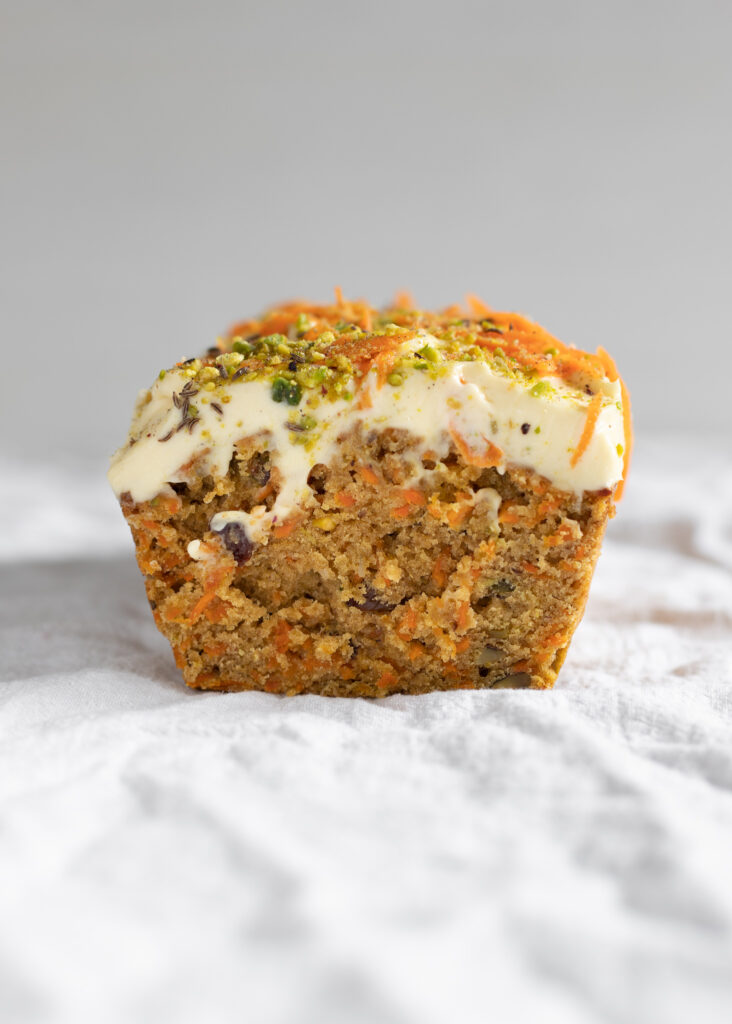
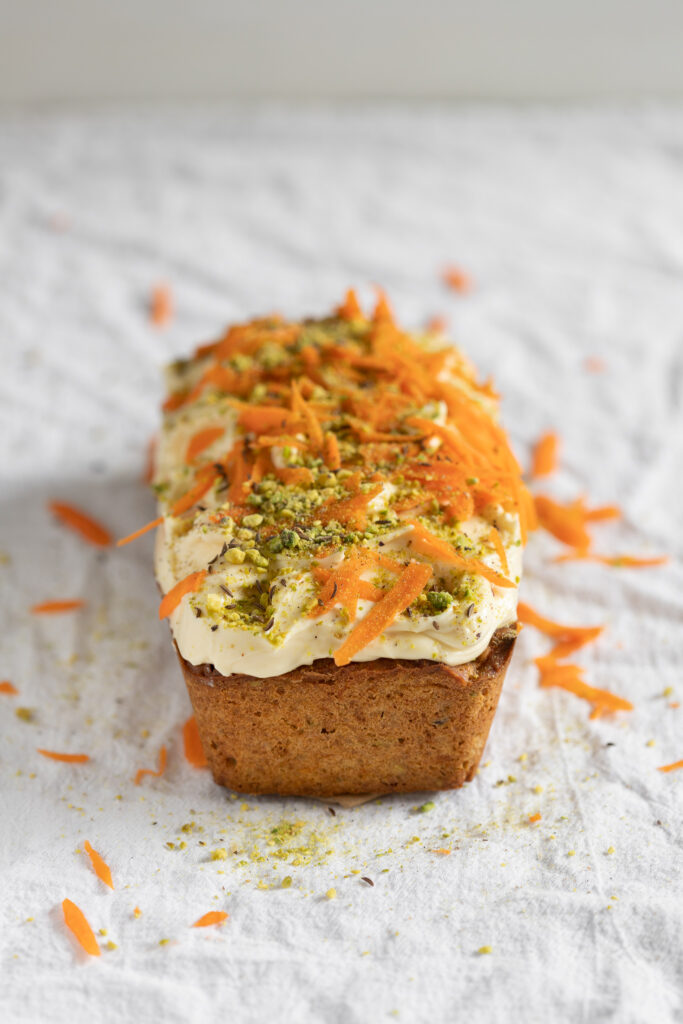
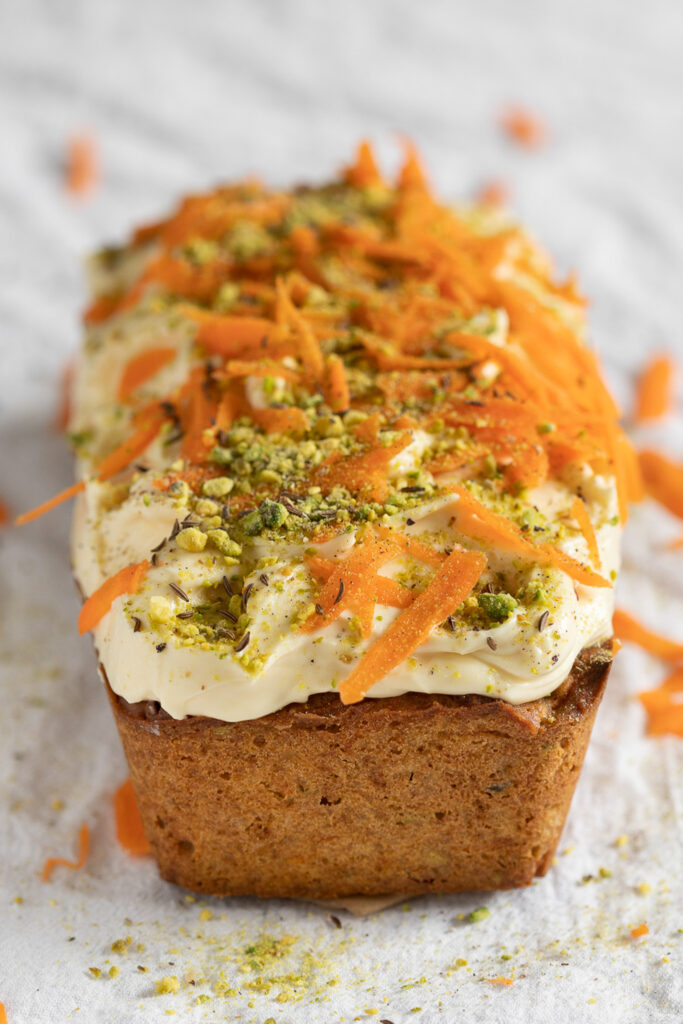
A carrot loaf cake is a rustic affair, but that doesn’t mean you can’t decorate it! If you’re feeling fancy, a few carrot rosettes are lovely, but I usually go for a simple sprinkle of freshly grated carrot. Just grate a bit extra while prepping the batter ingredients, and set it aside for later. A handful of chopped pistachios or a dusting of spices also adds a nice touch. However you choose to decorate, just be sure to let the loaf cool completely before adding any frosting.
Do not over-mix the batter
Once the wet ingredients and the dry ingredients come together, do not over-mix. This is the key to any good cake, whether it’s this carrot cake or a Persian love cake. If you over-mix, the gluten will develop and give the cake a tough, dry texture.
Choose your own flavor adventure
There are no fewer than four optional ingredients in the following recipe, and that’s entirely on purpose. Flavor is personal! I personally always include all four (pistachios, caraway seeds, cardamom, and raisins) because they add a bit of extra sparkle and depth. But if you’re more of a classic carrot loaf cake kind of person, feel free to skip them.
Slice and store in the freezer for maximum shelf life
While developing this recipe (+4 other loaf cakes!) for my cookbook, our freezer was jam-packed with slices of loaf cakes. They really do keep better and longer in the freezer—the fridge will dry them out and make them stale more quickly. To thaw, just leave a slice at room temperature for a couple hours.
Carrot Loaf Cake


Ingredients
For the cake:
- 2 cups [230 g] grated carrots, plus more for topping
- ½ cup [105 g] neutral oil, such as canola
- 2 large eggs
- ⅓ cup [65 g] granulated sugar
- ⅓ cup [65 g] brown sugar
- 1½ cups [195 g] all-purpose flour
- 1 tsp ground cinnamon
- ¾ tsp ground caraway (optional), plus more for topping
- ¾ tsp salt
- ½ tsp ground cardamom (optional*), plus more for topping
- ½ tsp baking powder
- ¼ tsp baking soda
- ½ cup [60 g] chopped pistachios (optional), plus more for topping
- ¼ cup [40 g] raisins (optional)
For the cream cheese frosting:
- 8 oz [225 g] cream cheese, at room temperature
- ¼ cup [85 g] honey
Instructions
Butter an 8 by 4 in [20 by 10 cm] loaf pan, line it with a parchment sling,** and preheat the oven to 350°F [180°C].
To make the cake:
- In a medium mixing bowl, whisk together the carrots, oil, eggs, granulated sugar, and brown sugar until completely incorporated.
- In another medium mixing bowl, sift together the flour, cinnamon, caraway, salt, cardamom, baking powder, and baking soda.
- Pour the wet ingredients over the dry ingredients and fold together until there are only a couple of remaining dry flour streaks. Add the pistachios and raisins (optional) and gently fold to combine. Do not over-mix.
- Scoop the batter into the loaf pan and bake for about 50 minutes, until a toothpick inserted into the center comes out clean. Remove from the pan and cool on a rack for at least 45 minutes before icing or serving.
To make the frosting:
- While the cake cools, place the cream cheese in the bowl of a stand mixer and beat for about 1 minute. Drizzle in the honey with the mixer running and continue to beat for 1 minute more, until light and fluffy.
- Once the loaf has cooled, dollop the frosting on top and make swooshes with an offset spatula or knife. Decorate with pistachios, shredded carrots, caraway (optional), and cardamom (optional).
Notes
* If you skip the cardamom, you can add more cinnamon or even a small pinch of ginger, allspice, and/or nutmeg.
** To make a parchment sling, cut a piece of parchment paper to about 7½ by 10 in [19 by 25 cm]. Place the parchment sheet over the pan; the sheet’s length should go in the opposite direction of the pan’s length. Press the parchment paper into the pan so that it just covers the pan’s bottom and long sides. Fold the flaps so that they drape over the sides (optionally secure them with metal binder clips if they’re unwieldy). Press it into the buttered pan so it sticks really well.
Note on the pan size: This recipe has never overflowed during testing and it should not overflow on you if you use a standard 8×4 inch pan. But if yours does overflow, something has gone wrong with your ingredient ratios, oven temperature, or pan depth. If you’re making this for the first time and worried it might overflow, you can place a baking sheet on the rack one level down from the rack you’re baking on.

Psst… by the way, I wrote a whole cookbook of adaptable recipes like this one. It’s called A Dish for All Seasons!
Check it out for adaptable base recipes + ideas for seasonal (and evergreen!) variations


