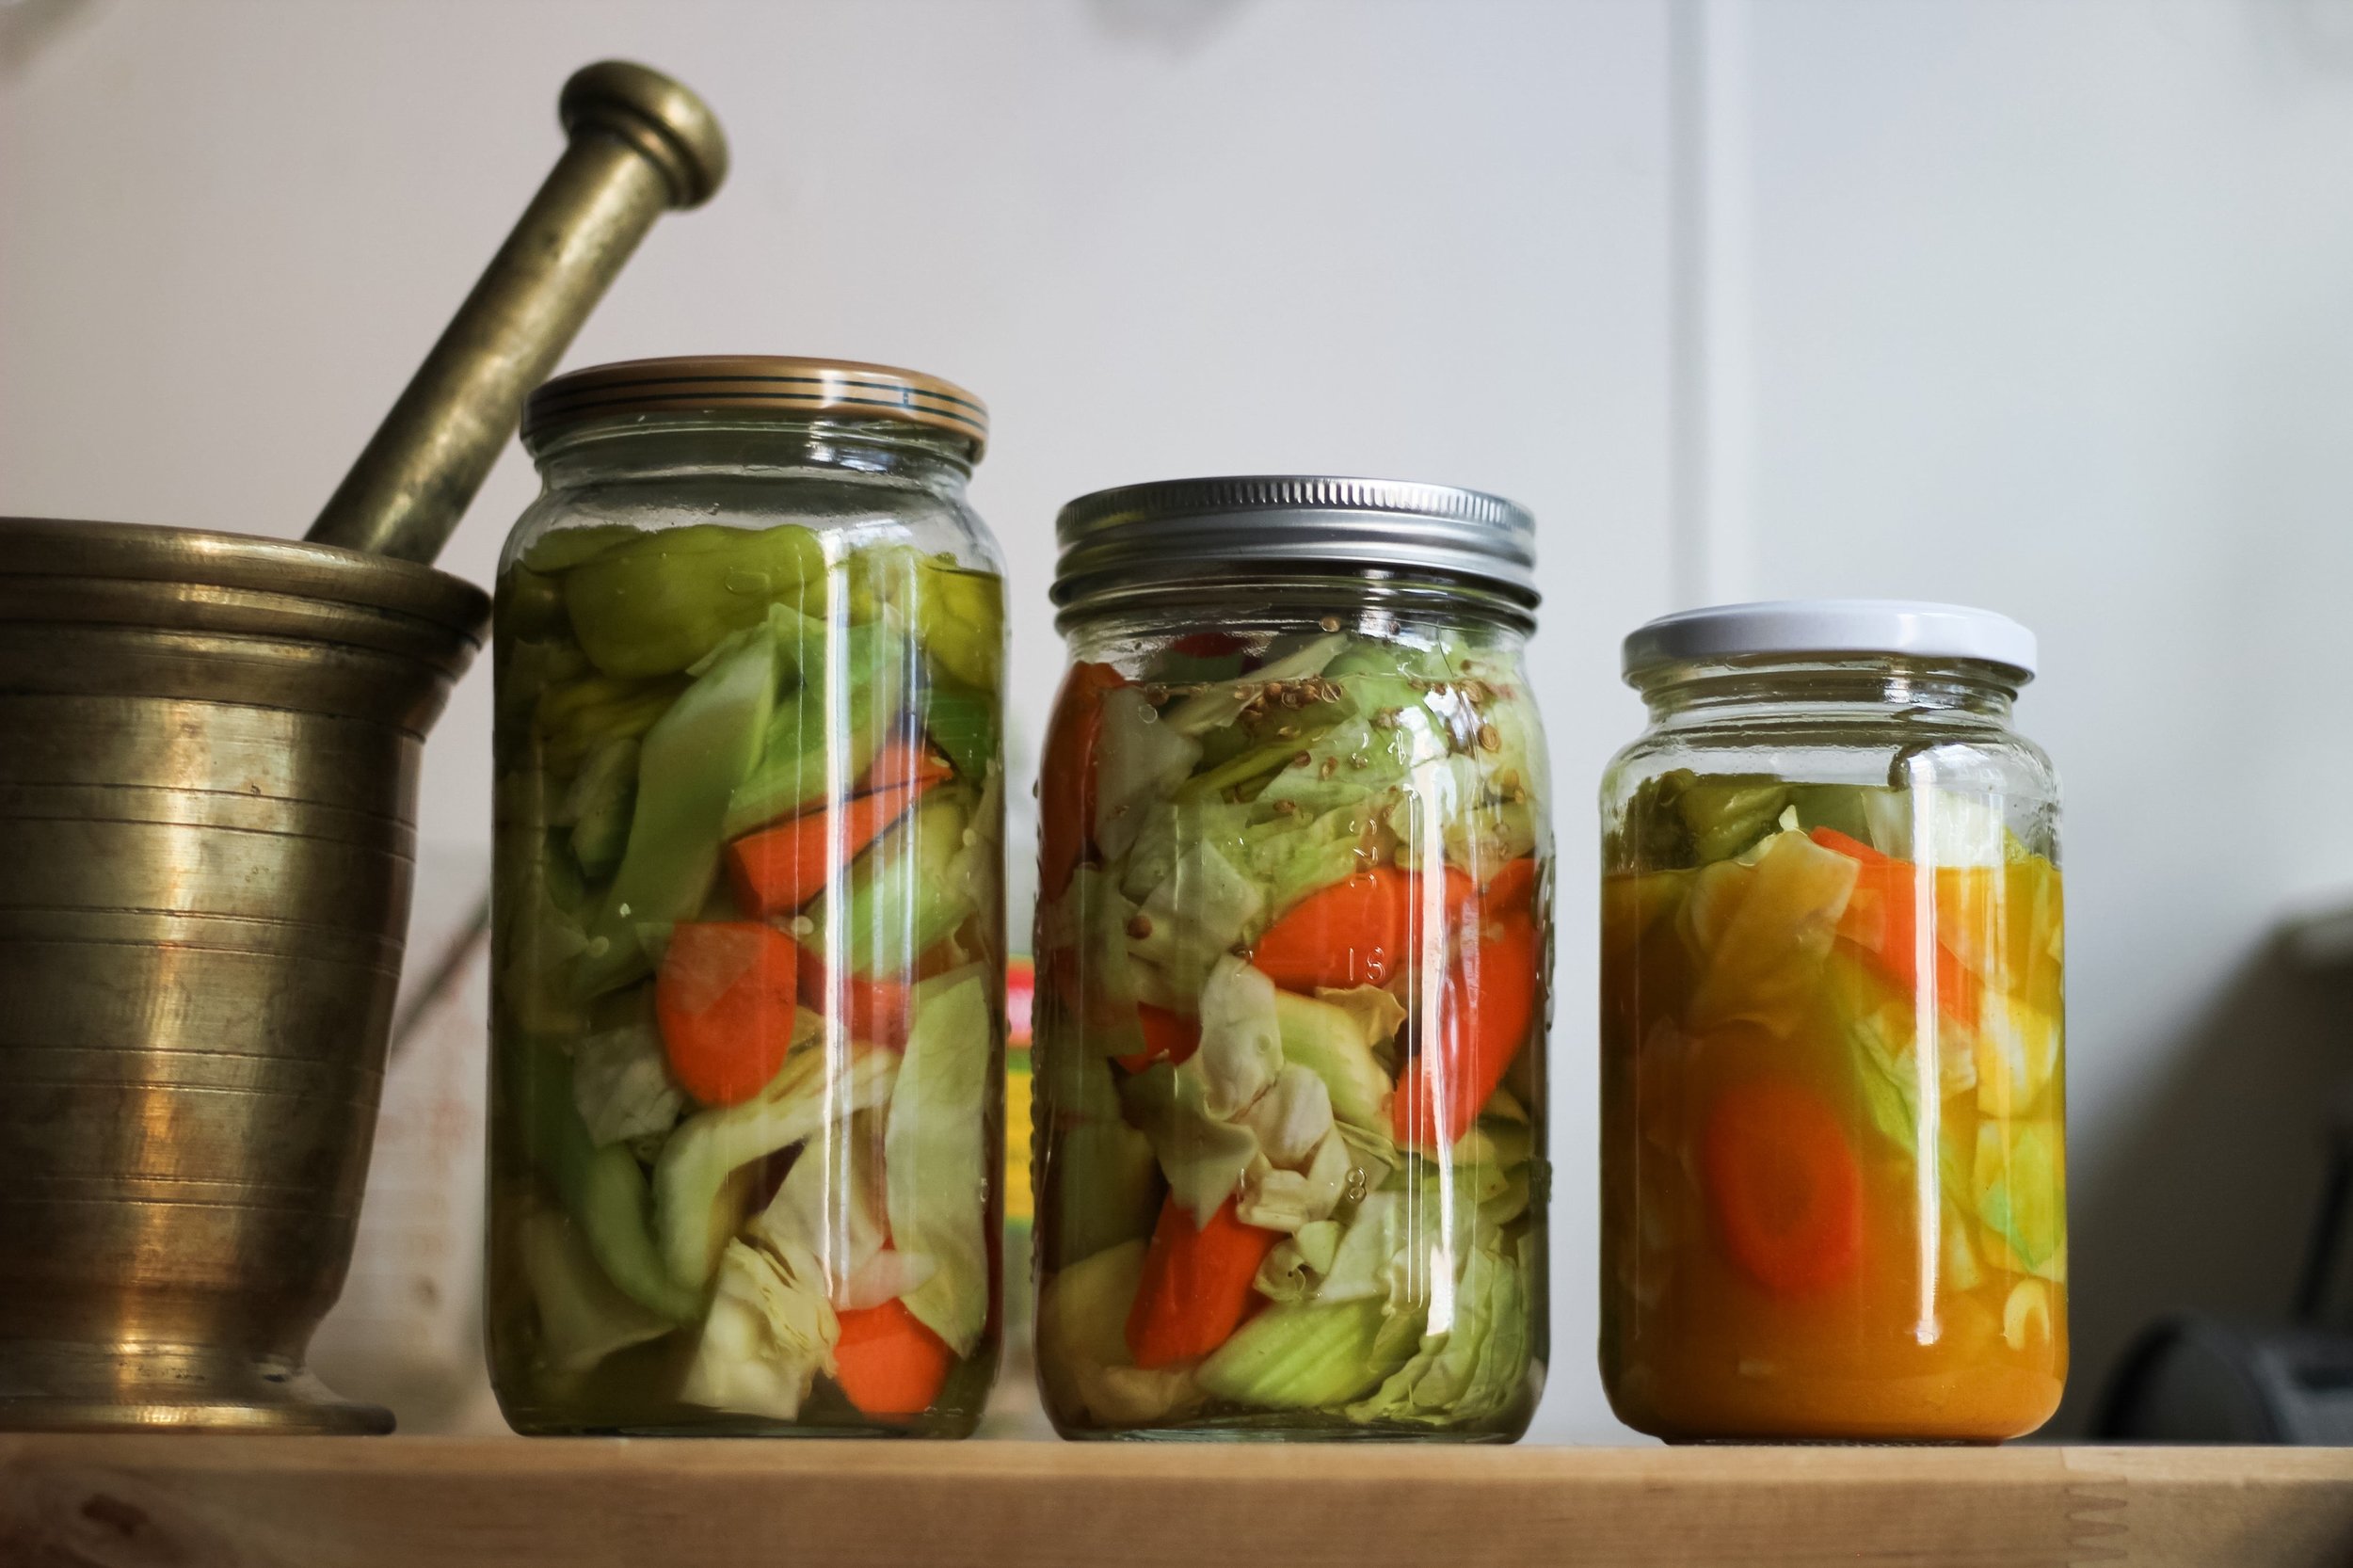
I’ve got a magic trick: put some torshi in a little bowl at your next dinner party, and watch it disappear as you refill it over and over again. These wonderful pickled veggies add the perfect little bit of crunch and acidity to any plate.
There are essentially two ways to make torshi: the traditional fermented way and the easier vinegar brine way.
The easier way: My grandmother shared her easier vinegar brine recipe, which I’m sharing in this post. It’s great for anyone who wants torshi now(ish) without all the fermentation time.
The fermented way: I also developed a fun recipe for a more traditional fermented torshi. The fermented kind normally takes a lot of know-how. The method is passed down from one generation to the next through in-person demonstration and hands-on learning. But if you don’t have an elder relative who’s available to spend hours teaching you the ways of torshi fermentation, I’ve developed this recipe using precise measurements.
Jump to the two recipes if you want to get right to it, or read on to learn a little bit more about both methods.


The easier vinegar brine version
Vinegar brine pickles are easier than fermented pickles simply because they don’t need to create their own acidity. An acidic environment is what pickles need to stay preserved for long periods of time. And if you don’t feel like creating your own acidity through the slow process of fermentation, vinegar is a great shortcut. But with vinegar brined pickles, they have a shorter shelf life and need to be kept chilled from the moment they’re made.
Traditional, fermented torshi
With fermented torshi, they start out in a salt water solution, which impedes growth of bad microbes and allows for growth of good microbes. And as they ferment, the brine starts to turn from neutral to acidic. That developing acidity plays a similar role to the vinegar in the easy torshi version.
But with a fermentation recipe, it’s important to say a few words on safety:
Different sea salts have different volumes, so if you choose to substitute a coarse or flaky sea salt, use an equal weight [20 g], not an equal volume. The salt allows the torshi to ferment safely, so don’t cut back on it, and try to be as precise as possible. If you’re new to fermentation, I highly recommend using the weight measurements for this recipe.
Above all else, please be safe! This recipe is for informational purposes only. Fermentation involves natural processes that can vary depending on your environment, ingredients, and handling. Always follow proper hygiene and food safety practices. I am not responsible for any illness, injury, or adverse outcomes. When in doubt, consult a food safety expert.

torshi (the easy way & the fun way)


Ingredients
For the easy vinegar brine version:
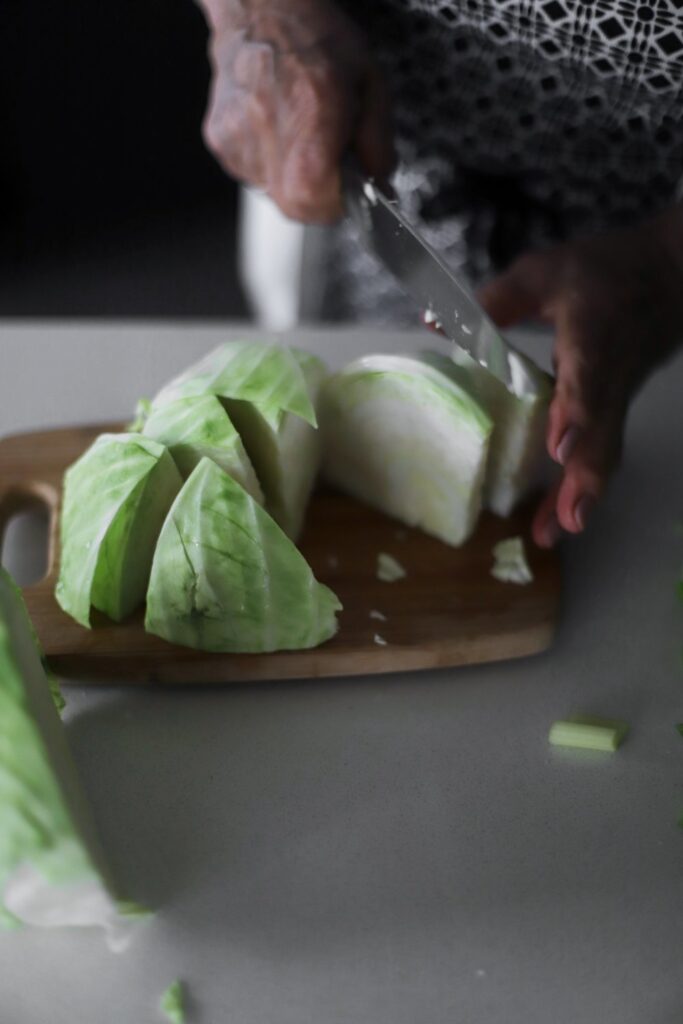
- 1 kg cabbage cut into large pieces (from 1 medium or 2 small heads)
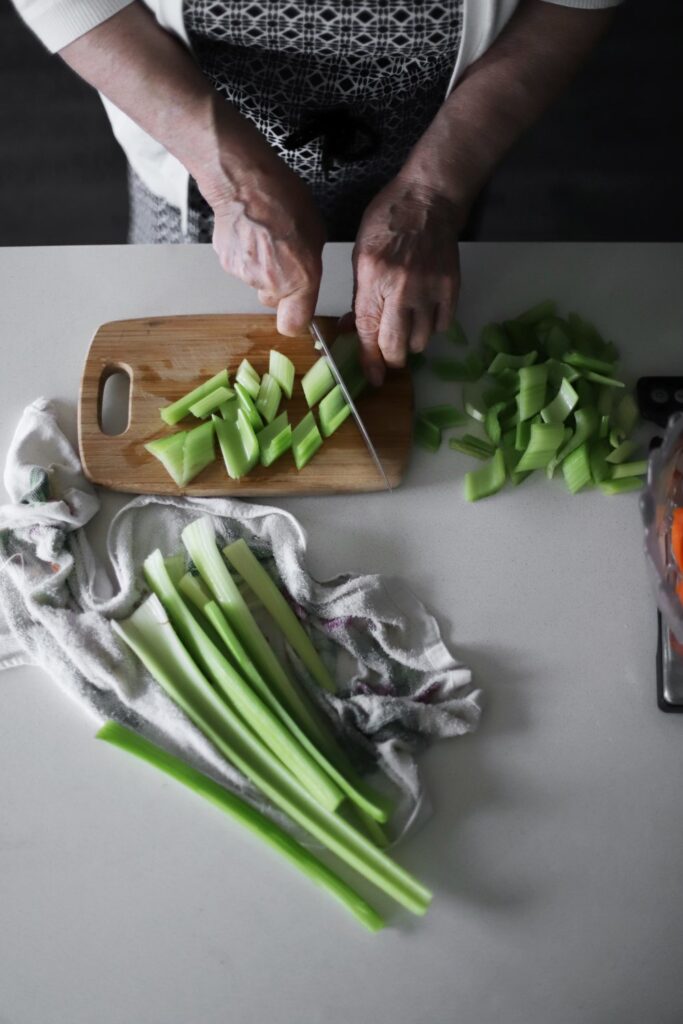
- 450g peeled and sliced celery (from 1 large bunch celery)
- 400g peeled and sliced carrots (from a 1 lb bag)
- 1175g water (5 cups), plus more for boiling
- 70g salt (1/4 cup)
- Your favorite torshi pickling spices (e.g., caraway, coriander seeds, and/ or turmeric), to taste
- 590g apple cider vinegar (2 1/2 cups)
- One 650g container giardiniera peppers (23 oz), brine reserved *
- Five 1-quart mason jars
or
For the traditional fermented version:
- 1½ cups [350 g] filtered water
- 1 Tbsp plus 1 tsp [20 g] fine sea salt
- 2 tsp [4 g] yellow curry powder
- ½ small head cauliflower (6¼ oz [180g])
- 2 carrots, peeled (3½ oz [100 g])
- 1 jalapeño (¾ oz [20 g])
- One 24 oz jar
Instructions
For the easy vinegar brine version:
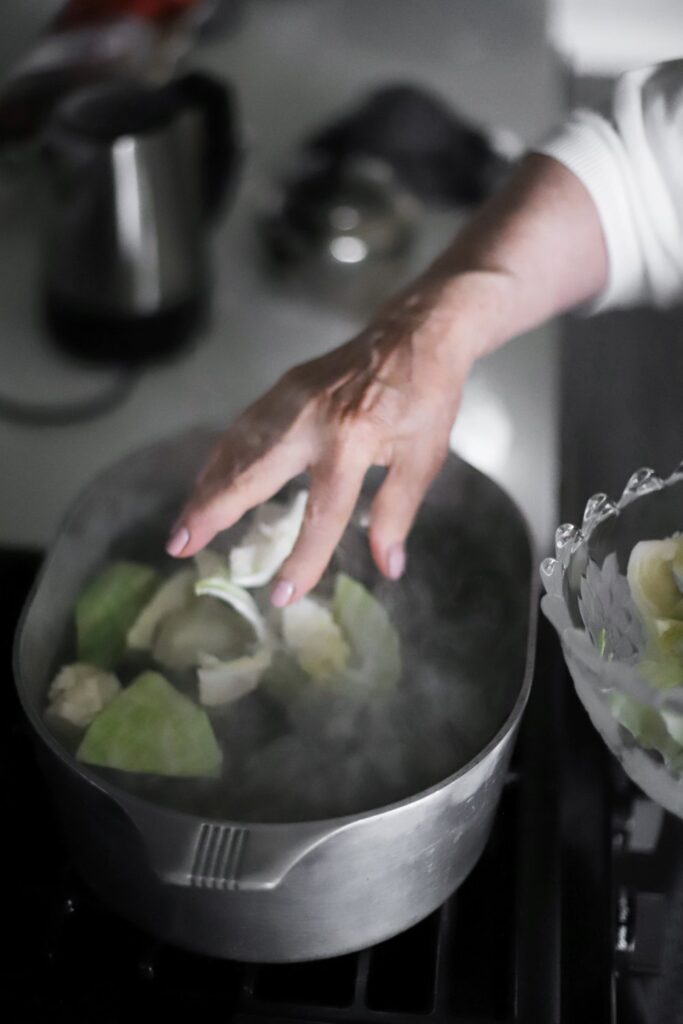
- Bring a large pot of water to a boil. Add the cabbage, and simmer for 6 minutes. Fish the cabbage out with a mesh spider or slotted spoon (don’t dump out the water), place in a colander, and shock under cold water immediately until it’s cooled down. Move to a large mixing bowl.
- Repeat with the celery, simmering them for 3 minutes, then shocking them. Repeat with the carrots, simmering them for 4 minutes, then shocking them.
- Bring the 1175g/5 cups water to a boil. Add the salt and pickling spices (if using), remove from heat, and stir until the salt has dissolved. Add the vinegar and brine from the giardiniera peppers to the salt water.
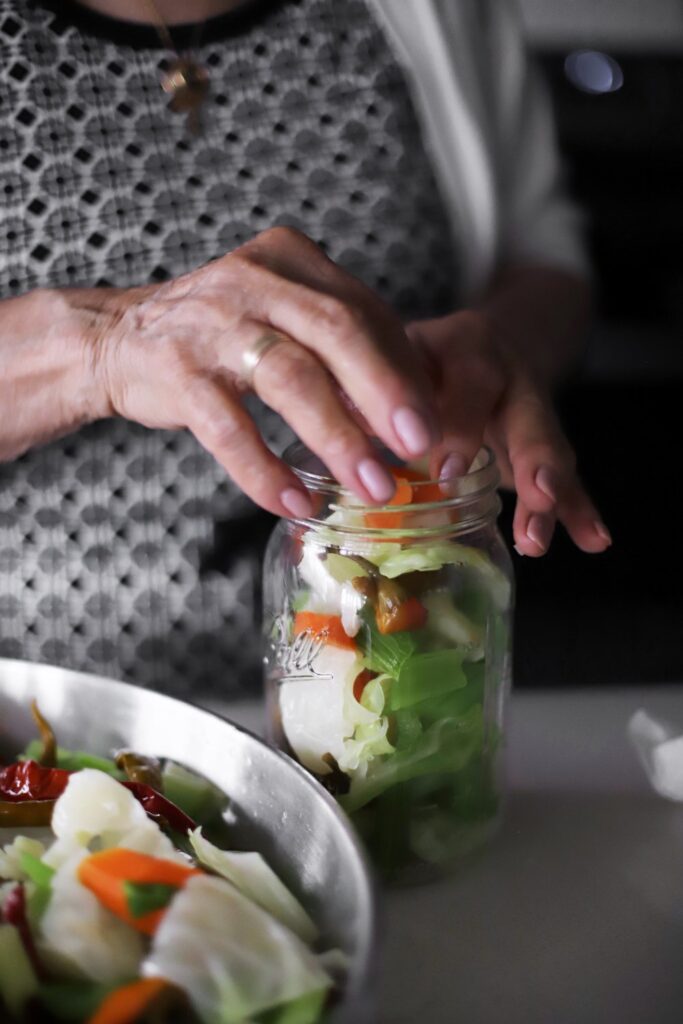
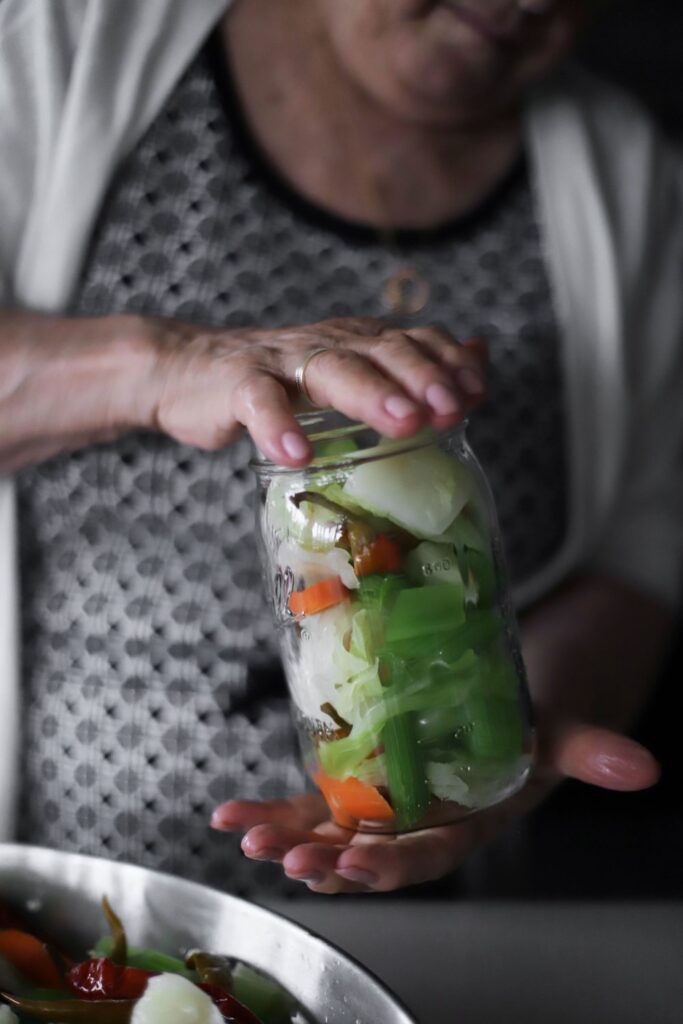
- Mix together the blanched cabbage, celery, carrots, and giardiniera peppers. Stuff the jars with the veggie mix. Shake the jar slightly and nest the ingredients together to help the contents settle. Top each one with the brine, making sure everything is completely submerged (press the veggies down with a spoon if they are not compact enough). Screw shut, and refrigerate. Pickles should last in the refrigerator for at least 2 months, and are best after the first 24 hours (but are still very tasty even after about 2 hours of pickling). Discard them if they start to look or smell off.
For the traditional fermented version:
- Combine the water, sea salt, and curry powder in a clean measuring cup. Stir together until the salt completely dissolves.
- Make sure your vegetables are rinsed well. Cut the cauliflower into small, bite-size florets. Grate the carrots coarsely on a box grater. Very thinly slice the jalapeño.
- Find a very clean 24 oz [710 ml] jar and sprinkle a thin layer of carrots on the bottom. Next, add a layer of cauliflower, followed by more carrots and a few slices of jalapeño. Shake the jar to help the carrots and jalapeños settle into the gaps (add more carrots to fill in the gaps completely). Repeat with another layer of cauliflower, carrots, and jalapeño, finishing with some carrots and jalapeños on top.
- Top the produce with the brine so that everything is completely covered. If any veggies are floating up to the top, weight them down with a tiny ramekin or another food-safe ceramic or plastic object.
- Cover the top with a clean towel or paper towel, secured tightly with a rubber band. Set aside at room temperature (between 70°F and 75°F [21°C and 24°C]) for 4 to 8 days (it will ferment more slowly in a cool kitchen). Do not screw on the lid, or it will explode.
- During the first day or two at room temperature, you should start to notice some bubbles under the surface of the water. Gently jiggle the jar a couple of times a day to help the bubbles rise to the surface and dissipate, and check on it to make sure everything is fully submerged.
- Once the bubbles have died down, transfer the jar to the refrigerator. After 48 hours bubble-free in the fridge, remove the towel and seal it with a lid. They should taste tangy and smell pleasantly funky and fermented but should not smell funky like rotting food. If the pickles smell off to you, discard them or check with a friend who is very experienced with fermenting if you’re unsure. If they develop any visible mold or slime, discard them (mold has roots—do not take the risk). Fermented pickles will last in the refrigerator for a couple of months.
Notes
* Feel free to leave out the hot peppers altogether. You’ll end up with less pickles, but the ratio of brine:veggies will hold constant without the hot peppers.
This is my favorite recipe for tourshi!
I’m so glad you’ve been enjoying it! 😀
Kathryn, I loved reading and viewing your post about Tourshi. I make tourshi yearly, the same way my Armenian Grandmother and Aunts have. It is in this fall season of abundance that the best vegetables for pickle-making come from the the garden. According to our recipe, also a refrigerator pickle, we never blanch the vegetables. The hot brine is poured over the veg which are packed tightly into the jars. Tourshi making will be happening here next week. Cheers to your new home!
Oh I love the idea of pouring hot brine over them instead of blanching them! Definitely streamlines things, and I’ve made many other tasty pickles that way. I think they may keep for a tad longer if you blanch them… but it’s not like torshi lasts very long before someone devours the entire stash anyway haha
Wishing you happy torshi making! 🙂
Lynn, I’ve never had torshi and making this lovely recipe now. Can you tell me the amount of spice I should add to the brine…5c water plus apple cider vinegar?
I usually add just 2 teaspoons, but you can add more to taste. Hope you enjoy!