
The other day I made a double batch of my favorite focaccia dough. After baking a standard loaf, I thought it would be fun to try baking the other half in a muffin tin. It turned out so great, I think focaccia muffins might be my new favorite way of making focaccia, especially for a crowd.
Jump to the recipe to hit the ground running, or read on for a few tips:
A few notes on focaccia muffin success:
1. How to deal with varying muffin tin sizes (and materials):
Muffin tins vary in size. Mine is slightly on the large size. If yours is smaller than mine, you might need to work in a couple batches instead of making 12 at once. Unlike a muffin or cupcake batter, a properly-made focaccia dough is unlikely to overflow and make a mess if you over-fill the tin. But to make sure your focaccia muffins turn out right, follow the cues in the recipe below:
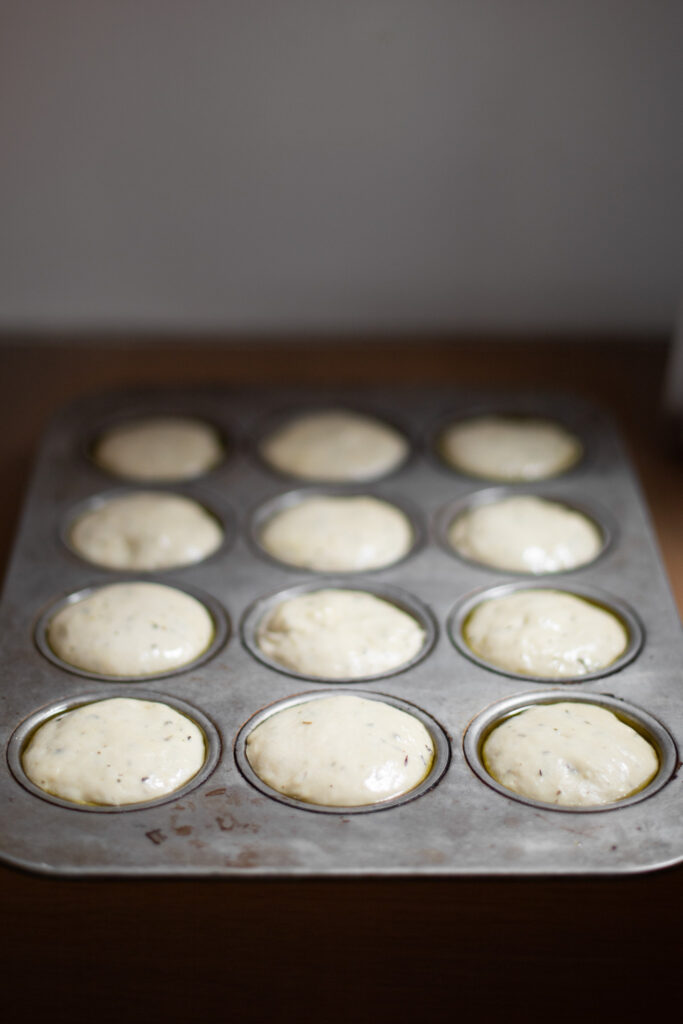
Fill the muffin tin not quite to the top. Once they proof, they should just crest the top (as in the photo above and to the left). Once you add oil and dimple them, they’ll deflate slightly, and then rise again in the oven.
Note that if you make yours smaller (e.g., making 16 instead of 12 of them), they will likely take less time to bake. If you use a muffin tin made from a darker metal (or coated metal), they will also take less time to bake through. Keep an eye on them.
2. Improvising
I haven’t tried making these muffins with produce or different herbs, but I feel fairly confident they would turn out great with toppings and various herby mix-ins.
See my general focaccia post for more tips on improvising, and feel free to experiment here.
3. Focaccia video
I didn’t record a new video for this post, but my focaccia video walks you thought the actual dough-making process. So feel free to check that out (it’s in the recipe card below).

Focaccia Muffins


Ingredients
For the focaccia dough
- 5½ cups [715 g] all-purpose flour*
- 2¼ tsp [13 g] salt
- 2½ tsp [8 g] instant yeast
- ⅓ cup [70 g] extra-virgin olive oil
- 2 cups [470 g] water, at room temperature
- Herbs (optional): 4 Tbsp thyme or 2 Tbsp rosemary**
For the topping
- 4 Tbsp [55 g] extra-virgin olive oil
- Flaky salt
Instructions
- Make the dough: Combine the flour, salt, yeast, oil, water, and herbs (if using) in the bowl of a stand mixer fitted with the hook attachment (or large mixing bowl). Mix together on low (or using your hand in the bowl if you don’t have a stand mixer) until it forms a lumpy dough and then increase the speed to medium. Knead with the hook for about 3 minutes, just until it smooths out quite a lot and starts to look stringy instead of lumpy (about 5 minutes mixing by hand). The dough should be very wet and sticky but not soupy.
- Let it rise: Cover and place the bowl of dough at room temperature. You can let it rise overnight or quickly. To do it overnight, let it sit at room temperature for 15 minutes, then place in the fridge overnight (up to 36 hours). If you do it quickly, let it rise at room temperature for a total of about 60 minutes, until doubled in size.
- Fill the muffin tin and proof: Drizzle about 1/2 tsp olive oil in the bottom of all 12 muffin tin wells. Use a finger to evenly coat the bottom and sides of each well. Evenly distribute the dough across the wells. It should not quite come up to the top. Proof 60-90 minutes until they are about 1.5 their original size (just cresting the muffin tin).
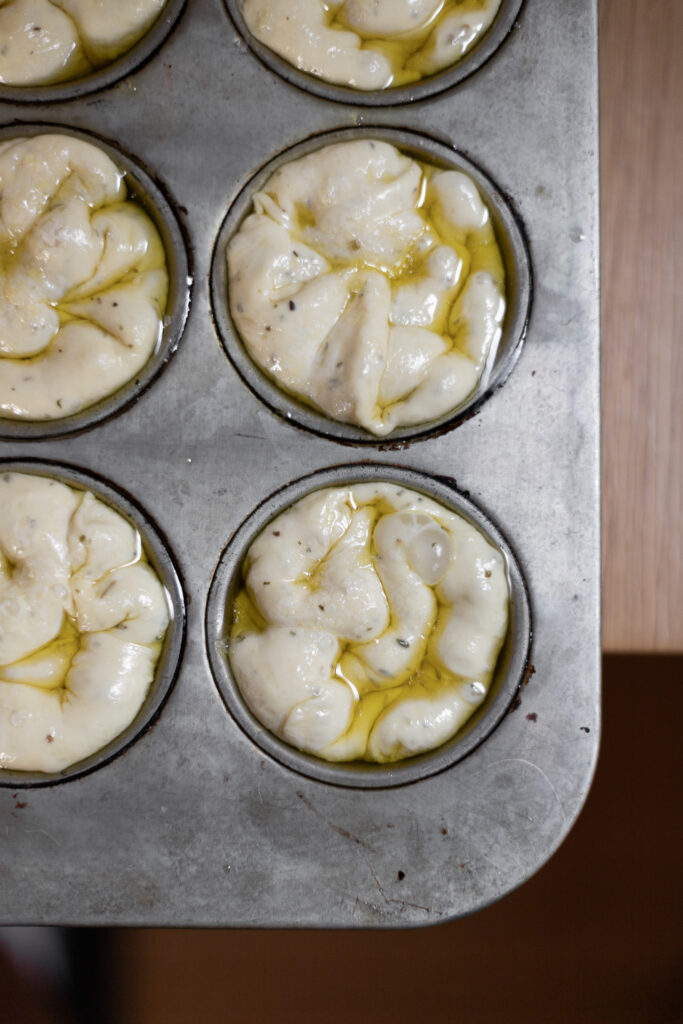
- Once they’ve risen, drizzle a few drops (just under 1/2 tsp) over each and dimple with your fingers.
- Preheat the oven to 425°F [220°C] when the dough is almost done proofing.
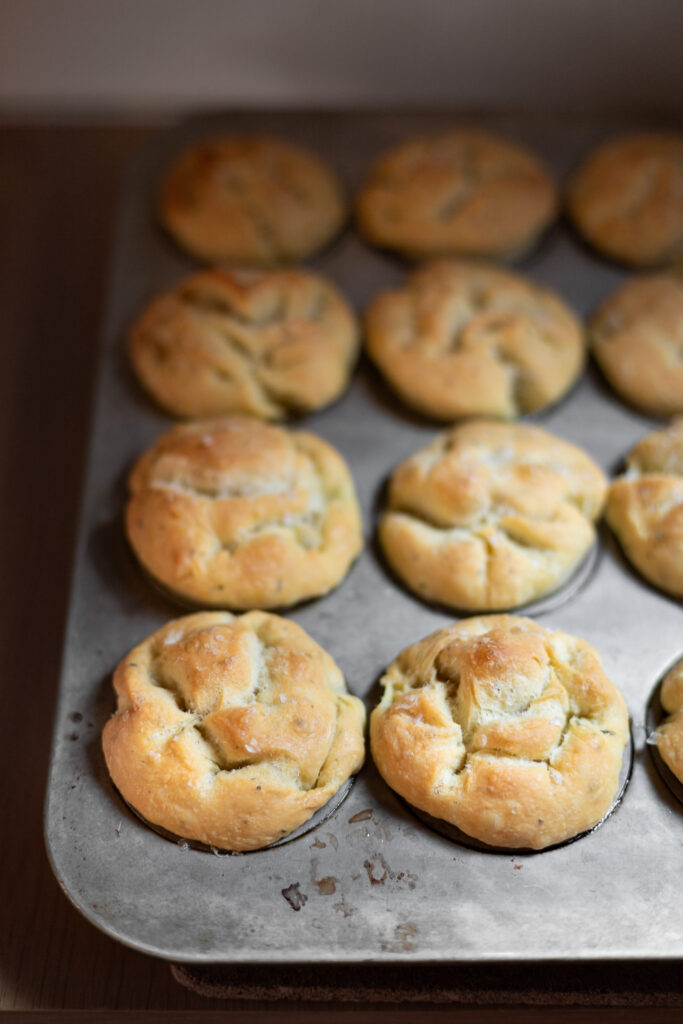
- Bake for about 30 to 35 minutes (start checking on them after about 25 minutes), until the tops are golden brown and they’re cooked through (200°F [93°C] internal temperature).
(If video does not appear below, please disable ad block)
Notes
* You can alternatively use bread flour or whole wheat flour. I’ve even used whole wheat pastry flour, which yields a more tender (yet still chewy) crumb.
** You can substitute a smaller amount of dried herbs if you don’t have fresh. Or omit the herbs entirely!
Storage: After completely cooled, store sealed at room temperature for 1 day, and freeze whatever you don’t plan to eat right away (bread keeps much better in the freezer than in the refrigerator or at room temperature).
Leave a Reply